微服务:Eureka配置集群环境
一、注册中心编码
1.使用idea创建一个spring boot项目,pom如下:
<?xml version="1.0" encoding="UTF-8"?>

<project xmlns="http://maven.apache.org/POM/4.0.0" xmlns:xsi="http://www.w3.org/2001/XMLSchema-instance"

    xsi:schemaLocation="http://maven.apache.org/POM/4.0.0 http://maven.apache.org/xsd/maven-4.0.0.xsd">

    <modelVersion>4.0.</modelVersion>

    <groupId>com.eureka</groupId>

    <artifactId>ser</artifactId>

    <version>0.0.-SNAPSHOT</version>

    <packaging>jar</packaging>

    <name>ser</name>

    <description>Demo project for Spring Boot</description>

    <parent>

        <groupId>org.springframework.boot</groupId>

        <artifactId>spring-boot-starter-parent</artifactId>

        <version>2.0.3.RELEASE</version>

        <relativePath/> <!-- lookup parent from repository -->

    </parent>

    <properties>

        <project.build.sourceEncoding>UTF-</project.build.sourceEncoding>

        <project.reporting.outputEncoding>UTF-</project.reporting.outputEncoding>

        <java.version>1.8</java.version>

        <spring-cloud.version>Finchley.RELEASE</spring-cloud.version>

    </properties>

    <dependencies>

        <dependency>

            <groupId>org.springframework.cloud</groupId>

            <artifactId>spring-cloud-starter-netflix-eureka-server</artifactId>

        </dependency>

        <dependency>

            <groupId>org.springframework.boot</groupId>

            <artifactId>spring-boot-starter-test</artifactId>

            <scope>test</scope>

        </dependency>

    </dependencies>

    <dependencyManagement>

        <dependencies>

            <dependency>

                <groupId>org.springframework.cloud</groupId>

                <artifactId>spring-cloud-dependencies</artifactId>

                <version>${spring-cloud.version}</version>

                <type>pom</type>

                <scope>import</scope>

            </dependency>

        </dependencies>

    </dependencyManagement>

    <build>

        <plugins>

            <plugin>

                <groupId>org.springframework.boot</groupId>

                <artifactId>spring-boot-maven-plugin</artifactId>

            </plugin>

        </plugins>

    </build>

</project>
2.这里开发3个样例,组成集群。3个样例的pom不变,application.yml如下:
#样例1:
server:

  port:

eureka:

  instance:

    hostname: centos7-

  client:

    registerWithEureka: false

    fetchRegistry: false

    serviceUrl:

      defaultZone: http://centos7-02:8888/eureka/,http://centos7-03:8888/eureka/
#样例2:
server:

  port:

eureka:

  instance:

    hostname: centos7-

  client:

    registerWithEureka: false

    fetchRegistry: false

    serviceUrl:

      defaultZone: http://centos7-01:8888/eureka/,http://centos7-03:8888/eureka/
#样例3:
server:

  port:

eureka:

  instance:

    hostname: centos7-

  client:

    registerWithEureka: false

    fetchRegistry: false

    serviceUrl:

      defaultZone: http://centos7-01:8888/eureka/,http://centos7-02:8888/eureka/
3.这些样例的java代码一样:
package com.eureka.ser;

import org.springframework.boot.SpringApplication;

import org.springframework.boot.autoconfigure.SpringBootApplication;

import org.springframework.cloud.netflix.eureka.server.EnableEurekaServer;

@SpringBootApplication

@EnableEurekaServer

public class SerApplication {

    public static void main(String[] args) {

        SpringApplication.run(SerApplication.class, args);

    }

}
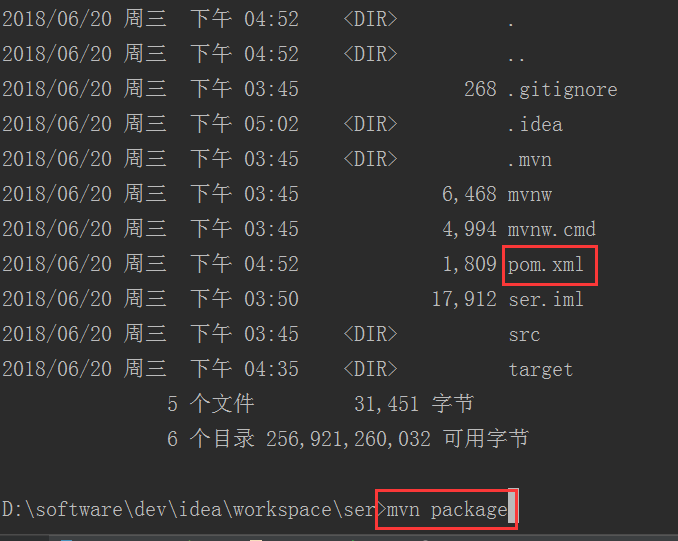
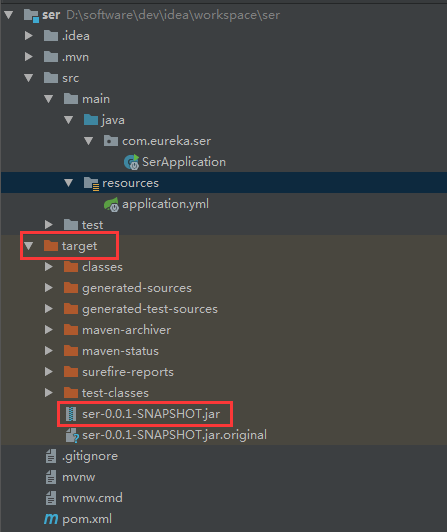
4.打包,要在项目的根路径
二、部署运行
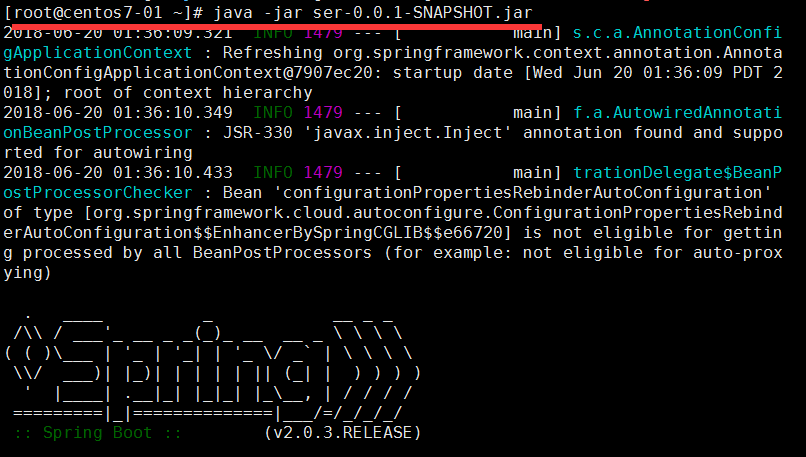
1.这里开启3台虚拟机,域名分布为centos7-01 centos7-02 centos7-03,上面的yml文件的hostname与之对应。将这3个jar文件分别运行
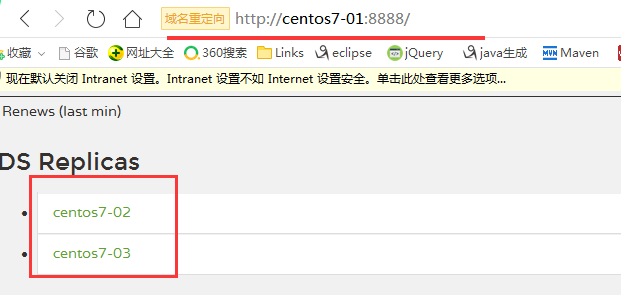
2.查看结果,在本机访问虚拟机时,需要关闭虚拟机的防火墙(或者开放端口);
把url换为centos7-02 centos7-03,会看到类似的结果,说明3台服务已经协调运行了
三、客户端注册
1. 新创建一个spring boot项目,其中pom文件如上,yml和java代码如下,然后按照上面的方式打包运行
eureka:

  client:

    serviceUrl:

      defaultZone: http://centos7-02:8888/eureka/    ###这里只向centos7-02注册,会向另外两台会同步过去

server:

  port:

spring:

  application:

    name: eureka-cli
package com.cloud.eurekacli01;

import org.springframework.beans.factory.annotation.Value;

import org.springframework.boot.SpringApplication;

import org.springframework.boot.autoconfigure.SpringBootApplication;

import org.springframework.cloud.netflix.eureka.EnableEurekaClient;

import org.springframework.web.bind.annotation.RequestMapping;

import org.springframework.web.bind.annotation.RequestParam;

import org.springframework.web.bind.annotation.RestController;

import java.text.SimpleDateFormat;

import java.util.Date;

@SpringBootApplication

@EnableEurekaClient

@RestController

public class EurekaCli01Application {

    public static void main(String[] args) {

        SpringApplication.run(EurekaCli01Application.class, args);

    }

    @RequestMapping("/")

    public String index(){

        SimpleDateFormat sdf = new SimpleDateFormat("YYYY-MM-DD hh:mm:ss");

        String time = sdf.format(new Date());

        return "current time is "+time;

    }

}
2. 查看注册结果,打开3个中任意一个注册界面,都会有如下结果,说明客户端已经成功在集群上注册了

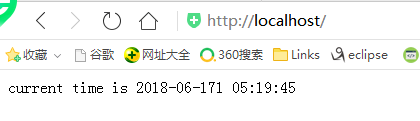
3.访问客户端 (客户端是在本地启动的)
微服务:Eureka配置集群环境的更多相关文章
- 交付Dubbo微服务到kubernetes集群
1.基础架构 1.1.架构图 Zookeeper是Dubbo微服务集群的注册中心 它的高可用机制和k8s的etcd集群一致 java编写,需要jdk环境 1.2.节点规划 主机名 角色 ip hdss ...
- (转)实验文档2:实战交付一套dubbo微服务到kubernetes集群
基础架构 主机名 角色 ip HDSS7-11.host.com k8s代理节点1,zk1 10.4.7.11 HDSS7-12.host.com k8s代理节点2,zk2 10.4.7.12 HDS ...
- 庐山真面目之六微服务架构Consul集群、Ocelot网关集群和Nginx版本实现
庐山真面目之六微服务架构Consul集群.Ocelot网关集群和Nginx版本实现 一.简介 在上一篇文章<庐山真面目之五微服务架构Consul集群.Ocelot网关和Nginx版本实 ...
- 庐山真面目之七微服务架构Consul集群、Ocelot网关集群和IdentityServer4版本实现
庐山真面目之七微服务架构Consul集群.Ocelot网关集群和IdentityServer4版本实现 一.简介 在上一篇文章<庐山真面目之六微服务架构Consul集群.Ocelot网 ...
- springcloud微服务基于redis集群的单点登录
springcloud微服务基于redis集群的单点登录 yls 2019-9-23 简介 本文介绍微服务架构中如何实现单点登录功能 创建三个服务: 操作redis集群的服务,用于多个服务之间共享数据 ...
- RocketMQ的安装配置:配置jdk环境,配置RocketMQ环境,配置集群环境,配置rocketmq-console
RocketMQ的安装配置 演示虚拟机环境:Centos64-1 (D:\linuxMore\centos6_64) root / itcast : 固定IP 192.168.52.128 一,配置J ...
- Zookeeper 配置集群环境详解
在Linux环境下安装zookeeper 在Linux环境下安装zookeeper 1. 将zookeeper-3.4.13.tar.gz复制到linux操作系统 2. 通过p ...
- Elasticsearch配置集群环境
环境选择: 1.方案一:准备三台机器 每一台机器一个节点 2.方案二:准备一台机器 启动三个节点,用端口号区分即可 3.ES启 ...
- 8.实战交付一套dubbo微服务到k8s集群(1)之Zookeeper部署
1.基础架构 主机名 角色 ip HDSS7-11.host.com K8S代理节点1,zk1 10.4.7.11 HDSS7-12.host.com K8S代理节点2,zk2 10.4.7.12 H ...
随机推荐
- (扫盲)WebSocket 教程
原文地址:http://www.ruanyifeng.com/blog/2017/05/websocket.html WebSocket 是一种网络通信协议,很多高级功能都需要它. 本文介绍 WebS ...
- LeetCode_Easy_471:Number Complement
LeetCode_Easy_471:Number Complement 题目描述 Given a positive integer, output its complement number. The ...
- npm安装出错Unexpected end of input at 1:2307
执行命令: npm cache clean --force 然后再安装 搞定
- mongodb中的__v字段
"__v"是"versionKey"的简写,当每一个文档由mongoose创建时就会自动添加,代表这该文档的版本,此属性可配置修改,默认为"__v&q ...
- 20145230《Java程序设计》第3周学习总结
20145230 <Java程序设计> 第3周学习总结 教材学习内容总结 String s=new String();第四章我首先了解了CPU与内存的关系,栈与堆的关系.要产生对象必须先定 ...
- iOS开发过程中常见错误问题及解决方案
错误原因:ld: x duplicate symbol for architecture x86_64 clang: error: linker command failed with exit co ...
- 互联网高并发之Hystrix实现服务隔离和降级
当大多数人在使用Tomcat时,多个HTTP服务会共享一个线程池,假设其中一个HTTP服务访问的数据库响应非常慢,这将造成服务响应时间延迟增加,大多数线程阻塞等待数据响应返回,导致整个Tomcat线程 ...
- multi update caused deadlock problem
https://social.msdn.microsoft.com/Forums/sqlserver/en-US/dba45618-1d64-4661-891d-74cab09dddf1/deadlo ...
- js提示确认删除吗
<script language="javascript"> function delcfm() { if (!confirm("确认要删除?")) ...
- 元素 "context:component-scan" 的前缀 "context" 未绑定的解决方案
在动态web项目(Dynamic Web Project)中,使用SpringMVC框架,新建Spring的配置文件springmvc.xml,添加扫描控制器 <context:componen ...