
Spring Boot 2 单元测试
开发环境:IntelliJ IDEA 2019.2.2
Spring Boot版本:2.1.8
IDEA新建一个Spring Boot项目后,pom.xml默认包含了Web应用和单元测试两个依赖包。
如下:
    <dependencies>

        <dependency>

            <groupId>org.springframework.boot</groupId>

            <artifactId>spring-boot-starter-web</artifactId>

        </dependency>

        <dependency>

            <groupId>org.springframework.boot</groupId>

            <artifactId>spring-boot-starter-test</artifactId>

            <scope>test</scope>

        </dependency>

    </dependencies>
一、测试Web服务
1、新建控制器类 HelloController.java
package com.example.demo.controller;

import org.springframework.web.bind.annotation.RequestMapping;

import org.springframework.web.bind.annotation.RestController;

@RestController

public class HelloController {

    @RequestMapping("/")

    public String index() {

        return "index";

    }

    @RequestMapping("/hello")

    public String hello() {

        return "hello";

    }

}
2、新建测试类 HelloControllerTest.cs
下面WebEnvironment.RANDOM_PORT会启动一个真实的Web容器,RANDOM_PORT表示随机端口,如果想使用固定端口,可配置为
WebEnvironment.DEFINED_PORT,该属性会读取项目配置文件(如application.properties)中的端口(server.port)。
如果没有配置,默认使用8080端口。
package com.example.demo.controller;

import org.junit.Assert;

import org.junit.Test;

import org.junit.runner.RunWith;

import org.springframework.beans.factory.annotation.Autowired;

import org.springframework.boot.test.context.SpringBootTest;

import org.springframework.boot.test.web.client.TestRestTemplate;

import org.springframework.test.context.junit4.SpringRunner;

@RunWith(SpringRunner.class)

@SpringBootTest(webEnvironment = SpringBootTest.WebEnvironment.RANDOM_PORT)

public class HelloControllerTest {

    @Autowired

    private TestRestTemplate restTemplate;

    @Test

    public void testIndex(){

        String result = restTemplate.getForObject("/",String.class);

        Assert.assertEquals("index", result);

    }

    @Test

    public void testHello(){

        String result = restTemplate.getForObject("/",String.class);

        Assert.assertEquals("Hello world", result);//这里故意写错

    }

}
在HelloControllerTest.java代码中右键空白行可选择Run 'HelloControllerTest',测试类里面所有方法。
(如果只想测试一个方法如testIndex(),可在testIndex()代码上右键选择Run 'testIndex()')
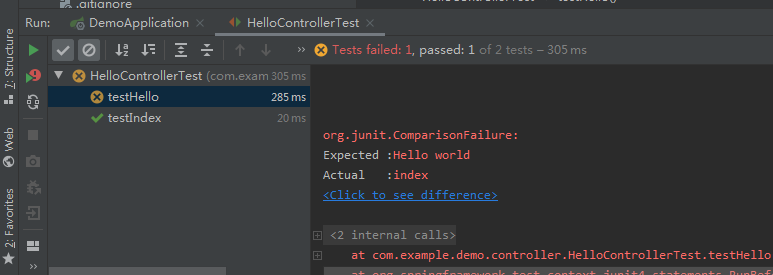
运行结果如下,一个通过,一个失败。
二、模拟Web测试
新建测试类 HelloControllerMockTest.java
设置WebEnvironment属性为WebEnvironment.MOCK,启动一个模拟的Web容器。
测试方法中使用Spring的MockMvc进行模拟测试。
package com.example.demo.controller;

import org.junit.Test;

import org.junit.runner.RunWith;

import org.springframework.beans.factory.annotation.Autowired;

import org.springframework.boot.test.autoconfigure.web.servlet.AutoConfigureMockMvc;

import org.springframework.boot.test.context.SpringBootTest;

import org.springframework.test.context.junit4.SpringRunner;

import org.springframework.test.web.servlet.MockMvc;

import org.springframework.test.web.servlet.MvcResult;

import org.springframework.test.web.servlet.ResultActions;

import org.springframework.test.web.servlet.request.MockMvcRequestBuilders;

import java.net.URI;

@RunWith(SpringRunner.class)

@SpringBootTest(webEnvironment = SpringBootTest.WebEnvironment.MOCK)//MOCK为默认值,也可不设置

@AutoConfigureMockMvc

public class HelloControllerMockTest {

    @Autowired

    private MockMvc mvc;

    @Test

    public  void testIndex() throws Exception{

        ResultActions ra = mvc.perform(MockMvcRequestBuilders.get(new URI("/")));

        MvcResult result = ra.andReturn();

        System.out.println(result.getResponse().getContentAsString());

    }

    @Test

    public  void testHello() throws Exception{

        ResultActions ra = mvc.perform(MockMvcRequestBuilders.get(new URI("/hello")));

        MvcResult result = ra.andReturn();

        System.out.println(result.getResponse().getContentAsString());

    }

}
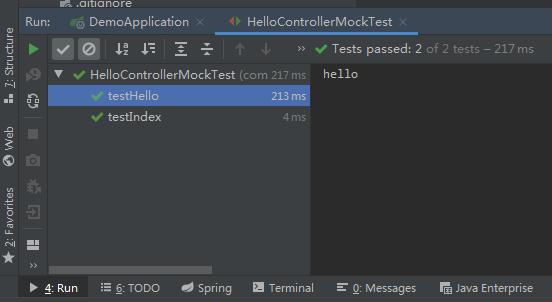
右键Run 'HelloControllerMockTest',运行结果如下:
三、测试业务组件
1、新建服务类 HelloService.java
package com.example.demo.service;

import org.springframework.stereotype.Service;

@Service

public class HelloService {

    public String hello(){

        return "hello";

    }

}
2、新建测试类 HelloServiceTest.java
WebEnvironment属性设置为NONE,不会启动Web容器,只启动Spring容器。
package com.example.demo.service;

import org.junit.Test;

import org.junit.runner.RunWith;

import org.springframework.beans.factory.annotation.Autowired;

import org.springframework.boot.test.context.SpringBootTest;

import org.springframework.test.context.junit4.SpringRunner;

@RunWith(SpringRunner.class)

@SpringBootTest(webEnvironment = SpringBootTest.WebEnvironment.NONE)

public class HelloServiceTest {

    @Autowired

    private HelloService helloService;

    @Test

    public void testHello(){

        String result = helloService.hello();

        System.out.println(result);

    }

}
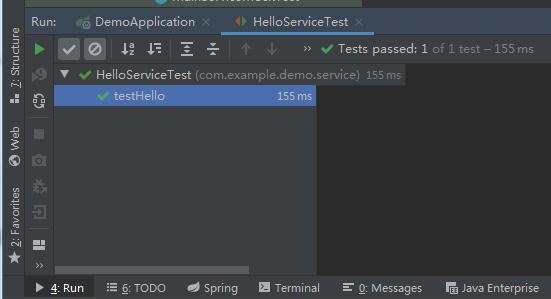
右键Run 'HelloServiceTest',运行结果如下:
四、模拟业务组件
假设上面的HelloService.cs是操作数据库或调用第三方接口,为了不让这些外部不稳定因素影响单元测试的运行结果,可使用mock来模拟
某些组件的返回结果。
1、新建一个服务类 MainService.java
里面的main方法会调用HelloService的方法
package com.example.demo.service;

import org.springframework.beans.factory.annotation.Autowired;

import org.springframework.stereotype.Service;

@Service

public class MainService {

    @Autowired

    private HelloService helloService;

    public void main(){

        System.out.println("调用业务方法");

        String result = helloService.hello();

        System.out.println("返回结果:" + result);

    }

}
2、新建测试类 MainServiceMockTest.java
下面代码中,使用MockBean修饰需要模拟的组件helloService,测试方法中使用Mockito的API模拟helloService的hello方法返回。
package com.example.demo.service;

import org.junit.Test;

import org.junit.runner.RunWith;

import org.mockito.BDDMockito;

import org.springframework.beans.factory.annotation.Autowired;

import org.springframework.boot.test.context.SpringBootTest;

import org.springframework.boot.test.mock.mockito.MockBean;

import org.springframework.test.context.junit4.SpringRunner;

@RunWith(SpringRunner.class)

@SpringBootTest

public class MainServiceMockTest {

    @MockBean

    private HelloService helloService;

    @Autowired

    private MainService mainService;

    @Test

    public void testMain(){

        BDDMockito.given(this.helloService.hello()).willReturn("hello world");

        mainService.main();

    }

}
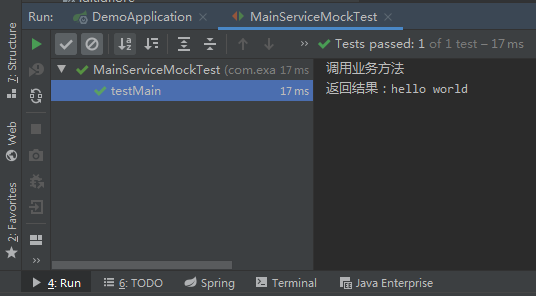
右键Run 'MainServiceMockTest',运行结果如下:
五、IDEA项目结构图

Spring Boot 2 单元测试的更多相关文章
- Spring Boot学习——单元测试
本随笔记录使用Spring Boot进行单元测试,主要是Service和API(Controller)进行单元测试. 一.Service单元测试 选择要测试的service类的方法,使用idea自动创 ...
- Spring Boot干货系列:(十二)Spring Boot使用单元测试(转)
前言这次来介绍下Spring Boot中对单元测试的整合使用,本篇会通过以下4点来介绍,基本满足日常需求 Service层单元测试 Controller层单元测试 新断言assertThat使用 单元 ...
- Spring Boot 的单元测试
Spring Boot 的单元测试 引入依赖 testCompile group: 'org.springframework.boot', name: 'spring-boot-starter-tes ...
- Spring Boot使用单元测试
一.Service层单元测试: 代码如下: package com.dudu.service;import com.dudu.domain.LearnResource;import org.junit ...
- 学习 Spring Boot:(二十九)Spring Boot Junit 单元测试
前言 JUnit 是一个回归测试框架,被开发者用于实施对应用程序的单元测试,加快程序编制速度,同时提高编码的质量. JUnit 测试框架具有以下重要特性: 测试工具 测试套件 测试运行器 测试分类 了 ...
- Spring Boot Mock单元测试学习总结
单元测试的方法有很多种,比如使用Postman.SoapUI等工具测试,当然,这里的测试,主要使用的是基于RESTful风格的SpringMVC的测试,我们可以测试完整的Spring MVC流程,即从 ...
- Spring Boot 的单元测试和集成测试
学习如何使用本教程中提供的工具,并在 Spring Boot 环境中编写单元测试和集成测试. 1. 概览 本文中,我们将了解如何编写单元测试并将其集成在 Spring Boot 环境中.你可在网上找到 ...
- (27)Spring Boot Junit单元测试【从零开始学Spring Boot】
Junit这种老技术,现在又拿出来说,不为别的,某种程度上来说,更是为了要说明它在项目中的重要性. 那么先简单说一下为什么要写测试用例 1. 可以避免测试点的遗漏,为了更好的进行测试,可以提高测试效率 ...
- (转)Spring Boot Junit单元测试
场景:在项目开发中要测试springboot工程中一个几个dao和service的功能是否正常,初期是在web工程中进行要素的录入,工作量太大.使用该单元测试大大减小了工作强度. Junit这种老技术 ...
随机推荐
- 敏捷开发--洞察敏捷模型,从PO的角度看敏捷产品管理
转自本人运营的公众号“ 携程技术中心PMO”(ID:cso_pmo) 经常有人抱怨的一个问题:敏捷会让团队自组织,要求团队能“一方有难,八方支援”,但是为什么总感觉自己团队虽然实践了敏捷, ...
- Linux-进程的观察
16.1.1 进程与程序 ·程序 (program):通常为 binary program ,放置在储存媒体中 (如硬盘.光盘.软盘.磁带等), 为实体文 件的型态存在: ·进程 (process): ...
- LINUX OS 正常关机失败
描述:LINUX OS运行命令shutdown now显示:Telling INIT to go to single user mode.... 解决方法:运行命令exit重新登录,再运行 hal ...
- 活久见: maven pom 竟然都会崩溃!
问题是: 我的应用的pom 并没有任何报错,但是代码报错,而且编译不通过. 如下,我本地项目,从 spring-cloud-alibaba-dependencies 0.2.1.RELEASE 升级到 ...
- SpringMVC架构模拟
这次来学习一下SpringMVC的源码. 对于常见的项目架构模式,比如大名鼎鼎的SSM(SpringMVC,Spring,Mybatis)框架. SpringMVC ->web层(Control ...
- ES6-promise对象的使用
Promise 的含义(摘自阮一峰ES6ru) Promise 是异步编程的一种解决方案,比传统的解决方案——回调函数和事件——更合理和更强大.它由社区最早提出和实现,ES6 将其写进了语言标准,统一 ...
- Redis速记
参考: 集群 https://blog.csdn.net/xiaoxiaoyusheng2012/article/details/82051744 主从 https://blog.csdn.net/u ...
- python判断文件夹和文件是否存在
1.os.path.exists()既可以判断文件是否存在,又可以判断文件夹是否存在 2.os.path.isfile()判断文件是否存在 3.os.path.isdir()判断文件夹是否存在
- C# WPF 解决方案MineRealms启动器 自动随机播放音乐的代码
//Nothing //Nothing string[] files = Directory.GetFiles(Path.GetDirectoryName(App.config.MainConfigP ...
- 2019-2020-1 20199305《Linux内核原理与分析》第十二周作业
缓冲区溢出漏洞实验 (一)何为缓冲区溢出漏洞 缓冲区溢出是指程序试图向缓冲区写入超出预分配固定长度数据的情况.这一漏洞可以被恶意用户利用来改变程序的流控制,甚至执行代码的任意片段.这一漏洞的出现是由于 ...