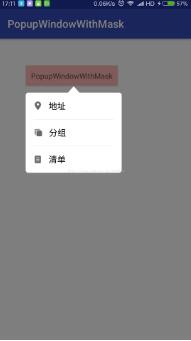
Android PopupWindow增加半透明蒙层
先看效果图:
BasePopupWindowWithMask.class
 package com.example.popupwindowwithmask;

 import android.content.Context;

 import android.graphics.PixelFormat;

 import android.graphics.drawable.ColorDrawable;

 import android.os.IBinder;

 import android.view.KeyEvent;

 import android.view.View;

 import android.view.WindowManager;

 import android.widget.PopupWindow;

 /**

  * Created by kk on 2017/7/22.

  */

 public abstract class BasePopupWindowWithMask extends PopupWindow {

  protected Context context;

  private WindowManager windowManager;

  private View maskView;

  public BasePopupWindowWithMask(Context context) {

   super(context);

   this.context = context;

   windowManager = (WindowManager) context.getSystemService(Context.WINDOW_SERVICE);

   setContentView(initContentView());

   setHeight(initHeight());

   setWidth(initWidth());

   setOutsideTouchable(true);

   setFocusable(true);

   setTouchable(true);

   setBackgroundDrawable(new ColorDrawable());

  }

  protected abstract View initContentView();

  protected abstract int initHeight();

  protected abstract int initWidth();

  @Override

  public void showAsDropDown(View anchor) {

   addMask(anchor.getWindowToken());

   super.showAsDropDown(anchor);

  }

  private void addMask(IBinder token) {

   WindowManager.LayoutParams wl = new WindowManager.LayoutParams();

   wl.width = WindowManager.LayoutParams.MATCH_PARENT;

   wl.height = WindowManager.LayoutParams.MATCH_PARENT;

   wl.format = PixelFormat.TRANSLUCENT;//不设置这个弹出框的透明遮罩显示为黑色

   wl.type = WindowManager.LayoutParams.TYPE_APPLICATION_PANEL;//该Type描述的是形成的窗口的层级关系

   wl.token = token;//获取当前Activity中的View中的token,来依附Activity

   maskView = new View(context);

   maskView.setBackgroundColor(0x7f000000);

   maskView.setFitsSystemWindows(false);

   maskView.setOnKeyListener(new View.OnKeyListener() {

    @Override

    public boolean onKey(View v, int keyCode, KeyEvent event) {

     if (keyCode == KeyEvent.KEYCODE_BACK) {

      removeMask();

      return true;

     }

     return false;

    }

   });

   /**

    * 通过WindowManager的addView方法创建View,产生出来的View根据WindowManager.LayoutParams属性不同,效果也就不同了。

    * 比如创建系统顶级窗口,实现悬浮窗口效果!

    */

   windowManager.addView(maskView, wl);

  }

  private void removeMask() {

   if (null != maskView) {

    windowManager.removeViewImmediate(maskView);

    maskView = null;

   }

  }

  @Override

  public void dismiss() {

   removeMask();

   super.dismiss();

  }

 }
TestPopupWindow.class
 package com.example.popupwindowwithmask;

 import android.content.Context;

 import android.view.LayoutInflater;

 import android.view.View;

 import android.view.WindowManager;

 /**

  * Created by kk on 2017/7/22.

  */

 public class TestPopupWindow extends BasePopupWindowWithMask {

  private int[] mIds;

  private View contentView;

  private OnItemClickListener listener;

  public interface OnItemClickListener {

   void OnItemClick(View v);

  }

  public void setOnItemClickListener(OnItemClickListener listener) {

   this.listener = listener;

  }

  public TestPopupWindow(Context context, int[] mIds) {

   super(context);

   this.mIds = mIds;

   initListener();

  }

  @Override

  protected View initContentView() {

   contentView = LayoutInflater.from(context).inflate(R.layout.pop_layout, null, false);

   return contentView;

  }

  private void initListener() {

   for (int i = ; i < mIds.length; i++) {

    contentView.findViewById(mIds[i]).setOnClickListener(new View.OnClickListener() {

     @Override

     public void onClick(View v) {

      if (null != listener) {

       listener.OnItemClick(v);

      }

      dismiss();

     }

    });

   }

  }

  @Override

  protected int initHeight() {

   return WindowManager.LayoutParams.WRAP_CONTENT;

  }

  @Override

  protected int initWidth() {

   return (int) (0.5 * UIUtils.getScreenWidth(context));

  }

 }

 MainActivity.class

 ?

 package com.example.popupwindowwithmask;

 import android.os.Bundle;

 import android.support.v7.app.AppCompatActivity;

 import android.view.View;

 import android.widget.TextView;

 import android.widget.Toast;

 public class MainActivity extends AppCompatActivity {

  private TextView textView;

  @Override

  protected void onCreate(Bundle savedInstanceState) {

   super.onCreate(savedInstanceState);

   setContentView(R.layout.activity_main);

   textView = (TextView) findViewById(R.id.tv_popup);

   final TestPopupWindow testPopupWindow = new TestPopupWindow(this, new int[]{R.id.pop_location, R.id.pop_group, R.id.pop_list});

   textView.setOnClickListener(new View.OnClickListener() {

    @Override

    public void onClick(View v) {

     testPopupWindow.showAsDropDown(textView);

    }

   });

   testPopupWindow.setOnItemClickListener(new TestPopupWindow.OnItemClickListener() {

    @Override

    public void OnItemClick(View v) {

     switch (v.getId()) {

      case R.id.pop_location:

       Toast.makeText(MainActivity.this, "地址", Toast.LENGTH_SHORT).show();

       break;

      case R.id.pop_group:

       Toast.makeText(MainActivity.this, "分组", Toast.LENGTH_SHORT).show();

       break;

      case R.id.pop_list:

       Toast.makeText(MainActivity.this, "清单", Toast.LENGTH_SHORT).show();

       break;

     }

    }

   });

  }

 }
pop_layout.xml
 <?xml version="1.0" encoding="utf-8"?>

 <RelativeLayout xmlns:android="http://schemas.android.com/apk/res/android"

  android:layout_width="wrap_content"

  android:layout_height="wrap_content">

  <RelativeLayout

   android:layout_width="wrap_content"

   android:layout_height="wrap_content">

   <RelativeLayout

    android:id="@+id/rl_indicator"

    android:layout_width="match_parent"

    android:layout_height="wrap_content"

    android:gravity="center_horizontal">

    <ImageView

     android:layout_width="wrap_content"

     android:layout_height="12dp"

     android:scaleType="fitCenter"

     android:src="@drawable/filter_arrow_up" />

   </RelativeLayout>

   <LinearLayout

    android:layout_width="wrap_content"

    android:layout_height="150dp"

    android:layout_below="@+id/rl_indicator"

    android:background="@drawable/pop_background"

    android:gravity="center_horizontal"

    android:orientation="vertical"

    android:paddingLeft="15dp"

    android:paddingRight="15dp">

    <TextView

     android:id="@+id/pop_location"

     android:layout_width="match_parent"

     android:layout_height="0dp"

     android:layout_weight=""

     android:drawableLeft="@mipmap/fault_equipment_location_icon"

     android:drawablePadding="12dp"

     android:gravity="center_vertical"

     android:text="地址"

     android:textColor="#000"

     android:textSize="16sp" />

    <View

     android:layout_width="match_parent"

     android:layout_height="0.3dp"

     android:background="#D2D2D2" />

    <TextView

     android:id="@+id/pop_group"

     android:layout_width="match_parent"

     android:layout_height="0dp"

     android:layout_weight=""

     android:drawableLeft="@mipmap/fault_equipment_grouping_icon"

     android:drawablePadding="12dp"

     android:gravity="center_vertical"

     android:text="分组"

     android:textColor="#000"

     android:textSize="16sp" />

    <View

     android:layout_width="match_parent"

     android:layout_height="0.3dp"

     android:background="#D2D2D2" />

    <TextView

     android:id="@+id/pop_list"

     android:layout_width="match_parent"

     android:layout_height="0dp"

     android:layout_weight=""

     android:drawableLeft="@mipmap/fault_equipment_list_icon"

     android:drawablePadding="12dp"

     android:gravity="center_vertical"

     android:text="清单"

     android:textColor="#000"

     android:textSize="16sp" />

   </LinearLayout>

  </RelativeLayout>

 </RelativeLayout>
pop_background.xml
 <?xml version="1.0" encoding="utf-8"?>

 <shape xmlns:android="http://schemas.android.com/apk/res/android">

  <solid android:color="#ffffff" />

  <corners

   android:radius="5dp" />

 </shape>
UIUtils.class
 package com.example.popupwindowwithmask;

 import android.content.Context;

 /**

  * Created by kk on 2017/7/22.

  */

 public class UIUtils {

  /**

   * 获得屏幕宽度

   *

   * @param context

   * @return

   */

  public static int getScreenWidth(Context context) {

   return context.getResources().getDisplayMetrics().widthPixels;

  }

  /**

   * 获得屏幕高度

   *

   * @param context

   * @return

   */

  public static int getScreenHeight(Context context) {

   return context.getResources().getDisplayMetrics().heightPixels;

  }

 }
https://github.com/ganchuanpu/AndroidPopupWindowWithMask.git
Android PopupWindow增加半透明蒙层的更多相关文章
- iOS开发之实现半透明蒙层背景效果[用于下拉菜单页和分享页]
郝萌主倾心贡献.尊重作者的劳动成果,请勿转载. 假设文章对您有所帮助.欢迎给作者捐赠.支持郝萌主,捐赠数额任意.重在心意^_^ 我要捐赠: 点击捐赠 Cocos2d-X源代码下载:点我传送 游戏官方下 ...
- 在Ubuntu上为Android系统的Application Frameworks层增加硬件访问服务(老罗学习笔记5)
在数字科技日新月异的今天,软件和硬件的完美结合,造就了智能移动设备的流行.今天大家对iOS和Android系统的趋之若鹜,一定程度上是由于这两个系统上有着丰富多彩的各种应用软件.因此,软件和硬件的关系 ...
- 在Ubuntu上为Android系统的Application Frameworks层增加硬件访问服务
文章转载至CSDN社区罗升阳的安卓之旅,原文地址:http://blog.csdn.net/luoshengyang/article/details/6578352 在数字科技日新月异的今天,软件和硬 ...
- 为Android系统的Application Frameworks层增加硬件访问服务
在数字科技日新月异的今天,软件和硬件的完美结合,造就了智能移动设备的流行.今天大家对iOS和Android系统的趋之若鹜,一定程度上是由于这两 个系统上有着丰富多彩的各种应用软件.因此,软件和硬件的关 ...
- 在Ubuntu上为Android系统的Application Frameworks层增加硬件访问服务【转】
本文转载自:http://blog.csdn.net/luoshengyang/article/details/6578352 在数字科技日新月异的今天,软件和硬件的完美结合,造就了智能移动设备的流行 ...
- Android开发如何定制framework层服务
刚刚跨完年,新年第一篇文章,那么今天将对Android开发framework中间层的服务定制使用作个总结.首先我们先导入Android平台源码framework层的代码到开发工具eclipse中,代码 ...
- C# Winform 实现自定义半透明遮罩层介绍
在网页中通过div+css实现半透明效果不难,今天我们看看一种在winfrom中实现的方法: 效果图如下,正常时: 显示遮罩层时: 自定义遮罩层控件的源码如下: View Row Code 1 usi ...
- web页面弹出遮罩层,通过js或css禁止蒙层底部页面跟随滚动
场景概述 弹窗是一种常见的交互方式,而蒙层是弹窗必不可少的元素,用于隔断页面与弹窗区块,暂时阻断页面的交互.但是,在蒙层元素中滑动的时候,滑到内容的尽头时,再继续滑动,蒙层底部的页面会开始滚动,显然这 ...
- Android PopupWindow Dialog 关于 is your activity running 崩溃详解
Android PopupWindow Dialog 关于 is your activity running 崩溃详解 [TOC] 起因 对于 PopupWindow Dialog 需要 Activi ...
随机推荐
- luogu P3111 [USACO14DEC]牛慢跑Cow Jog_Sliver |贪心+模拟
有N (1 <= N <= 100,000)头奶牛在一个单人的超长跑道上慢跑,每头牛的起点位置都不同.由于是单人跑道,所有他们之间不能相互超越.当一头速度快的奶牛追上另外一头奶牛的时候,他 ...
- 记录我的 python 学习历程-Day03 列表/元组/rang
一.列表初识 列表是 Python 的基础数据类型之一,它是以''[ ]''的形式括起来的,每个元素用","隔开,属于容器型数据类型,他可以存放大量的.各种类型的数据. 基本格式 ...
- WeihanLi.Npoi 支持 ShadowProperty 了
WeihanLi.Npoi 支持 ShadowProperty 了 Intro 在 EF 里有个 ShadowProperty (阴影属性/影子属性)的概念,你可以通过 FluentAPI 的方式来定 ...
- 线段树+lazy标记 2019年8月10日计蒜客联盟周赛 C.小A的题
题目链接:https://nanti.jisuanke.com/t/40852 题意:给定一个01串s,进行m次操作,|s|<=1e6,m<=5e5 操作有两种 l r 0,区间[l,r] ...
- Spring MVC文件上传出现错误:Required MultipartFile parameter 'file' is not present
1.配置文件上传的解析器 首先需要在spring mvc的配置文件中(注意是spring mvc的配置文件而不是spring的配置文件:applicationContext.xml)配置: sprin ...
- Windows基础
目录 一. 硬件概述 二.常见硬件设备 三.文件系统 四. 文件类型和DOS命令 五 .批处理 六 .TCP/IP概述和Windows配置 七.网络设置.DNS.邮件★ 一. 硬件概述 1.计算机的发 ...
- 3年java开发面试BAT,你必须彻底搞定Maven!
前言 现在的Java项目中,Maven随处可见. Maven的仓库管理.依赖管理.继承和聚合等特性为项目的构建提供了一整套完善的解决方案,如果你搞不懂Maven,那么一个多模块的项目足以让你头疼,依赖 ...
- Python基础知识第八篇(集合)
#集合是无序的#集合是不同元素组成的#集合是不可变的,列如:列表,字典,元组#创建空集合 s=set() # s={1,2,3,4,2} # print(s) #集合添加>>>> ...
- 我在知识星球上创建了免费的Web3D学习的星球~
大家好,我是YYC. 我在知识星球创建了一个免费的星球-"YYC的Web 3D旅程",欢迎大家加入- 本星球完全免费,致力于打造专业的Web 3D技术学习区,分享各种3D技术和信息 ...
- sqlserver 行转列、字符串行转列、自动生产行转列脚本
行转列,老生常谈的问题.这里总结一下网上的方法. 1.生成测试数据: CREATE TABLE human( name ), --姓名 norm ), --指标 score INT , --分数 gr ...