linux(Ubuntu22.04)二进制安装mysql及redis
安装MySQL
1.下载mysql安装包
https://downloads.mysql.com/archives/community/
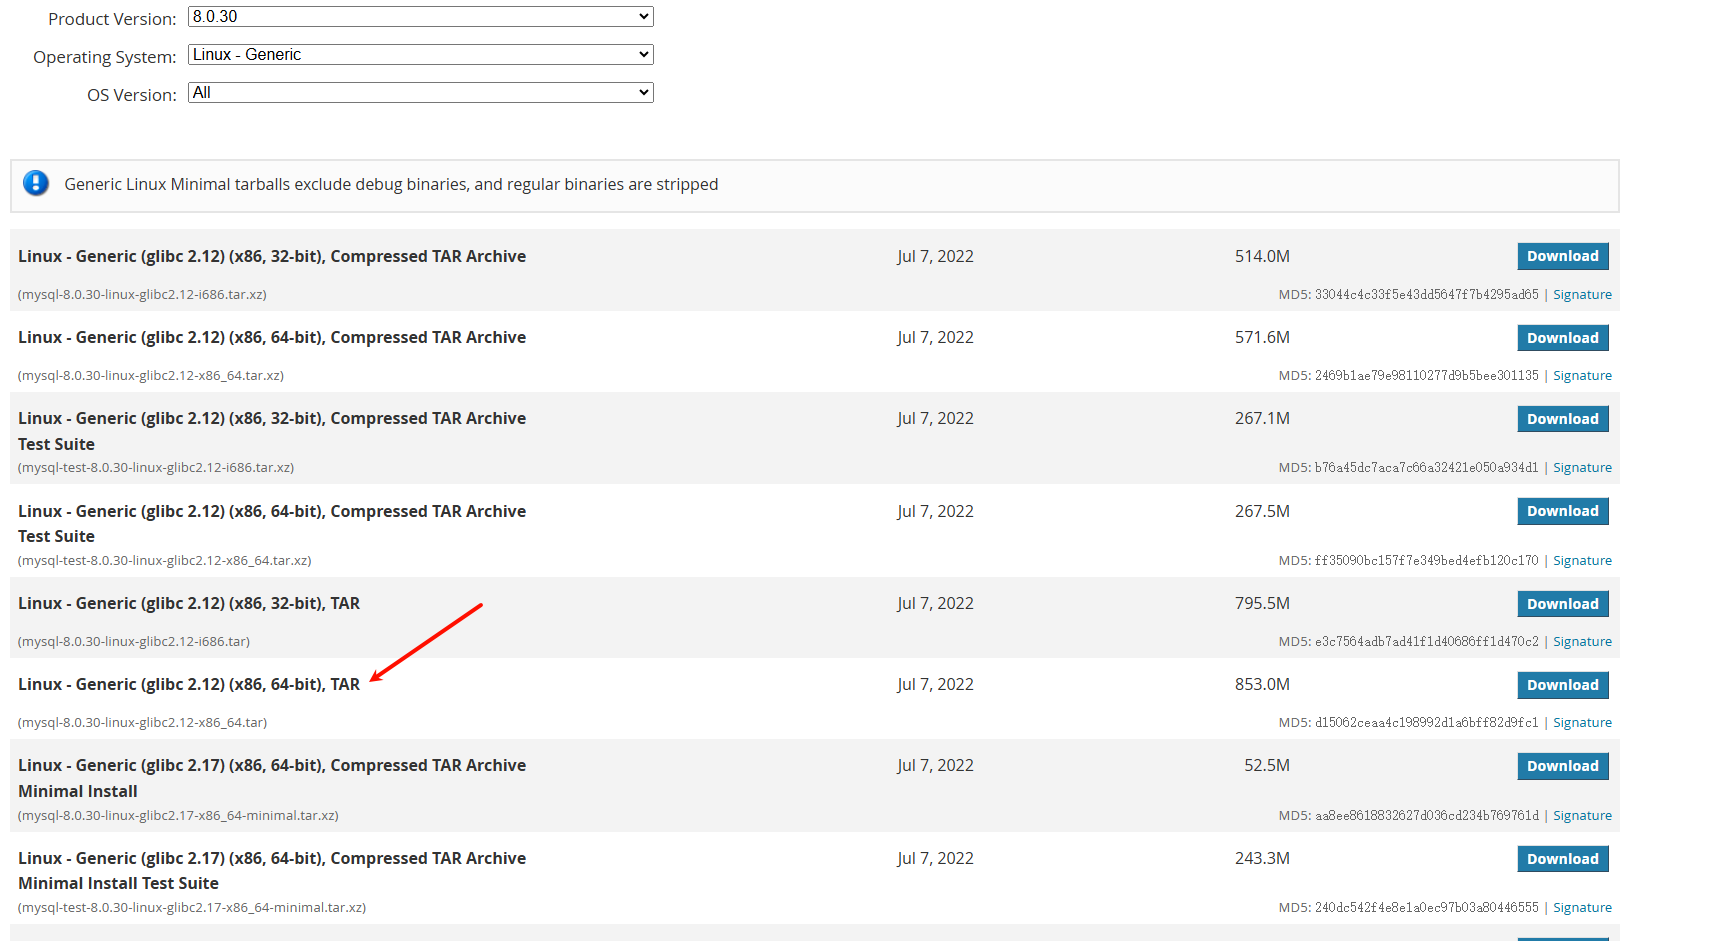
解压压缩包 tar xf mysql-8.0.30-linux-glibc2.17-x86_64-minimal.tar
再次解压需要的压缩包tar xf mysql-8.0.30-linux-glibc2.17-x86_64-minimal.tar.xz
将解压的压缩包移动到/usr/local目录下
2.创建数据存放目录
cd /usr/local/mysql
mkdir -p date
3.创建用户组和用户
groupadd mysql
useradd g mysql mysql
4.修改目录权限
chown -R mysql.mysql /usr/local/mysql
5.初始化mysql
cd /usr/local/mysql
./bin/mysqld --user=mysql --basedir=/usr/local/mysql --datadir=/usr/local/mysql/data --initialize
命令执行后会输出密码。将密码复制下后
6.修改配置文件
vim /etc/my.cnf
[client]

port = 3306

socket = /usr/local/mysql/data/mysql.sock

default-character-set = utf8mb4

[mysql]

default-character-set = utf8mb4

[mysqld]

character-set-client-handshake = FALSE

character-set-server = utf8mb4

collation-server = utf8mb4_general_ci

init_connect = 'SET NAMES utf8mb4'

max_connections = 300

port = 3306

socket = /usr/local/mysql/data/mysql.sock

skip-external-locking

key_buffer_size = 16M

max_allowed_packet = 1000M

table_open_cache = 64

sort_buffer_size = 512K

net_buffer_length = 8K

read_buffer_size = 256K

read_rnd_buffer_size = 512K

myisam_sort_buffer_size = 8M

datadir = /usr/local/mysql/data

#lower_case_table_names=1

#如果要设置lower_case_table_names可以在初始化里面设置 ./mysqld --initialize --user=mysql --datadir=/usr/local/mysql/data --basedir=/usr/local/mysql --lower_case_table_names=1

[mysqldump]

quick

max_allowed_packet = 16M

[mysql]

no-auto-rehash

[myisamchk]

key_buffer_size = 20M

sort_buffer_size = 20M

read_buffer = 2M

write_buffer = 2M

[mysqlhotcopy]

interactive-timeout
7.设置mysql开机自启动
vim /etc/systemd/system/mysql.service
[Unit]

Description=MySQL Server

After=network.target

[Service]

User=mysql

Group=mysql

ExecStart=/usr/local/mysql/bin/mysqld --defaults-file=/etc/my.cnf

LimitNOFILE=5000

Restart=always

PIDFile=/usr/local/mysql/data/mysqld.pid

[Install]

WantedBy=multi-user.target
systemctl daemon-reload
systemctl enable --now mysql
8.创建软连接用于连接数据库
ln -s /usr/local/mysql/bin/mysql /usr/bin/mysql
在ubuntu中登录数据库是为报错libncurses.so.5确实需要安装
apt install -y libncurses.so5
9.修改mysql登录密码
mysql -u root -p
ALTER USER 'root'@'localhost' IDENTIFIED WITH mysql_native_password BY '自己的密码';
10 设置mysql远程登录
use mysql;

update user set host='%' where user='root' limit 1;

flush privileges;
安装redis
1.下载安装包
https://download.redis.io/releases/
2.解压压缩包
3.移动至/usr/local/redis
4.编译安装
make && make install
5.redis 启动
切换至redis根目录,创建bin和etc文件,将redis.conf文件移动到/usr/local/redis/etc/目录,将mkreleasehdr.sh redis-benchmark redis-check-aof redis-check-rdb redis-cli redis-server 文件移动到/usr/local/redis/bin/目录。
6.设置redis后台启动
vim redis.conf
将daemonize no 改为yes
7.允许远程访问
找到bind 127.0.0.1 注释掉
8.启动redis
./redis-server
9.设置开机自启动
cat /etc/systemd/system/redis.service

[Unit]

Description=redis-server

After=network.target

[Service]

Type=forking

# 这行配置内容要根据redis的安装目录自定义路径

ExecStart=/usr/local/redis-6.0.5/bin/redis-server /usr/local/redis-6.0.5/redis.conf

PrivateTmp=true

[Install]

WantedBy=multi-user.target

systemctl daemon-reload

systemctl enable --now redis
附带自动化安装redis脚本
#!/bin/bash

#author: Turbo

# -------------------------------------------------------------------

# Script Name: download_redis.sh

# Description: A script to install and uninstall Redis.

# Author: Turbo

# Version: 1.0

# Created: 2024-12-21

# Last Updated: 2025-02-17

# License: MIT License

# -------------------------------------------------------------------

# Copyright (c) 2023 Turbo

# Permission is hereby granted, free of charge, to any person obtaining a copy

# of this software and associated documentation files (the "Software"), to deal

# in the Software without restriction, including without limitation the rights

# to use, copy, modify, merge, publish, distribute, sublicense, and/or sell

# copies of the Software, and to permit persons to whom the Software is

# furnished to do so, subject to the following conditions:

#

# The above copyright notice and this permission notice shall be included in all

# copies or substantial portions of the Software.

#

# THE SOFTWARE IS PROVIDED "AS IS", WITHOUT WARRANTY OF ANY KIND, EXPRESS OR

# IMPLIED, INCLUDING BUT NOT LIMITED TO THE WARRANTIES OF MERCHANTABILITY,

# FITNESS FOR A PARTICULAR PURPOSE AND NONINFRINGEMENT. IN NO EVENT SHALL THE

# AUTHORS OR COPYRIGHT HOLDERS BE LIABLE FOR ANY CLAIM, DAMAGES OR OTHER

# LIABILITY, WHETHER IN AN ACTION OF CONTRACT, TORT OR OTHERWISE, ARISING FROM,

# OUT OF OR IN CONNECTION WITH THE SOFTWARE OR THE USE OR OTHER DEALINGS IN THE

# SOFTWARE.

# -------------------------------------------------------------------

# Contact:

# - GitHub: https://gitee.com/lian-haoxiong/

# -------------------------------------------------------------------

# 定义颜色常量

GREEN='\033[0;32m'

YELLOW='\033[1;33m'

RED='\033[0;31m'

NC='\033[0m' # No Color

# 添加带日志信息的分割线函数

print_log_separator() {

  local message="$1"

  local level="$2"

  local color="$NC"

  local line_length=60

  local message_length=${#message}

  local padding_length=$(( (line_length - message_length - 4) / 2 ))

  local padding=$(printf '%*s' "$padding_length" | tr ' ' '=')

  case "$level" in

    info)

      color="$GREEN"

      ;;

    warning)

      color="$YELLOW"

      ;;

    error)

      color="$RED"

      ;;

    *)

      color="$YELLOW"

      ;;

  esac

  echo -e "${color}${padding} ${message} ${padding}${NC}"

}

show_help() {

  print_log_separator "显示帮助信息" "info"

  echo -e "${GREEN}使用方法: $0 [版本号] [安装目录]${NC}"

  echo -e "${GREEN}示例: $0 6.2.11 /opt${NC}"

  echo -e "${GREEN}如果不提供版本号,默认安装 Redis 6.0.5${NC}"

  echo -e "${GREEN}如果不提供安装目录,默认安装在 /usr/local/${NC}"

  echo -e "${GREEN}卸载 Redis: $0 --uninstall [安装目录]${NC}"

  exit 0

}

uninstall_redis() {

  read -p "请输入安装目录 (默认 /usr/local/): " INSTALL_DIR

  if [ -z "$INSTALL_DIR" ]; then

    INSTALL_DIR="/usr/local/"

  fi

  REDIS_DIR="$INSTALL_DIR/redis-*"

  # 卸载 Redis

  print_log_separator "卸载现有的 Redis 安装..." "warning"

  sudo systemctl stop redis

  sudo systemctl disable redis

  sudo rm -f /etc/systemd/system/redis.service

  sudo systemctl daemon-reload

  sudo userdel -r redis

  sudo rm -rf $REDIS_DIR

  sudo rm -rf $INSTALL_DIR/src/redis-*

  sudo rm -rf $INSTALL_DIR/redis-*.tar.gz

  echo -e "${GREEN}Redis 卸载完成!${NC}"

  exit 0

}

check_existing_redis() {

  if systemctl is-active --quiet redis; then

    print_log_separator "检测到已安装 Redis" "warning"

    echo -e "${YELLOW}检测到已安装 Redis。${NC}"

    read -p "是否要卸载现有的 Redis 安装? (y/n): " UNINSTALL

    if [ "$UNINSTALL" == "y" ]; then

      uninstall_redis

    else

      read -p "是否要修改 Redis 的端口? (y/n): " CHANGE_PORT

      if [ "$CHANGE_PORT" == "y" ]; then

        read -p "请输入新的 Redis 端口 (默认 6379): " NEW_PORT

        if [ -z "$NEW_PORT" ]; then

          NEW_PORT="6379"

        fi

      fi

    fi

  fi

}

get_redis_versions() {

  print_log_separator "正在获取 Redis 官方版本列表..." "info"

  VERSIONS_URL="https://download.redis.io/releases/"

  VERSIONS_PAGE=$(curl -s $VERSIONS_URL)

  # 解析版本列表

  IFS=$'\n' read -rd '' -a versions <<< "$(echo "$VERSIONS_PAGE" | grep -oP 'redis-\K[\d]+\.[\d]+\.[\d]+' | sort -rV)"

  echo "${versions[@]}"

}

select_redis_version() {

  local versions=("$@")

  print_log_separator "展示 Redis 版本列表" "info"

  echo "请选择要安装的 Redis 版本:"

  for i in "${!versions[@]}"; do

    echo "[$i] ${versions[$i]}"

  done

  # 用户选择版本

  read -p "请输入编号 (默认 6.0.5): " choice

  # 检查用户输入是否合法

  if [[ "$choice" =~ ^[0-9]+$ ]] && [ "$choice" -lt "${#versions[@]}" ]; then

    REDIS_VERSION=${versions[$choice]}

  else

    echo "无效的选择或未输入选择,使用默认版本 6.0.5"

    REDIS_VERSION="6.0.5"

  fi

}

install_dependencies() {

  print_log_separator "更新软件包并安装必要的依赖..." "info"

  if [[ "$OS" == "ubuntu" || "$OS" == "debian" ]]; then

    sudo apt-get update

    sudo apt-get install -y build-essential tcl wget curl

  elif [[ "$OS" == "centos" || "$OS" == "rhel" ]]; then

    sudo yum install -y gcc make tcl wget curl

  else

    echo -e "${RED}不支持的操作系统: $OS${NC}"

    exit 1

  fi

}

download_and_extract_redis() {

  print_log_separator "下载 Redis $REDIS_VERSION..." "info"

  wget "$DOWNLOAD_URL"

  if [ $? -ne 0 ]; then

    echo -e "${RED}下载失败,请检查 Redis 版本号。${NC}"

    exit 1

  fi

  # 解压

  print_log_separator "解压 Redis..." "info"

  sudo tar xf "redis-$REDIS_VERSION.tar.gz"

}

compile_redis() {

  print_log_separator "编译 Redis..." "info"

  cd "redis-$REDIS_VERSION"

  sudo make

  sudo make install

}

configure_redis() {

  print_log_separator "配置 Redis..." "info"

  sudo sed -i 's/protected-mode yes/protected-mode no/' "$REDIS_DIR/redis.conf"

  sudo sed -i 's/bind 127.0.0.1/#bind 127.0.0.1/' "$REDIS_DIR/redis.conf"

  # 修改端口

  if [ -n "$NEW_PORT" ]; then

    print_log_separator "修改 Redis 端口为 $NEW_PORT..." "info"

    sudo sed -i "s/^port 6379/port $NEW_PORT/" "$REDIS_DIR/redis.conf"

  fi

}

create_redis_user_and_dirs() {

  print_log_separator "创建 Redis 用户和数据目录..." "info"

  sudo useradd redis

}

create_redis_service() {

  print_log_separator "创建 Redis Systemd 服务..." "info"

  sudo tee /etc/systemd/system/redis.service > /dev/null <<EOF

[Unit]

Description=Redis In-Memory Data Store

After=network.target

[Service]

User=redis

Group=redis

ExecStart=$REDIS_DIR/src/redis-server $REDIS_DIR/redis.conf

ExecStop=$REDIS_DIR/src/redis-cli shutdown

Restart=always

[Install]

WantedBy=multi-user.target

EOF

}

start_and_enable_redis() {

  print_log_separator "启动并启用 Redis 服务..." "info"

  sudo systemctl daemon-reload

  sudo systemctl start redis

  sudo systemctl enable redis

}

download_and_install_redis() {

  print_log_separator "开始脚本执行" "info"

  # 检查是否需要帮助信息

  if [ "$1" == "--help" ]; then

    show_help

  fi

  # 检查是否需要卸载 Redis

  if [ "$1" == "--uninstall" ]; then

    uninstall_redis

  fi

  # 检查是否已安装 Redis

  check_existing_redis

  # 获取 Redis 版本列表

  versions=($(get_redis_versions))

  # 用户选择版本

  select_redis_version "${versions[@]}"

  # 用户输入安装目录

  read -p "请输入安装目录 (默认 /usr/local/): " INSTALL_DIR

  if [ -z "$INSTALL_DIR" ]; then

    INSTALL_DIR="/usr/local/"

  fi

  REDIS_DIR="$INSTALL_DIR/redis-$REDIS_VERSION"

  DOWNLOAD_URL="http://download.redis.io/releases/redis-$REDIS_VERSION.tar.gz"

  SOURCE_DIR="$INSTALL_DIR/src"

  # 判断系统类型

  if [ -f /etc/os-release ]; then

    . /etc/os-release

    OS=$ID

  else

    echo "无法识别操作系统类型,请手动安装所需依赖。"

    exit 1

  fi

  # 安装必要的依赖

  install_dependencies

  # 创建源代码目录

  sudo mkdir -p "$INSTALL_DIR"

  cd "$INSTALL_DIR"

  # 下载并解压 Redis

  download_and_extract_redis

  # 编译 Redis

  compile_redis

  # 配置 Redis

  configure_redis

  # 创建 Redis 用户和数据目录

  create_redis_user_and_dirs

  # 创建 Systemd 服务

  create_redis_service

  # 启动并启用 Redis 服务

  start_and_enable_redis

  print_log_separator "安装完成" "info"

  echo -e "${GREEN}Redis $REDIS_VERSION 安装完成并启动成功!${NC}"

}

# 调用函数

download_and_install_redis "$@"
linux(Ubuntu22.04)二进制安装mysql及redis的更多相关文章
- 使用docker安装mysql和redis
本文介绍在linux下使用docker安装mysql和redis. 原文地址:代码汇个人博客 http://www.codehui.net/info/59.html 测试环境:centos7.6,do ...
- 记录CentOS 7.4 上安装MySQL&MariaDB&Redis&Mongodb
记录CentOS 7.4 上安装MySQL&MariaDB&Redis&Mongodb 前段时间我个人Google服务器意外不能用,并且我犯了一件很低级的错误,直接在gcp讲服 ...
- Ubuntu18.04下安装MySQL
Ubuntu上安装MySQL非常简单只需要几条命令就可以完成. 1. sudo apt-get install mysql-server 2. apt-get isntall mysql-client ...
- centOS Linux下用yum安装mysql
centOS Linux下用yum安装mysql 第一篇:安装和配置MySQL 第一步:安装MySQL [root@192 local]# yum -y install mysql- ...
- linux下使用yum安装mysql、tomcat、httpd
一.linux下使用yum安装mysql 1.安装 查看有没有安装过: yum list installed mysql* rpm -qa | grep m ...
- Linux centos7环境下安装MySQL的步骤详解
Linux centos7环境下安装MySQL的步骤详解 安装MySQL mysql 有两个跟windows不同的地方 1).my.ini 保存到/etc/my.ini 2).用户权限,单独用户执行 ...
- CentOS7攻克日记(四) —— 安装Mysql和Redis
这一篇主要安装mysql,redis等数据库 在这篇开始之前,有一个坑,上一篇更改python软连接的时候,尽量都用名字是python3来软连接/usr/../bin/python3.6,把名字是 ...
- Ubuntu 12.04上安装MySQL并运行
Ubuntu 12.04上安装MySQL并运行 作者:凯鲁嘎吉 - 博客园 http://www.cnblogs.com/kailugaji/ 安装MySQL数据库 sudo apt-get upda ...
- 二进制安装MySQL数据库
今天安装的是二进制的mysql包5.7.21的包,在配置文件的时候采了好多坑,左后还是搞定了,来和大家分享一下 二进制msyql5.7.21版本的主从复制安装 新建/picclife目录 mkdir ...
- [mysql] linux下使用yum安装mysql
From: http://www.2cto.com/database/201207/141878.html linux下使用yum安装mysql 1.安装 查看有没有安装过: ...
随机推荐
- 最新活动 ISS 国际空间站 MAI-75 SSTV活动计划于2020年8月4日至5日
MAI-75 SSTV活动计划于2020年8月4日和5日举行 8月3日至9日这一周的最后宇航员时间表最近公布了,它显示了定于8月4日和5日进行的MAI-75活动.这是在Space X Demo-2脱 ...
- Fetch 别名查找
if (PlanClass.Attributes.Contains("new_excelcolor_avg")) ...
- 在 CentOS 系统下搭建 ZeroTier Moon
在 CentOS 系统下搭建 ZeroTier Moon 服务器时,生成的配置文件位置是在 /var/lib/zerotier-one/ 目录下.该目录包含了 ZeroTier One 的运行时数据, ...
- 支持VS2022的包发布工具NuPack 2022发布
我们很高兴地宣布 NuPack 2022 正式发布!这是一个开源项目,旨在简化 .NET 开发中的 NuGet 包发布流程. NuPack 是什么? NuPack 是一个轻量级工具,VS扩展,它可以帮 ...
- ARM开发板——实时获取用户点击触摸屏的LCD坐标信息(阻塞式读取)
ARM开发板--实时获取用户点击触摸屏的LCD坐标信息(阻塞式读取) 目录 ARM开发板--实时获取用户点击触摸屏的LCD坐标信息(阻塞式读取) 1.硬件信息 2.代码需求 3.代码实现 1.硬件信息 ...
- Windows 鼠标右键失效
突然有一天...小邋遢他变了... 哦不是...鼠标右键/键盘菜单键莫名其妙失效了. 解决办法 运行 regedit 打开注册表编辑器 依次展开 HKEY_CURRENT_USER\Software\ ...
- 把postgreSQL的表导入SQLite
万能的互联网,一查一大堆废话,几乎搞不定.现将查到的资料结合实践概况如下,对不对也不清楚,反正可以跑了. 1.把PostgreSQL的表SQL语句复制出来 CREATE TABLE "mai ...
- .NET 原生驾驭 AI 新基建实战系列(二):Semantic Kernel 整合对向量数据库的统一支持
1. 引言 在人工智能(AI)应用开发迅猛发展的今天,向量数据库作为存储和检索高维数据的重要工具,已经成为许多场景(如自然语言处理.推荐系统和语义搜索)的核心组件. 对于.NET生态系统的开发者而言, ...
- SpringBoot校验请求Json参数
spring boot 校验请求json参数 在后端开发中,通过接口和参数传输来进行与前端交互,才可以让一个项目成型. 由于全后端隔离的方式,所以有时候需要不那么信任前端,也就是在验证当前操作是否有权 ...
- FREERTOS_LWIP TcpServer 加快接收速度
刚开始调试时,关注点都在接收缓存等参数上,接受的间隔上限时钟在250ms左右. 后来发现是其中一个参数的设定决定了接收的速度,调整参数后,可以达到每80ms接收1024个字节. 发文留存,备忘.