定时任务-在spring中配置quartz
使用的版本Spring4.04+Quartz2.2.3,关于jar包自行下载。
详细需要以下几个步骤来完成:
1. 定义要执行的Job类
2. 定义quartz的配置文件applicationContext-quartz.xml
2.1 定义要调用的对象和对象的方法
2.2 在触发器中配置使用该方法的时间
2.3 在总管类中添加该任务
3. 定义执行的任务的时间配置文件
4. 在拦截器中添加要扫描的包
5. 将quartz配置文件添加到我们的spring容器的配置文件applicationContext.xml中
6. 启动tomcat
下面以具体实例来演示:
1. 定义要执行的Job类 TestJob.java
注意加上注解标记该类为Component组件,这样方便自动装配到spring容器中管理。
package com.crm.scheduler;

import java.text.SimpleDateFormat;

import java.util.Date;

import org.springframework.beans.factory.annotation.Value;

import org.springframework.stereotype.Component;

@Component("testJobComponent")

public class TestJob {

    //定义是否

    @Value("${crmbi.cronExpression.isDoTestJob}")

    private boolean isDoTestJob = false;

    public void execute(){

        if(!isDoTestJob){

            return ;

        }

        SimpleDateFormat sdf = new SimpleDateFormat("yyyy-MM-dd HH:mm:ss");

        System.out.println("我是定时任务类,现在的执行时间是" + sdf.format(new Date()));

    }

}
2. 定义quartz的配置文件
2.1 定义要调用的对象和对象的方法,在这里对象就是上面的新建的testJobComponnent。
    <!-- 定时器2:测试quartz类的使用方法 -->

    <!-- 定义调用的对象及对象中的方法 -->

    <bean id="defTestJob" class="org.springframework.scheduling.quartz.MethodInvokingJobDetailFactoryBean">

        <property name="targetObject" ref="testJobComponent" />

        <property name="targetMethod" value="execute" />

        <property name="concurrent" value="false" /> <!-- 是否支持并发 -->

    </bean>
2.2 定义触发器并配置定时任务执行的时间
    <!-- 触发器:定义出发器执行的脚本的时间  -->

    <bean id="triggerTestJob" class="org.springframework.scheduling.quartz.CronTriggerFactoryBean">

        <property name="jobDetail" ref="defTestJob" />

        <property name="cronExpression">

            <value>${crmbi.cronExpression.testJob}</value>

        </property>

    </bean>
2.3 在总管理中添加该任务
    <!-- 总管理类,启动触发器的配置, 如果将lazy-init='false'那么容器启动就会执行调度程序 -->

    <bean id="startQuartz" lazy-init='false' autowire="no"

            class="org.springframework.scheduling.quartz.SchedulerFactoryBean">

        <property name="triggers">

            <list>

                <ref bean="triggerTestjob" />

            </list>

        </property>

        <property name="autoStartup" value="true" />

        <property name="startupDelay" value="30"/>

    </bean>
最后展示下完成的配置文件applicationContext-quartz.xml如下,其中包含了2个定时任务类,triggerTestJob为我们新增的任务信息:
<?xml version="1.0" encoding="UTF-8"?>

<beans xmlns="http://www.springframework.org/schema/beans"

    xmlns:xsi="http://www.w3.org/2001/XMLSchema-instance" xmlns:aop="http://www.springframework.org/schema/aop"

    xmlns:tx="http://www.springframework.org/schema/tx" xmlns:context="http://www.springframework.org/schema/context"

    xmlns:task="http://www.springframework.org/schema/task" xmlns:util="http://www.springframework.org/schema/util"

    xsi:schemaLocation="http://www.springframework.org/schema/beans http://www.springframework.org/schema/beans/spring-beans-3.0.xsd

    http://www.springframework.org/schema/tx http://www.springframework.org/schema/tx/spring-tx-3.0.xsd

    http://www.springframework.org/schema/aop http://www.springframework.org/schema/aop/spring-aop-3.0.xsd

    http://www.springframework.org/schema/context http://www.springframework.org/schema/context/spring-context-3.0.xsd

    http://www.springframework.org/schema/task http://www.springframework.org/schema/task/spring-task-3.0.xsd

    http://www.springframework.org/schema/util http://www.springframework.org/schema/util/spring-util-3.0.xsd">

    <!-- Quartz common config-->

    <!-- 总管理类,启动触发器的配置, 如果将lazy-init='false'那么容器启动就会执行调度程序 -->

    <bean id="startQuartz" lazy-init='false' autowire="no"

            class="org.springframework.scheduling.quartz.SchedulerFactoryBean">

        <property name="triggers">

            <list>

                <ref bean="runSyncHive2OracleJob" />

                <ref bean="triggerTestjob" />

            </list>

        </property>

        <property name="autoStartup" value="true" />

        <property name="startupDelay" value="30"/>

    </bean>

    <!-- 定时器1: 同步hive数据到oracle -->

    <!-- 定义执行的对象及对象中的方法 -->

    <bean id="defineSyncHive2OracleJob" class="org.springframework.scheduling.quartz.MethodInvokingJobDetailFactoryBean">

        <property name="targetObject" ref="syncHive2OracleComponent" />

        <property name="targetMethod" value="execute" />

        <property name="concurrent" value="false" /> <!-- 指是否并行执行 -->

    </bean>

    <!-- 定义触发器的时间 -->

    <bean id="runSyncHive2OracleJob" class="org.springframework.scheduling.quartz.CronTriggerFactoryBean">

        <property name="jobDetail" ref="defineSyncHive2OracleJob" />

        <property name="cronExpression">

            <value>${crmbi.cronExpression.syncHive2OracleJob}</value>

        </property>

    </bean>

    <!-- 定时器2:测试quartz类的使用方法 -->

    <!-- 定义调用的对象及对象中的方法 -->

    <bean id="defTestJob" class="org.springframework.scheduling.quartz.MethodInvokingJobDetailFactoryBean">

        <property name="targetObject" ref="testJobComponent" />

        <property name="targetMethod" value="execute" />

        <property name="concurrent" value="false" /> <!-- 是否支持并发 -->

    </bean>

    <!-- 触发器:定义出发器执行的脚本的时间  -->

    <bean id="triggerTestJob" class="org.springframework.scheduling.quartz.CronTriggerFactoryBean">

        <property name="jobDetail" ref="defTestJob" />

        <property name="cronExpression">

            <value>${crmbi.cronExpression.testJob}</value>

        </property>

    </bean>

</beans>
3. 定义执行任务的时间配置文件config.properties.
注意这里的crmbi.cronExpression.isDotestJob用来控制是否执行任务的开关
# 3:00 every day

crmbi.cronExpression.syncHive2OracleJob=0 0 3 * * ?

crmbi.cronExpression.isDoSyncHive2Oracle=true

# each 5 minuts

crmbi.cronExpression.testJob=0 0/5 * * * ?

crmbi.cronExpression.isDoTestJob=true
4. 在拦截器中添加要扫描的包,这里加入了com.crm.scheduler包和config.properties文件的扫描。
<!----这个applicationContext-dao.xml文件中---->

    <context:component-scan base-package="com.crm.dao"/>

     <context:component-scan base-package="com.crm.scheduler"/>

    <context:property-placeholder location="classpath:jdbc.properties"  ignore-unresolvable="true"/>

    <context:property-placeholder location="classpath:config.properties"  ignore-unresolvable="true" />
5.将quartz的配置文件引入到spring容器中。
<?xml version="1.0" encoding="UTF-8" ?>

<beans xmlns="http://www.springframework.org/schema/beans"

    xmlns:xsi="http://www.w3.org/2001/XMLSchema-instance"

        xmlns:context="http://www.springframework.org/schema/context"

    xsi:schemaLocation="http://www.springframework.org/schema/beans http://www.springframework.org/schema/beans/spring-beans-3.0.xsd

    http://www.springframework.org/schema/context http://www.springframework.org/schema/context/spring-context-3.0.xsd">

    <!-- 数据访问层配置 -->

     <import resource="classpath:spring/applicationContext-dao.xml" />

    <!--服务层配置 -->

    <import resource="classpath:spring/applicationContext-service.xml" />

    <!-- 定时任务配置文件 -->

    <import resource="classpath:spring/applicationContext-quartz.xml" />

</beans>
6. 最后启动tomcat, 等待一段时间后,可以看到控制台输出如下:
[BI-CONSOLE] 2016-08-11 18:03:44.939 INFO RequestMappingHandlerMapping.registerHandlerMethod(197) | Mapped "{[/user/showUser],methods=[],params=[],headers=[],consumes=[],produces=[],custom=[]}" onto public java.lang.String com.crm.action.system.UserController.showUser(org.springframework.ui.Model,java.lang.String,java.lang.String)

[BI-CONSOLE] 2016-08-11 18:03:44.940 INFO RequestMappingHandlerMapping.registerHandlerMethod(197) | Mapped "{[/user/updateUserPwd],methods=[GET],params=[],headers=[],consumes=[],produces=[],custom=[]}" onto public java.util.Map<java.lang.String, java.lang.Object> com.crm.action.system.UserController.updateUserPwd(java.lang.String,javax.servlet.http.HttpServletRequest,javax.servlet.http.HttpServletResponse)

[BI-CONSOLE] 2016-08-11 18:03:44.940 INFO RequestMappingHandlerMapping.registerHandlerMethod(197) | Mapped "{[/user/userSave],methods=[POST],params=[],headers=[],consumes=[],produces=[],custom=[]}" onto public java.util.Map<java.lang.String, java.lang.Object> com.crm.action.system.UserController.saveUser(org.springframework.ui.Model,com.crm.entity.system.MUser)

[BI-CONSOLE] 2016-08-11 18:03:45.533 INFO SimpleUrlHandlerMapping.registerHandler(302) | Root mapping to handler of type [class org.springframework.web.servlet.mvc.ParameterizableViewController]

[BI-CONSOLE] 2016-08-11 18:03:45.540 INFO SimpleUrlHandlerMapping.registerHandler(315) | Mapped URL path [/**] onto handler 'org.springframework.web.servlet.resource.DefaultServletHttpRequestHandler#0'

[BI-CONSOLE] 2016-08-11 18:03:45.581 INFO SimpleUrlHandlerMapping.registerHandler(315) | Mapped URL path [/resources/**] onto handler 'org.springframework.web.servlet.resource.ResourceHttpRequestHandler#0'

[BI-CONSOLE] 2016-08-11 18:03:45.863 INFO DispatcherServlet.initServletBean(498) | FrameworkServlet 'crmbi': initialization completed in 1255 ms

八月 11, 2016 6:03:45 下午 org.apache.coyote.AbstractProtocol start

信息: Starting ProtocolHandler ["http-bio-8080"]

八月 11, 2016 6:03:45 下午 org.apache.coyote.AbstractProtocol start

信息: Starting ProtocolHandler ["ajp-bio-8009"]

八月 11, 2016 6:03:45 下午 org.apache.catalina.startup.Catalina start

信息: Server startup in 14949 ms

[BI-CONSOLE] 2016-08-11 18:04:14.583 INFO SchedulerFactoryBean.run(667) | Starting Quartz Scheduler now, after delay of 30 seconds

[BI-CONSOLE] 2016-08-11 18:04:14.584 INFO QuartzScheduler.start(575) | Scheduler startQuartz_$_NON_CLUSTERED started.

我是定时任务类,现在的执行时间是2016-08-11 18:05:00
我是定时任务类,现在的执行时间是2016-08-11 18:10:00
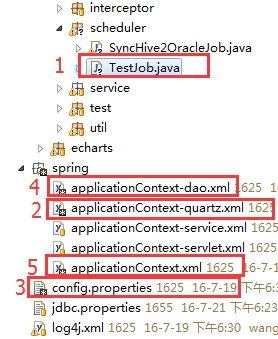
7. 附上项目的文档结构图如下:
定时任务-在spring中配置quartz的更多相关文章
- spring中配置quartz调用两次及项目日志log4j不能每天生成日志解决方法
在quartz中配置了一个方法运行时会连续调用两次,是因为加载两次,只需在tomcat的server.xml中修改配置 <Host name="www.xx.cn" appB ...
- spring 中使用quartz实现定时任务
一般开发系统,使用定时任务非常常见.当然也可以用Java实现.比如定时器.大致如下: 1: public static void main(String[] args) { 2: Timer time ...
- 浅谈Spring中的Quartz配置
浅谈Spring中的Quartz配置 2009-06-26 14:04 樊凯 博客园 字号:T | T Quartz是一个强大的企业级任务调度框架,Spring中继承并简化了Quartz,下面就看看在 ...
- Spring中使用Quartz之MethodInvokingJobDetailFactoryBean配置任务
Quartz是一个强大的企业级任务调度框架,Spring中继承并简化了Quartz. Spring中使用Quartz的3种方法(MethodInvokingJobDetailFactoryBean,i ...
- 在spring中实现quartz的动态调度(开始、暂停、停止等)
版权声明:本文为博主原创文章,未经博主允许不得转载. https://blog.csdn.net/fantasic_van/article/details/74942062 需求: 需要在页面设定某个 ...
- Spring 中使用Quartz实现任务调度
前言:Spring中使用Quartz 有两种方式,一种是继承特定的基类:org.springframework.scheduling.quartz.QuartzJobBean,另一种则不需要,(推荐使 ...
- 10 -- 深入使用Spring -- 5...2 在Spring中使用Quartz
10.5.2 在Spring中使用Quartz Spring 的任务调度抽象层简化了任务调度,在Quartz基础上提供了更好的调度抽象.本系统使用Quartz框架来完成任务调度,创建Quartz的作业 ...
- 在Spring中配置SQL server 2000
前言 Lz主要目的是在Spring中配置SQL server 2000数据库,但实现目的的过程中参差着许多SQL server 2000的知识,也包罗在本文记载下来!(Lz为什么要去搞sql serv ...
- spring中配置监听队列的MQ
一.spring中配置监听队列的MQ相关信息注:${}是读取propertites文件的常量,这里忽略.绿色部分配置在接收和发送端都要配置. <bean id="axx" ...
随机推荐
- gvim e303 无法打开 “[未命名]“的交换文件,恢复将不可能
今天vim出现:“gvim e303 无法打开 “[未命名]“的交换文件,恢复将不可能” 解决办法: 修改你的.vimrc,增加下面的一行: set directory=.,$TEMP "默 ...
- 使用Guava来计算笛卡尔积
以前做项目的时候计算笛卡尔积的时候,总是使用各种for循环来嵌套,最后往往在Sonar代码检查的时候总是会报警说for循环嵌套过深. 今天才知道Guava原来已经为我们提供了优雅的计算笛卡尔积的方法. ...
- A.Kaw矩阵代数初步学习笔记 5. System of Equations
“矩阵代数初步”(Introduction to MATRIX ALGEBRA)课程由Prof. A.K.Kaw(University of South Florida)设计并讲授. PDF格式学习笔 ...
- Android中定时执行任务的3种实现方法
在Android开发中,定时执行任务的3种实现方法: 一.采用Handler与线程的sleep(long)方法(不建议使用,java的实现方式)二.采用Handler的postDelayed(Runn ...
- JavaWeb---总结(十一)使用Cookie进行会话管理
一.会话的概念 会话可简单理解为:用户开一个浏览器,点击多个超链接,访问服务器多个web资源,然后关闭浏览器,整个过程称之为一个会话. 有状态会话:一个同学来过教室,下次再来教室,我们会知道这个同学曾 ...
- oneM2M
http://www.ccsa.org.cn/organization/intro.php?org=oneM2M 一.成立背景 随着物联网技术研发及市场推广的不断深入,全球各通信标准化组织都在加强物联 ...
- BigDecimal数据加法返回值接收
1.相加 两个BigDecimal变量a,b. 如果想进行相加,即a加b的话,返回值需要使用a进行接收,如下: a = a.add(b); BigDecimal为不可变类, 所以执行运算的结果需要再返 ...
- jpa delete related
delete deleteAll deleteInBatch notice List<Ap> apList = .deleteInBatch(apList)
- nodejs fs module
fs.watchFile(filename[, options], listener)# Added in: v0.1.31 filename <String> | <Buffer& ...
- MySQL取每组的前N条记录
一.对分组的记录取前N条记录:例子:取前 2条最大(小)的记录 .用子查询: SELECT * FROM right2 a WHERE > (SELECT COUNT(*) FROM right ...