Vue【原创】整合el-dialog,可拖动可全屏最大化弹出框
项目中很多时候需要弹出框可以拖动并且可最大化,el-dialog是不满足的,这边采用指令的方式进行拓展。
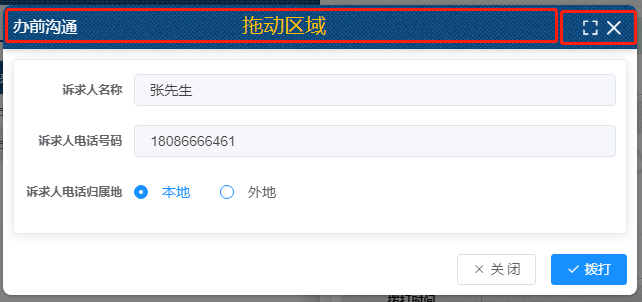
先来个效果图:
首先来个v-darg指令:
 1 import Vue from 'vue'

 2

 3 Vue.directive('alterELDialogMarginTop', {

 4     inserted(el, binding, vnode) {

 5         el.firstElementChild.style.marginTop = binding.value + 'px'

 6     }

 7 })

 8

 9 Vue.directive('alterELDialogMarginLeft', {

10     inserted(el, binding, vnode) {

11         el.firstElementChild.style.marginLeft = binding.value + 'px'

12     }

13 })

14

15 Vue.directive('drag', {

16     inserted(el, binding, vnode) {

17         let odiv = el.getElementsByTagName('div')[0];

18         let headerDiv = odiv.getElementsByTagName('div')[0];

19         const deepHeader = headerDiv.querySelector('header');

20         const flag = elementContains(headerDiv, deepHeader); //兼容dialog&&drawer

21         if(flag) {

22             headerDiv = deepHeader;

23         }

24         headerDiv.onmousedown = e => {

25             // document.body.style.userSelect = 'none';

26             // document.body.style.webkitUserSelect = 'none';

27             // document.body.style.msUserSelect = 'none';

28             // document.body.style.mozUserSelect = 'none';

29             // let odiv = el.getElementsByTagName('div')[0];

30             let disX = e.clientX - odiv.offsetLeft;

31             let disY = e.clientY - odiv.offsetTop;

32             document.onmousemove = e => {

33                 let left = e.clientX - disX;

34                 let top = e.clientY - disY;

35                 odiv.style.marginLeft = left + 'px';

36                 odiv.style.marginTop = top + 'px';

37             };

38             document.onmouseup = e => {

39                 document.onmousemove = null;

40                 document.onmouseup = null;

41                 // document.body.style.userSelect = 'auto';

42                 // document.body.style.webkitUserSelect = 'auto';

43                 // document.body.style.msUserSelect = 'auto';

44                 // document.body.style.mozUserSelect = 'auto';

45             };

46         };

47     }

48 })

49

50 const elementContains = (parent, child) => parent !== child && parent.contains(child);
再来个v-fullscreen指令:
 1 import Vue from 'vue'

 2

 3 function handleFullScreen(dialog, isFullScreen, marginTop, width) {

 4     if (!dialog) return false

 5     if (isFullScreen) {

 6         dialog.style.marginTop = '0'

 7         dialog.style.marginLeft = '0'

 8         dialog.style.position = 'absolute'

 9         dialog.style.top = '0px'

10         dialog.style.bottom = '0px'

11         dialog.style.left = '0px'

12         dialog.style.width = '100%'

13     } else {

14         // dialog.style.marginTop = marginTop

15         dialog.style.margin = '0 auto'

16         dialog.style.width = width

17         dialog.style.position = 'relative'

18     }

19 }

20

21 Vue.directive('fullScreen', {

22     bind(el, binding, vnode) {

23         let isFullScreen = false

24

25         const dialog = el.querySelector('.el-dialog')

26         const header = el.querySelector('.el-dialog__header')

27         if (!header || !dialog || !vnode) return

28         header.style.paddingRight = '43px'

29         header.style.boxShadow = '0 4px 6px -1px rgb(0 0 0 / 0.1), 0 2px 4px -2px rgb(0 0 0 / 0.1)'

30         const {

31             width,

32             top

33         } = vnode.componentInstance

34

35         const fullScreenBtn = document.createElement('button')

36         fullScreenBtn.type = 'button'

37         fullScreenBtn.style =

38             'padding:0;background: 0 0;border:0;outline:0;cursor:pointer;font-size:17px;top:14px;right:38px;position:absolute;color:white;'

39

40         const fullScreenIcon = document.createElement('i')

41         fullScreenIcon.className = 'el-icon el-icon-full-screen'

42         fullScreenBtn.append(fullScreenIcon)

43

44         fullScreenBtn.addEventListener('click', () => {

45             isFullScreen = !isFullScreen

46             handleFullScreen(dialog, isFullScreen, top, width)

47             return false

48         })

49

50         header.append(fullScreenBtn)

51

52         header.addEventListener('dblclick', () => {

53             isFullScreen = !isFullScreen

54             handleFullScreen(dialog, isFullScreen, top, width)

55             return false

56         })

57     }

58 })
集成el-dialog,(这个封装里面稍微做了一点对于移动端和pc端的尺寸响应,不需要可以去掉):
  1 <template>

  2     <el-dialog

  3         v-drag

  4         v-fullScreen

  5         :title="title"

  6         :visible="visible"

  7         :show-close="showClose"

  8         :close-on-click-modal="closeOnClickModal"

  9         :append-to-body="true"

 10         close-on-press-escape

 11         :modal="modal"

 12         :width="`${device === mobile ? 100 : width}%`"

 13         :top="`${device === mobile ? 0 : top}px`"

 14         v-if="visible"

 15         @close="closeDialog"

 16     >

 17         <div><slot name="title"></slot></div>

 18         <div><slot></slot></div>

 19         <div slot="footer"><slot name="footer"></slot></div>

 20     </el-dialog>

 21 </template>

 22

 23 <script>

 24 // :center="!!+(`${device === mobile ? false : true}`)"

 25

 26 const { body } = document;

 27 const WIDTH = 992; // refer to Bootstrap's responsive design

 28 const DESKTOP = 'desktop';

 29 const MOBILE = 'mobile';

 30

 31 export default {

 32     name: 'LiloResponsiveDialog',

 33     props: {

 34         title: {

 35             type: String,

 36             default: ''

 37         },

 38         width: {

 39             type: [Number, String],

 40             default: 50

 41         },

 42         top: {

 43             type: [Number, String],

 44             default: 54

 45         },

 46         visible: {

 47             type: Boolean,

 48             default: false

 49         },

 50         showClose: {

 51             type: Boolean,

 52             default: true

 53         },

 54         closeOnClickModal: {

 55             type: Boolean,

 56             default: false

 57         },

 58         modal: {

 59             type: Boolean,

 60             default: true

 61         }

 62     },

 63     data() {

 64         return {

 65             device: DESKTOP,

 66             mobile: MOBILE

 67         };

 68     },

 69     beforeMount() {

 70         window.addEventListener('resize', this.$_resizeHandler);

 71     },

 72     beforeDestroy() {

 73         window.removeEventListener('resize', this.$_resizeHandler);

 74     },

 75     mounted() {

 76         const isMobile = this.$_isMobile();

 77         if (isMobile) {

 78             this.device = 'mobile';

 79         }

 80     },

 81     methods: {

 82         $_isMobile() {

 83             const rect = body.getBoundingClientRect();

 84             return rect.width - 1 < WIDTH;

 85         },

 86         $_resizeHandler() {

 87             if (!document.hidden) {

 88                 const isMobile = this.$_isMobile();

 89                 this.device = isMobile ? MOBILE : DESKTOP;

 90             }

 91         },

 92         closeDialog() {

 93             this.$emit('update:visible', false);

 94             this.$emit('close');

 95         }

 96     }

 97 };

 98 </script>

 99

100 <style></style>
最后直接调用LiloResponsiveDialog组件即可,而我这里是做成了插件。
1 import ResponsiveDialog from './src/main';

2

3 /* istanbul ignore next */

4 ResponsiveDialog.install = function(Vue) {

5   Vue.component(ResponsiveDialog.name, ResponsiveDialog);

6 };

7

8 export default ResponsiveDialog;
Vue【原创】整合el-dialog,可拖动可全屏最大化弹出框的更多相关文章
- 基于Vue.js PC桌面端弹出框组件|vue自定义弹层组件|vue模态框
vue.js构建的轻量级PC网页端交互式弹层组件VLayer. 前段时间有分享过一个vue移动端弹窗组件,今天给大家分享一个最近开发的vue pc端弹出层组件. VLayer 一款集Alert.Dia ...
- elementUI vue 页面加载的时候页面出现了黑字 页面优化处理 按钮弹出框文字
elementUI 页面如果需要加载很多东西的时候, 自己定义的按钮或者弹出框dialog的文字就会显示在页面上, 一闪而过, 因此需要优化一下, elementUI 提供的loading有遮罩层, ...
- vue--vant组件库Dialog弹出框
安装vant UI框架: cnpm install vant –-save-dev 导入组件-在main.js里: import Vant from 'vant'; import'vant/lib/v ...
- WPF无边框拖动、全屏、缩放
原文:WPF无边框拖动.全屏.缩放 版权声明:本文为博主原创文章,转载请注明出处. https://blog.csdn.net/lwwl12/article/details/78059361 先看效果 ...
- vue封装公用弹出框方法,实现点击出现操作弹出框
vue封装公用弹出框方法,实现点击出现操作弹出框 如上图所示,这次要实现一个点击出现操作弹框的效果:并将这个功能封装成一个函数,便于在项目的多个地方使用. 具体思路是: 封装一个组件,组件保护一个插槽 ...
- 使用easeui dialog弹出框中使用CKeditor多次加载后无法编辑问题
问题呈现:弹出框页面 <tr class="addtr"> <th>内容</th> <td> <!-- <textare ...
- 关于隐式创建vue实例实现简化弹出框组件显示步骤
我们在使用vue写alert组件的时候,经常是定义了一个alert.vue,然后引入alert.vue,然后配置参数等等,非常繁琐,那有没有一种方式可以像window.alert("内容&q ...
- 弹出框插件——dialog
基于jquery和dot.js弹出框插件,兼容IE6+等其他浏览器. 思想:弹出框元素插入body节点中,并在页面垂直居中显示(fixed定位),触发确定和关闭事件绑定. 注意ie6包含两个问题:一. ...
- Android--自定义弹出框-自定义dialog
项目要用到弹出框,还要和苹果的样式一样(Android真是没地位),所以就自己定义了一个,不是很像(主要是没图),但是也还可以. 废话不多说了,直接上代码 1.先看布局文件 <?xml vers ...
- vue弹出框的封装
依旧是百度不到自己想要的,就自己动手丰衣足食 弹出框做成单独的组件confirm.vue; <template> <transition name="mask-bg-fad ...
随机推荐
- Github Copilot Chat 初体验
最近因为阳了的缘故一直躺在床上.今天终于从床上爬起来了.不是因为好透了,而是因为我收到了申请Copilot Chat preview 权限通过的邮件.实在忍不住,于是起床开电脑在咳嗽声中进行了一番体验 ...
- 合合信息亮相CCIG2023:多位大咖共话智能文档未来,文档图像内容安全还面临哪些技术难题?
近日,中国图象图形大会(CCIG 2023)(简称"大会")在苏州圆满落幕.本届大会以"图象图形·向未来"为主题,由中国科学技术协会指导,中国图象图形学学会 ...
- 这10个Lambda表达式必须掌握,简化你的代码,提高生产力
Lambda 表达式(lambda expression)是一个匿名函数,Lambda表达式基于数学中的λ演算得名,直接对应于其中的lambda抽象(lambda abstraction),是一个匿名 ...
- 源代码管理工具——Git
Git是一个开源的分布式版本控制系统,用于管理软件开发中的版本控制和协作.通过Git,开发人员可以记录文件的修改历史.协作开发,以及在多个分支上进行实验性开发.Git已成为现代软件开发中不可或缺的工具 ...
- 金三银四抢人季,HR 如何 3 招做到效率为王?
春招伊始,面对队伍庞大的校招人群,蜂拥而入的简历,HR 如何才能快速搞定呢?Bug君总结了一下过往招聘季的一些比较流行的环节: 通过线上宣讲,节省出行成本.时间,老板更认可了 现在大多数企业都会在直播 ...
- Java二维数组以及多维数组的定义及应用
一.二维数组以及多维数组 1.二维数组的定义: 在一维数组中定义每一个元素也是一个数组元素,这样的数组称为"二维数组" 多维数组就是在一维数组上再次定义二维数组或三位数组等 ...
- 解决google翻译出错问题
解决google翻译问题 一.为什么失效 因为google把google翻译的API给关闭了,导致翻译不了. 据网上说是服务器耗钱,但盈利不够导致的. 二.可修复的前提 国内还存有服务器可以用API ...
- 前端Vue加载中页面动画弹跳动画loading
前端Vue加载中页面动画弹跳动画loading, 下载完整代码请访问uni-app插件市场址:https://ext.dcloud.net.cn/plugin?id=13091 效果图如下: 使用方法 ...
- 我坚定的认为,这个源码肯定是有 BUG 的!
你好呀,我是歪歪. 上周我不是发了<我试图给你分享一种自适应的负载均衡.>这篇文章嘛,里面一种叫做"自适应负载均衡"的负载均衡策略,核心思路就是从多个服务提供者中随机选 ...
- RocketMq5.0 任意延迟时间 TimerMessageStore 源码解析
TimerMessageStore 简略介绍 延迟队列 rmq_sys_wheel_timer 指定时间的延迟消息.会先投递到 rmq_sys_wheel_timer 队列中 然后由 TimerMes ...