Ubuntu16安装GPU版本TensorFlow(个人笔记本电脑)
想着开始学习tf了怎么能不用GPU,网上查了一下发现GeForce GTX确实支持GPU运算,所以就尝试部署了一下,在这里记录一下,避免大家少走弯路。
使用个人笔记本电脑thinkpadE570,内存4G,显卡GeForce GTX 950M
前期电脑已经安装win0+Ubuntu16双系统,thinkpad安装win0+Ubuntu16配置参照这里(本人为了方便)
安装顺序为:
(1)安装NVIDIA Driver
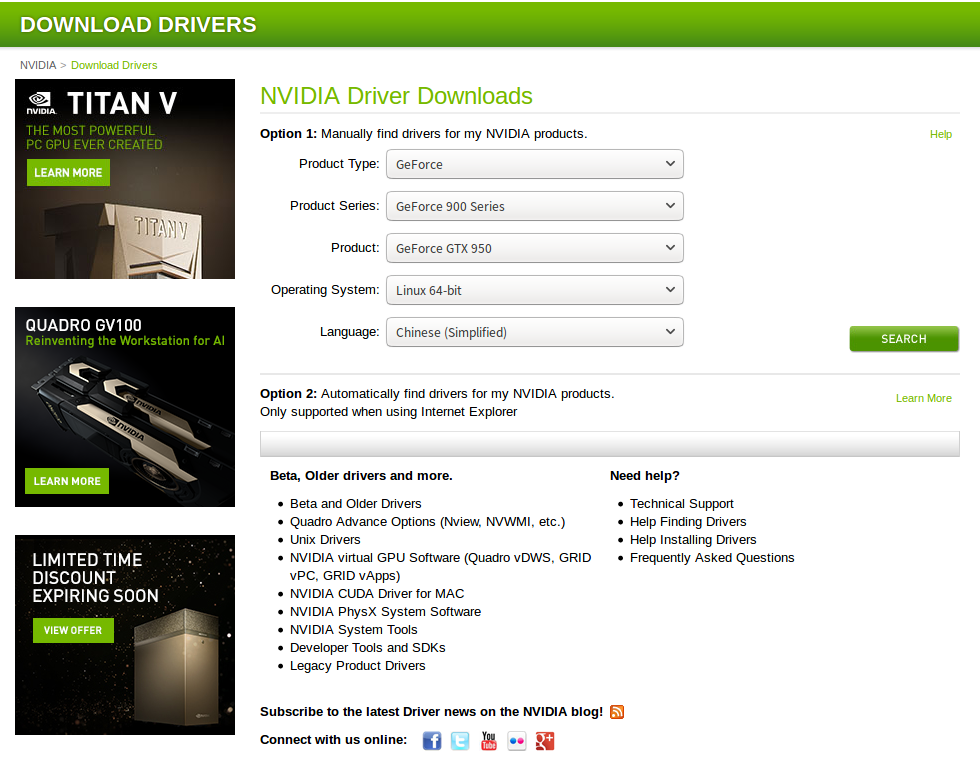
安装电脑对应的显卡驱动,安装完成能够在程序中找到NVIDIA。和windows驱动类似,不再赘述。
文件(GTX950):NVIDIA-Linux-x86_64-390.48.run
(2)安装CUDA,CUDA(Compute Unified Device Architecture),是英伟达公司推出的一种基于新的并行编程模型和指令集架构的通用计算架构,它能利用英伟达GPU的并行计算引擎,比CPU更高效的解决许多复杂计算任务。
不推荐sudo apt-get install nvidia-375安装,国内速度太慢,建议下载安装包,官网地址,选择选择runfile下载,
文件(GTX950):cuda_8.0.61_375.26_linux-run
(3)安装cuDNN,NVIDIA cuDNN是用于深度神经网络的GPU加速库。
直接下载同样非常慢,还需要注册,这里采用百度网盘上的,地址。
文件(GTX950):cudnn-8.0-linux-x64-v6.0.tgz
(4)安装gpu版本TensorFlow,下载地址,github地址:https://github.com/tensorflow/tensorflow
文件(GTX950):tf_nightly_gpu-1.head-cp27-none-linux_x86_64.whl
开始安装:
首先查看显卡信息
$sudo lshw -numeric -C display
       description: 3D controller
       product: GM107M [GeForce GTX 950M] [10DE:139A]
       vendor: NVIDIA Corporation [10DE]
       physical id: 0
       bus info: pci@0000:01:00.0
       version: a2
       width: 64 bits
       clock: 33MHz
       capabilities: pm msi pciexpress bus_master cap_list
       configuration: driver=nvidia latency=0
       resources: irq:136 memory:f1000000-f1ffffff memory:c0000000-cfffffff memory:d0000000-d1ffffff ioport:d000(size=128)
$ ubuntu-drivers devices
  == /sys/devices/pci0000:00/0000:00:1c.0/0000:01:00.0 ==
  modalias : pci:v000010DEd0000139Asv000017AAsd0000505Cbc03sc02i00
  vendor   : NVIDIA Corporation
  model    : GM107M [GeForce GTX 950M]
  driver   : nvidia-361 - distro non-free
  driver   : nvidia-384 - third-party non-free recommended
  driver   : xserver-xorg-video-nouveau - distro free builtin

(1)安装驱动
sudo apt-get install nvidia-384
如果速度慢,官网下载,地址
选择合适的版本,然后用安装包安装。E570版本。

(2)安装CUDA
$ sudo sh cuda_8.0.61_375.26_linux-run --override然后安装引导界面,交互界面,开始的Install NVIDIA Accelerated Graphics Driver for Linux-x86_64 367.48?选择n,因为你已经安装驱动了。
Using more to view the EULA.

End User License Agreement

--------------------------

Preface

-------

The following contains specific license terms and conditions

for four separate NVIDIA products. By accepting this

agreement, you agree to comply with all the terms and

conditions applicable to the specific product(s) included

herein.

NVIDIA CUDA Toolkit

Description

The NVIDIA CUDA Toolkit provides command-line and graphical

tools for building, debugging and optimizing the performance

of applications accelerated by NVIDIA GPUs, runtime and math

libraries, and documentation including programming guides,

user manuals, and API references. The NVIDIA CUDA Toolkit

License Agreement is available in Chapter .

Default Install Location of CUDA Toolkit

Windows platform:

Do you accept the previously read EULA?

accept/decline/quit: accept

Install NVIDIA Accelerated Graphics Driver for Linux-x86_64 367.48?

(y)es/(n)o/(q)uit: n

Install the CUDA 8.0 Toolkit?

(y)es/(n)o/(q)uit: y

Enter Toolkit Location

 [ default is /usr/local/cuda-8.0 ]:

Do you want to install a symbolic link at /usr/local/cuda?

(y)es/(n)o/(q)uit: y

Install the CUDA 8.0 Samples?

(y)es/(n)o/(q)uit: y

Enter CUDA Samples Location

 [ default is /home/kinny ]:

Installing the CUDA Toolkit in /usr/local/cuda-8.0 ...

Missing recommended library: libXmu.so

Installing the CUDA Samples in /home/kinny ...

Copying samples to /home/kinny/NVIDIA_CUDA-.0_Samples now...

Finished copying samples.

===========

= Summary =

===========

Driver:   Not Selected

Toolkit:  Installed in /usr/local/cuda-8.0

Samples:  Installed in /home/kinny, but missing recommended libraries

Please make sure that

 -   PATH includes /usr/local/cuda-8.0/bin

 -   LD_LIBRARY_PATH includes /usr/local/cuda-8.0/lib64, or, add /usr/local/cuda-8.0/lib64 to /etc/ld.so.conf and run ldconfig as root

To uninstall the CUDA Toolkit, run the uninstall script in /usr/local/cuda-8.0/bin

Please see CUDA_Installation_Guide_Linux.pdf in /usr/local/cuda-8.0/doc/pdf for detailed information on setting up CUDA.

***WARNING: Incomplete installation! This installation did not install the CUDA Driver. A driver of version at least 361.00 is required for CUDA 8.0 functionality to work.

To install the driver using this installer, run the following command, replacing <CudaInstaller> with the name of this run file:

    sudo <CudaInstaller>.run -silent -driver

Logfile is /tmp/cuda_install_17494.log
加入环境变量:
export PATH="$PATH:/usr/local/cuda-8.0/bin"

export LD_LIBRARY_PATH="/usr/local/cuda-8.0/lib64"

$ nvidia-smi
Tue May   ::

+-----------------------------------------------------------------------------+

| NVIDIA-SMI 384.111                Driver Version: 384.111                   |

|-------------------------------+----------------------+----------------------+

| GPU  Name        Persistence-M| Bus-Id        Disp.A | Volatile Uncorr. ECC |

| Fan  Temp  Perf  Pwr:Usage/Cap|         Memory-Usage | GPU-Util  Compute M. |

|===============================+======================+======================|

|     GeForce GTX 950M    Off  | ::00.0 Off |                  N/A |

| N/A   43C    P5    N/A /  N/A |    342MiB /  2002MiB |      %      Default |

+-------------------------------+----------------------+----------------------+

+-----------------------------------------------------------------------------+

| Processes:                                                       GPU Memory |

|  GPU       PID   Type   Process name                             Usage      |

|=============================================================================|

|                G   /usr/lib/xorg/Xorg                            49MiB |

|                G   /usr/lib/xorg/Xorg                           129MiB |

|                G   compiz                                       114MiB |

|                G   fcitx-qimpanel                                 8MiB |

|                G   /usr/lib/firefox/firefox                       1MiB |

+-----------------------------------------------------------------------------+
安装成功!
(3)安装cuDNN
$ tar xvzf cudnn-8.0-linux-x64-v6..tgz

$ sudo cp cuda/include/cudnn.h /usr/local/cuda/include

$ sudo cp cuda/lib64/libcudnn* /usr/local/cuda/lib64

$ sudo chmod a+r /usr/local/cuda/include/cudnn.h /usr/local/cuda/lib64/libcudnn*
(4)安装TensorFlow
pip install wheel

sudo pip install tf_nightly_gpu-.head-cp27-none-linux_x86_64.whl

export LD_LIBRARY_PATH="$LD_LIBRARY_PATH:/usr/local/cuda/lib64:/usr/local/cuda/extras/CUPTI/lib64"

export CUDA_HOME=/usr/local/cuda
搞定!
(5) 错误处理
zh@zh-ThinkPad-E570:~$ python

Python 2.7. (default, Nov  , ::)

[GCC 5.4. ] on linux2

Type "help", "copyright", "credits" or "license" for more information.

>>> import tensorflow

Traceback (most recent call last):

  File "<stdin>", line , in <module>

  File "/usr/local/lib/python2.7/dist-packages/tensorflow/__init__.py", line , in <module>

    from tensorflow.python import *

  File "/usr/local/lib/python2.7/dist-packages/tensorflow/python/__init__.py", line , in <module>

    from tensorflow.python import pywrap_tensorflow

  File "/usr/local/lib/python2.7/dist-packages/tensorflow/python/pywrap_tensorflow.py", line , in <module>

    raise ImportError(msg)

ImportError: Traceback (most recent call last):

  File "/usr/local/lib/python2.7/dist-packages/tensorflow/python/pywrap_tensorflow.py", line , in <module>

    from tensorflow.python.pywrap_tensorflow_internal import *

  File "/usr/local/lib/python2.7/dist-packages/tensorflow/python/pywrap_tensorflow_internal.py", line , in <module>

    _pywrap_tensorflow_internal = swig_import_helper()

  File "/usr/local/lib/python2.7/dist-packages/tensorflow/python/pywrap_tensorflow_internal.py", line , in swig_import_helper

    _mod = imp.load_module('_pywrap_tensorflow_internal', fp, pathname, description)

ImportError: libcusolver.so.8.0: cannot open shared object file: No such file or directory

Failed to load the native TensorFlow runtime.

See https://www.tensorflow.org/install/install_sources#common_installation_problems

for some common reasons and solutions.  Include the entire stack trace

above this error message when asking for help.
环境变量的问题,
zh@zh-ThinkPad-E570:~$ echo $LD_LIBRARY_PATH

”:/usr/local/cuda/lib64”

zh@zh-ThinkPad-E570:~$ sudo ldconfig /usr/local/cuda/lib64
ok!
Ubuntu16安装GPU版本TensorFlow(个人笔记本电脑)的更多相关文章
- Ubuntu 16安装GPU版本tensorflow
pre { direction: ltr; color: rgb(0, 0, 0) } pre.western { font-family: "Liberation Mono", ...
- ubuntu 18.04 64bit如何安装GPU版本tensorflow
注:笔者的ubuntu18.04 64bit已经安装好了显卡驱动,因此没有此步操作 1.获取cuda(https://developer.nvidia.com/cuda-downloads,选择ubu ...
- tensorflow 安装GPU版本,个人总结,步骤比较详细【转】
本文转载自:https://blog.csdn.net/gangeqian2/article/details/79358543 手把手教你windows安装tensorflow的教程参考另一篇博文ht ...
- 禁用GPU版本TensorFlow,切换到CPU版本TensorFlow。
#禁用gpu版本TensorFlow,因为CUDA号码从0开始,这里直接让CUDA使用-1的GPU,自然就无法使用gpu了. 代码前面加入: import osos.environ["CUD ...
- 安装GPU版本的tensorflow填过的那些坑!---CUDA说再见!
那些坑,那些说不出的痛! --------回首安装的过程,真的是填了一个坑又出现了一坑的感觉.记录下了算是自己的笔记也能给需要的人提供一点帮助. 1 写在前面的话 其实在装GPU版本的tensorfl ...
- ubuntu+anaconda+python安装各版本tensorflow
一.安装anaconda 1.去官网下载anaconda linux版本即可 选择合适的版本下载即可 2.安装Aanconda: 打开终端(Ctrl+Alt+t)进入到下载的目录一般在home 下的D ...
- Win10下Anaconda3安装CPU版本TensorFlow并使用Pycharm开发
环境:windows10 软件:Anaconda3 1.安装Anaconda 选择相应的Anaconda进行安装,下载地址点击这里,下载对应系统版本的Anaconda3. 运行 开始菜单->An ...
- Windows10安装GPU版本的Tensorflow
本人电脑配置(公司的)gtx1080ti,下载的的cuda8.0,cudnn6.0,python3.5.3安装完成后,安装tensorflow 1.pip install tensorflow-gpu ...
- Win10 64bit下安装GPU版Tensorflow+Keras
Tensorflow和Keras都是支持Python接口的,所以本文中说的都是搭建一个Python的深度学习环境. Keras是对Tensorflow或者Theano的再次封装,也就是以Tensorf ...
随机推荐
- (转)Linux ldconfig 与 ldd指令
原文:https://blog.csdn.net/iamzhangzhuping/article/details/49203981 一.ldconfig ldconfig是一个动态链接库管理命令,为了 ...
- EJB3 阶段总结+一个EJB3案例 (2)
这篇博文接着上一篇博文的EJB案例. 在上一篇博文中,将程序的架构基本给描述出来了,EJB模块分为5层. 1)DB层,即数据库层 在则一部分,我使用的数据库为mysql.在EJB程序中,访问数据库是通 ...
- Java之集合(二十一)LinkedTransferQueue
转载请注明源出处:http://www.cnblogs.com/lighten/p/7505355.html 1.前言 本章介绍无界的阻塞队列LinkedTransferQueue,JDK7才提供了这 ...
- nginx+jwplayer配置flv/MP4点播系统, 视频拖动支持
一 配置nginx 1. 下载 nginx 最新版 http://nginx.org/ 2. 安装依赖库, 以ubuntu为例 apt-get install libpcre3 libpcre3-de ...
- postman—环境切换和设置变量
postman提供了environment管理功能,想要在多个环境中测试,比如在测试环境.灰度环境.生产环境等,只需要用同样的接口,切换下环境即可,非常方便.具体步骤: 一.切换环境 1.点击界面右上 ...
- Fiddler Web Debugger安装后与浏览器之间的常用设置(辅助爬虫)(图文详解)
不多说,直接上干货! 怎么让我们的浏览经过代理服务呢?如下来正确设置: 这里有个经验,最好用历史低版本的火狐浏览器.比如 http://ftp.mozilla.org/pub/firefox/rele ...
- WordPress主题制作导航的N种方法
在WordPress主 题制作中,导航菜单的制作算是一个重点,已经写好导航菜单的HTML代码,放在WordPress主题中如何动态调用呢?本文将给你介绍几种编写PHP代 码动态实现导航的方法,本文也将 ...
- 【译】Spark调优
原文地址:http://spark.incubator.apache.org/docs/0.7.3/tuning.html 译文地址:http://www.oschina.net/translate/ ...
- manjaro i3 sound soft
sudo pacman -S pavucontrol sudo pacman -S pulseaudio # 为了启动 fcitx 输入法…… #exec --no-startup-id LANG=& ...
- Redis笔记(三):Redis常用命令
连接测试 连接本地服务器 语法 $ redis-cli 实例 启动 redis 客户端,打开终端并输入命令 redis-cli.该命令会连接本地的 redis 服务. $redis-cli redis ...
