eclipse下整合springboot和mybatis
1.新建maven项目
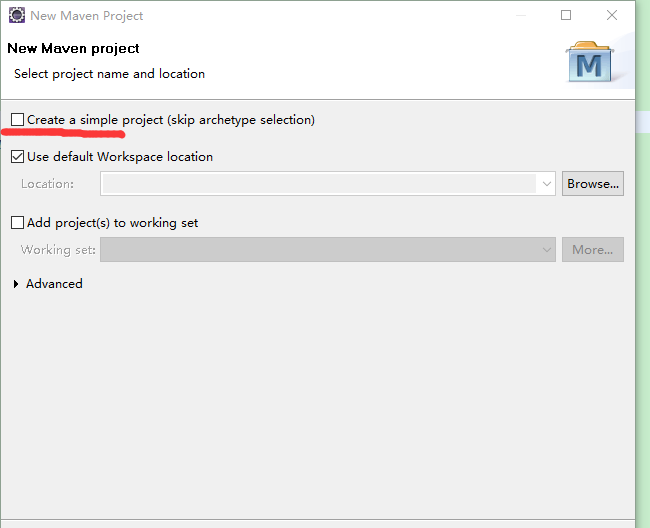
先新建一个maven项目,勾选上creat a simple project,填写groupid,artifactid
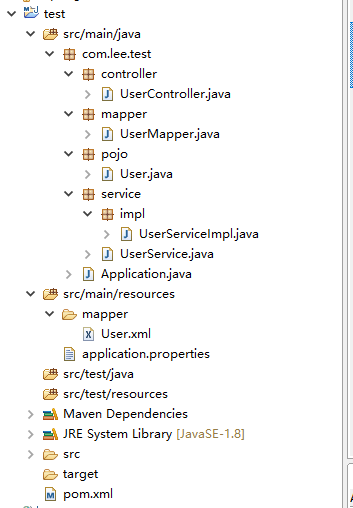
2.建立项目结构
3.添加依赖
<parent>

    <groupId>org.springframework.boot</groupId>

    <artifactId>spring-boot-starter-parent</artifactId>

    <version>2.0.3.RELEASE</version>

    <relativePath/> <!-- lookup parent from repository -->

</parent>

<properties>

    <project.build.sourceEncoding>UTF-8</project.build.sourceEncoding>

    <project.reporting.outputEncoding>UTF-8</project.reporting.outputEncoding>

    <java.version>1.8</java.version>

</properties>

<dependencies>

    <dependency>

        <groupId>org.springframework.boot</groupId>

        <artifactId>spring-boot-starter</artifactId>

    </dependency>

    <dependency>

        <groupId>org.springframework.boot</groupId>

        <artifactId>spring-boot-starter-test</artifactId>

        <scope>test</scope>

    </dependency>

    <dependency>

        <groupId>org.springframework.boot</groupId>

        <artifactId>spring-boot-starter-web</artifactId>

    </dependency>

     <dependency>

         <groupId>org.mybatis.spring.boot</groupId>

         <artifactId>mybatis-spring-boot-starter</artifactId>

         <version>1.3.2</version>

     </dependency>

     <dependency>

        <groupId>mysql</groupId>

        <artifactId>mysql-connector-java</artifactId>

    </dependency>

    <dependency>

      <groupId>junit</groupId>

      <artifactId>junit</artifactId>

      </dependency>

</dependencies>

<build>

    <plugins>

        <plugin>

            <groupId>org.springframework.boot</groupId>

            <artifactId>spring-boot-maven-plugin</artifactId>

        </plugin>

    </plugins>

</build>
4.代码编写
在包的最外层添加启动类
package com.lee.test;

import org.springframework.boot.SpringApplication;

import org.springframework.boot.autoconfigure.SpringBootApplication;

import org.springframework.cache.annotation.EnableCaching;

@SpringBootApplication

@EnableCaching

public class Application {

	public static void main(String[] args) {

		SpringApplication.run(Application.class, args);

	}

}
实体类
package com.lee.test.pojo;

import org.springframework.stereotype.Component;

@Component

public class User {

	private int id;

	private String name;

	private String telephone;

	public int getId() {

		return id;

	}

	public void setId(int id) {

		this.id = id;

	}

	public String getName() {

		return name;

	}

	public void setName(String name) {

		this.name = name;

	}

	public String getTelephone() {

		return telephone;

	}

	public void setTelephone(String telephone) {

		this.telephone = telephone;

	}

}
mapper接口
package com.lee.test.mapper;

import java.util.List;

import org.apache.ibatis.annotations.Mapper;

import com.lee.test.pojo.User;

@Mapper

public interface UserMapper {

	List<User> getUser(int id);

}
service接口
package com.lee.test.service;

import java.util.List;

import com.lee.test.pojo.User;

public interface UserService {

	public List<User> getUser(int id);

}
service接口实现
package com.lee.test.service.impl;

import java.util.List;

import org.springframework.beans.factory.annotation.Autowired;

import org.springframework.stereotype.Service;

import com.lee.test.mapper.UserMapper;

import com.lee.test.pojo.User;

import com.lee.test.service.UserService;

@Service

public class UserServiceImpl implements UserService {

	@Autowired

	private UserMapper userMapper;

	@Override

	public List<User> getUser(int id) {

		return userMapper.getUser(id);

	}

}
controller层
package com.lee.test.controller;

import java.util.List;

import org.springframework.beans.factory.annotation.Autowired;

import org.springframework.web.bind.annotation.RequestMapping;

import org.springframework.web.bind.annotation.RequestParam;

import org.springframework.web.bind.annotation.RestController;

import com.lee.test.pojo.User;

import com.lee.test.service.UserService;

@RestController

public class UserController {

	@Autowired

	private UserService userService;

	@RequestMapping("/getUser")

	public List<User> getUser(@RequestParam("id") int id) {

		return userService.getUser(id);

	}

}
还有mapper.xml的实现
<?xml version="1.0" encoding="UTF-8"?>

<!DOCTYPE mapper PUBLIC "-//mybatis.org//DTD Mapper 3.0//EN" "http://www.mybatis.org/dtd/mybatis-3-mapper.dtd">

<mapper namespace="com.lee.test.mapper.UserMapper">

   <select id="getUser" parameterType="java.lang.Integer" resultType="com.lee.test.pojo.User">

    select * from t_user where id = #{id}

   </select>

</mapper>
最后是一些配置在application.properties中
spring.datasource.driverClassName=com.mysql.jdbc.Driver

spring.datasource.url=jdbc:mysql://localhost:3306/test?useUnicode=true&characterEncoding=UTF-8

spring.datasource.username=root

spring.datasource.password=root

mybatis.mapper-locations: classpath:mapper/*.xml
eclipse下整合springboot和mybatis的更多相关文章
- Seata整合SpringBoot和Mybatis
Seata整合SpringBoot和Mybatis 一.背景 二.实现功能 三.每个服务使用到的技术 1.账户服务 2.订单服务 四.服务实现 1.账户服务实现 1.引入jar包 2.项目配置 3.建 ...
- 2分钟在eclipse下使用SpringBoot搭建Spring MVC的WEB项目
1. 首先用eclipse创建一个maven工程, 普通maven工程即可 2. 修改pom如下: <?xml version="1.0" encoding="UT ...
- intellij idea 整合springboot和mybatis
参考: http://blog.csdn.net/winter_chen001/article/details/77249029
- 基于 SpringBoot2.0+优雅整合 SpringBoot+Mybatis
SpringBoot 整合 Mybatis 有两种常用的方式,一种就是我们常见的 xml 的方式 ,还有一种是全注解的方式.我觉得这两者没有谁比谁好,在 SQL 语句不太长的情况下,我觉得全注解的方式 ...
- SpringBoot和Mybatis的整合
这里介绍两种整合SpringBoot和Mybatis的模式,分别是“全注解版” 和 “注解xml合并版”. 前期准备开发环境 开发工具:IDEAJDK:1.8技术:SpringBoot.Maven.M ...
- SpringBoot与Mybatis整合方式01(源码分析)
前言:入职新公司,SpringBoot和Mybatis都被封装了一次,光用而不知道原理实在受不了,于是开始恶补源码,由于刚开始比较浅,存属娱乐,大神勿喷. 就如网上的流传的SpringBoot与Myb ...
- springboot+springmvc+mybatis项目整合
介绍: 上篇给大家介绍了ssm多模块项目的搭建,在搭建过程中spring整合springmvc和mybatis时会有很多的东西需要我们进行配置,这样不仅浪费了时间,也比较容易出错,由于这样问题的产生, ...
- SpringBoot系列——MyBatis整合
前言 MyBatis官网:http://www.mybatis.org/mybatis-3/zh/index.html 本文记录springboot与mybatis的整合实例:1.以注解方式:2.手写 ...
- 零基础IDEA整合SpringBoot + Mybatis项目,及常见问题详细解答
开发环境介绍:IDEA + maven + springboot2.1.4 1.用IDEA搭建SpringBoot项目:File - New - Project - Spring Initializr ...
随机推荐
- MySQL各种版本的下载方式
1.在百度上搜“MySQL”,进入官网 原文地址:https://blog.csdn.net/mieleizhi0522/article/details/79109195
- ModelMap org.springframework.ui.ModelMap
ModelMap实现了map接口,可以在其中存放属性,作用域同request,同时可与@SessionAttributes联合使用,把数据放入到session中去, 下面这个示例,我们可以在Model ...
- hdu2852 KiKi's K-Number
题意:给定三个操作添加删除查询大于a的的第k大值----树状数组的逆向操作 给定a利用BIT查询有多少值比a小,这样比a大的k大值就应该有k+sum(a)个小于他的值 因此可以二分枚举k大值看看是不是 ...
- C++ - 一个构造函数调用构造函数的问题
今天做C++的实验,题目是写一个二维点的类,然后让一个三维点的类继承它然后扩展.题目是一般学面向对象语言的常用例子. 然后遇到一个这样的问题:之前用Java的时候写构造方法的时 ...
- codevs4343 找回密码
题目描述 Description jrMz 很喜欢动漫<叛逆的鲁鲁修>(额= =不知道是不是因为他盯上了动画片里的 MM),他准备以一种神奇的方式降临<叛逆的鲁鲁修>世界,所以 ...
- code wars quiz: toInteger
Your task is to program a function which converts any input to an integer. Do not perform rounding, ...
- 0213Zabbix通过percona监控MySQL
因为Zabbix自带的MySQL监控没有提供可以直接使用的Key,所以一般不采用,业界的同学们都使用Percona Monitoring Plugins 监控 MySQL的方式 Percona介绍 P ...
- [bzoj1612][Usaco2008 Jan]Cow Contest奶牛的比赛_dfs
Cow Contest奶牛的比赛 bzoj-1612 Usaco-2008 Jan 题目大意:题目链接. 注释:略. 想法: 我们对于每个点dfs,看一下比这个点大的点加上比这个点小的点是否是n-1即 ...
- Ubuntu 16.04解决在虚拟终端(Ctrl+Alt+F1)下显示菱形中文乱码问题
在安装Ubuntu时,如果默认选择了中文,那么以后进去到虚拟终端就会出现菱形的中文乱码. 其实这个是无解的,但是可以通过以下技巧去实现: 1.把系统转成英文的 sudo gedit /etc/defa ...
- c++中的set_new_handler和new_handler
当operator new申请一个内存失败的时候,它会进行如下的处理步骤: 1.如果存在客户指定的处理函数,则调用处理函数(new_handler),如果不存在则抛出一个异常. 2.继续申请内存 ...