
使用 python 进行 面部合成
完整代码已上传至GitHub:
https://github.com/chestnut-egg/Face
一. 准备工作
1. 此程序使用的是 Face++ 的API,所以需要去Face++官网注册账号:
https://www.faceplusplus.com.cn/
2. 创建应用,获取 key 和 secret
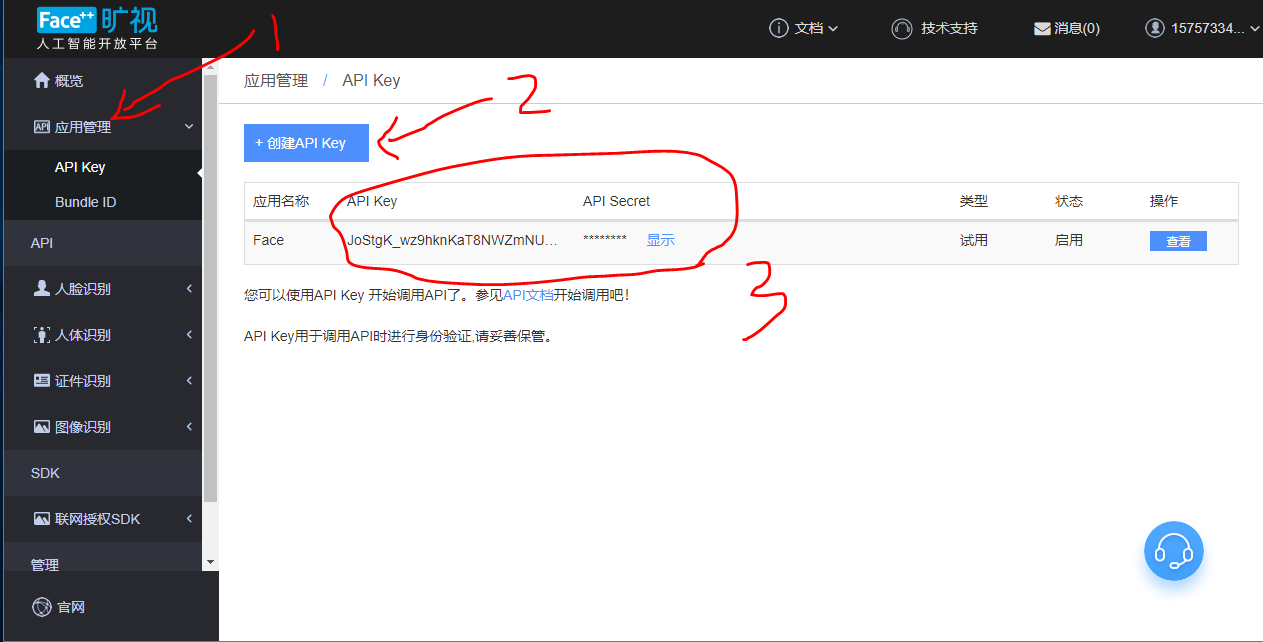
3. 下载 simplejson 模块 ,使用pip就可以下载了
pip install simplejson
二. 程序思路
1. 使用 decect 接口,获取人脸关键点
接口详细文档:
https://console.faceplusplus.com.cn/documents/4888373
* return_landmark 参数 不能为 0 不然不会返回人脸关键点
|
return_landmark |
Int |
是否检测并返回人脸关键点。合法值为:
注:本参数默认值为 0 |
核心代码:
def find_face(imgpath):

    print("finding")

    http_url = 'https://api-cn.faceplusplus.com/facepp/v3/detect'

    data = {"api_key": key, "api_secret": secret, "image_url": imgpath, "return_landmark": 1}

    files = {"image_file": open(imgpath, "rb")}

    response = requests.post(http_url, data=data, files=files)

    req_con = response.content.decode('utf-8')

    req_dict = JSONDecoder().decode(req_con)

    this_json = simplejson.dumps(req_dict)

    this_json2 = simplejson.loads(this_json)

    faces = this_json2['faces']

    list0 = faces[0]

    rectangle = list0['face_rectangle']

    # print(rectangle)

    return rectangle
2. 使用 mergeface 接口,合成脸部图像
接口详细文档:
https://console.faceplusplus.com.cn/documents/20813963
* 注意图片文件大小不超过 2 MB
核心代码:
# 模板图片地址 合成图片地址 生成图片地址 合成指数0-100

def add_face(image_url_1,image_url_2,image_url,number):

    ff1 = find_face(image_url_1)

    ff2 = find_face(image_url_2)

    rectangle1 = str(str(ff1['top']) + "," + str(ff1['left']) + "," + str(ff1['width']) + "," + str(ff1['height']))

    rectangle2 = str(ff2['top']) + "," + str(ff2['left']) + "," + str(ff2['width']) + "," + str(ff2['height'])

    # print(rectangle1)

    # print(rectangle2)

    url_add = "https://api-cn.faceplusplus.com/imagepp/v1/mergeface"

    f1 = open(image_url_1, 'rb')

    f1_64 = base64.b64encode(f1.read())

    f1.close()

    f2 = open(image_url_2, 'rb')

    f2_64 = base64.b64encode(f2.read())

    f2.close()

    data = {"api_key": key, "api_secret": secret, "template_base64": f1_64, "template_rectangle": rectangle1,

            "merge_base64": f2_64, "merge_rectangle": rectangle2, "merge_rate": number}

    response = requests.post(url_add, data=data)

    req_con = response.content.decode('utf-8')

    req_dict = JSONDecoder().decode(req_con)

    print(req_dict)

    result = req_dict['result']

    imgdata = base64.b64decode(result)

    file = open(image_url, 'wb')

    file.write(imgdata)

    file.close()
3. 示例运行代码
# 单独两张照片的合成示例

image_url_1 = r"C:\Users\1.jpg"

image_url_2 = r"C:\Users\2.jpg"

image_url = r'C:\Users\result.jpg'

add_face(image_url_1,image_url_2,image_url,50)
4. 封装一个多张照片的合成函数
用 列表List 储存图片地址,先以最开始的两张进行合成,然后将合成后的图片与列表中的其他图像依次合成
* 程序没有做List的长度验证,注意边界特殊情况
def add_many(list_face):

    print("正在合成第1-2张")

    image_now = r'C:\Users\now.jpg'

    add_face(list_face[0], list_face[1], image_now, 50)

    for index in range(2,len(list_face)):

        print("正在合成第"+str(index+1)+"张")

        add_face(image_now, list_face[index], image_now, 50)
5. 成果展示
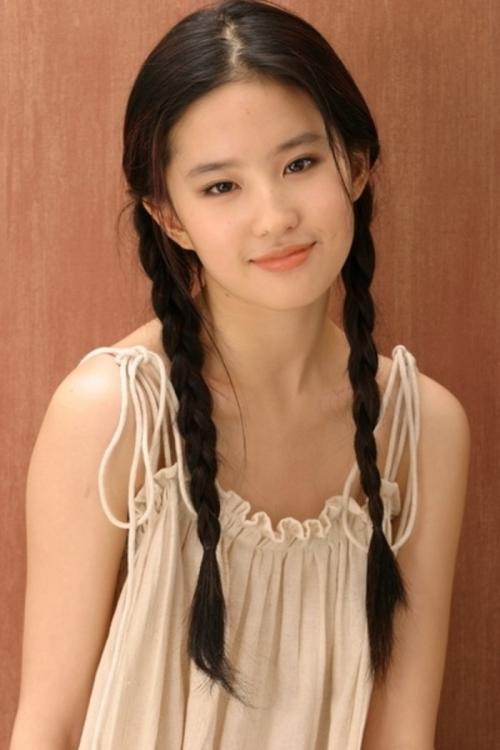
素材1:
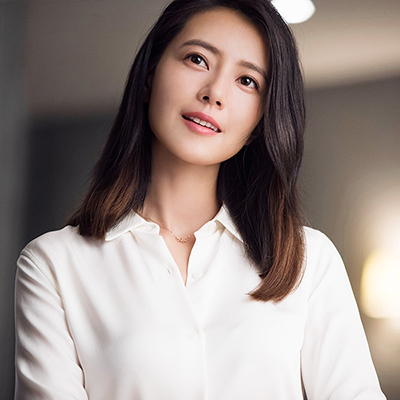
素材2:
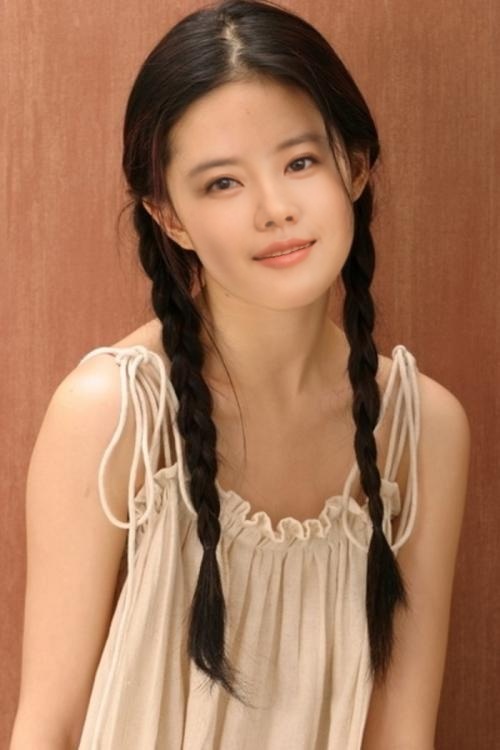
合成结果:
完整代码:
https://github.com/chestnut-egg/Face
使用 python 进行 面部合成的更多相关文章
- 基于opencv+Dlib的面部合成(Face Morph)
引自:http://blog.csdn.net/wangxing233/article/details/51549880 零.前言 前段时间看到文章[1]和[2],大概了解了面部合成的基本原理.这两天 ...
- python dlib 面部轮廓实时检测
1.dlib 实现动态人脸检测及面部轮廓检测 模型下载连接 : http://dlib.net/files/ # coding:utf-8 import cv2 import os import dl ...
- python利用opencv合成模糊图像
之前需要评估图像质量来筛选成像质量不错的图片,去除由于对焦,运动等造成的模糊图像,所以在构建数据集的时候考虑用opencv对清晰的图片进行处理获得模糊的图片从而进行训练. 1) 运动模糊图像 一般来说 ...
- [Python]PDF合成小程序PDF合成小程序
运行平台:Python3.5 用刀了PyPDF2这个库,需要提前下载好. 源码如下: import PyPDF2, os #建立一个装pdf文件的数组pdfFiles = [] for fileNam ...
- python多层数组合成一个数组后循环打印出数组内的每一项元素的方法
a=[1,2,3,4] b=[5,6,7,8] c=[a,b] def test(c): for i in c: return i print(test(c)) 以上代码执行后打印出来的结果是 预期目 ...
- 再学python类(终结篇)
续写 初学python类,这几天吃坏东西了,拖着虚弱的身躯写的.有些乱请各位看官海涵. 声明:本人编程新手,还在学习中.所表述的东西都是基础语法之类的,分享我的学习笔记.还望多多指点,我一定虚心接受. ...
- face-alignment:用 pytorch 实现的 2D 和 3D 人脸对齐库
使用世界上最准确的面对齐网络从 Python 检测面部地标,能够在2D和3D坐标中检测点. 项目地址:https://github.com/1adrianb/face-alignment 作者: 阿德 ...
- 痞子衡嵌入式:语音处理工具Jays-PySPEECH诞生记(1)- 环境搭建(Python2.7.14 + PyAudio0.2.11 + Matplotlib2.2.3 + SpeechRecognition3.8.1 + pyttsx3 2.7)
大家好,我是痞子衡,是正经搞技术的痞子.今天痞子衡给大家介绍的是语音处理工具Jays-PySPEECH诞生之环境搭建. 在写Jays-PySPEECH时需要先搭好开发环境,下表列出了开发过程中会用到的 ...
- Everybody Dance Now
一.摘要 作者提出了一种简单的动作迁移方法,实现了"do as I do":给定一个人跳舞的源视频,作者可以在目标对象表演标准动作的短短几分钟后,将该表演转移到一个新的(业余的)目 ...
随机推荐
- vue2.x学习笔记(五)
接着前面的内容:https://www.cnblogs.com/yanggb/p/12571062.html. 计算属性 模板内的表达式非常便利,但是设计它们的初衷是用于简单运算的.如果在模板中放入太 ...
- python调用word2vec工具包安装和使用指南
python调用word2vec工具包安装和使用指南 word2vec python-toolkit installation and use tutorial 本文选译自英文版,代码注释均摘自本文, ...
- pytorch seq2seq闲聊机器人加入attention机制
attention.py """ 实现attention """ import torch import torch.nn as nn im ...
- pytorch 中交叉熵损失实现方法
- Ubuntu下的eclipse配置MapReduce
下载配置文件: 链接:https://pan.baidu.com/s/13vatPHpDP5HaW0mKuHydUA提取码:pjxi 1)启动hadoop cd /usr/local/hadoop . ...
- Scrapy爬虫框架(2)--内置py文件
Scrapy概念图 这里有很多py文件,分别与Scrapy的各个模块对应 superspider是一个爬虫项目 spider1.py则是一个创建好的爬虫文件,爬取资源返回url和数据 items.py ...
- thinkphp5.0 模型的应用
<?php namespace app\admin\controller; use app\common\controller\BaseController; use think\Db;//数据 ...
- 文件包含漏洞(pikachu)
文件包含漏洞 在web后台开发中,程序员往往为了提高效率以及让代码看起来更加简洁,会使用'包含'函数功能,比如把一系列功能函数都写进function.php中,之后当某个文件需要调用的时候,就直接在文 ...
- swift 3.0字符串的简单使用
let str:String = "12314124" 获取某个指定位置的元素 print(str.characters[str.index(str.startIndex, off ...
- Vue.js中scoped引发的CSS作用域探讨
前言 在Vue.js的组件化开发中,常常会对某个组件的style标签加上scoped属性,如<style lang='less' scoped>,这样做的目的在于使这个组件的样式不能轻易在 ...