Maven私服搭建(Nexus Repository Manager 3)
下载和安装
下载地址:https://help.sonatype.com/repomanager3/download

注意:Nexus Repository Manager 3是一个Java服务器应用程序,安装需要 jdk1.8以上的版本。
下载解压后,用命令行到解压目录的bin目录下运行 nexus.exe /run(Linux运行./nexus run),启动完成后会显示“Started Sonatype Nexus”:
-------------------------------------------------

Started Sonatype Nexus OSS 3.16.2-01

-------------------------------------------------
访问Nexus管理后台
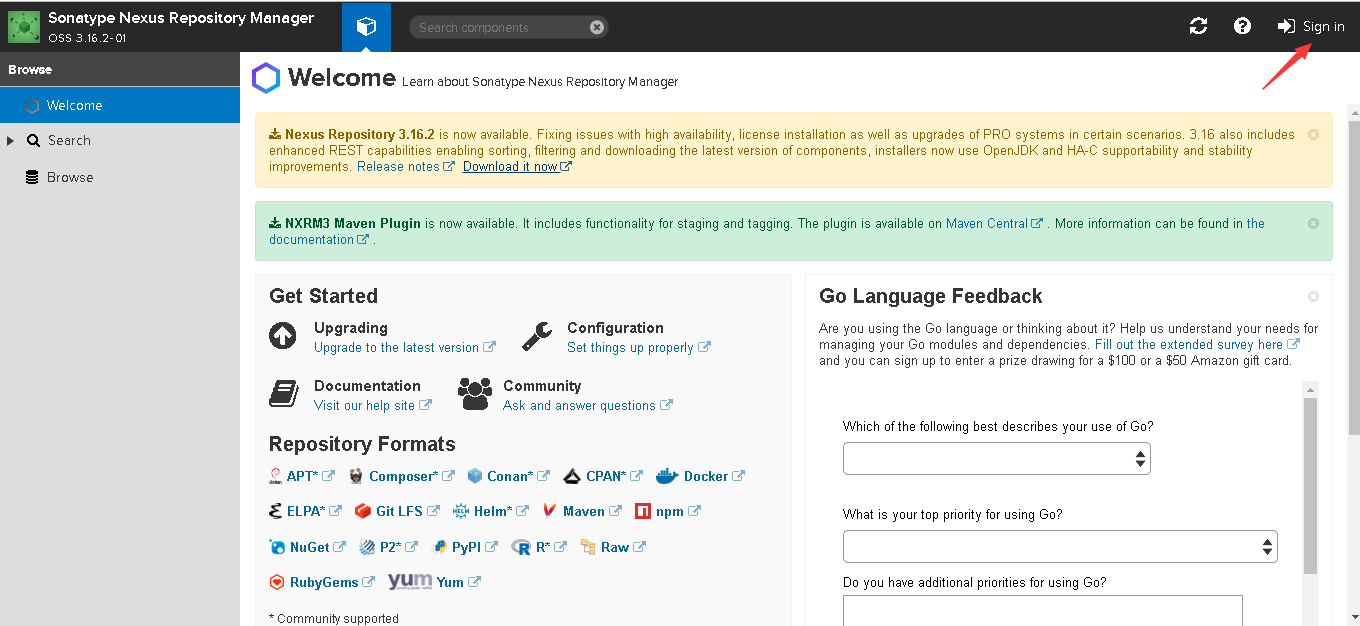
Nexus管理后台地址:http://localhost:8081/
点击右上角Sign in登录,默认账号和密码为:admin/admin123
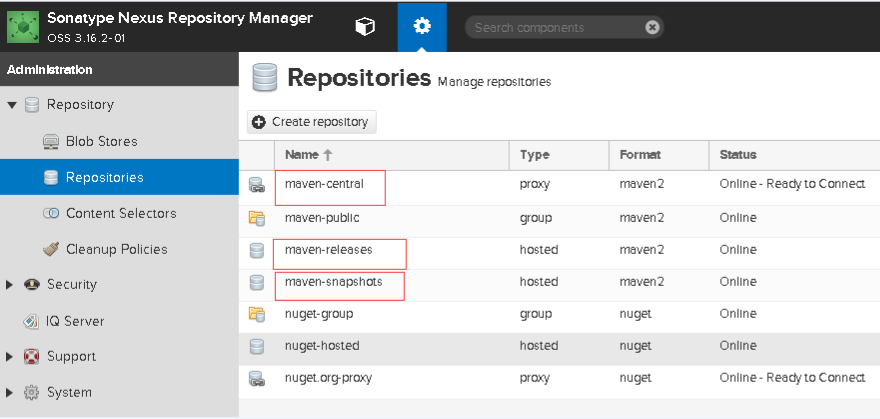
在Repositories 仓库管理界面中有多种默认的仓库,也可以添加新的仓库,本实例直接使用默认的仓库:
maven-central,Type为proxy,表示代理仓库。代理仓库用来代理远程仓库(maven-central代理的是超级POM中配置的Maven中央仓库),当在下载组件时,如果代理仓库搜索不到,则会把请求转发到远程仓库从远程仓库下载。从远程仓库下载后会缓存到代理仓库,下次还有该组件的请求则会直接到代理仓库下载,不会再次请求远程仓库。
maven-releases/maven-snapshots,Type为hosted,表示为宿主仓库。宿主仓库主要用来部署团队内部使用的内部组件,默认的maven-releases和maven-snapshots分别用来部署团队内部的发布版本组件和快照版本组件。
配置代理仓库
配置settings.xml:
<settings>

   <!-- 配置镜像,此处拦截所有远程仓库的请求到代理仓库-->

  <mirrors>

    <mirror>

      <id>nexus</id>

      <mirrorOf>*</mirrorOf>

      <url>http://localhost:8081/repository/maven-central/</url>

    </mirror>

  </mirrors>

  <!-- 配置远程库和远程插件库-->

  <profiles>

    <profile>

      <id>nexus</id>

      <!-- Maven用于填充构建系统本地存储库的远程仓库集合-->

      <repositories>

        <repository>

          <id>central</id>

          <url>http://central</url>

          <releases><enabled>true</enabled></releases>

          <snapshots><enabled>true</enabled></snapshots>

        </repository>

      </repositories>

     <!-- 类似于repositories元素,指定Maven可以在哪里找到Maven插件的远程仓库位置-->

     <pluginRepositories>

        <pluginRepository>

          <id>central</id>

          <url>http://central</url>

          <releases><enabled>true</enabled></releases>

          <snapshots><enabled>true</enabled></snapshots>

        </pluginRepository>

      </pluginRepositories>

    </profile>

  </profiles>

  <!-- 激活profiles配置 -->

  <activeProfiles>

    <activeProfile>nexus</activeProfile>

  </activeProfiles>

</settings>
创建Maven项目,pom.xml如下:
<project xmlns="http://maven.apache.org/POM/4.0.0" xmlns:xsi="http://www.w3.org/2001/XMLSchema-instance"

  xsi:schemaLocation="http://maven.apache.org/POM/4.0.0 http://maven.apache.org/xsd/maven-4.0.0.xsd">

  <modelVersion>4.0.0</modelVersion>

  <groupId>com.nocoffee</groupId>

  <artifactId>coffee-api</artifactId>

  <version>0.0.1-SNAPSHOT</version>

  <packaging>jar</packaging>

  <name>coffee-api</name>

  <url>http://maven.apache.org</url>

  <dependencies>

    <dependency>

      <groupId>junit</groupId>

      <artifactId>junit</artifactId>

      <version>3.8.1</version>

      <scope>test</scope>

    </dependency>

  </dependencies>

</project>
执行mvn clean,执行mvn clean需要下载maven-clean-plugin插件,通过Browse界面可以看到因为执行mvn clean而下载的maven-clean-plugin.jar:

注意:如果界面为空,表示没有下载,原因是之前下载过该插件到本地仓库,需要把本地仓库的maven-clean-plugin插件删除,我的本地仓库路径为D:\Reporsitory,所以需要删掉文件夹:D:\Reporsitory\org\apache\maven\plugins\maven-clean-plugin,然后重新构建即可。
配置宿主仓库
settings.xml增加如下配置:
<servers>

     <server>

        <id>nexus</id>

        <username>admin</username>

        <password>admin123</password>

    </server>

</servers>
配置pom.xml:
<project xmlns="http://maven.apache.org/POM/4.0.0" xmlns:xsi="http://www.w3.org/2001/XMLSchema-instance"

  xsi:schemaLocation="http://maven.apache.org/POM/4.0.0 http://maven.apache.org/xsd/maven-4.0.0.xsd">

  <modelVersion>4.0.0</modelVersion>

  <groupId>com.nocoffee</groupId>

  <artifactId>coffee-api</artifactId>

  <version>0.0.1-SNAPSHOT</version>

  <packaging>jar</packaging>

  <name>coffee-api</name>

  <url>http://maven.apache.org</url>

  <dependencies>

    <dependency>

      <groupId>junit</groupId>

      <artifactId>junit</artifactId>

      <version>3.8.1</version>

      <scope>test</scope>

    </dependency>

  </dependencies>

  <distributionManagement>

		<repository>

		<id>nexus</id>

		<name>maven-releases</name>

		<url>http://localhost:8081/repository/maven-releases/</url>

		</repository>

		<snapshotRepository>

		<id>nexus</id>

		<name>maven-snapshots</name>

		<url>http://localhost:8081/repository/maven-snapshots/</url>

		</snapshotRepository>

   </distributionManagement>

</project>
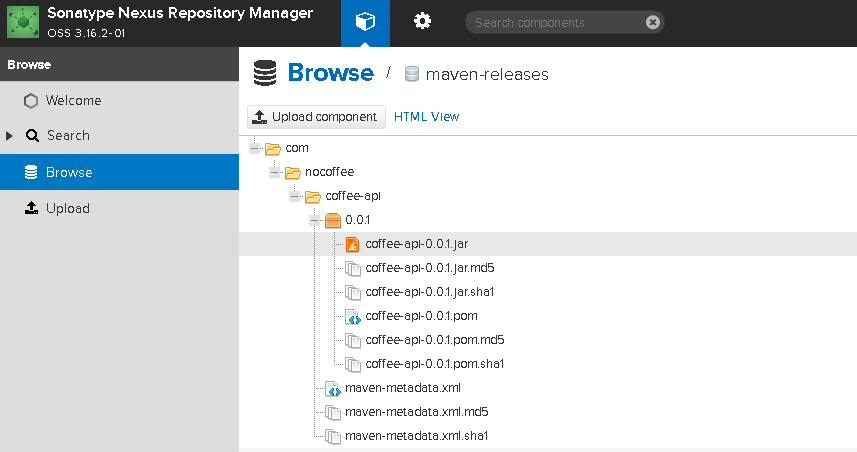
执行mvn clean deploy将项目打包并发布到宿主仓库,构建成功后到Browse中maven-snapshots库查看(因为项目版本为0.0.1-SNAPSHOT,是带SNAPSHOT的快照版本):

maven-releases库
需要将项目版本改成发布版本,在pom.xml中0.0.1-SNAPSHOT去掉-SNAPSHOT,改为0.0.1。重新执行mvn clean deploy:
注意:maven-releases库默认不能重新发布,需要可重新发布则需要修改该仓库配置。
测试重新发布到maven-releases库,执行mvn clean deploy将会构建失败:
[INFO] ------------------------------------------------------------------------

[INFO] BUILD FAILURE

[INFO] ------------------------------------------------------------------------

[INFO] Total time: 4.112 s

[INFO] Finished at: 2019-06-10T16:34:29+08:00

[INFO] Final Memory: 18M/164M

[INFO] ------------------------------------------------------------------------

[ERROR] Failed to execute goal org.apache.maven.plugins:maven-deploy-plugin:2.7:deploy (default-deploy) on project coffee-api: Failed to deploy artifacts: Could not transfer artifact com.nocoffee:coffee-api:jar:0.0.1 from/to nexus (http://localhost:8081/repository/maven-releases/): Failed to transfer file: http://localhost:8081/repository/maven-releases/com/nocoffee/coffee-api/0.0.1/coffee-api-0.0.1.jar. Return code is: 400, ReasonPhrase: Repository does not allow updating assets: maven-releases. -> [Help 1]

[ERROR]

[ERROR] To see the full stack trace of the errors, re-run Maven with the -e switch.

[ERROR] Re-run Maven using the -X switch to enable full debug logging.

[ERROR]

[ERROR] For more information about the errors and possible solutions, please read the following articles:

[ERROR] [Help 1] http://cwiki.apache.org/confluence/display/MAVEN/MojoExecutionException
将maven-releases库中Deployment pollcy改为Allow redeploy既可:

Maven私服搭建(Nexus Repository Manager 3)的更多相关文章
- window Maven私服搭建——nexus
注:本文来源于 <window Maven私服搭建--nexus> Maven私服搭建--nexus 1.下载nexus https://www.sonatype.com/downlo ...
- maven私服搭建nexus/windows/linux(一)
为什么要搭建nexus私服,原因很简单,有些公司都不提供外网给项目组人员,因此就不能使用maven访问远程的仓库地址,还有就是公司内部开发的一些版本的jar包,如果没有私服需要一人拷贝一份然后再自己安 ...
- maven私服搭建nexus介绍(二)
1.各个仓库介绍 Hosted:宿主仓库 主要放本公司开发的SNAPSHOTS测试版本,RELEASES正式发行版.合作公司第三方的jar包. Proxy:代理仓库 代理中央仓库:代理Apache下测 ...
- 使用 Nexus Repository Manager 搭建 npm 私服
目录 环境 下载与安装 添加npm仓库 配置与验证npm仓库 发布自己的包 Nexus开启启动 脚注 环境 windows10(1803) Nexus Repository Manager OSS 3 ...
- Linux安装配置maven以及搭建nexus私服(编写启动脚本)
2011年07月12日16:32 下面介绍在Linux操作系统下安装配置maven和搭建nexus私服. 一.安装前的准备 下载 jdk http://www.oracle.com/technetw ...
- [转] 使用HTTPS在Nexus Repository Manager 3.0上搭建私有Docker仓库
FROM: https://www.hifreud.com/2018/06/06/03-nexus-docker-repository-with-ssl/ 搭建方式 搭建SSL的Nexus官方提供两种 ...
- maven仓库总结,maven私服搭建
配置pom.xml依赖包时在这里找包的描述: http://search.maven.org/#browse 以java为根目录. mvn archtype:generate -DgroupId=zt ...
- Nexus Repository Manager OSS 3.x 安装配置
前言想要使用maven搭建项目,但是国内的网络环境可以想象,还有公司自己开发的jar包等问题,所以需要搭建一个maven的私服,这样便于管理. 找了一些教程,顺便记下来,当做笔记. 本文以Window ...
- maven仓库总结,maven私服搭建,批量mvn eclipse:eclipse
配置pom.xml依赖包时在这里找包的描述: http://search.maven.org/#browse 以java为根目录. mvn archtype:generate -DgroupId=zt ...
随机推荐
- 5 Ways to Make Your Hive Queries Run Faster
5 Ways to Make Your Hive Queries Run Faster Technique #1: Use Tez Hive can use the Apache Tez execu ...
- 11、JavaScript 比较和逻辑运算符
- C++中如何计算程序运行的时间 (转载)
转载地址:http://blog.csdn.net/wuxuguang123/article/details/8130081 一 个程序的功能通常有很多种方法来实现,怎么样的程序才算得上最优呢?举个例 ...
- BZOJ2120 数颜色 —— 待修改莫队
题目链接:https://vjudge.net/problem/HYSBZ-2120 2120: 数颜色 Time Limit: 6 Sec Memory Limit: 259 MBSubmit: ...
- C#开发遇到的常见问题及知识点
今天遇到的类型初始值设定项引发异常的原因是:类没有添加[Serializable]属性. this.DialogResult = System.Windows.Forms.DialogResult.O ...
- Windows内存性能分析(一)内存泄漏
判断内存性能表现主要是为了解决如下两个问题: 1. 当前web应用是否存在内存泄漏,如果有,问题的程度有多大? 2. 如果web应用的代码无法进一步改进,当前web应用所在的服务器是否存在内存上的瓶颈 ...
- Log4j输出格式控制--log4j的PatternLayout参数含义
参数 说明 例子 %c 列出logger名字空间的全称,如果加上{<层数>}表示列出从最内层算起的指定层数的名字空间 log4j配置文件参数举例 输出显示媒介 假设当前logger名字 ...
- July Cook-Off 2017
Chang and Bitwise OR 分析:因为按位或最后肯定小于等于加,所以把所有数按位或即可 #include "iostream" #include "cstd ...
- Day01:Python入门
一.编程与编程语言 编程的目的是将人类的思想流程按照某种能够被计算机识别的表达方式传递给计算机,从而让计算机能像人脑一样自动执行工作. 能被计算机所识别的表达方式是编程语言,python就是一门编程语 ...
- Docker运行MongoDB及Redis及ssh端口映射远程连接
Docker运行MongoDB及Redis及ssh端口映射远程连接 本节内容简介 在本实验里我们将通过完成 MongoDB 和 Redis 两个容器来学习Dockerfile及Docker的运行机制. ...