
SpringBoot整合Eureka搭建微服务
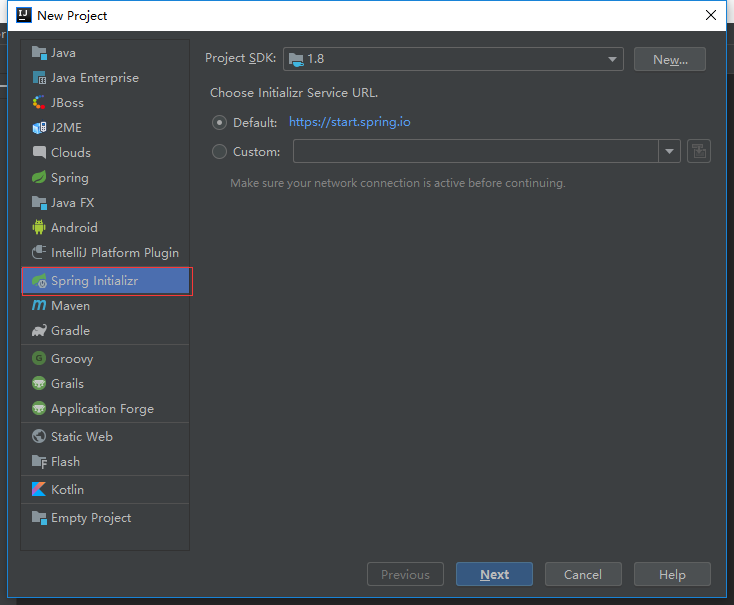
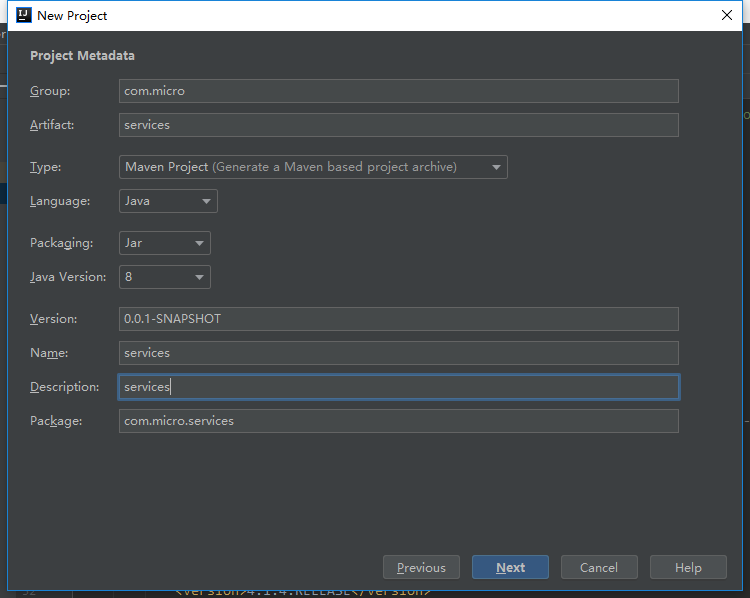
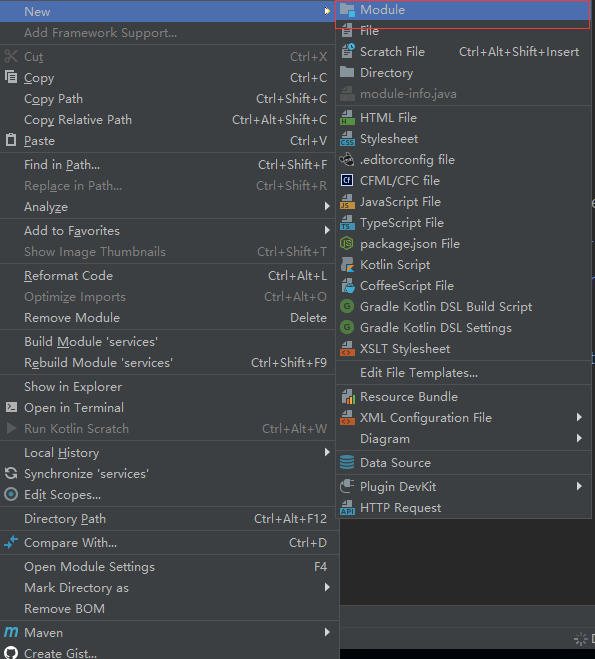
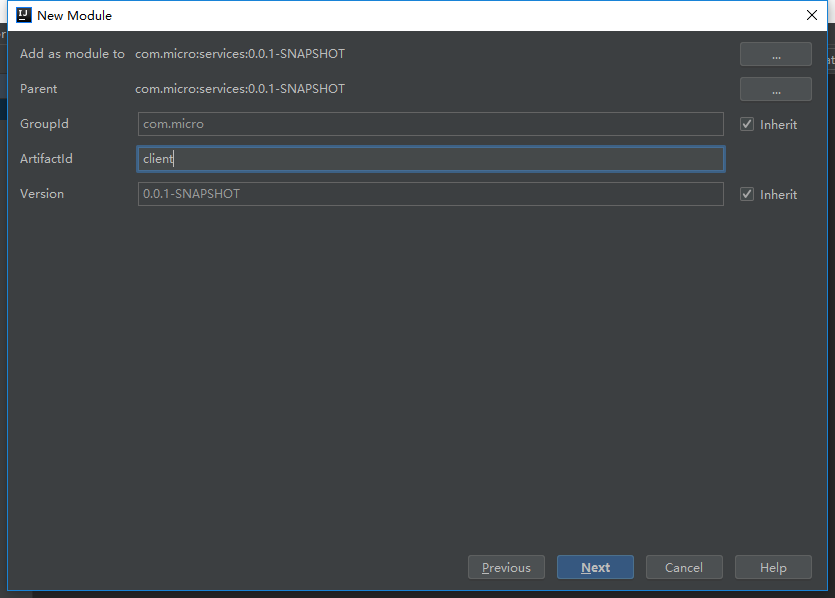
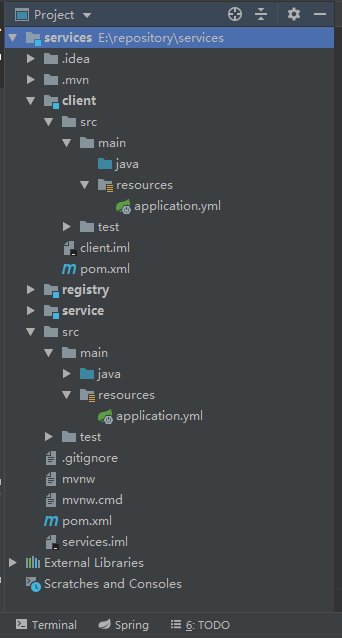
1.创建一个services项目,添加三个子模块client(客户端)、service(服务端)、registry(注册中心)
1.1 创建一个services项目
1.2 添加pom.xml依赖
<?xml version="1.0" encoding="UTF-8"?>

<project xmlns="http://maven.apache.org/POM/4.0.0" xmlns:xsi="http://www.w3.org/2001/XMLSchema-instance"

         xsi:schemaLocation="http://maven.apache.org/POM/4.0.0 http://maven.apache.org/xsd/maven-4.0.0.xsd">

    <modelVersion>4.0.</modelVersion>

    <packaging>pom</packaging>

    <modules>

        <module>client</module>

        <module>service</module>

        <module>registry</module>

    </modules>

    <parent>

        <groupId>org.springframework.boot</groupId>

        <artifactId>spring-boot-starter-parent</artifactId>

        <version>2.1..RELEASE</version>

        <relativePath/> <!-- lookup parent from repository -->

    </parent>

    <groupId>com.micro</groupId>

    <artifactId>services</artifactId>

    <version>0.0.-SNAPSHOT</version>

    <name>services</name>

    <description>services</description>

    <properties>

        <java.version>1.8</java.version>

    </properties>

    <dependencies>

        <dependency>

            <groupId>org.springframework.boot</groupId>

            <artifactId>spring-boot-starter</artifactId>

        </dependency>

        <dependency>

            <groupId>org.springframework.boot</groupId>

            <artifactId>spring-boot-starter-test</artifactId>

            <scope>test</scope>

        </dependency>

        <dependency>

            <groupId>org.springframework.cloud</groupId>

            <artifactId>spring-cloud-starter-netflix-eureka-server</artifactId>

            <version>1.4..RELEASE</version>

        </dependency>

        <dependency>

            <groupId>org.springframework.cloud</groupId>

            <artifactId>spring-cloud-starter-netflix-eureka-client</artifactId>

        </dependency>

    </dependencies>

    <build>

        <plugins>

            <plugin>

                <groupId>org.springframework.boot</groupId>

                <artifactId>spring-boot-maven-plugin</artifactId>

            </plugin>

        </plugins>

    </build>

    <dependencyManagement>

        <dependencies>

            <dependency>

                <groupId>org.springframework.cloud</groupId>

                <artifactId>spring-cloud-dependencies</artifactId>

                <version>Finchley.RELEASE</version>

                <type>pom</type>

                <scope>import</scope>

            </dependency>

        </dependencies>

    </dependencyManagement>

</project>
1.3 添加子模块client(客户端)
1.4 添加子模块service(服务端)
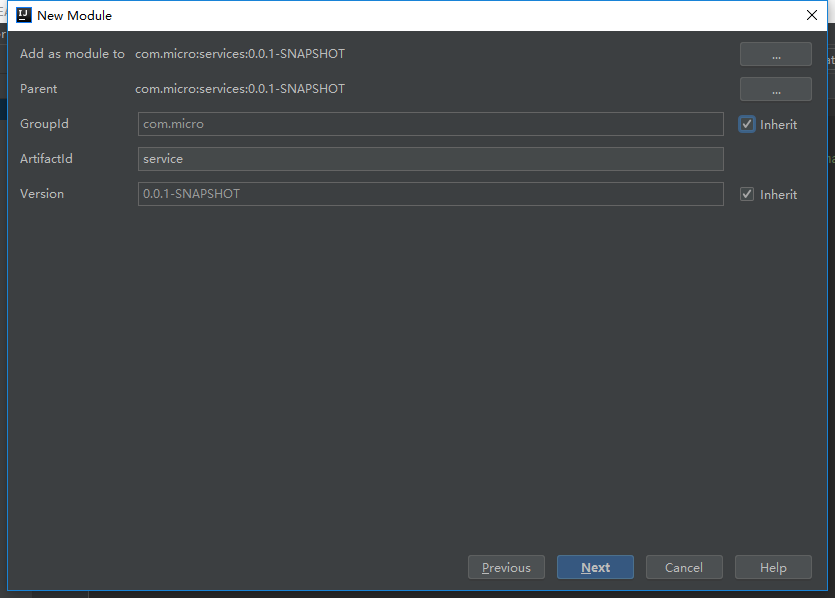
1.5 添加子模块registry(注册中心)
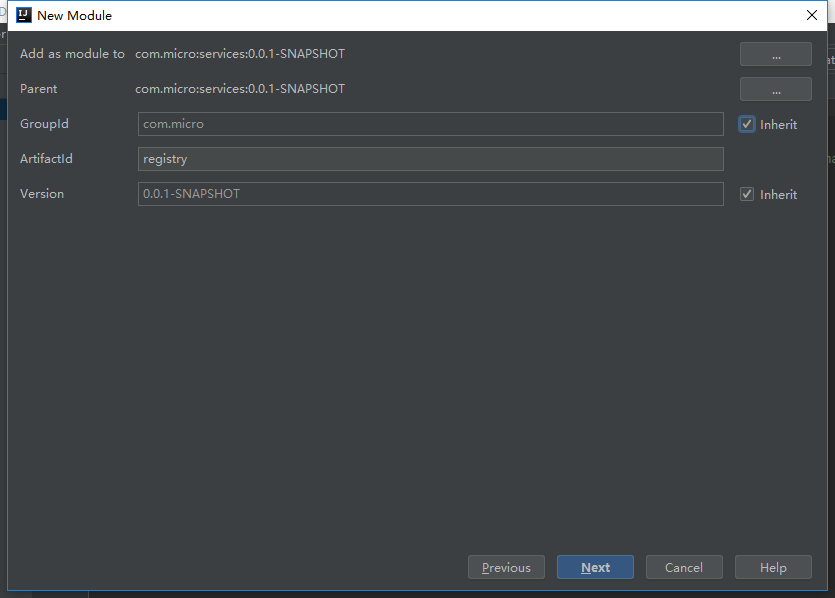
2.搭建registry(注册中心)
2.1 application.yml 配置
server:

  port:

eureka:

  instance:

    hostname: localhost

  client:

    registerWithEureka: false

    fetchRegistry: false
2.2 编写启动程序
package com.services.registry;

import org.springframework.boot.SpringApplication;

import org.springframework.boot.autoconfigure.SpringBootApplication;

import org.springframework.cloud.netflix.eureka.server.EnableEurekaServer;

@SpringBootApplication

@EnableEurekaServer

public class RegistryApplication {

    public static void main(String[] args) {

        SpringApplication.run(RegistryApplication.class);

    }

}
3.搭建service(服务端)
3.1 application.yml 配置
server:

  port:

spring:

  application:

    name: service

eureka:

  client:

    serviceUrl:

      defaultZone: http://localhost:8080/eureka/
3.2 编写启动程序
package com.services.service;

import org.springframework.boot.SpringApplication;

import org.springframework.boot.autoconfigure.SpringBootApplication;

import org.springframework.cloud.client.discovery.EnableDiscoveryClient;

@SpringBootApplication

@EnableDiscoveryClient

public class ServiceApplication {

    public static void main(String[] args) {

        SpringApplication.run(ServiceApplication.class, args);

    }

}
3.3 编写服务
package com.services.service;

import org.springframework.web.bind.annotation.PathVariable;

import org.springframework.web.bind.annotation.RequestMapping;

import org.springframework.web.bind.annotation.RestController;

@RestController

public class HelloWorldController {

    @RequestMapping("hello/{name}")

    public String hello(@PathVariable String name) {

        return name + " say hello";

    }

}
4.搭建client(客户端)
4.1 application.yml 配置
server:

  port:

spring:

  application:

    name: client

eureka:

  client:

    serviceUrl:

      defaultZone: http://localhost:8080/eureka/

app:

  service-url: http://localhost:8081/
4.2 编写启动程序
package com.services.client;

import org.springframework.boot.SpringApplication;

import org.springframework.boot.autoconfigure.SpringBootApplication;

import org.springframework.cloud.client.discovery.EnableDiscoveryClient;

import org.springframework.context.annotation.Bean;

import org.springframework.web.client.RestTemplate;

@SpringBootApplication

@EnableDiscoveryClient

public class ClientApplication {

    public static void main(String[] args) {

        SpringApplication.run(ClientApplication.class, args);

    }

    @Bean

    RestTemplate restTemplate() {

        return new RestTemplate();

    }

}
4.3 编写service
package com.services.client;

import org.springframework.beans.factory.annotation.Autowired;

import org.springframework.beans.factory.annotation.Value;

import org.springframework.http.ResponseEntity;

import org.springframework.stereotype.Service;

import org.springframework.web.client.RestTemplate;

@Service

public class CallHelloService {

    @Value("${app.service-url}")

    private String appServiceUrl;

    @Autowired

    private RestTemplate restTemplate;

    public String callHello(String name) {

        // 是一个http client

        ResponseEntity result = restTemplate.postForEntity(appServiceUrl + "hello/" + name, null, String.class);

        return result.getBody().toString();

    }

}
4.4 编写controller
package com.services.client;

import org.springframework.beans.factory.annotation.Autowired;

import org.springframework.web.bind.annotation.GetMapping;

import org.springframework.web.bind.annotation.RestController;

@RestController

public class CallHelloController {

    @Autowired

    private CallHelloService callHelloService;

    @GetMapping("hello")

    public String hello(String name) {

        String result = callHelloService.callHello(name);

        return result;

    }

}
5.启动registry-service-client模块
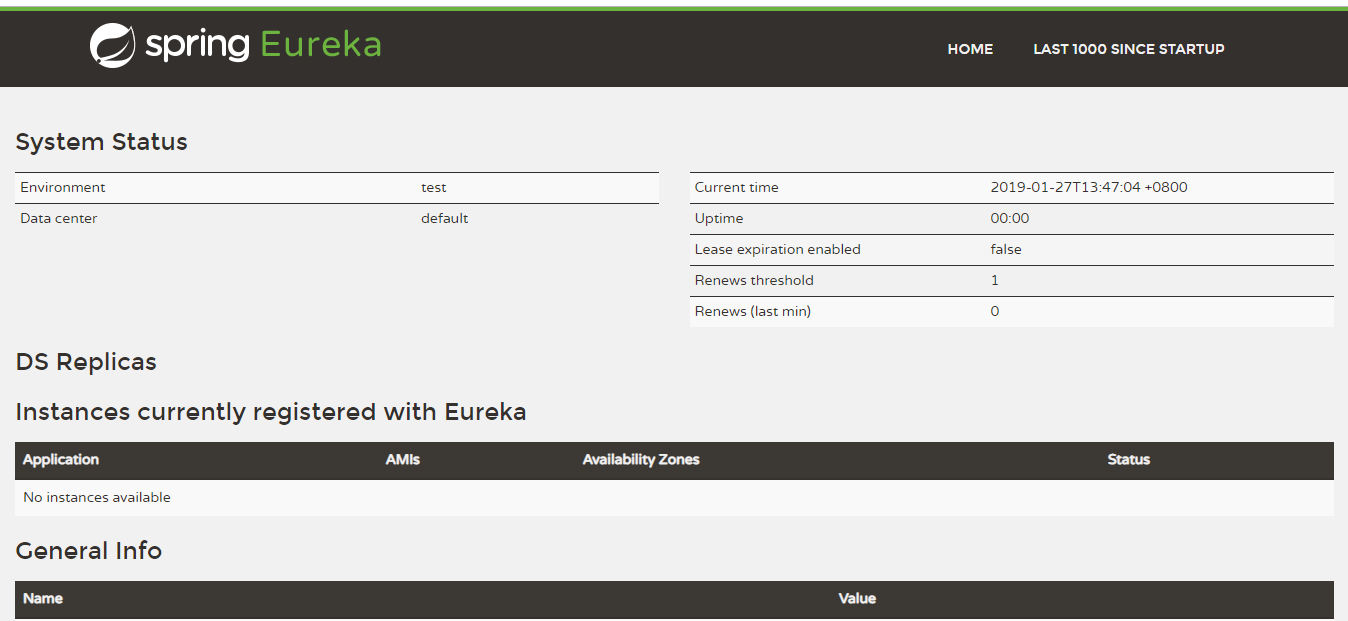
5.1 registry
http://localhost:8080/
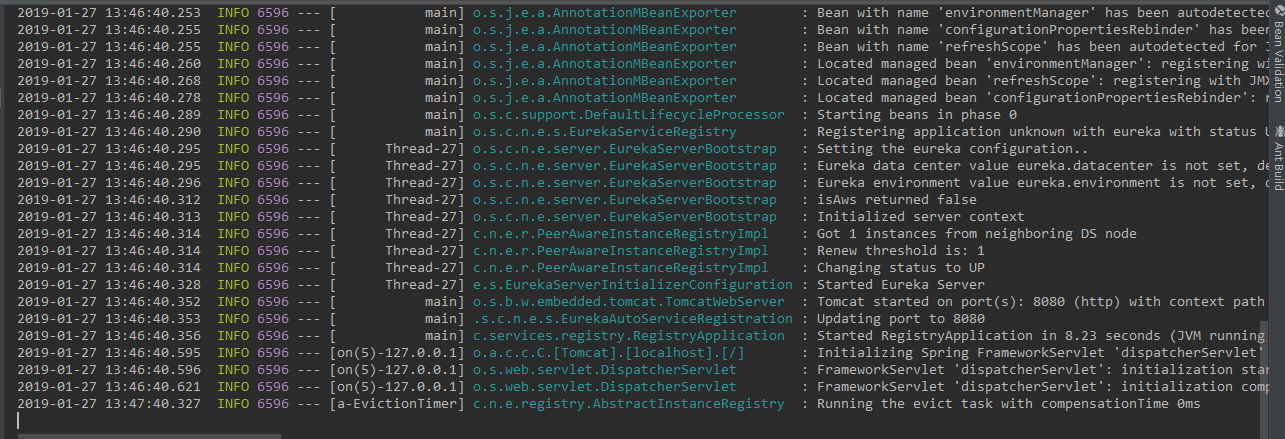
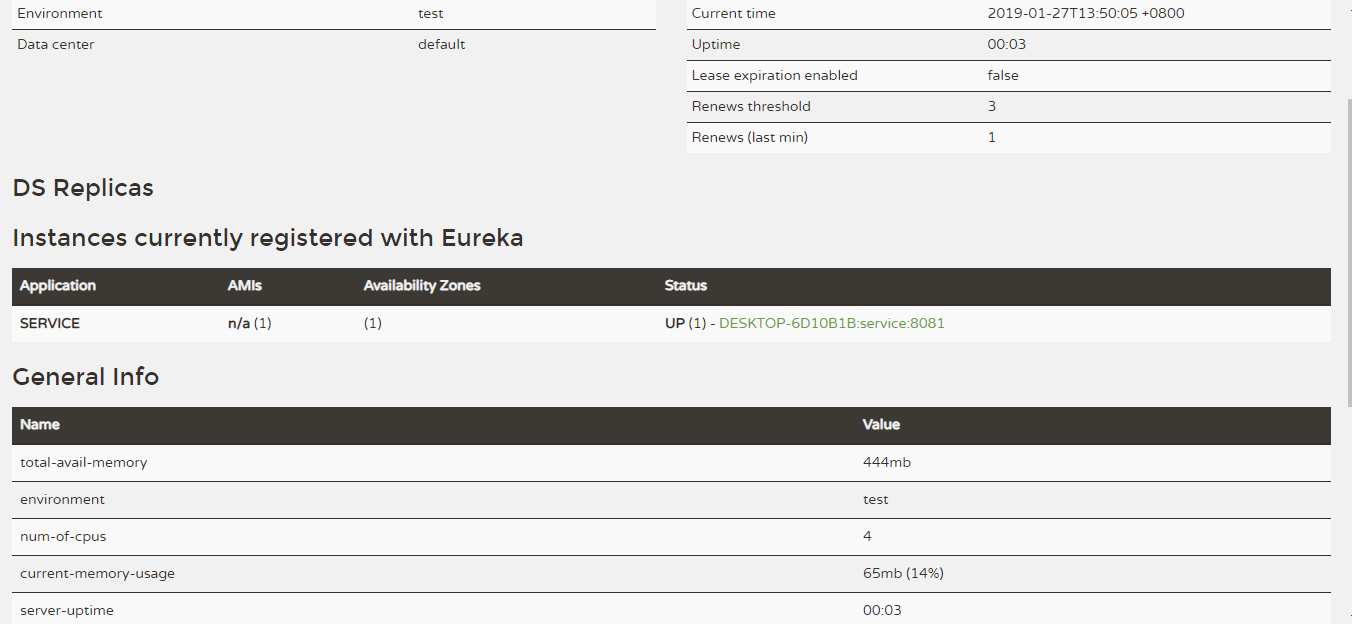
5.2 service

刷新网页 http://localhost:8080/
5.3 client
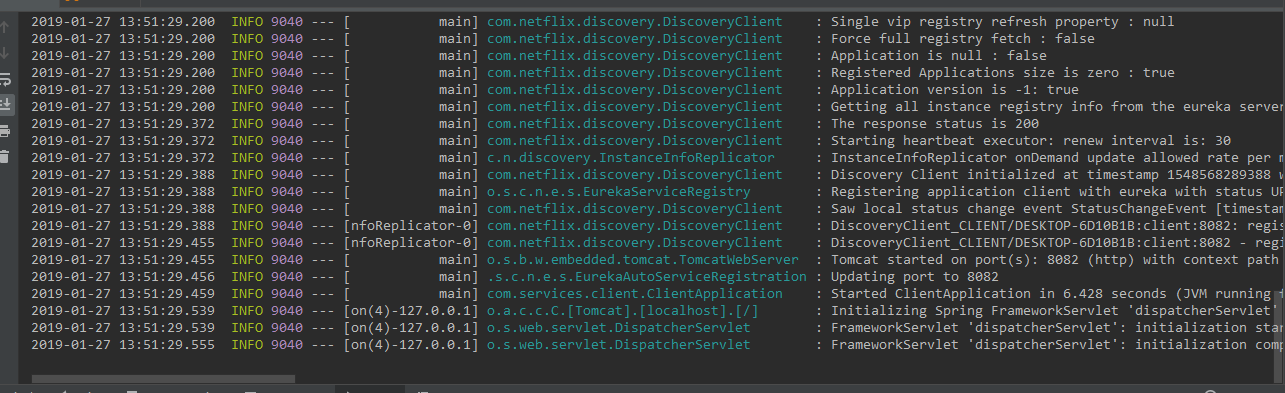
刷新网页 http://localhost:8080/
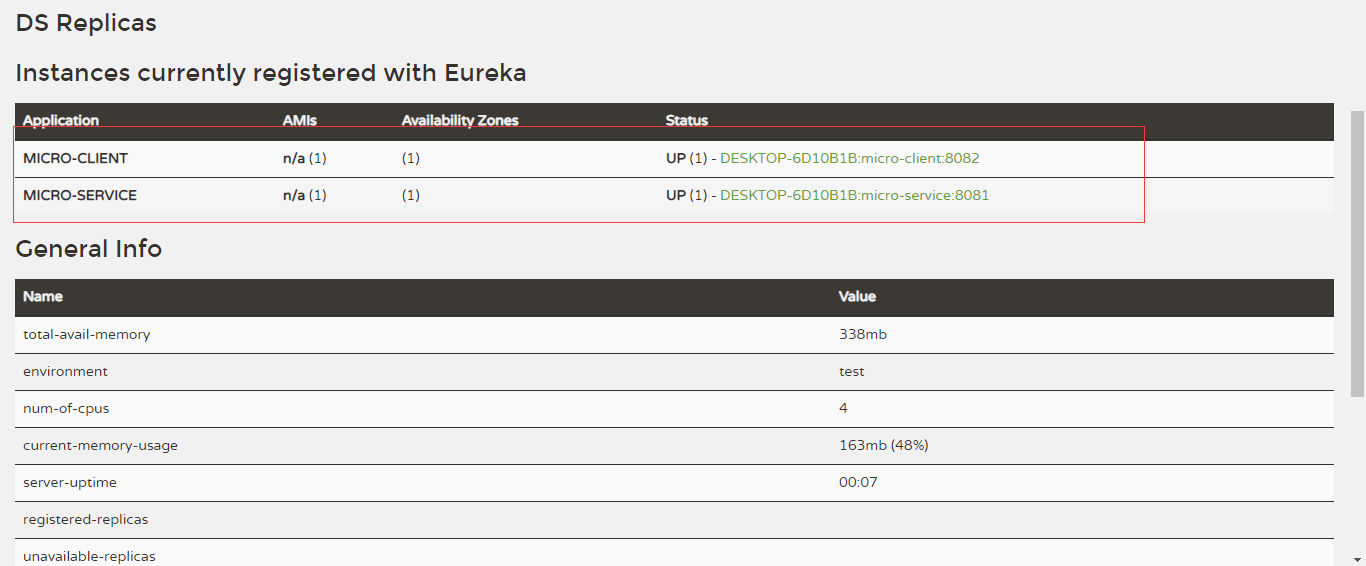
client 访问 http://localhost:8082/hello?name=tao

源码地址: https://github.com/80905949/SpringCloud.git
SpringBoot整合Eureka搭建微服务的更多相关文章
- 十分钟搭建微服务框架(SpringBoot +Dubbo+Docker+Jenkins源码)
本文将以原理+实战的方式,首先对“微服务”相关的概念进行知识点扫盲,然后开始手把手教你搭建这一整套的微服务系统. 这套微服务框架能干啥? 这套系统搭建完之后,那可就厉害了: 微服务架构 你的整个应用程 ...
- Spring-Boot:Spring Cloud构建微服务架构
概述: 从上一篇博客<Spring-boot:5分钟整合Dubbo构建分布式服务> 过度到Spring Cloud,我们将开始学习如何使用Spring Cloud 来搭建微服务.继续采用上 ...
- 【微服务】使用spring cloud搭建微服务框架,整理学习资料
写在前面 使用spring cloud搭建微服务框架,是我最近最主要的工作之一,一开始我使用bubbo加zookeeper制作了一个基于dubbo的微服务框架,然后被架构师否了,架构师曰:此物过时.随 ...
- 【译文】用Spring Cloud和Docker搭建微服务平台
by Kenny Bastani Sunday, July 12, 2015 转自:http://www.kennybastani.com/2015/07/spring-cloud-docker-mi ...
- spring cloud+dotnet core搭建微服务架构:Api授权认证(六)
前言 这篇文章拖太久了,因为最近实在太忙了,加上这篇文章也非常长,所以花了不少时间,给大家说句抱歉.好,进入正题.目前的项目基本都是前后端分离了,前端分Web,Ios,Android...,后端也基本 ...
- spring cloud+.net core搭建微服务架构:Api授权认证(六)
前言 这篇文章拖太久了,因为最近实在太忙了,加上这篇文章也非常长,所以花了不少时间,给大家说句抱歉.好,进入正题.目前的项目基本都是前后端分离了,前端分Web,Ios,Android...,后端也基本 ...
- Spring Cloud和Docker搭建微服务平台
用Spring Cloud和Docker搭建微服务平台 This blog series will introduce you to some of the foundational concepts ...
- 手把手教你使用spring cloud+dotnet core搭建微服务架构:服务治理(-)
背景 公司去年开始使用dotnet core开发项目.公司的总体架构采用的是微服务,那时候由于对微服务的理解并不是太深,加上各种组件的不成熟,只是把项目的各个功能通过业务层面拆分,然后通过nginx代 ...
- spring cloud+dotnet core搭建微服务架构:服务发现(二)
前言 上篇文章实际上只讲了服务治理中的服务注册,服务与服务之间如何调用呢?传统的方式,服务A调用服务B,那么服务A访问的是服务B的负载均衡地址,通过负载均衡来指向到服务B的真实地址,上篇文章已经说了这 ...
随机推荐
- [小北De编程手记] : Lesson 04 - Selenium For C# 之 API 上
这一部分,我准备向大家介绍Selenium WebDriver的常用API,学习这部分内容需要大家最好有一些简单的HTML相关知识,本文主要涉及到以下内容: Selenium API:元素检查 Sel ...
- .NET开源工作流RoadFlow-流程运行-任务收回
如果一个任务则发送,又觉得还要想修改可以立即收回刚刚发送的任务. 任务收回条件:任务发送后下一步处理人还没有打开该任务,则在已办事项中会看到 收回 按钮,否则不能收回. 点击收回按钮再确认即可收回刚刚 ...
- Caffe&Torch&Theano&TensorFlow
https://www.youtube.com/watch?v=Qynt-TxAPOs&index=12&list=PL16j5WbGpaM0_Tj8CRmurZ8Kk1gEBc7fg ...
- 09_dubbo服务发布原理
[ 启动服务的日志分析 ] 1.暴露本地服务 Export dubbo service com.alibaba.dubbo.demo.DemoService to local registry, du ...
- Android Studio设置代码风格
进入settings,然后搜索CodeStyle选择Java进入如下界面 scheme选择project
- python完全学习笔记
dir(__builtins__) help(input) 'let\'s go' #转义字符 \ r'c:\now' #字符串前加r 自动转义 str= ''' shdiufhi s ...
- 微信小程序——小程序的能力
小程序启动 通过app.json里pages字段可以获得页面路径,而写在 pages 字段的第一个页面就是这个小程序的首页(打开小程序看到的第一个页面),就像下面的代码中,小程序启动后的第一个页面就是 ...
- pt-find使用
查找MySQL的表,并且做一些操作,基本语法就如下: pt-find [OPTIONS] [DATABASES] (1)查找一天前建立的MyISAM 引擎的表 [root@mxqmongodb2 bi ...
- 设计模式:组合(Composite)模式
设计模式:组合(Composite)模式 一.前言 关于Composite模式,其实就是组合模式,又叫部分整体模式,这个模式在我们的生活中也经常使用,比如说如果读者有使用Java的GUI编写过程序 ...
- sublime text html5开发学习 插件篇记录
1.第一步先按照 Package Control,具体步骤自行百度,Google. 2. view in browser 默认的快捷键应该是这样的,我用的是IE浏览器.所以ctrl+alt+i 即可让 ...