MySQL5.7.22版本的安装和调试
1:安装前的准备工作
需要的软件:
boost_1_59_0.tar.gz,cmake-3.6.1.tar.gz,mysql-5.7.22.tar.gz
开始安装MySQL
2.1 检查cmake
[root@oracle cmake-3.6.1]# ./bootstrap && make && make install
2.2 开始编译安装mysql
创建用户和组
[root@oracle cmake-3.6.1]#groupadd mysql
[root@oracle cmake-3.6.1]#useradd -g mysql -s /sbin/nologin -M mysql
创建安装数据库的目录和数据存放目录
[root@oracle src]# mkdir mysql5
[root@oracle src]# mkdir mysql
2.2.1 解压数据库软件
[root@oracle src]# tar -xvf mysql-5.7.22.tar.gz
[root@oracle mysql-5.7.22]# cmake . -DCMAKE_INSTALL_PREFIX=/data/src/mysql -DMYSQL_DATADIR=/data/src/mysql5 -DMYSQL_UNIX_ADDR=/tmp/mysql.sock -DWITH_INNOBASE_STORAGE_ENGINE=1 -DMYSQL_TCP_PORT=3306 -DEXTRA_CHARSETS=all -DDEFAULT_CHARSET=utf8 -DDEFAULT_COLLATION=utf8_general_ci -DWITH_DEBUG=0
[root@oracle mysql-5.7.]# cmake . -DCMAKE_INSTALL_PREFIX=/data/src/mysql -DMYSQL_DATADIR=/data/src/mysql5 -DMYSQL_UNIX_ADDR=/tmp/mysql.sock -DWITH_INNOBASE_STORAGE_ENGINE= -DMYSQL_TCP_PORT= -DEXTRA_CHARSETS=all -DDEFAULT_CHARSET=utf8 -DDEFAULT_COLLATION=utf8_general_ci -DWITH_DEBUG=

-- Running cmake version 3.6.

-- Could NOT find Git (missing:  GIT_EXECUTABLE)

-- Configuring with MAX_INDEXES = 64U

-- The C compiler identification is GNU 4.4.

-- The CXX compiler identification is GNU 4.4.

-- Check for working C compiler: /usr/bin/cc

-- Check for working C compiler: /usr/bin/cc -- works

-- Detecting C compiler ABI info

-- Detecting C compiler ABI info - done

-- Detecting C compile features

-- Detecting C compile features - done

-- Check for working CXX compiler: /usr/bin/c++

-- Check for working CXX compiler: /usr/bin/c++ -- works

-- Detecting CXX compiler ABI info

-- Detecting CXX compiler ABI info - done

-- Detecting CXX compile features

-- Detecting CXX compile features - done

-- CMAKE_GENERATOR: Unix Makefiles

-- Looking for SHM_HUGETLB

-- Looking for SHM_HUGETLB - found

-- Looking for sys/types.h

-- Looking for sys/types.h - found

-- Looking for stdint.h

-- Looking for stdint.h - found

-- Looking for stddef.h

-- Looking for stddef.h - found

-- Check size of void *

-- Check size of void * - done

-- SIZEOF_VOIDP

-- Performing Test HAVE_C_SHIFT_OR_OPTIMIZATION_BUG

-- Performing Test HAVE_C_SHIFT_OR_OPTIMIZATION_BUG - Failed

-- Performing Test HAVE_CXX_SHIFT_OR_OPTIMIZATION_BUG

-- Performing Test HAVE_CXX_SHIFT_OR_OPTIMIZATION_BUG - Failed

-- Performing Test HAVE_C_FLOATING_POINT_FUSED_MADD

-- Performing Test HAVE_C_FLOATING_POINT_FUSED_MADD - Failed

-- Performing Test HAVE_CXX_FLOATING_POINT_FUSED_MADD

-- Performing Test HAVE_CXX_FLOATING_POINT_FUSED_MADD - Failed

-- Performing Test HAVE_C_FP_CONTRACT_FLAG

-- Performing Test HAVE_C_FP_CONTRACT_FLAG - Failed

-- Performing Test HAVE_CXX_FP_CONTRACT_FLAG

-- Performing Test HAVE_CXX_FP_CONTRACT_FLAG - Failed

-- MySQL 5.7.

-- Packaging as: mysql-5.7.-Linux-x86_64

-- Looked for boost/version.hpp in  and

-- BOOST_INCLUDE_DIR BOOST_INCLUDE_DIR-NOTFOUND

-- LOCAL_BOOST_DIR

-- LOCAL_BOOST_ZIP

-- Could not find (the correct version of) boost.

-- MySQL currently requires boost_1_59_0

CMake Error at cmake/boost.cmake: (MESSAGE):

  You can download it with -DDOWNLOAD_BOOST= -DWITH_BOOST=<directory>

  This CMake script will look for boost in <directory>.  If it is not there,

  it will download and unpack it (in that directory) for you.

  If you are inside a firewall, you may need to use an http proxy:

  export http_proxy=http://example.com:80

Call Stack (most recent call first):

  cmake/boost.cmake: (COULD_NOT_FIND_BOOST)

  CMakeLists.txt: (INCLUDE)

-- Configuring incomplete, errors occurred!

See also "/data/src/mysql-5.7.22/CMakeFiles/CMakeOutput.log".

See also "/data/src/mysql-5.7.22/CMakeFiles/CMakeError.log
这个的解决方法是:
在/usr/local下创建一个名为boost的文件夹
- mkdir -p /usr/local/boost
- 把上面的名为boost_1_59_0.tar.gz的压缩包解压就可以了
- tar -xvf boost_1_59_0.tar.gz
继续CMAKE 这里要注意红色的部分
[root@oracle src]# cmake . -DCMAKE_INSTALL_PREFIX=/data/src/mysql -DMYSQL_DATADIR=/data/src/mysql5 -DMYSQL_UNIX_ADDR=/tmp/mysql.sock -DWITH_INNOBASE_STORAGE_ENGINE=1 -DMYSQL_TCP_PORT=3306 -DEXTRA_CHARSETS=all -DDEFAULT_CHARSET=utf8 -DWITH_BOOST=/usr/local/boost -DDEFAULT_COLLATION=utf8_general_ci -DWITH_DEBUG=0 这是根据刚才按装的路径添加的
   sql/CMakeLists.txt:572 (INCLUDE)

 CMake Warning at cmake/bison.cmake:20 (MESSAGE):

   Bison executable not found in PATH

 Call Stack (most recent call first):

   libmysqld/CMakeLists.txt:205 (INCLUDE)

 -- Library mysqlserver depends on OSLIBS -lpthread;m;rt;crypt;dl;aio

 -- MERGE_CONVENIENCE_LIBRARIES TARGET mysqlserver

 -- MERGE_CONVENIENCE_LIBRARIES LIBS dbug;strings;regex;mysys;mysys_ssl;vio;zlib;yassl;taocrypt;crypt;dl;archive_embedded;blackhole_embedded;csv_embedded;federated_embedded;heap_embedded;innobase_embedded;lz4_lib;myisam_embedded;myisammrg_embedded;partition_embedded;ngram_parser_embedded;sql_embedded

 -- MERGE_CONVENIENCE_LIBRARIES MYLIBS dbug;strings;regex;mysys;mysys_ssl;vio;zlib;yassl;taocrypt;archive_embedded;blackhole_embedded;csv_embedded;federated_embedded;heap_embedded;innobase_embedded;lz4_lib;myisam_embedded;myisammrg_embedded;partition_embedded;ngram_parser_embedded;sql_embedded

 -- library target mysqlserver debug_target /data/src/debug/archive_output_directory/libmysqld.a

 -- INSTALL mysqlclient.pc lib/pkgconfig

 -- Skipping deb packaging on unsupported platform .

 -- CMAKE_BUILD_TYPE: RelWithDebInfo

 -- COMPILE_DEFINITIONS: _GNU_SOURCE;_FILE_OFFSET_BITS=64;HAVE_CONFIG_H;HAVE_LIBEVENT1

 -- CMAKE_C_FLAGS:  -Wall -Wextra -Wformat-security -Wvla -Wwrite-strings -Wdeclaration-after-statement

 -- CMAKE_CXX_FLAGS:  -Wall -Wextra -Wformat-security -Wvla -Woverloaded-virtual -Wno-unused-parameter

 -- CMAKE_C_LINK_FLAGS:

 -- CMAKE_CXX_LINK_FLAGS:

 -- CMAKE_C_FLAGS_RELWITHDEBINFO: -O3 -g -fabi-version=2 -fno-omit-frame-pointer -fno-strict-aliasing -DDBUG_OFF

 -- CMAKE_CXX_FLAGS_RELWITHDEBINFO: -O3 -g -fabi-version=2 -fno-omit-frame-pointer -fno-strict-aliasing -DDBUG_OFF

 -- Configuring done

 -- Generating done

 -- Build files have been written to: /data/src/mysql-5.7.22
看到上面的信息就证明cmake 成功了
2.2.2
[root@oracle mysql-5.7.22]# make && make install
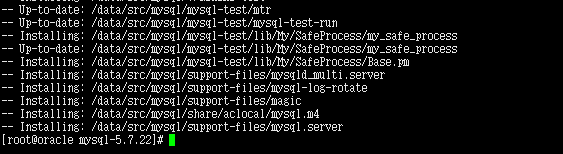
把配置文件拷贝到/etc 下

通过上面的截图我们不难发现 没有我们要找的配置文件,难道5.7.22版本不需要配置文件了吗,我们先不管,接着往下做
[root@oracle mysql-5.7.22]# cp support-files/mysql.server /etc/init.d/mysqld
[root@oracle mysql-5.7.22]# chmod +x /etc/init.d/mysqld
[root@oracle mysql-5.7.22]# chkconfig --add mysqld
初始化MySQL数据库
注:在5.7.22版本中mysql_install_db 被废弃了,取而代之的是 mysqld –initialize
[root@oracle mysql]# bin/mysqld --initialize-insecure --user=mysql --basedir=/data/src/mysql/ --datadir=/data/src/mysql5
2018-05-24T07:07:55.314350Z 0 [Warning] TIMESTAMP with implicit DEFAULT value is deprecated. Please use --explicit_defaults_for_timestamp server option (see documentation for more details).
2018-05-24T07:07:56.262284Z 0 [Warning] InnoDB: New log files created, LSN=45790
2018-05-24T07:07:56.407878Z 0 [Warning] InnoDB: Creating foreign key constraint system tables.
2018-05-24T07:07:56.494757Z 0 [Warning] No existing UUID has been found, so we assume that this is the first time that this server has been started. Generating a new UUID: 2f2eaae3-5f21-11e8-ab77-000c29e94efc.
2018-05-24T07:07:56.497669Z 0 [Warning] Gtid table is not ready to be used. Table 'mysql.gtid_executed' cannot be opened.
2018-05-24T07:07:56.512801Z 1 [Warning] root@localhost is created with an empty password ! Please consider switching off the --initialize-insecure option.
注:这些警告信息不用管,只要没有error 就可以
2.2.3 我们尝试启动MySQL服务
[root@oracle mysql]# /etc/init.d/mysqld start
Starting MySQL.Logging to '/data/src/mysql5/oracle.err'.
SUCCESS!
数据库启动成功,因此 MySQL.5.7.22版本没有配置文件也是可以的。
[root@oracle mysql5]# echo '/data/src/mysql/include/' >> /etc/ld.so.conf
[root@oracle mysql5]# echo '/data/src/mysql/lib/' >> /etc/ld.so.conf
[root@oracle mysql5]# ldconfig
2.2.4 施工后校验,这里是没有初始化用户的

这个比5.6的版本多了sys 库少了test
mysql> show databases;
+--------------------+
| Database |
+--------------------+
| information_schema |
| mysql |
| performance_schema |
| sys |
+--------------------+
4 rows in set (0.00 sec)
mysql> update mysql.user set authentication_string=password('m2i3sc') where user='root' ;
Query OK, 1 row affected, 1 warning (0.01 sec)
Rows matched: 1 Changed: 1 Warnings: 1
mysql> flush privileges;
Query OK, 0 rows affected (0.00 sec)
mysql> exit
Bye
[root@oracle mysql5]# mysql -uroot -pm2i3sc
mysql: [Warning] Using a password on the command line interface can be insecure.
Welcome to the MySQL monitor. Commands end with ; or \g.
Your MySQL connection id is 3
Server version: 5.7.22 Source distribution
Copyright (c) 2000, 2018, Oracle and/or its affiliates. All rights reserved.
Oracle is a registered trademark of Oracle Corporation and/or its
affiliates. Other names may be trademarks of their respective
owners.
Type 'help;' or '\h' for help. Type '\c' to clear the current input statement.
mysql> exit
Bye
[root@oracle mysql5]# mysqladmin -u root password 'm2i3sc'
mysqladmin: connect to server at 'localhost' failed
error: 'Access denied for user 'root'@'localhost' (using password: NO)'
我们现在看一下每个schema的文件和之前有什么不同
[root@oracle mysql5]# ls

auto.cnf  ib_buffer_pool  ibdata1  ib_logfile0  ib_logfile1  ibtmp1  lhh  mysql  oracle.err  oracle.pid  performance_schema  sys

[root@oracle mysql5]# cd lhh

[root@oracle lhh]# ls

db.opt  emp.frm  emp.ibd  test.frm  test.ibd

[root@oracle lhh]#
注意上面标记的红色的部分,这个在以前的5.6的版本中是没有这个文件的,存的表的结构,它所有的数据存在ibdata1 的这个文件中,这也是5.7版本的新特性。
至此,mysql-5.7.22版本的安装就算完成了。
MySQL5.7.22版本的安装和调试的更多相关文章
- Mysql5.7.22版本,插入中文乱码的问题
首先,mysql5.7.22版本的免安装版本的,需要自己配置信息,而且容易出现问题,这里还是建议下载安装版本.msi,按照安装教程进行安装:安装成功后会在数据存储的data文件下找到参数配置文件my. ...
- 升级MySQL5.7.22版本_总结记录
目录 一. mysql5.7安装 0. 背景 1. 准备:下载安装包 2. 安装流程小结 3. 具体步骤 二. mysql5.7的一些变化 一. mysql5.7安装 0. 背景 之前用的5.6版本, ...
- mysql5.7.22的安装与配置(适用mysql5.7.20至mysql5.7.22版本)
一.解压Mysql5.7.20安装包,刚解压是没有 data 这个文件夹的 二.配置mysql环境变量,创建MYSQL_HOME,然后在Path上添加%MYSQL_HOME%\bin; 三.配置m ...
- MySQL5.7.19版本压缩包安装方式的一些坑
ySQL社区版下载地址:https://dev.mysql.com/downloads/mysql/,在这里也可以选择之前的版本下载. MySQL进入5.7.7版本以后,压缩包安装需要注意一些地方: ...
- mysql5.7.22 zip 版安装
2.将zip文件解压到本地,本文解压到如下目录:D:\softwares\mysql-5.7.14-winx64 3.新建一个配置文件(my.ini)用于配置字符集.端口等信息,用以覆盖原始的配置文件 ...
- TensorFlow GPU版本的安装与调试
笔者采用python3.6.7+TensorFlow1.12.0+CUDA10.0+CUDNN7.3.1构建环境 PC端配置为GTX 1050+Intel i7 7700HQ 4核心8线程@2.8GH ...
- MySQL5.5多实例编译安装——多配置文件
一.什么是MySQL多实例?MySQL多实例简单的说就是在一台服务器上安装一套MySQL程序,通过不同的端口对外提供访问,多实例不仅节省物理主机成本,还有效提升了单台物理主机的CPU.磁盘I/O使用效 ...
- mysql-5.6.22的安装步骤
一.环境与下载地址: 1.系统下载地址: http://mirrors.sohu.com/centos/6.6/isos/x86_64/CentOS-6.6-x86_64-bin-DVD1.iso 2 ...
- [转]MySQL5.6.22 安装
原文路径 http://jifeng3321.iteye.com/blog/2181517?utm_source=tuicool 由于一直做银行项目,所以一直在用oracle和db2,但最近自己想 ...
随机推荐
- Sybase常用时间日期函数
Sybase日期函数日期函数getdate()得到当前时间,可以设置得到各种时间格式.datepart(日期部分,日期)取指定时间的某一个部分,年月天时分秒.datediff(日期部分,日期1,日期2 ...
- 深入浅出SharePoint2010——请假系统无代码篇之数据框架设计
文档库SOP:上传用户操作手册等系统相关文档. 员工信息列表EmployeeInfo:用来存储员工基本信息.直属领导和假卡信息. 请假申请列表LeaveRequest:申请人Requester填写请假 ...
- 021.8 properties(开发使用频率高)
内容:Properties基本存取.存储到持久化设备.从持久化设备读取.简单模拟收费软件试用结束##Properties——有配置文件的功能. 特点: 1.Hash table的子类,ma ...
- centos虚拟机安装,配置静态ip可以访问网络
centos安装过程中需要注意几个问题 1.选择安装的软件 默认选择的是mininal,应该选择GNEME Desktop 安装的过程中可以设置network 配置linux网络命令 具体配置 退出键 ...
- 【NOIP2014】解方程
题目描述 已知多项式方程 \[a_0 + a_1x + a_2x^2 + \dots +a_nx^n=0\] 求这个方程在\([1,m]\)内的整数解(\(n\)和\(m\)均为正整数). 输入输出格 ...
- Unicode data in a Unicode-only collation or ntext data cannot be sent to clients using DB-Library (such as ISQL) or ODBC version 3.7 or earlier
php 连接 sqlserver 时, 程序生成的sql语句, 如果在 sqlserver客户端执行时, 可以正确返回结果, 在程序中执行, 总返回 false, 打开调试也没有任何错误. 无意中发现 ...
- Mysql 用户权限管理--从 xxx command denied to user xxx
今天遇到一个mysql 权限的问题,即标题所述 xxx command denied to user xxx,一般mysql 这种报错,基本都属于当前用户没有进行该操作的权限,需要 root 用户授 ...
- C、CSL 的密码 【set暴力 || 后缀数组】 (“新智认知”杯上海高校程序设计竞赛暨第十七届上海大学程序设计春季联赛 )
题目传送门:https://ac.nowcoder.com/acm/contest/551/C 题目描述 众所周知,CSL 最喜欢的密码是 ******.于是有一天…… 为了改变这一点,他决定 ...
- 如何寫一個自定義控件/vs2010生成Dll文件并引用dll(C#)
1.最簡單的例子 首先你先新建->項目->類庫.然後右鍵項目.添加一個用戶控件.設置其用戶控件繼承button. egg: namespace ClassLibrary1{ publ ...
- 20165302实验二java面向对象程序设计
20165302实验二java面向对象程序设计 实验结果 提交点1 1.实验要求: 参考 (http://www.cnblogs.com/rocedu/p/6371315.html#SECUNITTE ...