使用百度的富文本编辑器UEditor遇到的问题总结
1、下载地址:http://ueditor.baidu.com/website/download.html(我下载的是.net版本)
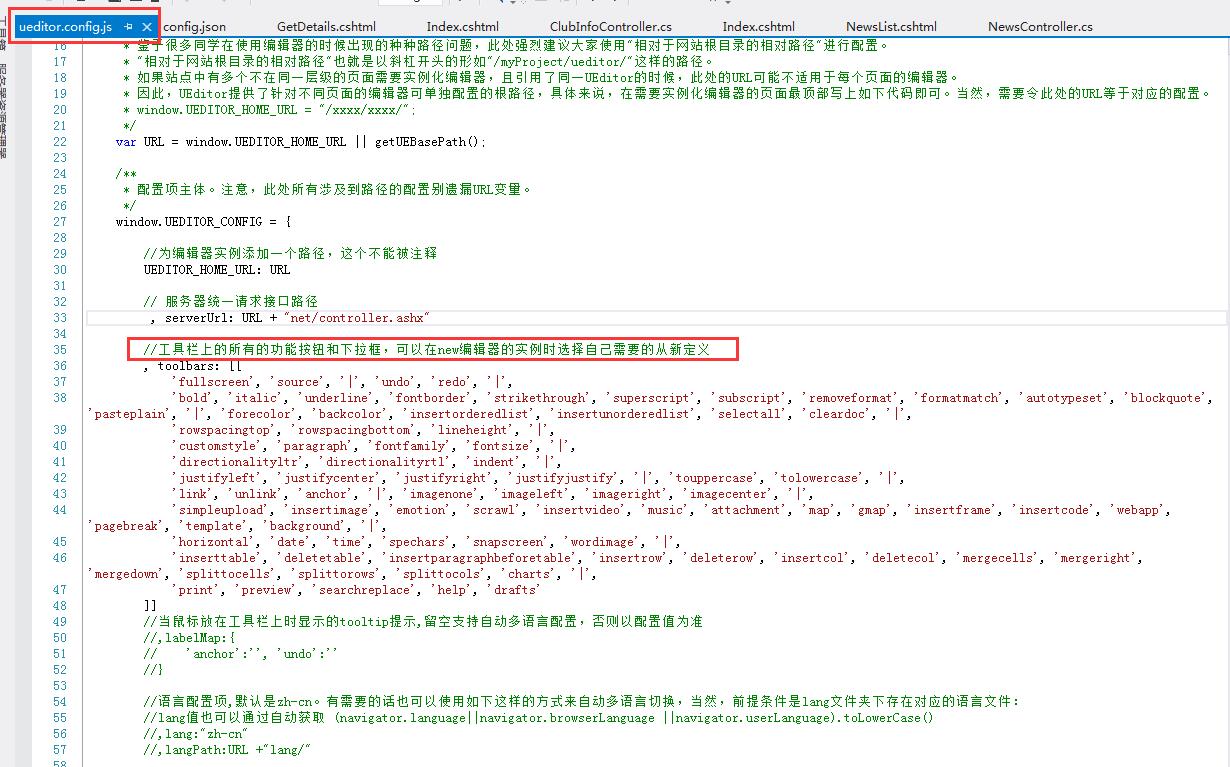
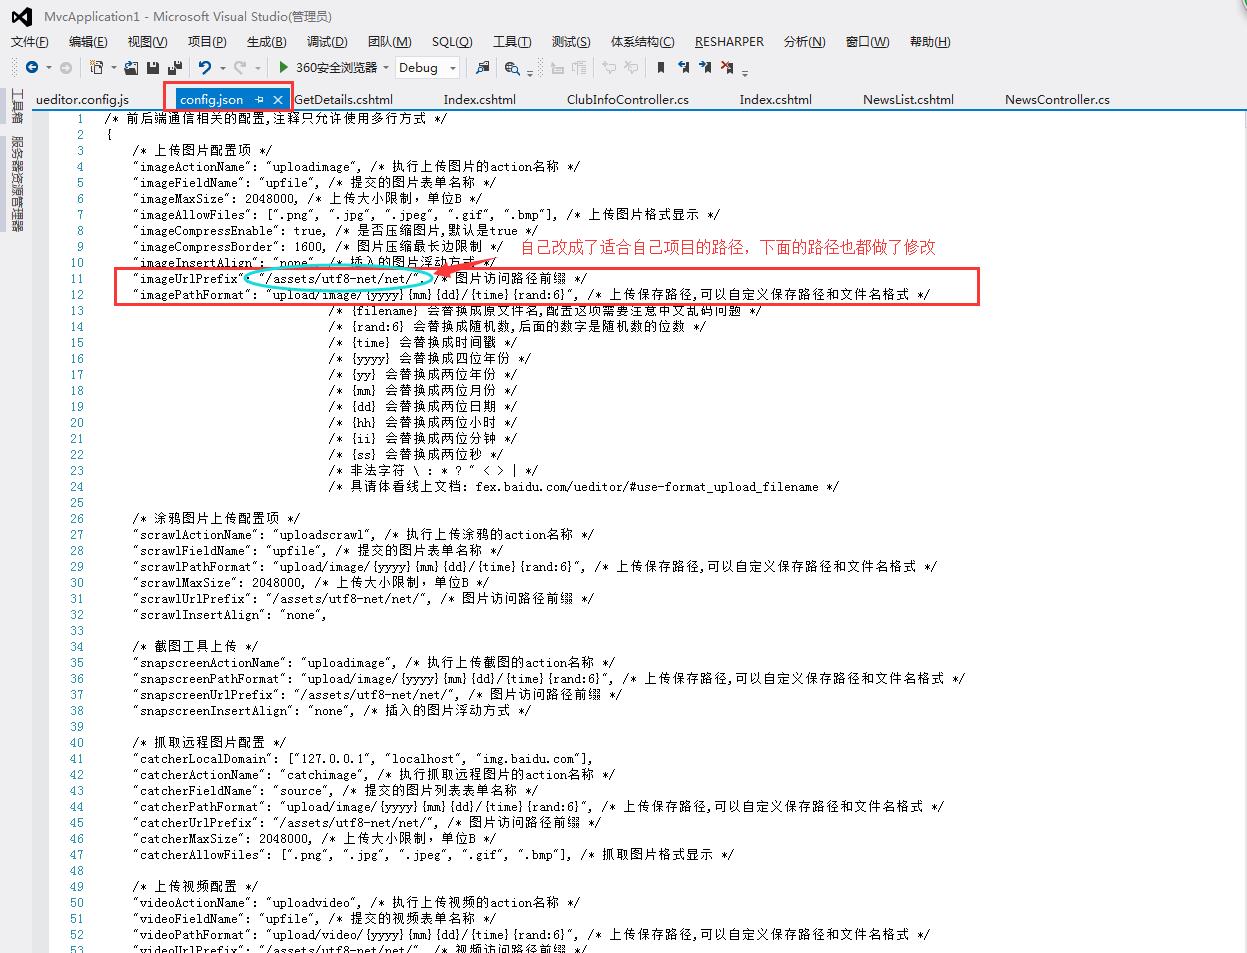
下载后要先看一下ueditor.config.js和 net/config.json的文件,里面是关于图片上传和其他方法的一些路径配置
2、显示编辑页面(一定要看使用文档:http://fex.baidu.com/ueditor/#server-deploy)
- 引入所需的js文件

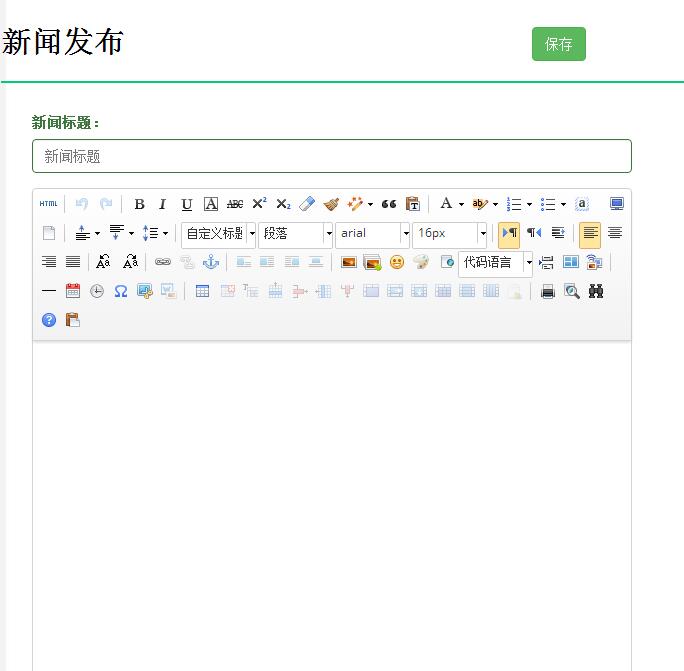
- 初始化编辑器 html代码:
 <div class="form-group has-warning">

                 <textarea class="A4page" id="myEditor" name="NewsContent"></textarea>

             </div>
jquery代码:
  var ue = UE.getEditor('myEditor', {

             toolbars: [

                 ['fullscreen', 'source', '|', 'undo', 'redo', '|',

             'bold', 'italic', 'underline', 'fontborder', 'strikethrough', 'superscript', 'subscript', 'removeformat', 'formatmatch', 'autotypeset', 'blockquote', 'pasteplain', '|', 'forecolor', 'backcolor', 'insertorderedlist', 'insertunorderedlist', 'selectall', 'cleardoc', '|',

             'rowspacingtop', 'rowspacingbottom', 'lineheight', '|',

             'customstyle', 'paragraph', 'fontfamily', 'fontsize', '|',

             'directionalityltr', 'directionalityrtl', 'indent', '|',

             'justifyleft', 'justifycenter', 'justifyright', 'justifyjustify', '|', 'touppercase', 'tolowercase', '|',

             'link', 'unlink', 'anchor', '|', 'imagenone', 'imageleft', 'imageright', 'imagecenter', '|',

             'simpleupload', 'insertimage', 'emotion', 'scrawl', 'insertframe', 'insertcode', 'pagebreak', 'template', 'background', '|',

             'horizontal', 'date', 'time', 'spechars', 'snapscreen', 'wordimage', '|',

             'inserttable', 'deletetable', 'insertparagraphbeforetable', 'insertrow', 'deleterow', 'insertcol', 'deletecol', 'mergecells', 'mergeright', 'mergedown', 'splittocells', 'splittorows', 'splittocols', 'charts', '|',

             'print', 'preview', 'searchreplace', 'help', 'drafts']

             ],

             allHtmlEnabled: false,//提交到后台的数据是否包含整个html字符串

             autoHeightEnabled: false,

             autoFloatEnabled: true,

             allowDivTransToP: false//阻止div标签自动转换为p标签

         });
说明:修改配置项的方法: 1. 方法一:修改 ueditor.config.js 里面的 toolbars 2. 方法二:实例化编辑器的时候传入 toolbars 参数(详情参考:http://fex.baidu.com/ueditor/#start-toolbar)
- 前端配置基本上配置好了,下面是后端配置(如果后端配置不好,上传图片功能将无法使用。网址:http://fex.baidu.com/ueditor/#server-net)我配置了好久才配置好的,按照文档上说的做就行了
- 当你的编辑器可以使用的时候,获取编辑器里的内容(网址:http://fex.baidu.com/ueditor/#api-common)
 //实例化编辑器到id为 container 的 dom 容器上:

 var ue = UE.getEditor('container');

 //设置编辑器内容:

 ue.ready(function() {

     ue.setContent('<p>hello!</p>');

 });

 //追加编辑器内容:

 ue.ready(function() {

     ue.setContent('<p>new text</p>', true);

 });

 //获取编辑器html内容:

 ue.ready(function() {

     var html = ue.getContent();

 });

 //获取纯文本内容:

 ue.getContentTxt();

 //获取保留格式的文本内容:

 ue.getPlainTxt();

 //获取纯文本内容:

 ue.getContentTxt();

 //判断编辑器是否有内容:

 ue.hasContents();

 //让编辑器获得焦点:

 ue.focus();

 //让编辑器获得焦点

 ue.blur();

 //判断编辑器是否获得焦点:

 ue.isFocus();

 //设置当前编辑区域不可编辑:

 ue.setDisabled();

 //设置当前编辑区域可以编辑:

 ue.setEnabled();

 //隐藏编辑器:

 ue.setHide();

 //显示编辑器:

 ue.setShow();

 //获得当前选中的文本:

 ue.selection.getText();

 //常用命令:

 //在当前光标位置插入html内容

 ue.execCommand('inserthtml', '<span>hello!</span>');

 //设置当前选区文本格式:

 ue.execCommand('bold'); //加粗

 ue.execCommand('italic'); //加斜线

 ue.execCommand('subscript'); //设置上标

 ue.execCommand('supscript'); //设置下标

 ue.execCommand('forecolor', '#FF0000'); //设置字体颜色

 ue.execCommand('backcolor', '#0000FF'); //设置字体背景颜色

 //回退编辑器内容:

 ue.execCommand('undo');

 //撤销回退编辑器内容:

 ue.execCommand('redo');

 //切换源码和可视化编辑模式:

 ue.execCommand('source');

 //选中所有内容:

 ue.execCommand('selectall');

 //清空内容:

 ue.execCommand('cleardoc');

 //读取草稿箱

 ue.execCommand('drafts');

 //清空草稿箱

ue.execCommand('clearlocaldata');- 输入的数据是这样的:
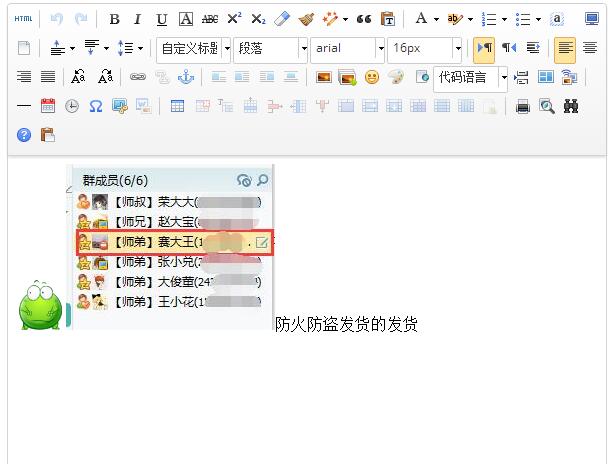
获取到的数据是这样的:<p><img src="http://img.baidu.com/hi/jx2/j_0015.gif"/><img src="/assets/utf8-net/net/upload/image/20160427/6359737678078530983400002.jpg" title="QQ截图20160427144629.jpg" alt="QQ截图20160427144629.jpg"/>防火防盗发货的发货</p>
- 将数据存到数据库中了,那么怎么让数据原样显示到编辑器里呢?(这个问题我试了一天,开始我以为是这个函数uParse,但是我试了好多路径都不管用,如果谁用这个方法实现了,一定要告诉我一声哦,先qqq了)
- 后台获取数据:
  public ActionResult GetDetails(string NewsId)

         {

             int id = Int32.Parse(NewsId);

             NewsInfo news = db.NewsInfoes.Find(id);

             ViewData["news"] = news;

             return View();

         }
前台html代码:
 <div class="col-sm-6">

     <div class="panel">

         <div class="panel-body">

             <div class="form-group has-success">

                 <label class="control-label" for="NewsName">新闻标题:</label>

                 <input type="text" class="form-control" id="NewsName" name="NewsName" placeholder="新闻标题" style="width:600px" value="@(((NewsInfo)ViewData["news"]).NewsName)" />

             </div>

             <div class="form-group has-warning">

                 <textarea class="A4page" id="myEditor" name="NewsContent">@(((NewsInfo)ViewData["news"]).NewsContent)</textarea>

             </div>

         </div>

     </div>

 </div>
jquery代码:
    function load() {

             var ue = UE.getEditor('myEditor', {

                 toolbars: [

                     ['fullscreen', 'source', '|', 'undo', 'redo', '|',

                 'bold', 'italic', 'underline', 'fontborder', 'strikethrough', 'superscript', 'subscript', 'removeformat', 'formatmatch', 'autotypeset', 'blockquote', 'pasteplain', '|', 'forecolor', 'backcolor', 'insertorderedlist', 'insertunorderedlist', 'selectall', 'cleardoc', '|',

                 'rowspacingtop', 'rowspacingbottom', 'lineheight', '|',

                 'customstyle', 'paragraph', 'fontfamily', 'fontsize', '|',

                 'directionalityltr', 'directionalityrtl', 'indent', '|',

                 'justifyleft', 'justifycenter', 'justifyright', 'justifyjustify', '|', 'touppercase', 'tolowercase', '|',

                 'link', 'unlink', 'anchor', '|', 'imagenone', 'imageleft', 'imageright', 'imagecenter', '|',

                 'simpleupload', 'insertimage', 'emotion', 'scrawl', 'insertframe', 'insertcode', 'pagebreak', 'template', 'background', '|',

                 'horizontal', 'date', 'time', 'spechars', 'snapscreen', 'wordimage', '|',

                 'inserttable', 'deletetable', 'insertparagraphbeforetable', 'insertrow', 'deleterow', 'insertcol', 'deletecol', 'mergecells', 'mergeright', 'mergedown', 'splittocells', 'splittorows', 'splittocols', 'charts', '|',

                 'print', 'preview', 'searchreplace', 'help', 'drafts']

                 ],

                 autoHeightEnabled: false,

                 autoFloatEnabled: true,

                 allowDivTransToP: false//阻止div标签自动转换为p标签

             });

         }

  $(function () {

             load();

         });
然后就可以了,O(∩_∩)O哈哈~
- 我的流程:先添加数据
- 在新闻列表里点击新闻标题,传递新闻id获取新闻详细内容

- 最后将数据展示到新闻修改页面的编辑器上

使用百度的富文本编辑器UEditor遇到的问题总结的更多相关文章
- 百度Web富文本编辑器ueditor在ASP.NET MVC3项目中的使用说明
====================================================================== [百度Web富文本编辑器ueditor在ASP.NET M ...
- 百度开源富文本编辑器 UEditor配置:图片上传和文件上传独立使用方法
使用UEditor编辑器自带的插件实现图片上传和文件上传功能,这里通过配置UEditor单独使用其内置的第三方插件swfupload来实现图片和文件的上传,通过对UEditor配置轻松实现图片批量上传 ...
- 百度的富文本编辑器UEditor批量添加图片自动加上宽度和高度的属性
若是没有对编辑器做任何配置直接添加图片的话,显示的html内容如下图所示:它会显示出原图片尺寸 所以必须要对图片的初始显示尺寸做控制:ueditor文件中找到image.js文件 在image.js中 ...
- 百度的富文本编辑器UEDITOR
还是百度的ueditor 比较好用,文件导入后,基本不用配置就可以直接使用图片,文件上传等功能. CKeditor要注意的地方太多了 .但是相对ckeditor 样式比较好看.
- 百度富文本编辑器UEditor安装配置全过程
网站开发时富文本编辑器是必不可少的,他可以让用户自行编辑内容的样式然后上传到后台!下面我们来介绍如何安装使用百度富文本编辑器 一.下载并且设置百度富文本编辑器的样式 你可以去百度UEditor ...
- 百度富文本编辑器ueditor使用总结
最近做的项目用到了ueditor这个东东,但是他的一些配置文档对初次使用者来说很难以理解,故作此总结 相关详细操作链接地址: http://blog.csdn.net/wusuopubupt/arti ...
- 百度富文本编辑器ueditor使用启示
百度富文本编辑器ueditor使用启示 一.总结 一句话总结:使用工具,多去看官方demo,非常详细. 二.百度富文本编辑器ueditor使用启示 官方完整demo 官方完整demo对应的源代码 &l ...
- springboot+layui 整合百度富文本编辑器ueditor入门使用教程(踩过的坑)
springboot+layui 整合百度富文本编辑器ueditor入门使用教程(踩过的坑) 写在前面: 富文本编辑器,Multi-function Text Editor, 简称 MTE, 是一 ...
- thinkphp5.1中适配百度富文本编辑器ueditor
百度富文本编辑器ueditor虽然很老,但是功能齐全,我近期需要能批量粘贴图片的功能,但是找不到,很无奈.然后现在就分享一下如何把ueditor适配到thinkphp5.1,有知道如何批量上传图片的艾 ...
随机推荐
- 使用Navicat快速生成数据库字典
https://blog.csdn.net/maquealone/article/details/60764420
- 20165314 2017-2018-2《Java程序设计》课程总结
20165314 2017-2018-2<Java程序设计>课程总结 每周作业链接汇总 预备作业1:我期望的师生关系 预备作业2:C语言基础调查和java学习展望 预备作业3:Linux安 ...
- php 数组函数学习
1.array_change_key_case array_change_key_case(array,case)函数将数组的所有的键都转换为大写字母或小写字母.array表示目标数组,case表示转 ...
- C++ 使用system()实现锁定屏幕
除了使用函数“LockWorkStation()”实现锁定屏幕,参考:http://www.cnblogs.com/Satu/p/8183081.html 此外,也可以使用函数“system()”来实 ...
- C++中的继承(1) 继承方式
1.继承与派生 继承是使代码可以复用的重要手段,也是面向对象程序设计的核心思想之一.简单的说,继承是指一个对象直接使用另一对象的属性和方法.继承呈现了 面向对象程序设 计的层次结构, 体现了 由简单 ...
- 论文阅读笔记二十八:You Only Look Once: Unified,Real-Time Object Detection(YOLO v1 CVPR2015)
论文源址:https://arxiv.org/abs/1506.02640 tensorflow代码:https://github.com/nilboy/tensorflow-yolo 摘要 该文提出 ...
- Tensorflow 损失函数及学习率的四种改变形式
Reference: https://blog.csdn.net/marsjhao/article/details/72630147 分类问题损失函数-交叉熵(crossentropy) 交叉熵描述的 ...
- The.Glory.of.Innovation 创新之路3放飞好奇
教育最重要的就是 问题不在于教他各种学问,而在于培养他爱好学问的兴趣,而且在这种兴趣充分增长起来的时候,教他以研究学问的方法. ———— 卢梭 如何辨识不同的观点, 老师考查的重点不在于学生 ...
- PowerDesigner逆向生成MYSQL数据库表结构总结
由于日常数据建模经常使用PowerDesigner,使用逆向工程能更加快速的生成模型提高效率,所以总结使用如下: 1. 安装MYSQL的ODBC驱动 Connector/ODBC 5.1.1 ...
- Task.Run()任务执行
1)Task本身就是异步执行的(4.5的那个类). 2)控制数量和终止线程问题可以考虑这个模式: static async void RunAsync() { CancellationTokenSou ...