jquery实现同时展示多个tab标签+左右箭头实现来回滚动
内容:
jquery实现同时展示多张图片+定时向左单张滚动+前后箭头插件
jquery实现同时展示多个tab标签+左右箭头实现来回滚动
小颖最近的项目要实现类似如下效果:

蓝色框圈起来的分别是向上翻、向下翻俩按钮。绿色框分别是用户点击菜单后,出现相应的tab标签,当tab标签太多内容显示不下时,左右两边的按钮就可以实现看后面的tab标签和看之前的tab标签。小颖一开始想使用bootstrap的轮播图 carousel插件,后来发现行不通,就开始问度娘,偶然间发现了别人发表的:jquery同时展示多张图片+定时向左单张滚动+前后箭头插件,小颖将其修修改改后实现了自己想要的功能:jquery实现同时展示多个tab标签+左右箭头实现来回滚动
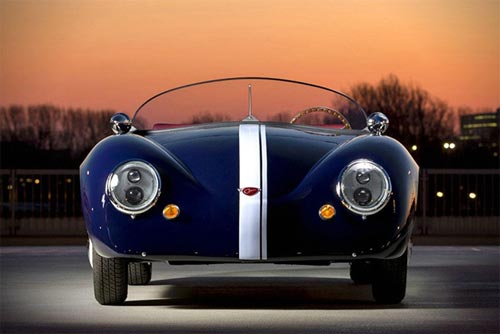
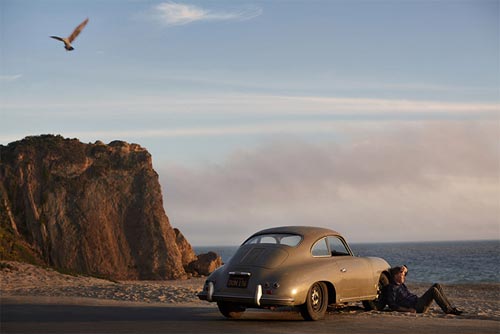
jquery实现同时展示多张图片+定时向左单张滚动+前后箭头插件
这个由于图片太大,小颖就不给大家看效果图了,感兴趣的可以把代码复制下来,自己运行后看下具体的效果图时怎样的。
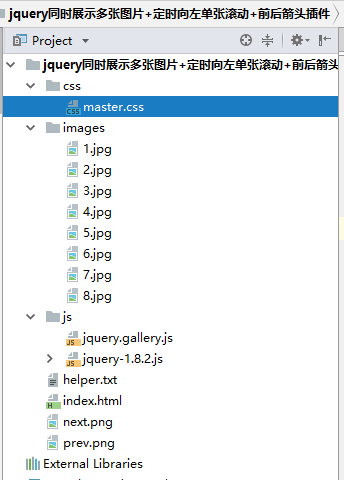
目录:
代码:
index.html
<!DOCTYPE html>

<html lang="en">

<head>

    <meta charset="utf-8">

    <link href="css/master.css" rel="stylesheet"/>

    <script src="js/jquery-1.8.2.js"></script>

    <script src="js/jquery.gallery.js"></script>

    <script>

        jQuery(function () {

            var options = {  //所有属性都可选

                duration: 500,  //单张图片轮播持续时间

                interval: 5000,  //图片轮播结束到下一张图片轮播开始间隔时间

                showImgNum: 5,  //同时展示的图片数量,此参数最大值=Math.floor(画廊宽度/一张图片宽度)

                galleryClass: "gallery"  //画廊class

            }

            $(".wrapper").gallery(options);

        });

    </script>

</head>

<body>

<div class="wrapper">

    <div class="gallery">

        <ul>

            <li><img src="data:images/1.jpg" width="190" height="190"/></li>

            <li><img src="data:images/2.jpg" width="190" height="190"/></li>

            <li><img src="data:images/3.jpg" width="190" height="190"/></li>

            <li><img src="data:images/4.jpg" width="190" height="190"/></li>

            <li><img src="data:images/5.jpg" width="190" height="190"/></li>

            <li><img src="data:images/6.jpg" width="190" height="190"/></li>

            <li><img src="data:images/7.jpg" width="190" height="190"/></li>

            <li><img src="data:images/8.jpg" width="190" height="190"/></li>

        </ul>

    </div>

</div>

</body>

</html>
jquery.gallery.js
(function ($) {

    $.fn.extend({

        "gallery": function (options) {

            if (!isValid(options))

                return this;

            opts = $.extend({}, defaults, options);

            return this.each(function () {

                var $this = $(this);

                var imgNum = $this.children("." + opts.galleryClass).find("img").length;  //图片总张数

                var galleryWidth = $this.children("." + opts.galleryClass).width();  //展示图片部分宽度

                var imgWidth = $this.children("." + opts.galleryClass).find("img").width();  //每张图片的宽度

                var imgHeight = $this.children("." + opts.galleryClass).find("img").height();  //每张图片的高度

                $this.prepend("<span class='prev'></span>");

                $this.append("<span class='next'></span>");

                var arrowHeight = $this.children("span").height();  //前后箭头的高度

                var arrowTop = (imgHeight - arrowHeight) / 2;  //前后箭头距顶部的距离

                $this.children("span").css({"top": arrowTop + "px"});

                assignImgWidth = galleryWidth / opts.showImgNum;  //给每张图片分配的宽度

                var ulWidth = imgNum * assignImgWidth;  //ul的总宽度

                $this.find("ul").width(ulWidth);

                var imgMarginWidth = (assignImgWidth - imgWidth) / 2;  //每张图片的左右外边距

                $this.find("li").css({margin: "0 " + imgMarginWidth + "px"});

                hiddenWidth = ulWidth - galleryWidth;  //超出图片显示部分的宽度

                var t = setTimeout(function () {

                    rightScroll($this, t);

                }, opts.interval);

                bindEvent($this, t);

            });

        }

    });

    var opts, assignImgWidth, hiddenWidth;

    var defaults = {

        duration: 500,  //单张图片轮播持续时间

        interval: 5000,  //图片轮播结束到下一张图片轮播开始间隔时间

        showImgNum: 5,  //同时展示的图片数量

        galleryClass: "gallery"  //画廊class

    };

    function isValid(options) {

        return !options || (options && typeof options === "object") ? true : false;

    }

    function bindEvent($this, t) {

        $this.children(".next").click(function () {

            rightScroll($this, t);

        });

        $this.children(".prev").click(function () {

            leftScroll($this, t);

        });

    }

    function unbindEvent($this, t) {

        $this.children(".next").unbind("click");

        $this.children(".prev").unbind("click");

    }

    function rightScroll($this, t) {

        clearTimeout(t);

        unbindEvent($this, t);

        var left = parseInt($this.find("ul").css("left"));

        if (left > -hiddenWidth)

            $this.find("ul").animate({left: "-=" + assignImgWidth + "px"}, opts.duration, function () {

                bindEvent($this, t);

            });

        else

            $this.find("ul").animate({left: "0px"}, opts.duration, function () {

                bindEvent($this, t);

            });

        var t = setTimeout(function () {

            rightScroll($this, t);

        }, opts.interval + opts.duration);

    }

    function leftScroll($this, t) {

        clearTimeout(t);

        unbindEvent($this, t);

        var left = parseInt($this.find("ul").css("left"));

        if (left < 0)

            $this.find("ul").animate({left: "+=" + assignImgWidth + "px"}, opts.duration, function () {

                bindEvent($this, t);

            });

        else

            $this.find("ul").animate({left: "-" + hiddenWidth + "px"}, opts.duration, function () {

                bindEvent($this, t);

            });

        var t = setTimeout(function () {

            rightScroll($this, t);

        }, opts.interval + opts.duration);

    }

})(window.jQuery);
master.css
*{margin:;padding:;}

.wrapper{position:relative;width:1170px;margin:auto;}

.wrapper .gallery{width:1000px;margin:auto;overflow:hidden;}

.wrapper .gallery ul{position:relative;left:;list-style:none;overflow:hidden;}

.wrapper .gallery ul li{float:left;}

.wrapper .prev{display:inline-block;position:absolute;left:0px;width:30px;height:70px;background:url('../prev.png') no-repeat 0px 0px;cursor:pointer;}

.wrapper .next{display:inline-block;position:absolute;right:0px;width:30px;height:70px;background:url('../next.png') no-repeat 0px 0px;cursor:pointer;}

.wrapper span:hover{background-position:0px -70px;}
所需图片:


next.png prev.png


jquery实现同时展示多个tab标签+左右箭头实现来回滚动
先上效果图:
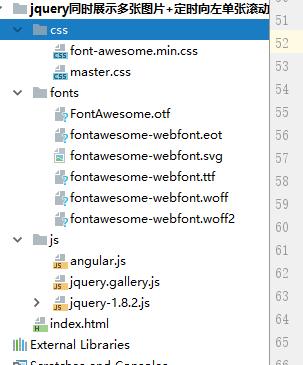
目录:
代码:
index.html
<!DOCTYPE html>

<html lang="en">

<head>

    <meta charset="utf-8">

    <link href="css/master.css" rel="stylesheet"/>

    <link href="css/font-awesome.min.css" rel="stylesheet"/>

    <script src="js/jquery-1.8.2.js"></script>

    <script src="js/jquery.gallery.js"></script>

    <script src="js/angular.js" charset="utf-8"></script>

    <script>

        jQuery(function () {

            var options = {  //所有属性都可选

                duration: 500,  //单张图片轮播持续时间

                interval: 5000,  //图片轮播结束到下一张图片轮播开始间隔时间

                showImgNum: 10,  //同时展示的图片数量,此参数最大值=Math.floor(画廊宽度/一张图片宽度)

                galleryClass: "gallery"  //画廊class

            }

            $(".wrapper").gallery(options);

        });

        let mod = angular.module('test', []);

        mod.controller('main', function ($scope) {

            $scope.ceshi=[{

                id:1,

                name:'系统首页'

            },{

                id:2,

                name:'客户信息'

            },{

                id:3,

                name:'客户信息2'

            },{

                id:4,

                name:'客户信息3'

            },{

                id:5,

                name:'客户信息4'

            },{

                id:6,

                name:'系统首页2'

            },{

                id:7,

                name:'客户信息5'

            },{

                id:8,

                name:'客户信息6'

            },{

                id:9,

                name:'客户信息7'

            },{

                id:10,

                name:'系统首页3'

            },{

                id:11,

                name:'客户信息8'

            },{

                id:12,

                name:'客户信息9'

            },{

                id:13,

                name:'客户信息1'

            },{

                id:14,

                name:'客户信息2'

            },{

                id:15,

                name:'系统首页3'

            },{

                id:16,

                name:'客户信息4'

            },{

                id:17,

                name:'客户信息5'

            }];

        });

    </script>

</head>

<body ng-app="test">

<div class="wrapper" ng-controller="main">

    <div class="gallery">

        <ul>

            <li ng-repeat="names in ceshi">

                <span style="height: 50px">{{names.name}}</span>

            </li>

        </ul>

    </div>

</div>

</body>

</html>
jquery.gallery.js剩下的angular.js、jquery-1.8.2.js大家可以在网上下载。
(function ($) {

    $.fn.extend({

        "gallery": function (options) {

            if (!isValid(options))

                return this;

            opts = $.extend({}, defaults, options);

            return this.each(function () {

                var $this = $(this);

                var imgNum = $this.children("." + opts.galleryClass).find("span").length;  //图片总张数

                var galleryWidth = $this.children("." + opts.galleryClass).width();  //展示图片部分宽度

                var imgWidth = $this.children("." + opts.galleryClass).find("span").width();  //每张图片的宽度

                var imgHeight = $this.children("." + opts.galleryClass).find("span").height();  //每张图片的高度

                $this.prepend("<span class='prev fa fa-arrow-circle-left'></span>");

                $this.append("<span class='next fa fa-arrow-circle-right'></span>");

                var arrowHeight = $this.children("span").height();  //前后箭头的高度

                var arrowTop = (imgHeight - arrowHeight) / 2;  //前后箭头距顶部的距离

                $this.children("span").css({"top": 0 + "px"});

                assignImgWidth = galleryWidth / opts.showImgNum;  //给每张图片分配的宽度

                var ulWidth = imgNum * assignImgWidth;  //ul的总宽度

                $this.find("ul").width(ulWidth);

                // var imgMarginWidth = (assignImgWidth - imgWidth) / 2;  //每张图片的左右外边距

                $this.find("li").css({'margin-right': 1 + "px"});

                hiddenWidth = ulWidth - galleryWidth;  //超出图片显示部分的宽度

                // var t = setTimeout(function () {

                //     rightScroll($this, t);

                // }, opts.interval);

                // console.log(t);

                bindEvent($this, 0);

            });

        }

    });

    var opts, assignImgWidth, hiddenWidth;

    var defaults = {

        duration: 500,  //单张图片轮播持续时间

        interval: 5000,  //图片轮播结束到下一张图片轮播开始间隔时间

        showImgNum: 5,  //同时展示的图片数量

        galleryClass: "gallery"  //画廊class

    };

    function isValid(options) {

        return !options || (options && typeof options === "object") ? true : false;

    }

    function bindEvent($this, t) {

        $this.children(".next").click(function () {

            rightScroll($this, t);

        });

        $this.children(".prev").click(function () {

            leftScroll($this, t);

        });

    }

    function unbindEvent($this, t) {

        $this.children(".next").unbind("click");

        $this.children(".prev").unbind("click");

    }

    function rightScroll($this, t) {

        clearTimeout(t);

        unbindEvent($this, t);

        var left = parseInt($this.find("ul").css("left"));

        if (left > -hiddenWidth)

            $this.find("ul").animate({left: "-=" + assignImgWidth + "px"}, opts.duration, function () {

                bindEvent($this, t);

            });

        else

            $this.find("ul").animate({}, opts.duration, function () {

                bindEvent($this, t);

            });

        // var t=setTimeout(function(){rightScroll($this,t);},opts.interval+opts.duration);

    }

    function leftScroll($this, t) {

        clearTimeout(t);

        unbindEvent($this, t);

        var left = parseInt($this.find("ul").css("left"));

        if (left < 0)

            $this.find("ul").animate({left: "+=" + assignImgWidth + "px"}, opts.duration, function () {

                bindEvent($this, t);

            });

        else

            $this.find("ul").animate({}, opts.duration, function () {

                bindEvent($this, t);

            });

        // var t=setTimeout(function(){rightScroll($this,t);},opts.interval+opts.duration);

    }

})(window.jQuery);
master.css
* {

    margin:;

    padding:;

}

.wrapper {

    position: relative;

    width: 1050px;

    margin: auto;

}

.wrapper .gallery {

    width: 1000px;

    margin: auto;

    overflow: hidden;

}

.wrapper .gallery ul {

    position: relative;

    left:;

    list-style: none;

    overflow: hidden;

}

.wrapper .gallery ul li {

    text-align: center;

    float: left;

    padding: 0 8px;

    background-color: #ccc;

    border-radius: 2px;

    width: 80px

}

.wrapper .prev,

.wrapper .next {

    display: inline-block;

    position: absolute;

    width: 30px;

    height: 30px;

    cursor: pointer;

    line-height: 25px;

    /*text-align: center;*/

    /*border-radius: 50%;*/

    /*background-color: #d8d4d5;*/

}

.wrapper .prev {

    left: 0px;

}

.wrapper .next {

    right: 0px;

}

.wrapper span:hover {

    background-position: 0px -70px;

}
jquery实现同时展示多个tab标签+左右箭头实现来回滚动的更多相关文章
- jquery实现同时展示多个tab标签+左右箭头实现来回滚动(美化版增加删除按钮)
闲聊 前段时间小颖分享了:jquery实现同时展示多个tab标签+左右箭头实现来回滚动文章,引入项目后,我们的组长说样子太丑了,小颖觉得还好啊,要不大家评评理,看下丑不丑?无图无真相,来上图: 看吧其 ...
- vant中tab标签切换时会改变内容滚动高度
vant的tabs标签页,标签切换时会改变内容区的滚动高度,这是因为内容区共用同一个父元素为滚动区域引起的,解决办法:在tabs的内容区域嵌套一层滚动区域,让每个内容区域使用单独的滚动元素就行了. ...
- jquery插件之tab标签页或滑动门
该插件乃本博客作者所写,目的在于提升作者的js能力,也给一些js菜鸟在使用插件时提供一些便利,老鸟就悠然地飞过吧. 此插件旨在实现目前较为流行的tab标签页或滑动门特效,在此插件中默认使用的是鼠标滑过 ...
- Jquery LigerUI框架学习(二)之Tree于Tab标签实现iframe功能
LigerUI框架Tree于Tab标签动态使用,当点击Tree后动态创建Tab标签,和通常用的iframe框架功能类似 Tree中的关键代码 //Tree初始化 $("#tree1" ...
- 如何一行jquery代码写出tab标签页(链式操作)
啦啦!今天又学了一招,js写几十行的tab标签页jquery写一行就行啦,用到了链式操作!以下是代码: <!DOCTYPE html> <html lang="en&quo ...
- jquery切换tab标签例子
之前做了一个简单的小效果,使用jquery方式,让tab标签切换,效果如下 代码其实很简单,首先先把代码分享给大家,代码如下 var shoptoggle = $('.shoptoggle .shop ...
- jQuery蓝色修边tab标签切换
jQuery蓝色修边tab标签切换,jQuery,tab选项卡,标签切换,jQuery蓝色修边tab标签广告代码切换是一款非常简单实用tab选项卡切换效果,自己定义好相关的html标签即可,选项卡切换 ...
- 支持自动切换的tab标签代码札记
html代码如下: <!-- tab标签代码begin --> <div class="tab1" id="tab1"> <div ...
- 类似掌盟的Tab页 Android 开源框架ViewPageIndicator 和 ViewPager 仿网易新闻客户端Tab标签 (转)
原博客地址 :http://blog.csdn.net/xiaanming/article/details/10766053 本文转载,记录学习用,如有需要,请到原作者网站查看(上面这个网址) 之前 ...
随机推荐
- 使用 OpenSessionInViewFilter 配置加载
1.使用 OpenSessionInViewFilter
- Network Monitoring in Software-Defined Networking :A Review(综述)
来源:IEEE SYSTEMS JOURNAL 发表时间:2018 类型:综述 主要内容:概述了SDN监控的发展,并从收集信息.预处理.传送信息.分析.和描述五个阶段进行解读,并比较了传统网络和SDN ...
- 完美解决C#Webbrowser控件设置Cookie问题
完美解决C#Webbrowser控件设置Cookie问题由于个人项目需求,需要把从抓包里面的Cookie数据写入到webbrowser空控件里,经过百度白百般折腾,结果还是失败,搜索到的答案基本上都是 ...
- Amazon Publisher Studio让产品推广更简单
Amazon联盟最近推出了Publisher Studio新功能,只要在Amazon联盟网站后台添加一段特定的代码,以后推广所有Amazon产品的时候就不需要再访问Amazon Associates网 ...
- JSONArray数据转换成java List
1.后台接收json数组转成封装实体类的List: package no.integrasco.ingentia.news.qaedition; public class Person { priva ...
- 【Zuul】Zuul过滤器参考资料
#https://blog.csdn.net/chenqipc/article/details/53322830#https://github.com/spring-cloud/spring-clou ...
- Delphi10.2 DPR文件
通过选择[Project | View Source],可以看到DPR文件的基本面貌,操作如下: 默认的 Delphi 项目文件的内容如下: program Project1; {关键字 progra ...
- SpringBoot 2.x 集成QQ邮箱、网易系邮箱、Gmail邮箱发送邮件
在Spring中提供了非常好用的 JavaMailSender接口实现邮件发送,在SpringBoot的Starter模块中也为此提供了自动化配置. 项目源码已托管在Gitee-SpringBoot_ ...
- JAVA获取程序(打成jar或classpath)所在目录
一.简述 JAVA获取程序(打成jar或classpath)所在目录. 二.代码 package dearcloud.utils.context; import dearcloud.utils.Str ...
- CAS 单点登录【2】自定义用户验证
基础不太熟的同学可以先去看:CAS 单点登录[1]入门 方案1:CAS默认的JDBC扩展方案: CAS自带了两种简单的通过JDBC方式验证用户的处理器. 1.QueryDatabaseAuthe ...