Android开发 UI布局
Android开发 UI布局
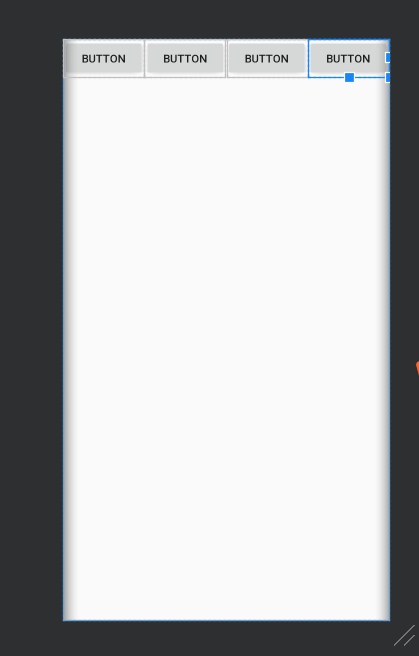
一、线性布局LinearLayout
什么是线性布局?
其实呢,线性布局就是把所有的孩子摆在同一条线上
 <?xml version="1.0" encoding="utf-8"?>

<LinearLayout

    xmlns:android="http://schemas.android.com/apk/res/android"

    android:layout_width="match_parent"

    android:layout_height="match_parent">

    <Button

        android:id="@+id/button"

        android:layout_width="wrap_content"

        android:layout_height="wrap_content"

        android:layout_weight="1"

        android:text="Button" />

    <Button

        android:id="@+id/button2"

        android:layout_width="wrap_content"

        android:layout_height="wrap_content"

        android:layout_weight="1"

        android:text="Button" />

    <Button

        android:id="@+id/button3"

        android:layout_width="wrap_content"

        android:layout_height="wrap_content"

        android:layout_weight="1"

        android:text="Button" />

</LinearLayout>
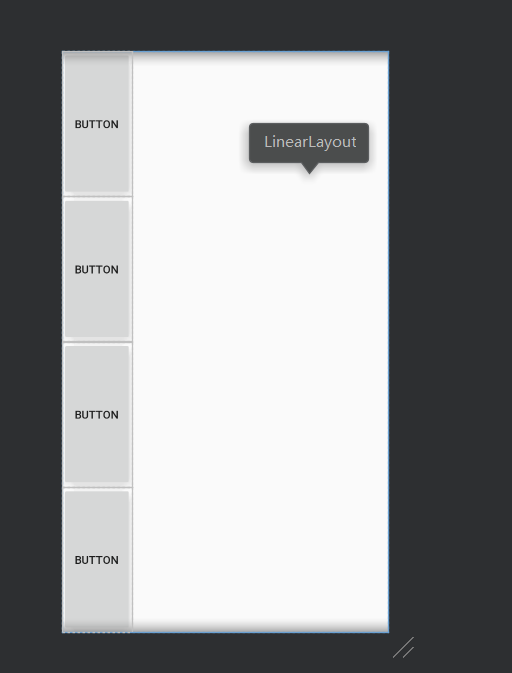
线性布局摆放的方向:我们可以通过orientation来修改LinerLayout的布局的摆放方向,它的值有两个,一个是horizontal(水平),另一个是vertical(竖直)
3、线性布局的权重
当有些时候,我们需要平均地给孩子分配宽度或高度,我们就可以使用权重;
有时候不平均,但点占的宽或高成比例,我们也可以使用权重。
android:layout_width="0th"
android:layout_weight="1"
将宽度设为零,权重设为1,即可平均。
权重就是把所有的数字加起来,上面的占的比例就是大小的比例。
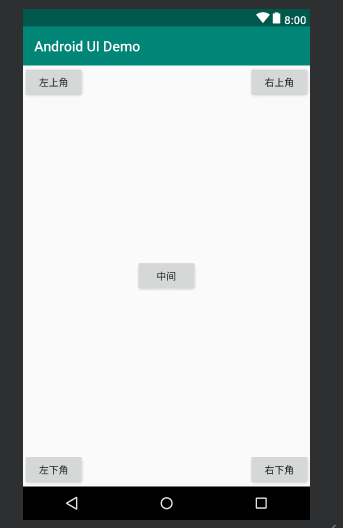
二、相对布局RelativeLayout
1、相对布局相对于父控件
<?xml version="1.0" encoding="utf-8"?>

<RelativeLayout

    xmlns:android="http://schemas.android.com/apk/res/android"

    android:orientation="vertical" android:layout_width="match_parent"

    android:layout_height="match_parent">

    <Button

        android:id="@+id/button5"

        android:layout_width="wrap_content"

        android:layout_height="wrap_content"

        android:layout_centerInParent="true"

        android:text="中间" />

    <Button

        android:id="@+id/button6"

        android:layout_width="wrap_content"

        android:layout_height="wrap_content"

        android:layout_alignParentRight="true"

        android:layout_alignParentTop="true"

        android:text="右上角" />

    <Button

        android:id="@+id/button7"

        android:layout_width="wrap_content"

        android:layout_height="wrap_content"

        android:layout_alignParentLeft="true"

        android:layout_alignParentTop="true"

        android:text="左上角" />

    <Button

        android:id="@+id/button8"

        android:layout_width="wrap_content"

        android:layout_height="wrap_content"

        android:layout_alignParentLeft="true"

        android:layout_alignParentBottom="true"

        android:text="左下角" />

    <Button

        android:id="@+id/button9"

        android:layout_width="wrap_content"

        android:layout_height="wrap_content"

        android:layout_alignParentRight="true"

        android:layout_alignParentBottom="true"

        android:text="右下角" />

</RelativeLayout>
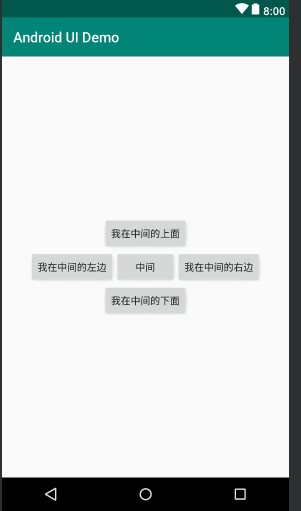
2、相对布局相对于同级控件
<?xml version="1.0" encoding="utf-8"?>

<RelativeLayout

    xmlns:android="http://schemas.android.com/apk/res/android"

    android:orientation="vertical" android:layout_width="match_parent"

    android:layout_height="match_parent">

    <Button

        android:id="@+id/center_button"

        android:layout_width="wrap_content"

        android:layout_height="wrap_content"

        android:layout_centerInParent="true"

        android:text="中间" />

    <Button

        android:layout_width="wrap_content"

        android:layout_height="wrap_content"

        android:layout_centerVertical="true"

        android:layout_toRightOf="@id/center_button"

        android:text="我在中间的右边"/>

        <Button

            android:layout_width="wrap_content"

            android:layout_height="wrap_content"

            android:layout_centerVertical="true"

            android:layout_toLeftOf="@id/center_button"

            android:text="我在中间的左边"/>

    <Button

        android:layout_width="wrap_content"

        android:layout_height="wrap_content"

        android:layout_centerHorizontal="true"

        android:layout_above="@id/center_button"

        android:text="我在中间的上面"/>

    <Button

        android:layout_width="wrap_content"

        android:layout_height="wrap_content"

        android:layout_centerHorizontal="true"

        android:layout_below="@id/center_button"

        android:text="我在中间的下面"/>

</RelativeLayout>
三、其它布局
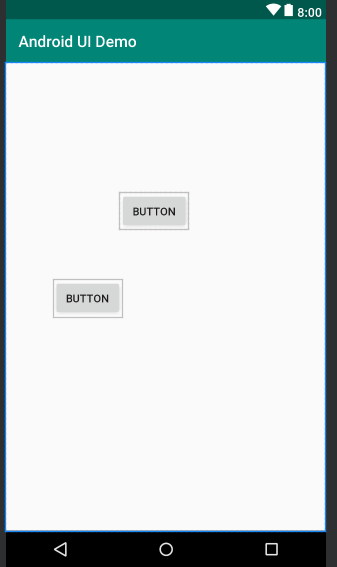
1、绝对布局AbsoluteLayout
依靠x、y控制自己的位置
<?xml version="1.0" encoding="utf-8"?>

<AbsoluteLayout

    xmlns:android="http://schemas.android.com/apk/res/android"

    android:orientation="vertical" android:layout_width="match_parent"

    android:layout_height="match_parent">

    <Button

        android:id="@+id/button5"

        android:layout_width="wrap_content"

        android:layout_height="wrap_content"

        android:layout_x="147dp"

        android:layout_y="167dp"

        android:text="Button" />

    <Button

        android:id="@+id/button6"

        android:layout_width="wrap_content"

        android:layout_height="wrap_content"

        android:layout_x="61dp"

        android:layout_y="279dp"

        android:text="Button" />

</AbsoluteLayout>
2、表格布局TableLayout
<?xml version="1.0" encoding="utf-8"?>

<TableLayout

    xmlns:android="http://schemas.android.com/apk/res/android"

    android:orientation="vertical"

    android:layout_width="match_parent"

    android:layout_height="match_parent">

    <TableRow>

        <Button

            android:layout_width="wrap_content"

            android:layout_height="wrap_content"

            android:text="1" />

        <Button

            android:layout_width="wrap_content"

            android:layout_height="wrap_content"

            android:text="2" />

        <Button

            android:layout_width="wrap_content"

            android:layout_height="wrap_content"

            android:text="3" />

    </TableRow>

    <TableRow>

        <Button

            android:layout_width="wrap_content"

            android:layout_height="wrap_content"

            android:text="4" />

        <Button

            android:layout_width="wrap_content"

            android:layout_height="wrap_content"

            android:text="5" />

        <Button

            android:layout_width="wrap_content"

            android:layout_height="wrap_content"

            android:text="6" />

    </TableRow>

    <TableRow>

        <Button

            android:layout_width="wrap_content"

            android:layout_height="wrap_content"

            android:text="7" />

        <Button

            android:layout_width="wrap_content"

            android:layout_height="wrap_content"

            android:text="8" />

        <Button

            android:layout_width="wrap_content"

            android:layout_height="wrap_content"

            android:text="9" />

    </TableRow>

</TableLayout>

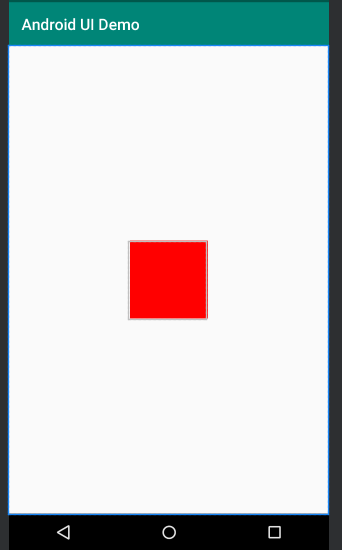
3、帧布局FrameLayout
<?xml version="1.0" encoding="utf-8"?>

<FrameLayout

    xmlns:android="http://schemas.android.com/apk/res/android"

    android:orientation="vertical"

    android:layout_width="match_parent"

    android:layout_height="match_parent">

  <View

      android:layout_width="100dp"

      android:layout_height="100dp"

      android:layout_gravity="center"

      android:background="#ff00"

      />

</FrameLayout>
四、布局中常用的单位
1、像素单位px
像素单位不建议使用,除非是手表,或者机顶盒
2、适配单位dp
推荐使用,因为可以实现适配
以160dp为基准,1dp=1px
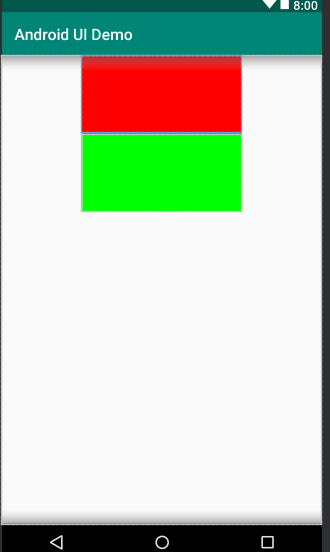
3、字体单位sp
<?xml version="1.0" encoding="utf-8"?>

<LinearLayout xmlns:android="http://schemas.android.com/apk/res/android"

    android:orientation="vertical"

    android:layout_width="match_parent"

    android:layout_height="match_parent">

    <View

        android:layout_width="540px"

        android:layout_height="100dp"

        android:layout_gravity="center"

        android:background="#ff00"

        />

    <View

        android:layout_width="205dp"

        android:layout_height="100dp"

        android:layout_gravity="center"

        android:background="#00ff00"

        />

</LinearLayout>
Android开发 UI布局的更多相关文章
- Android开发--UI之Bundle的使用
Android开发–UI之Bundle的使用 最近,把之前学过的东西大体的整理了以下,并且想把学过的心得分享给大家.我自己做了一个小小的demo,以便说明具体的应用. 这里的两个界面是通过第一个界面输 ...
- Android开发---网格布局案例
Android开发---网格布局案例 效果图: 1.MainActivity.java package com.example.android_activity; import android.ap ...
- Android开发 --代码布局
Android开发 --代码布局 在线性布局LinearLayout里加入view比较简单,因为属性比较少,布局简单 示例,加入一个TextView LinearLayout layout = (Li ...
- Android开发 ---xml布局元素
1.android:orientation="vertical/horizontal" vertical为垂直布局, horizontal为水平布局 2.android:layou ...
- Android开发-动态布局小记
android动态布局相比静态布局,动态布局不用再将xml转变了布局代码,提高了一定的效率,当然可以忽略不记.动态布局主要是比较灵活,可以很快的在代码中直接修改布局,并直接使用控件进行业务逻辑开发.但 ...
- Android开发UI之开源项目第一篇——个性化控件(View)篇
原文:http://blog.csdn.net/java886o/article/details/24355907 本文为那些不错的Android开源项目第一篇——个性化控件(View)篇,主要介绍A ...
- Android开发UI之补间动画-布局添加动画
布局添加动画 使用步骤: 1.获取到布局的id RelativeLayout ly=(RelativeLayout)findViewById(R.id.layout); 2.设置动画样式 ScaleA ...
- Android开发UI之布局文件LinearLayout
LinearLayout-线性布局,该布局中的控件按照水平方向排列或者竖直方向排列. 通过属性android:orientation=""决定的,可选值:vertical和hori ...
- Android开发UI之给ListView设置布局动画效果
1.通过JAVA代码添加,资源文件基本上不修改 XML文件,只添加了一个ListView,就不贴XML文件的代码了. java代码: public class MainActivity extends ...
随机推荐
- Python安装和配置环境变量(简明教程)
声明:借鉴Python 简明教程 安装我们在本书中提到的「Python 3」指的是 Python 版本大于或等于 Python 3.6.0. 针对Python3.6.版本:注意数据的缓存机制 # ## ...
- java学习笔记之IO编程—字节流和字符流
1. 流的基本概念 在java.io包里面File类是唯一一个与文件本身有关的程序处理类,但是File只能够操作文件本身而不能操作文件的内容,或者说在实际的开发之中IO操作的核心意义在于:输入与输出操 ...
- C# VS2017 WinForm 打包和升级
C# WinFrom打包不怎么常用,但一年总有那么一两次,每次都记不全,为了方便自己回看,于是有了本篇文章. 本例使用<C#工具类LogHelper>的解决方案作为例子,实现WinForm ...
- 关于GET和POST请求的区别,最通俗全面的回答
GET和POST是HTTP请求的两种基本方法,要说它们的区别,接触过WEB开发的人都能说出一二. 最直观的区别就是GET把参数包含在URL中,POST通过request body传递参数. 你可能自己 ...
- 神经网络反向传播算法&&卷积神经网络
听一遍课程之后,我并不太明白这个算法的奇妙之处?? 为啥? 神经网络反向传播算法 神经网络的训练依靠反向传播算法,最开始输入层输入特征向量,网络层计算获得输出,输出层发现输出和正确的类号不一样,这时就 ...
- ubuntu---禁止更新内核
系统内核 4.15.0-29 更新成了 4.15.0-88,降级内核并禁止更新内核 查看已安装内核:dpkg --get-selections |grep linux-image 查看正在使用的内核 ...
- python django项目的搭建及初始配置
1.创建项目并创建应用 django-admin startproject my_project # 创建项目python manage.py startapp my_app # 创建应用 1.1 项 ...
- git三剑客笔记
看了git三剑客视频总结的笔记,只给自己参考. 常用命令 查看分支:git branch 创建分支:git branch <name> 切换分支:git checkout <name ...
- C# 读取Excel到DataTable两种方式对比
方式一 OLEDB读取 数据库引擎 优点:读取速度快,依据sheet排序读取 缺点:对于Excel版本依赖强,无法读取指定sheet 错误提示:本地计算机未指定 Microsoft.ACE.OLEDB ...
- java - GC垃圾收集器详解(二)
CMS收集器 CMS收集器(ConcurrentMarkSweep:并发标记清除)是一种以获取最短回收停顿时间为目标的收集器. 适合应用在互联网站或者B/S系统的服务器上,这类应用尤其重视服务器的响应 ...