【OpenGL ES】纹理贴图
1 前言
纹理贴图是指:将图片贴在模型的表面。
纹理贴图的本质是:将图片划分为一系列三角形,使得图片顶点序列与模型顶点序列中的顶点一一对应,对于模型中任意三角形内部的坐标和图片中对应三角形内部的坐标,可以通过插值,建立一一对应关系,模型中任意位置的颜色由其对应的图片位置的颜色填充。
本文完整代码资源见→【OpenGL ES】纹理贴图
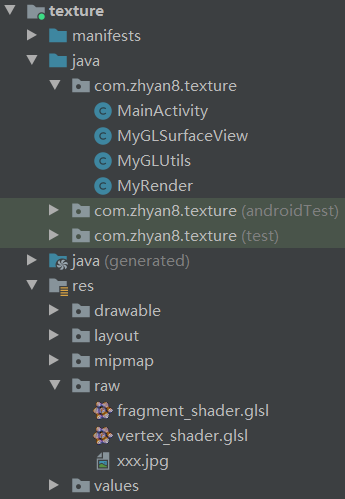
项目目录如下:
2 案例
MainActivity.java
package com.zhyan8.texture;

import android.opengl.GLSurfaceView;

import android.os.Bundle;

import androidx.appcompat.app.AppCompatActivity;

public class MainActivity extends AppCompatActivity {

    private GLSurfaceView mGlSurfaceView;

    @Override

    protected void onCreate(Bundle savedInstanceState) {

        super.onCreate(savedInstanceState);

        mGlSurfaceView = new MyGLSurfaceView(this);

        setContentView(mGlSurfaceView);

        mGlSurfaceView.setRenderer(new MyRender(this));

    }

    @Override

    protected void onResume() {

        super.onResume();

        mGlSurfaceView.onResume();

    }

    @Override

    protected void onPause() {

        super.onPause();

        mGlSurfaceView.onPause();

    }

}
MyGLSurfaceView.java
package com.zhyan8.texture;

import android.content.Context;

import android.opengl.GLSurfaceView;

import android.util.AttributeSet;

public class MyGLSurfaceView extends GLSurfaceView {

    public MyGLSurfaceView(Context context) {

        super(context);

        setEGLContextClientVersion(3);

    }

    public MyGLSurfaceView(Context context, AttributeSet attrs) {

        super(context, attrs);

        setEGLContextClientVersion(3);

    }

}
MyRender.java
package com.zhyan8.texture;

import android.content.Context;

import android.opengl.GLES30;

import android.opengl.GLSurfaceView;

import java.nio.FloatBuffer;

import javax.microedition.khronos.egl.EGLConfig;

import javax.microedition.khronos.opengles.GL10;

public class MyRender implements GLSurfaceView.Renderer {

    private FloatBuffer vertexBuffer;

    private FloatBuffer textureBuffer;

    private MyGLUtils mGLUtils;

    private float[] mvpMatrix = new float[16];

    private int mvpMatrixLocation;

    private int mTextureId;

    public MyRender(Context context) {

        mGLUtils = new MyGLUtils(context);

        getFloatBuffer();

    }

    @Override

    public void onSurfaceCreated(GL10 gl, EGLConfig eglConfig) {

        //设置背景颜色

        GLES30.glClearColor(0.1f, 0.2f, 0.3f, 0.4f);

        //编译着色器

        final int vertexShaderId = mGLUtils.compileShader(GLES30.GL_VERTEX_SHADER, R.raw.vertex_shader);

        final int fragmentShaderId = mGLUtils.compileShader(GLES30.GL_FRAGMENT_SHADER, R.raw.fragment_shader);

        //链接程序片段

        int programId = mGLUtils.linkProgram(vertexShaderId, fragmentShaderId);

        GLES30.glUseProgram(programId);

        mvpMatrixLocation = GLES30.glGetUniformLocation(programId, "mvpMatrix");

        mTextureId = mGLUtils.loadTexture(R.raw.xxx);

    }

    @Override

    public void onSurfaceChanged(GL10 gl, int width, int height) {

        //设置视图窗口

        GLES30.glViewport(0, 0, width, height);

        mGLUtils.transform(width, height, mvpMatrix);

    }

    @Override

    public void onDrawFrame(GL10 gl) {

        //将颜色缓冲区设置为预设的颜色

        GLES30.glClear(GLES30.GL_COLOR_BUFFER_BIT);

        GLES30.glUniformMatrix4fv(mvpMatrixLocation, 1, false, mvpMatrix, 0);

        //启用顶点的数组句柄

        GLES30.glEnableVertexAttribArray(0);

        GLES30.glEnableVertexAttribArray(1);

        //准备顶点坐标和纹理坐标

        GLES30.glVertexAttribPointer(0, 3, GLES30.GL_FLOAT, false, 0, vertexBuffer);

        GLES30.glVertexAttribPointer(1, 2, GLES30.GL_FLOAT, false, 0, textureBuffer);

        //激活纹理

        GLES30.glActiveTexture(GLES30.GL_TEXTURE);

        //绑定纹理

        GLES30.glBindTexture(GLES30.GL_TEXTURE_2D, mTextureId);

        //绘制贴图

        GLES30.glDrawArrays(GLES30.GL_TRIANGLE_FAN, 0, 4);

        //禁止顶点数组句柄

        GLES30.glDisableVertexAttribArray(0);

        GLES30.glDisableVertexAttribArray(1);

    }

    private void getFloatBuffer() {

        float[] vertex = new float[] {

                1f, 1f, 0f,     //V0

                -1f, 1f, 0f,    //V1

                -1f, -1f, 0f,   //V2

                1f, -1f, 0f     //V3

        };

        float[] texture = {

                1f, 0f,     //V0

                0f, 0f,     //V1

                0f, 1.0f,   //V2

                1f, 1.0f    //V3

        };

        vertexBuffer = mGLUtils.getFloatBuffer(vertex);

        textureBuffer = mGLUtils.getFloatBuffer(texture);

    }

}
MyGLUtils.java
package com.zhyan8.texture;

import android.content.Context;

import android.graphics.Bitmap;

import android.graphics.BitmapFactory;

import android.opengl.GLES30;

import android.opengl.GLUtils;

import android.opengl.Matrix;

import java.io.BufferedReader;

import java.io.InputStream;

import java.io.InputStreamReader;

import java.nio.ByteBuffer;

import java.nio.ByteOrder;

import java.nio.FloatBuffer;

public class MyGLUtils {

    private Context mContext;

    private Bitmap mBitmap;

    public MyGLUtils(Context context) {

        mContext = context;

    }

    public FloatBuffer getFloatBuffer(float[] floatArr) {

        FloatBuffer fb = ByteBuffer.allocateDirect(floatArr.length * Float.BYTES)

            .order(ByteOrder.nativeOrder())

            .asFloatBuffer();

        fb.put(floatArr);

        fb.position(0);

        return fb;

    }

    //通过代码片段编译着色器

    public int compileShader(int type, String shaderCode){

        int shader = GLES30.glCreateShader(type);

        GLES30.glShaderSource(shader, shaderCode);

        GLES30.glCompileShader(shader);

        return shader;

    }

    //通过外部资源编译着色器

    public int compileShader(int type, int shaderId){

        String shaderCode = readShaderFromResource(shaderId);

        return compileShader(type, shaderCode);

    }

    //链接到着色器

    public int linkProgram(int vertexShaderId, int fragmentShaderId) {

        final int programId = GLES30.glCreateProgram();

        //将顶点着色器加入到程序

        GLES30.glAttachShader(programId, vertexShaderId);

        //将片元着色器加入到程序

        GLES30.glAttachShader(programId, fragmentShaderId);

        //链接着色器程序

        GLES30.glLinkProgram(programId);

        return programId;

    }

    //从shader文件读出字符串

    private String readShaderFromResource(int shaderId) {

        InputStream is = mContext.getResources().openRawResource(shaderId);

        BufferedReader br = new BufferedReader(new InputStreamReader(is));

        String line;

        StringBuilder sb = new StringBuilder();

        try {

            while ((line = br.readLine()) != null) {

                sb.append(line);

                sb.append("\n");

            }

            br.close();

        } catch (Exception e) {

            e.printStackTrace();

        }

        return sb.toString();

    }

    //加载纹理贴图

    public int loadTexture(int resourceId) {

        BitmapFactory.Options options = new BitmapFactory.Options();

        options.inScaled = false;

        mBitmap = BitmapFactory.decodeResource(mContext.getResources(), resourceId, options);

        final int[] textureIds = new int[1];

        // 生成纹理id

        GLES30.glGenTextures(1, textureIds, 0);

        // 绑定纹理到OpenGL

        GLES30.glBindTexture(GLES30.GL_TEXTURE_2D, textureIds[0]);

        GLES30.glTexParameteri(GLES30.GL_TEXTURE_2D, GLES30.GL_TEXTURE_MIN_FILTER, GLES30.GL_LINEAR_MIPMAP_LINEAR);

        GLES30.glTexParameteri(GLES30.GL_TEXTURE_2D, GLES30.GL_TEXTURE_MAG_FILTER, GLES30.GL_LINEAR);

        // 加载bitmap到纹理中

        GLUtils.texImage2D(GLES30.GL_TEXTURE_2D, 0, mBitmap, 0);

        // 生成MIP贴图

        GLES30.glGenerateMipmap(GLES30.GL_TEXTURE_2D);

        // 取消绑定纹理

        GLES30.glBindTexture(GLES30.GL_TEXTURE_2D, 0);

        return textureIds[0];

    }

    //调整图片宽高适配屏幕尺寸

    public void transform(int width, int height, float[] matrix) {

        int mapWidth = mBitmap.getWidth();

        int mapHeight = mBitmap.getHeight();

        float mapRatio = mapWidth / (float)mapHeight;

        float ratio = width / (float)height;

        float w = 1.0f;

        float h = 1.0f;

        if (mapRatio > ratio) { //宽度最大,高度适配

            h = mapRatio / ratio;

        } else { //高度最大,宽度适配

            w = ratio / mapRatio;

        }

        Matrix.orthoM(matrix, 0, -w, w, -h, h,-1, 1);

    }

}
vertex_shader.glsl
#version 300 es

layout (location = 0) in vec4 aPosition;

layout (location = 1) in vec2 aTextureCoord;

uniform mat4 mvpMatrix;

out vec2 vTexCoord;

void main() {

     gl_Position  = mvpMatrix * aPosition;

     vTexCoord = aTextureCoord;

}

//attribute vec4 aPosition;

//attribute vec2 aTextureCoord;

//uniform mat4 mvpMatrix;

//varying vec2 vTexCoord;

//void main() {

//     gl_Position  = mvpMatrix * aPosition;

//     vTexCoord = aTextureCoord;

//}
顶点着色器的作用:进行矩阵变换位置、根据光照公式计算顶点颜⾊、⽣成 / 变换纹理坐标,并且把位置和纹理坐标发送到片元着色器。
顶点着色器中,如果没有指定默认精度,则 int 和 float 的默认精度都为 highp。
fragment_shader.glsl
#version 300 es

precision mediump float;

uniform sampler2D uTextureUnit;

in vec2 vTexCoord;

out vec4 fragColor;

void main() {

     fragColor = texture(uTextureUnit, vTexCoord);

}

//precision mediump float;

//uniform sampler2D uTextureUnit;

//varying vec2 vTexCoord;

//void main() {

//     gl_FragColor = texture2D(uTextureUnit, vTexCoord);

//}
片元着色器的作用:处理经光栅化阶段生成的每个片元,计算每个像素的颜色和透明度。
在片元着色器中,浮点值没有默认的精度值,每个着色器必须声明一个默认的 float 精度。
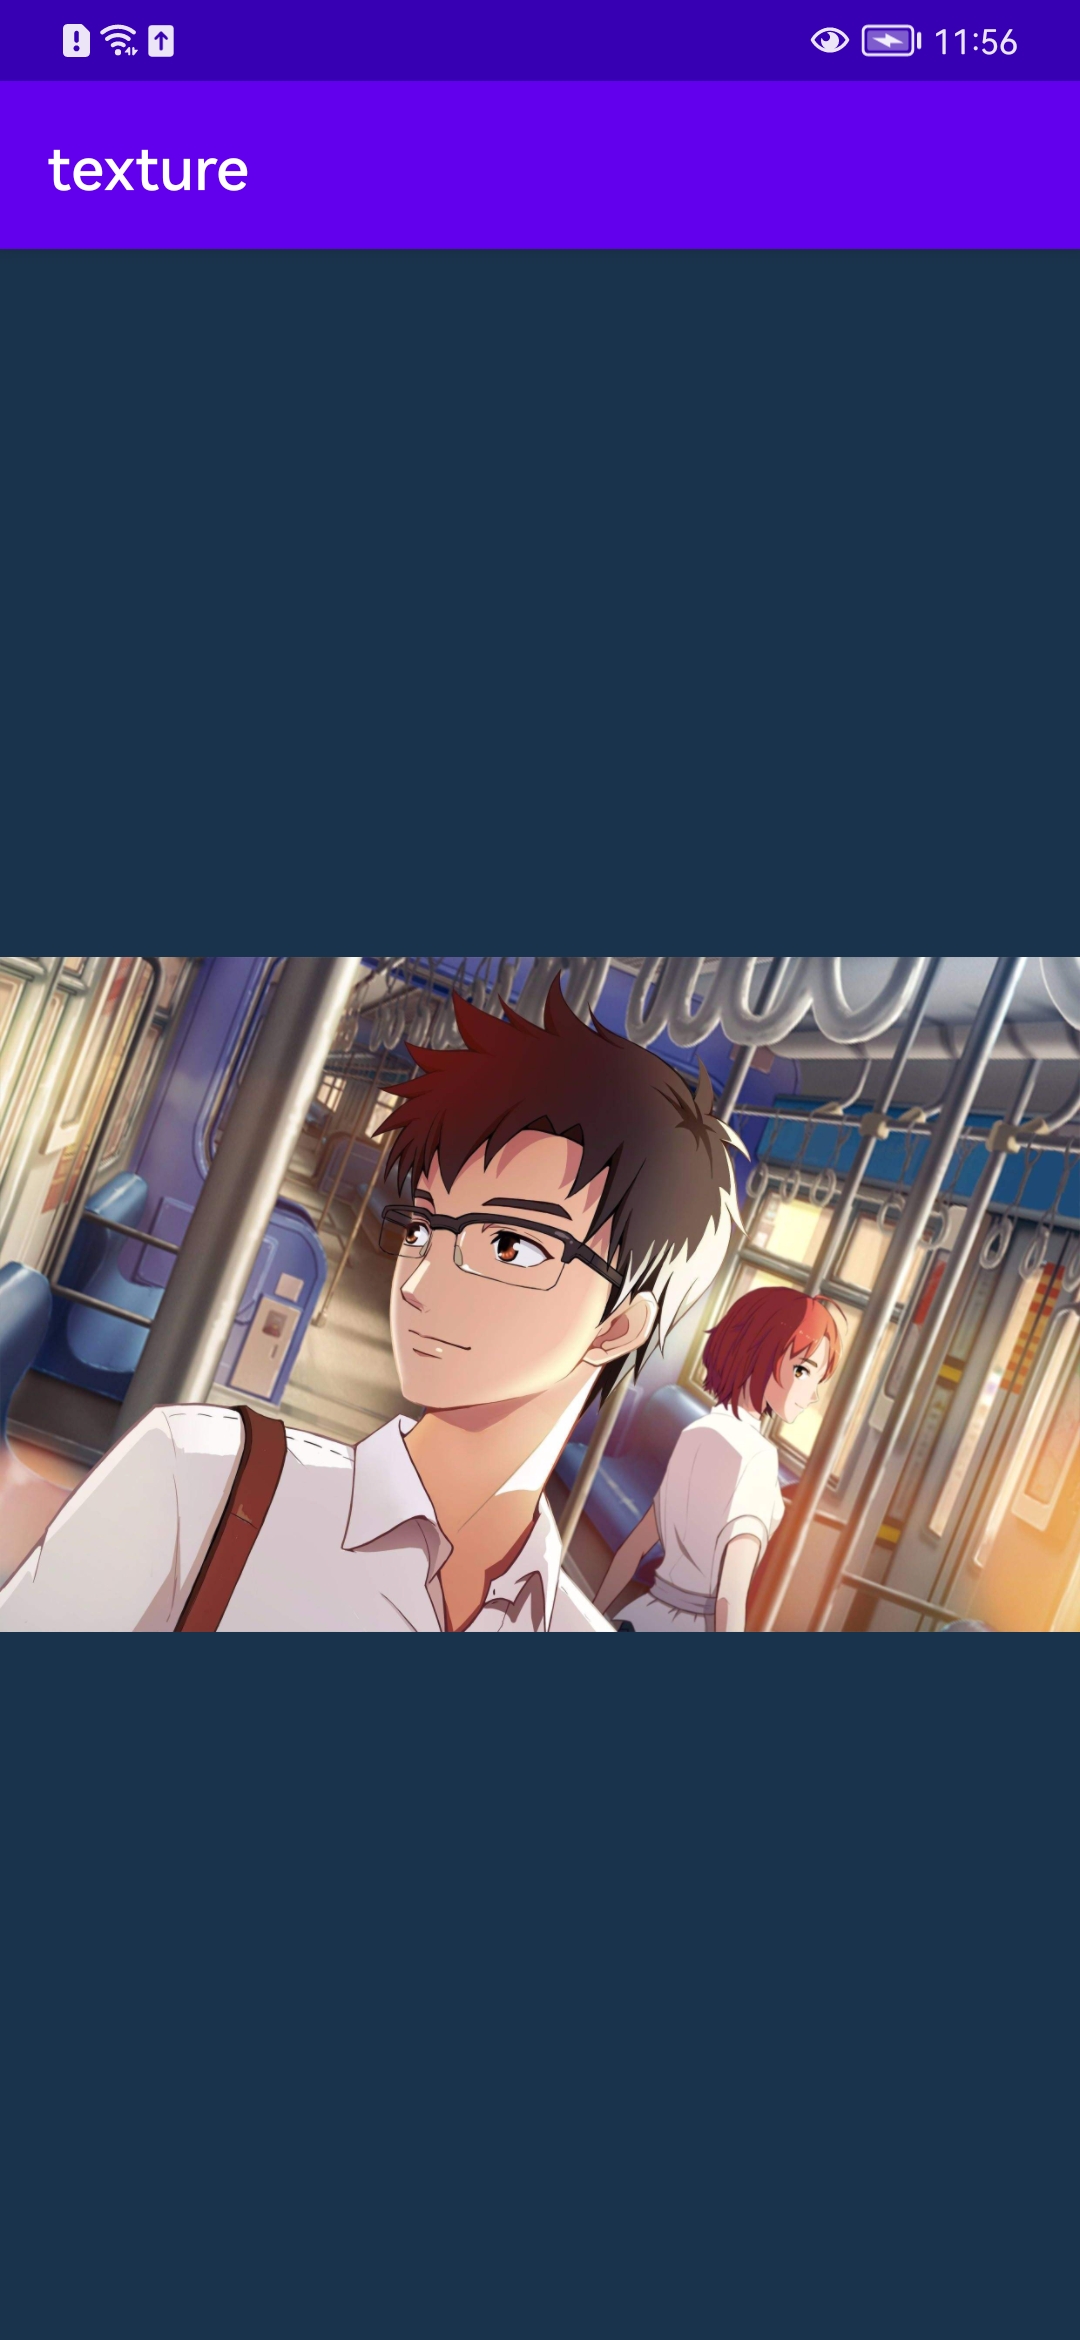
运行结果:
声明:本文转自【OpenGL ES】纹理贴图
【OpenGL ES】纹理贴图的更多相关文章
- Android OpenGL ES 开发(九): OpenGL ES 纹理贴图
一.概念 一般说来,纹理是表示物体表面的一幅或几幅二维图形,也称纹理贴图(texture).当把纹理按照特定的方式映射到物体表面上的时候,能使物体看上去更加真实.当前流行的图形系统中,纹理绘制已经成为 ...
- android ndk调用OpenGL 实现纹理贴图Texture
android ndk调用OpenGL 实现纹理贴图Texture 时间 2014-06-25 05:24:39 CSDN博客 原文 http://blog.csdn.net/chrisfxs/a ...
- OpenGL ES: 纹理采样 texture sample
Sampler (GLSL) Sampler通常是在Fragment shader(片元着色器)内定义的,这是一个uniform类型的变量,即处理不同的片元时这个变量是一致不变的.一个sampler和 ...
- 一文详解 OpenGL ES 纹理颜色混合
在OpenGL中绘制的时候,有时候想使新画的颜色和已经有的颜色按照一定的方式进行混合.例如:想使物体拥有半透明的效果,或者绘制叠加光亮的效果,这时候就需要用到OpenGLES混合. 如上图所示,为石头 ...
- opengl学习笔记(四):openCV读入图片,openGL实现纹理贴图
在opengl中实现三维物体的纹理贴图的第一步就是要读入图片,然后指定该图片为纹理图片. 首先利用opencv的cvLoadImage函数把图像读入到内存中 img = cvLoadImage(); ...
- OpenGL之纹理贴图(Texture)
学习自: https://learnopengl-cn.github.io/01%20Getting%20started/06%20Textures/ 先上一波效果图: 实际上就是:画了一个矩形,然后 ...
- OpenGL(二十二) gluBuild2DMipmaps 加载Mip纹理贴图
当纹理被用于渲染一个面积比它本身小很多的对象时,会由于纹理图像的降采样率不足而导致混叠现象,主要的表现特征是纹理图像的闪烁,出现纹理躁动.特别是在场景远近移动变换时,这种闪烁情况更为明显,严重可能会影 ...
- TextureView+SurfaceTexture+OpenGL ES来播放视频(三)
引自:http://www.jianshu.com/p/291ff6ddc164 做好的Demo截图 opengl-video 前言 讲了这么多,可能有人要问了,播放视频用个android封装的Vid ...
- Android OpenGL ES 开发
OpenGL(Open Graphics Library) 是开放图形库,是一个跨平台的图形 API.OpenGL ES(OpenGL for Embedded System)是专为移动端提供的一个子 ...
- OpenGL ES着色器语言之变量和数据类型(一)(官方文档第四章)和varying,uniform,attribute修饰范围
OpenGL ES着色器语言之变量和数据类型(一)(官方文档第四章) 所有变量和函数在使用前必须声明.变量和函数名是标识符. 没有默认类型,所有变量和函数声明必须包含一个声明类型以及可选的修饰符. ...
随机推荐
- CoreDNS -- DNS服务与服务发现
CoreDNS -- DNS服务与服务发现 DNS服务器 手册:https://coredns.io/manual/toc/ Github:https://github.com/coredns/cor ...
- [转帖]Oracle中有大量的sniped会话
https://www.cnblogs.com/abclife/p/15699959.html 1 2 3 4 5 6 7 SQL> select status ,count(*) from g ...
- 一个监控数据的思考-sockets_used
一个监控数据的思考-sockets_used 背景 最近跟踪一个项目问题. Grafana的监控了里面有一个tcp的使用监控 CurrEstab 的数据量是: 700-2000 左右 但是同时有一个非 ...
- [转帖]Linux运维常用150个命令
Linux运维常用150个命令 转载自:www.cnblogs.com/bananaaa/p/7774467.html 命令 功能说明 线上查询及帮助命令(2个) man 查看命令帮助,命令的词典,更 ...
- mysql8 initialize 命令 初学版 lower_case_table_names
1. 今天开发找我跟我说 我安装的mysql 不对. 比较蛋疼. 需要修改一个参数 但是数据库已经初始进去了 重装起来比较麻烦. 硬着头皮搞. 2. 参数的名字为: lower_case_tabl ...
- canvas实现添加水印
canvas添加水印思路 1.在画布上写上水印的名称(时间加上用户名) 2.canvas转化为base64,作为body的背景色 3.优化倾斜度和透明度 4.如果用户去除body的style水印消失 ...
- 【分享代码片段】terraform中,如何从刚刚创建的 deployment 中获得所有容器的名字和 ip
作者:张富春(ahfuzhang),转载时请注明作者和引用链接,谢谢! cnblogs博客 zhihu Github 公众号:一本正经的瞎扯 不好意思,刚刚才开始用 terraform,或许是更好的办 ...
- linux服务器cup100%问题排查
一.出现问题在发现公司门禁服务无法开门的第一时间,去线上服务器上查看了一下进程的运行情况,具体运行如下: 第一次在查看的时候发现并没有我需要的服务entranceguard进程(图片是后续截图的) 二 ...
- python2和python3的版本历史及入门书籍
python版本历史 我们端游项目使用是python2.7版本 32位 python2 2.7.18 last version on 2020.4.20 2.7 first version on 20 ...
- 9.2 Windows驱动开发:内核解析PE结构导出表
在笔者的上一篇文章<内核特征码扫描PE代码段>中LyShark带大家通过封装好的LySharkToolsUtilKernelBase函数实现了动态获取内核模块基址,并通过ntimage.h ...