Windows下编程--模拟时钟的实现
windows下编程--模拟时钟的实现:
主要可以分为几个步骤:
(1) 编写按键事件处理(启动和停止时钟)
(2) 编写时钟事件处理,调用显示时钟函数
(3) 编写显示时钟函数,要调用显示数字时钟函数、画出钟面函数和画出指针函数
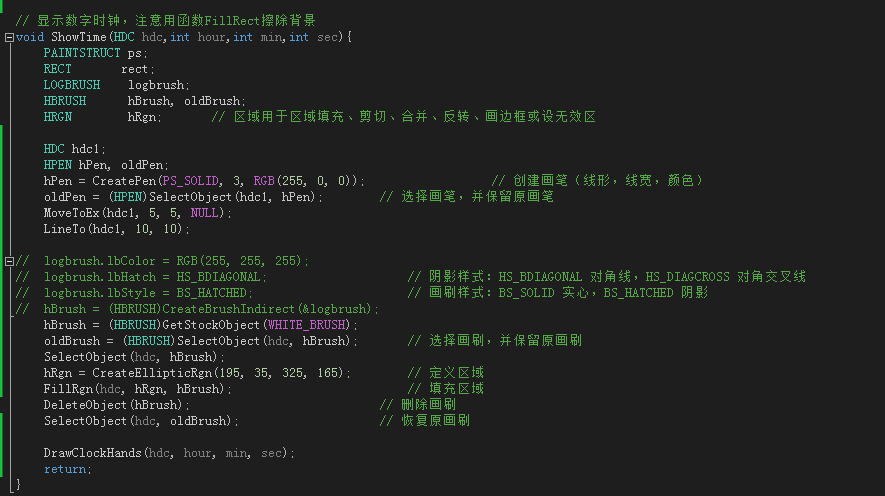
(4) 编写显示数字时钟函数。注意要自己用矩形填充(FillRect)擦除背景。
(5) 编写画出钟面函数
(6) 编写画出指针函数
(7) 增加WM_PAINT消息处理:调用显示时钟函数,防止在停止时钟后从窗口最小化恢复会不显示内容。
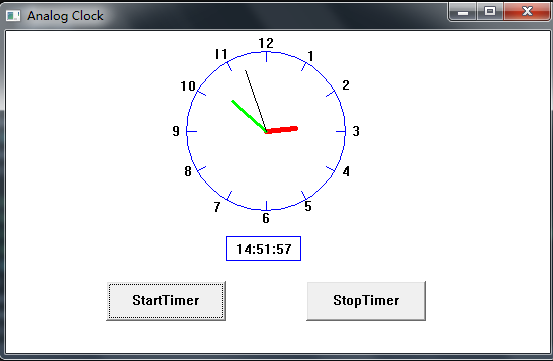
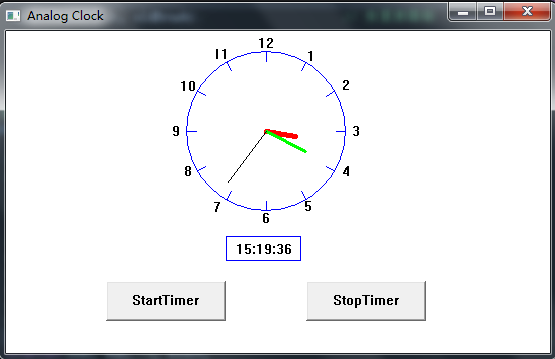
最后结果类似于这种形式---一个模拟时钟,数字时钟+画面时钟

每一步的说明:
(1)编写按键事件处理(启动和停止时钟)

(2) 编写时钟事件处理,调用显示时钟函数

(3) 编写显示时钟函数,要调用显示数字时钟函数、画出钟面函数和画出指针函数

(4) 编写显示数字时钟函数。注意要自己用矩形填充(FillRect)擦除背景。
(5) 编写画出钟面函数
(6) 编写画出指针函数(注意好时针分针秒针的角度关系计算方法就行了)

(7) 增加WM_PAINT消息处理:调用显示时钟函数,防止在停止时钟后从窗口最小化恢复会不显示内容。

基本上只是考察了基本的windows编程,掌握好时钟事件和按钮的编程。
最后附上长长的代码...
 /*------------------------------------------------------------

    HELLOWIN.C -- Displays "Hello, Windows 98!" in client area

                  (c) Charles Petzold, 1998

   ------------------------------------------------------------*/

 #include <windows.h>

 #include <stdio.h>

 #include <math.h>

 #define PI        3.14159265358979323846

 #define TIMER_SEC   1

 #define TIMER_MIN   2

 #define BUTTON1     3

 #define BUTTON2     4

 LRESULT CALLBACK WndProc (HWND, UINT, WPARAM, LPARAM) ;

 int WINAPI WinMain (HINSTANCE hInstance, HINSTANCE hPrevInstance,

                     PSTR szCmdLine, int iCmdShow)

 {

      static TCHAR szAppName[] = TEXT ("HelloWin") ;

      HWND         hwnd,hwndButton1,hwndButton2;

      MSG          msg ;

      WNDCLASS     wndclass ;

      wndclass.style         = CS_HREDRAW | CS_VREDRAW ;

      wndclass.lpfnWndProc   = WndProc ;

      wndclass.cbClsExtra    =  ;

      wndclass.cbWndExtra    =  ;

      wndclass.hInstance     = hInstance ;

      wndclass.hIcon         = LoadIcon (NULL, IDI_APPLICATION) ;

      wndclass.hCursor       = LoadCursor (NULL, IDC_ARROW) ;

      wndclass.hbrBackground = (HBRUSH) GetStockObject (WHITE_BRUSH) ;

      wndclass.lpszMenuName  = NULL ;

      wndclass.lpszClassName = szAppName ;

      if (!RegisterClass (&wndclass))

      {

           MessageBox (NULL, TEXT ("This program requires Windows NT!"),

                       szAppName, MB_ICONERROR) ;

           return  ;

      }

      hwnd = CreateWindow (szAppName,                  // window class name

                           TEXT ("Analog Clock"), // window caption

                           WS_OVERLAPPEDWINDOW,        // window style

                           CW_USEDEFAULT,              // initial x position

                           CW_USEDEFAULT,              // initial y position

                           ,              // initial x size

                           ,              // initial y size

                           NULL,                       // parent window handle

                           NULL,                       // window menu handle

                           hInstance,                  // program instance handle

                           NULL) ;                     // creation parameters

      ShowWindow (hwnd, iCmdShow) ;

      UpdateWindow (hwnd) ;

      hwndButton1 = CreateWindow(TEXT("button"),                       // 窗口类名(系统内部定义了该窗口类)

          TEXT("StartTimer"),                               // 标题

          WS_CHILD | WS_VISIBLE | BS_PUSHBUTTON,        // 样式

          , ,                                      // 左上角位置x,y

          , ,                                         // 宽度,高度

          hwnd,                                        // 父窗口句柄

          (HMENU)BUTTON1,                                // 控件ID

          hInstance,                                     // 实例句柄

          NULL);                                        // 自定义参数

      hwndButton2 = CreateWindow(TEXT("button"),                       // 窗口类名

          TEXT("StopTimer"),                               // 标题

          WS_CHILD | WS_VISIBLE | BS_PUSHBUTTON,        // 样式

          , ,                                      // 左上角位置x,y

          , ,                                         // 宽度,高度

          hwnd,                                        // 父窗口句柄

          (HMENU)BUTTON2,                                // 控件ID

          hInstance,                                     // 实例句柄

          NULL);

      while (GetMessage (&msg, NULL, , ))

      {

           TranslateMessage (&msg) ;

           DispatchMessage (&msg) ;

      }

      return msg.wParam ;

 }

 // 画出钟面(不包括指针)

 void DrawClockFace(HDC hdc){

 //    PAINTSTRUCT ps;

     RECT        rect;

     HPEN hPen;

     HPEN oldPen;

     hPen = CreatePen(PS_SOLID, , RGB(, , ));                    // 创建画笔(线形,线宽,颜色)

     oldPen = (HPEN)SelectObject(hdc, hPen);        // 选择画笔,并保留原画笔

     Ellipse(hdc, , , , );   // 时钟--半径 80  作出时钟原始图像

     Rectangle(hdc, , , , );

     double xStart1, yStart1, xEnd1, yEnd1;

     for (int i = ; i <= ; i++){

         if (i <= ){

             xEnd1 =  +  * sin(i* PI / );

             xStart1 =  + ( - ) * sin(i* PI / );

             yEnd1 =  -  * cos(i* PI / );

             yStart1 =  - ( - ) * cos(i* PI / );

         }

         if (i >  && i <= ){

             xEnd1 =  +  * sin(i* PI / );

             xStart1 =  + ( - ) * sin(i* PI / );

             yStart1 =  + ( - ) * cos(PI - i* PI / );

             yEnd1 =  +  * cos(PI - i* PI / );

         }

         if (i >  && i <= )

         {

             xEnd1 =  -  * cos(1.5*PI - i* PI / );

             xStart1 =  - ( - ) * cos(1.5*PI - i* PI / );

             yStart1 =  + ( - ) * sin(1.5*PI - i* PI / );

             yEnd1 =  +  * sin(1.5*PI - i* PI / );

         }

         if (i > ){

             xEnd1 =  -  * sin( * PI - i* PI / );

             xStart1 =  - ( - ) * sin( * PI - i* PI / );

             yEnd1 =  -  * cos( * PI - i* PI / );

             yStart1 =  - ( - ) * cos( * PI - i* PI / );

         }

         MoveToEx(hdc, xStart1, yStart1, NULL);

         LineTo(hdc, xEnd1, yEnd1);

     }

     DeleteObject(hPen);

     // 钟面相应数字 --- 12

     rect.left = ;

     rect.top = ;

     rect.right = ;

     rect.bottom = ;

     DrawText(hdc, TEXT(""), -, &rect, DT_SINGLELINE | DT_CENTER | DT_VCENTER);

     // 钟面相应数字 --- 11

     rect.left = ;

     rect.top = ;

     rect.right = ;

     rect.bottom = ;

     DrawText(hdc, TEXT(""), -, &rect, DT_SINGLELINE | DT_CENTER | DT_VCENTER);

     // 钟面相应数字 --- 10

     rect.left = ;

     rect.top = ;

     rect.right = ;

     rect.bottom = ;

     DrawText(hdc, TEXT(""), -, &rect, DT_SINGLELINE | DT_CENTER | DT_VCENTER);

     // 钟面相应数字 --- 9

     rect.left = ;

     rect.top = ;

     rect.right = ;

     rect.bottom = ;

     DrawText(hdc, TEXT(""), -, &rect, DT_SINGLELINE | DT_CENTER | DT_VCENTER);

     // 钟面相应数字 --- 8

     rect.left = ;

     rect.top = ;

     rect.right = ;

     rect.bottom = ;

     DrawText(hdc, TEXT(""), -, &rect, DT_SINGLELINE | DT_CENTER | DT_VCENTER);

     // 钟面相应数字 --- 7

     rect.left = ;

     rect.top = ;

     rect.right = ;

     rect.bottom = ;

     DrawText(hdc, TEXT(""), -, &rect, DT_SINGLELINE | DT_CENTER | DT_VCENTER);

     // 钟面相应数字 --- 6

     rect.left = ;

     rect.top = ;

     rect.right = ;

     rect.bottom = ;

     DrawText(hdc, TEXT(""), -, &rect, DT_SINGLELINE | DT_CENTER | DT_VCENTER);

     // 钟面相应数字 --- 5

     rect.left = ;

     rect.top = ;

     rect.right = ;

     rect.bottom = ;

     DrawText(hdc, TEXT(""), -, &rect, DT_SINGLELINE | DT_CENTER | DT_VCENTER);

     // 钟面相应数字 --- 4

     rect.left = ;

     rect.top = ;

     rect.right = ;

     rect.bottom = ;

     DrawText(hdc, TEXT(""), -, &rect, DT_SINGLELINE | DT_CENTER | DT_VCENTER);

     // 钟面相应数字 --- 3

     rect.left = ;

     rect.top = ;

     rect.right = ;

     rect.bottom = ;

     DrawText(hdc, TEXT(""), -, &rect, DT_SINGLELINE | DT_CENTER | DT_VCENTER);

     // 钟面相应数字 --- 2

     rect.left = ;

     rect.top = ;

     rect.right = ;

     rect.bottom = ;

     DrawText(hdc, TEXT(""), -, &rect, DT_SINGLELINE | DT_CENTER | DT_VCENTER);

     // 钟面相应数字 --- 1

     rect.left = ;

     rect.top = ;

     rect.right = ;

     rect.bottom = ;

     DrawText(hdc, TEXT(""), -, &rect, DT_SINGLELINE | DT_CENTER | DT_VCENTER);

     return;

 }

 // 画出时钟指针

 void DrawClockHands(HDC hdc,int hour,int min,int sec){

     PAINTSTRUCT ps;

     RECT        rect;

     HPEN hPen;

     HPEN oldPen;

     double xStart1, yStart1, xEnd1, yEnd1;

     hour = (hour >=  ? hour -  : hour);

     hPen = CreatePen(PS_SOLID, , RGB(, , ));                    // 创建画笔(线形,线宽,颜色)

     oldPen = (HPEN)SelectObject(hdc, hPen);        // 选择画笔,并保留原画笔

                                            // 显示时针

     xStart1 = ;

     yStart1 = ;

     xEnd1 =  + ( - ) * sin(hour*PI /  + ((min *  + sec) * PI / (*)));

     yEnd1 =  - ( - ) * cos(hour*PI /  + ((min *  + sec) * PI / (*)));

     MoveToEx(hdc, xStart1, yStart1, NULL);

     LineTo(hdc, xEnd1, yEnd1);

     DeleteObject(hPen);

     hPen = CreatePen(PS_SOLID, , RGB(, , ));                    // 创建画笔(线形,线宽,颜色)

     oldPen = (HPEN)SelectObject(hdc, hPen);        // 选择画笔,并保留原画笔

                                          // 显示分针

     xStart1 = ;

     yStart1 = ;

     xEnd1 =  + ( - ) * sin(min*PI /  + (sec * PI / ));

     yEnd1 =  - ( - ) * cos(min*PI /  + (sec * PI / ));

     MoveToEx(hdc, xStart1, yStart1, NULL);

     LineTo(hdc, xEnd1, yEnd1);

     DeleteObject(hPen);

     hPen = CreatePen(PS_SOLID, , RGB(, , ));                    // 创建画笔(线形,线宽,颜色)

     oldPen = (HPEN)SelectObject(hdc, hPen);        // 选择画笔,并保留原画笔

                                           // 显示秒针

     xStart1 = ;

     yStart1 = ;

     xEnd1 =  + ( - ) * sin(sec * PI / );

     yEnd1 =  - ( - ) * cos(sec * PI / );

     MoveToEx(hdc, xStart1, yStart1, NULL);

     LineTo(hdc, xEnd1, yEnd1);

     DeleteObject(hPen);

     return;

 }

 /*////////////////////////////////////////////////////

 void ShowTime1(HDC hdc){          // use for debug

     HPEN hPen, oldPen;

     hPen = CreatePen(PS_SOLID, 3, RGB(255, 0, 0));    // 创建画笔(线形,线宽,颜色)

     oldPen = (HPEN)SelectObject(hdc, hPen);        // 选择画笔,并保留原画笔

     MoveToEx(hdc, 5, 5, NULL);

     LineTo(hdc, 10, 10);

 }

 *////////////////////////////////////////////////////

 // 显示数字时钟,注意用函数FillRect擦除背景

 void ShowTime(HDC hdc,int hour,int min,int sec){

     PAINTSTRUCT ps;

     RECT       rect;

     LOGBRUSH    logbrush;

     HBRUSH        hBrush, oldBrush;

     HRGN        hRgn;        // 区域用于区域填充、剪切、合并、反转、画边框或设无效区

     HDC hdc1;

     HPEN hPen, oldPen;

     hPen = CreatePen(PS_SOLID, , RGB(, , ));                    // 创建画笔(线形,线宽,颜色)

     oldPen = (HPEN)SelectObject(hdc1, hPen);        // 选择画笔,并保留原画笔

     MoveToEx(hdc1, , , NULL);

     LineTo(hdc1, , );

 //    logbrush.lbColor = RGB(255, 255, 255);

 //    logbrush.lbHatch = HS_BDIAGONAL;                    // 阴影样式:HS_BDIAGONAL 对角线,HS_DIAGCROSS 对角交叉线

 //    logbrush.lbStyle = BS_HATCHED;                        // 画刷样式:BS_SOLID 实心,BS_HATCHED 阴影

 //    hBrush = (HBRUSH)CreateBrushIndirect(&logbrush);

     hBrush = (HBRUSH)GetStockObject(WHITE_BRUSH);

     oldBrush = (HBRUSH)SelectObject(hdc, hBrush);        // 选择画刷,并保留原画刷

     SelectObject(hdc, hBrush);

     hRgn = CreateEllipticRgn(, , , );        // 定义区域

     FillRgn(hdc, hRgn, hBrush);                            // 填充区域

     DeleteObject(hBrush);                            // 删除画刷

     SelectObject(hdc, oldBrush);                    // 恢复原画刷

     DrawClockHands(hdc, hour, min, sec);

     return;

 }

 // 显示时钟函数,

 void ShowClock(HWND hwnd){

     int x,y,r;

     HDC hdc = GetDC(hwnd);

     RECT rect;

     TCHAR buf[];

     SYSTEMTIME     st;

     //GetClientRect(hwnd,&rect);

     rect.left = ;

     rect.top = ;

     rect.right = rect.left + ;

     rect.bottom = rect.top + ;

     GetLocalTime(&st);

     wsprintf(buf, TEXT("%d:%d:%d\0"), st.wHour, st.wMinute, st.wSecond);

     DrawText(hdc, buf, -, &rect,

         DT_SINGLELINE | DT_LEFT | DT_TOP);

     ReleaseDC(hwnd, hdc);

     return;

 }

 LRESULT CALLBACK WndProc (HWND hwnd, UINT message, WPARAM wParam, LPARAM lParam)

 {

      HDC         hdc ;

      PAINTSTRUCT ps ;

      HPEN hPen;

      HPEN oldPen;

      SYSTEMTIME     st;

      switch (message)

      {

      case WM_CREATE:

           PlaySound (TEXT ("hellowin.wav"), NULL, SND_FILENAME | SND_ASYNC) ;

           return  ;

      case WM_PAINT:

           hdc = BeginPaint (hwnd, &ps) ;

           DrawClockFace(hdc);   // 画钟

           GetLocalTime(&st);    //画时针分针秒针

          DrawClockHands(hdc ,st.wHour, st.wMinute, st.wSecond);

           ShowClock(hwnd);// 当窗口重刷时显示时间,否则停止时钟时可能空白

         //  EndPaint(hwnd, &ps) ;

           return  ;

      case WM_COMMAND:

          // LOWORD (wParam) 子窗口ID, HIWORD (wParam)     按钮通知码, lParam    子窗口句柄

          switch (LOWORD(wParam))  //子窗口ID

          {

          case BUTTON1:

              SetTimer(hwnd, TIMER_SEC, , NULL); // 启动定时器(1000毫秒一次),TIMER_SEC为自定义索引号

              break;

          case BUTTON2:

              KillTimer(hwnd, TIMER_SEC);            // 删除定时器

              break;

          }

          return ;

      case WM_TIMER:

          switch (wParam)

          {

          case TIMER_SEC:

              ShowClock(hwnd);//每秒一次的处理

              InvalidateRgn(hwnd, NULL, );     // 使区域无效

             // ShowTime1(hdc);

              ShowTime(hdc, st.wHour, st.wMinute, st.wSecond);

              break;

          case TIMER_MIN:        //每分钟一次的处理

              break;

          }

          return ;

      case WM_DESTROY:

           PostQuitMessage () ;

           return  ;

      }

      return DefWindowProc (hwnd, message, wParam, lParam) ;

 }
Windows下编程--模拟时钟的实现的更多相关文章
- windows 下编程实现打印日志
下面是在windows下编程实现的日志打印,写的比较简单,可以根据实际情况进行修改使用. 宏WRITELOG在vs2013可以正常使用. 在vs2003和vs2010可能会报错,可以直接使用myLog ...
- VC++SDK编程——模拟时钟
#include <Windows.h> #include <tchar.h> #include <math.h> typedef struct Time { in ...
- 使用IDEA2017在Windows下编程并测试Hadoop2.7+Spark2.2+Azkaban
1. 下载好IDEA HADOOP SPARK 首先,配置IDEA, 在插件管理中使用IDEA在线库安装scala插件, 在在线库直接搜索即可; 其次,配置Maven选项, 将Maven添加到IDEA ...
- Windows下编程2----- C语言常用函数举例
几个小函数 1. //MessageBoxA(0,"网络故障,重新登录","qq error",3); //弹出对话框 2. //ShellExec ...
- windows下LINUX模拟终端Cypwin以及Vim的配置使用
Cypwin的安装 从官网下载相应版本后,直接安装. 官网地址:Cypwin 安装过程中可以选择相应的Packages,我们需要安装的Vim就需要在这一步中选择相应的包. Cypwin的使用 纯命令行 ...
- Windows下Android模拟环境的搭建
- windows下C语言编程获取磁盘(分区)使用情况
windows下编程获取磁盘(分区)使用情况 windows下编程获取磁盘(分区)使用情况 GetLogicalDriveStrings函数 使用示例 获取需要的缓冲区长度示例 获取所有驱动器号示例 ...
- windows下的socket网络编程
windows下的socket网络编程 windows下的socket网络编程 clinet.c 客户端 server.c 服务器端 UDP通信的实现 代码如下 已经很久没有在windows下编程了, ...
- windows下的socket网络编程(入门级)
windows下的socket网络编程 clinet.c 客户端 server.c 服务器端 UDP通信的实现 代码如下 已经很久没有在windows下编程了,这次因为需要做一个跨平台的网络程序,就先 ...
随机推荐
- 手动编译安装LAMP之httpd
安装前准备: 开发环境:Development Libraries 和 Development Tools httpd环境包:apr-1.4.6.tar.bz2 和 apr-util-1.4.1.ta ...
- jQuery限制文本框的输入长度
jQuery限制文本框输入,包含粘贴. //限制文本框的输入长度 $(function () { $(document).on("keypress", ".txt-val ...
- django drf 改变retrive的pk查询字段
lookup_filed可以改变retrive查询时默认以pk查询的逻辑 from django.shortcuts import render from rest_framework import ...
- Js异常捕获
<!DOCTYPE html> <html> <head> <meta charset="UTF-8"> <title> ...
- sharepoint 版本信息查看
#检查版本:# PowerShell script to display SharePoint products from the registry. Param( # decide on wheth ...
- 重装SQL前,一定要把SQL2005、SQL2008之类的彻底删除干净
0.预备 如果你曾删除过VS2010或者VS2008之类的,同理也要照此方法删除 1.步骤,顺序无妨 卸载程序:控制面板---查找SQL..NET 删除干净 停掉SQL的所有服务: 计算机--管 ...
- C# 收银机顾显(客显)及打印小票(58热敏打印机)
最近做winform收银机,设计顾显及打印小票总结. 1.顾显(串口COM1) 只涉及到总计,所以只是简单的功能. public static ClientDisplayResult Display( ...
- Android 如何保存资源 Id 数组在 res/values/arrays.xml 里
<resources> <!-- Tracks Information --> <array name="music_ids"> <ite ...
- 红与黑(DFS)
描述有一间长方形的房子,地上铺了红色.黑色两种颜色的正方形瓷砖.你站在其中一块黑色的瓷砖上,只能向相邻的黑色瓷砖移动.请写一个程序,计算你总共能够到达多少块黑色的瓷砖.输入包括多个数据集合.每个数据集 ...
- 获取 input type="file" 标签的内容,并使用ajax进行请求到服务器
<!DOCTYPE html> <html lang="en"> <head> <meta charset="UTF-8&quo ...