Linux系统下yum镜像源环境部署记录
之前介绍了Linux环境下本地yum源配置方法,不过这个是最简单最基础的配置,在yum安装的时候可能有些软件包不够齐全,下面说下完整yun镜像源系统环境部署记录(yum源更新脚本下载地址:https://pan.baidu.com/s/1miMNPgc 提取密码:hq6u):
|
1
2
3
4
5
6
7
8
9
10
11
12
13
14
15
16
17
18
19
20
21
22
23
24
25
26
27
28
29
30
31
32
33
34
35
36
37
38
39
40
41
42
43
44
45
46
47
48
49
50
51
52
53
54
55
56
57
58
59
60
61
62
63
64
65
66
67
68
69
70
71
72
73
74
75
76
77
78
79
80
81
82
83
84
85
86
87
88
89
90
91
92
93
94
95
96
97
98
99
100
101
102
103
104
105
106
107
108
109
110
111
112
113
114
115
116
117
118
119
120
121
122
123
124
125
126
127
128
129
130
131
132
133
134
135
136
137
138
139
140
141
142
143
144
145
146
147
148
149
150
151
152
153
154
155
156
157
158
159
160
161
162
163
164
165
166
167
168
169
170
171
172
173
174
175
176
177
178
179
180
181
182
183
184
185
186
187
188
189
190
191
192
193
194
195
196
197
198
199
200
201
202
203
204
205
206
207
208
209
210
211
212
213
214
215
216
217
218
219
220
221
222
223
224
225
226
227
228
229
230
231
232
233
234
235
236
237
238
239
240
241
242
243
244
245
246
247
248
249
250
251
252
253
254
255
256
257
258
259
260
261
|
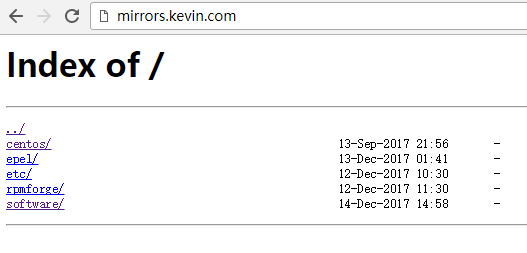
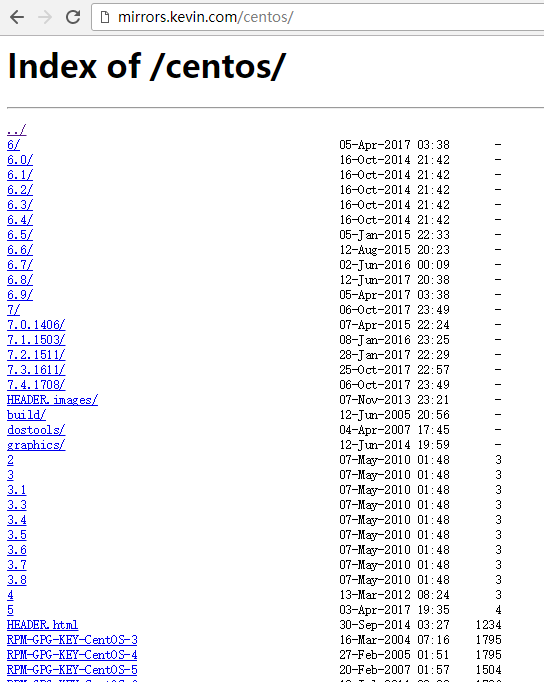
1)安装nginx,用于yum镜像源访问配置[root@yum ~]# yum -y install gcc pcre-devel zlib-devel openssl-devel[root@yum ~]# cd /data/software[root@yum software]# wget http://nginx.org/download/nginx-1.12.0.tar.gz[root@yum software]# tar -zvxf nginx-1.12.0.tar.gz[root@yum software]# cd nginx-1.12.0 添加www用户,其中-M参数表示不添加用户家目录,-s参数表示指定shell类型[root@yum nginx-1.12.0]# useradd www -M -s /sbin/nologin[root@yum nginx-1.12.0]# ./configure --prefix=/data/nginx --user=www --group=www --with-http_ssl_module --with-http_flv_module --with-http_stub_status_module --with-http_gzip_static_module --with-pcre[root@yum nginx-1.12.0]# make && make install 2)配置nginx[root@yum ~]# cat /data/nginx/conf/vhosts/mirrors.confserver { listen 80; server_name yum.kevin.com mirrors.kevin.com localhost; index index.html index.php index.htm; access_log /data/nginx/logs/access.log main; error_log /data/nginx/logs/error.log; location / { root /data/mirrors; autoindex on; autoindex_exact_size off; autoindex_localtime on; } } [root@yum ~]# /data/nginx/sbin/nginx -tnginx: the configuration file /data/nginx/conf/nginx.conf syntax is oknginx: configuration file /data/nginx/conf/nginx.conf test is successful[root@yum ~]# /data/nginx/sbin/nginx[root@yum ~]# lsof -i:80COMMAND PID USER FD TYPE DEVICE SIZE/OFF NODE NAMEnginx 7741 root 6u IPv4 28311 0t0 TCP *:http (LISTEN)nginx 7769 www 6u IPv4 28311 0t0 TCP *:http (LISTEN)nginx 7770 www 6u IPv4 28311 0t0 TCP *:http (LISTEN)nginx 7771 www 6u IPv4 28311 0t0 TCP *:http (LISTEN)nginx 7772 www 6u IPv4 28311 0t0 TCP *:http (LISTEN)nginx 7773 www 6u IPv4 28311 0t0 TCP *:http (LISTEN)nginx 7774 www 6u IPv4 28311 0t0 TCP *:http (LISTEN)nginx 7775 www 6u IPv4 28311 0t0 TCP *:http (LISTEN)nginx 7776 www 6u IPv4 28311 0t0 TCP *:http (LISTEN) 3)创建yum源数据目录[root@yum ~]# mkdir -p /data/mirrors[root@yum ~]# cd /data/mirrors/[root@yum mirrors]# mkdir centos epel etc rpmforge[root@yum mirrors]# lscentos epel etc rpmforge 4)编写yum源下载更新脚本(从mirrors.ustc.edu.cn镜像网站下载和更新)[root@yum ~]# cat /data/script/mirrors.sh#!/bin/bash #==========================================# Program : /bin/update_yum_source.sh# Info : 定期同步官方 yum 源到本地# Version : 2017.12.10 v1.0# author :kevin# Usage : 3 3 * * * /bin/bash /data/script/mirrors.sh#========================================== Date=`date +%Y%m%d`LogFile="/data/logs/$Date.log"ReceiveMail="wangshibo@veredholdings.com" RsyncBin="/usr/bin/rsync"RsyncPerm="-avrt --delete --exclude=debug/ --exclude=isos/ --exclude=SRPMS/ --exclude=ppc/ --delete-excluded" #============ centos ==============CentOS_Path="/data/mirrors/centos"YumSiteList="rsync://mirrors.ustc.edu.cn/centos/"centosparm="--exclude=2*/ --exclude=3*/ --exclude=4*/ --exclude=5*/" #============ epel ==============epelSite="rsync://mirrors.ustc.edu.cn/fedora-epel"epelLocalPath="/data/mirrors/epel"epelparm="--include=7/x86_64 --include=7Server/x86_64 --include=6/x86_64 --include=6Server/x86_64" #============ rpmforge ==============rpmforgeSite="rsync://apt.sw.be/pub/freshrpms/pub/dag/redhat/"#rpmforgeSite="rsync://apt.sw.be/redhat/"rpmforgeLocalPath="/data/mirrors/rpmforge/"rpmforgeparm="--exclude=ppc/ --exclude=el2.1/ --exclude=el3/ --exclude=el4/ --exclude=el5/" echo "---- $Date `date +%T` Begin ----" >>$LogFile # centos$RsyncBin $RsyncPerm $centosparm $YumSiteList $CentOS_Path >> $LogFile # epel$RsyncBin $RsyncPerm $epelparm $epelSite $epelLocalPath >> $LogFile # rpmforge$RsyncBin $RsyncPerm $rpmforgeparm $rpmforgeSite $rpmforgeLocalPath >> $LogFile echo "---- $Date `date +%T` End ----" >> $LogFile #/bin/mail -s "opt001 - update yum source - $Date" $ReceiveMail<$LogFile 以上脚本中需要注意的几点:--exclude 表示rsync同步的时候,需要排除的目录(具体表现:同步下来的目录里面为空,大小为0)--include 表示rsync同步的时候,只想同步的目录 由于本案例是部署yum源,用于linux服务器上本地yum方案安装,不需要同步isos镜像(同时也可以节省机器空间资源),所以在同步的时候将isos镜像目录屏蔽 执行同步脚本。这个过程比较长,大概要下载将近180G的内容。需要耐心等待~~[root@yum ~]# sh -x /data/script/mirrors.sh [root@yum ~]# du -sh /data/mirrors/*93G /data/mirrors/centos80G /data/mirrors/epel4.0K /data/mirrors/etc4.0K /data/mirrors/rpmforge410M /data/mirrors/software [root@yum ~]# ls /data/mirrors/centos/2 3.6 6.0 6.6 7.1.1503 dostools RPM-GPG-KEY-CentOS-3 RPM-GPG-KEY-CentOS-Debug-6 timestamp.txt3 3.7 6.1 6.7 7.2.1511 filelist.gz RPM-GPG-KEY-centos4 RPM-GPG-KEY-CentOS-Debug-73.1 3.8 6.2 6.8 7.3.1611 graphics RPM-GPG-KEY-CentOS-4 RPM-GPG-KEY-CentOS-Security-63.3 4 6.3 6.9 7.4.1708 HEADER.html RPM-GPG-KEY-CentOS-5 RPM-GPG-KEY-CentOS-Testing-63.4 5 6.4 7 build HEADER.images RPM-GPG-KEY-CentOS-6 RPM-GPG-KEY-CentOS-Testing-73.5 6 6.5 7.0.1406 dir_sizes RPM-GPG-KEY-beta RPM-GPG-KEY-CentOS-7 TIME[root@yum ~]# ls /data/mirrors/epel/4 5Client 7Server fullfilelist.KDUVzc9WPK RPM-GPG-KEY-EPEL-4 RPM-GPG-KEY-EPEL-7Server4AS 5Server epel-release-latest-6.noarch.rpm fullfiletimelist-epel RPM-GPG-KEY-EPEL-5 testing4ES 6 epel-release-latest-7.noarch.rpm fullfiletimelist-epel.WaO7KUHvYz RPM-GPG-KEY-EPEL-64WS 6Server fullfilelist imagelist-epel RPM-GPG-KEY-EPEL-6Server5 7 fullfilelist.AwiES3LjSB RPM-GPG-KEY-EPEL RPM-GPG-KEY-EPEL-7 5)替换linux本机的yum源地址[root@yum ~]# cd /etc/yum.repos.d/[root@yum yum.repos.d]# lsCentOS-Base.repo CentOS-Debuginfo.repo CentOS-fasttrack.repo CentOS-Media.repo CentOS-Vault.repo[root@yum yum.repos.d]# mkdir bak[root@yum yum.repos.d]# mv *.repo bak/[root@yum yum.repos.d]# lsbak 编写yum源文件[root@yum yum.repos.d]# cat CentOS-Base.repo# CentOS-Base.repo## The mirrors system uses the connecting IP address of the client and the# update status of each mirrors to pick mirrors that are updated to and# geographically close to the client. You should use this for CentOS updates# unless you are manually picking other mirrorss.## If the mirrorslist= does not work for you, as a fall back you can try the# remarked out baseurl= line instead.##[base]name=CentOS-CentOS-$releasever - Base#mirrorslist=http://mirrorlist.centos.org/?release=CentOS-$releasever&arch=$basearch&repo=os&infra=$infrabaseurl=http://mirrors.veredholdings.cn/centos/$releasever/os/$basearch/gpgcheck=1gpgkey=http://mirrors.veredholdings.cn/centos/RPM-GPG-KEY-CentOS-$releasever#released updates[updates]name=CentOS-CentOS-$releasever - Updates#mirrorslist=http://mirrorlist.centos.org/?release=CentOS-$releasever&arch=$basearch&repo=updates&infra=$infrabaseurl=http://mirrors.veredholdings.cn/centos/$releasever/updates/$basearch/gpgcheck=1gpgkey=http://mirrors.veredholdings.cn/centos/RPM-GPG-KEY-CentOS-$releasever#additional packages that may be useful[extras]name=CentOS-CentOS-$releasever - Extras#mirrorslist=http://mirrorlist.centos.org/?release=CentOS-$releasever&arch=$basearch&repo=extras&infra=$infrabaseurl=http://mirrors.veredholdings.cn/centos/$releasever/extras/$basearch/gpgcheck=1gpgkey=http://mirrors.veredholdings.cn/centos/RPM-GPG-KEY-CentOS-$releasever#additional packages that extend functionality of existing packages[centosplus]name=CentOS-CentOS-$releasever - Plus#mirrorslist=http://mirrorlist.centos.org/?release=CentOS-$releasever&arch=$basearch&repo=centosplus&infra=$infrabaseurl=http://mirrors.veredholdings.cn/centos/$releasever/centosplus/$basearch/gpgcheck=1enabled=0gpgkey=http://mirrors.veredholdings.cn/centos/RPM-GPG-KEY-CentOS-$releasever#contrib - packages by Centos Users[contrib]name=CentOS-CentOS-$releasever - Contrib#mirrorslist=http://mirrorlist.centos.org/?release=CentOS-$releasever&arch=$basearch&repo=contrib&infra=$infrabaseurl=http://mirrors.veredholdings.cn/centos/$releasever/contrib/$basearch/gpgcheck=1enabled=0gpgkey=http://mirrors.veredholdings.cn/centos/RPM-GPG-KEY-CentOS-$releasever [root@yum yum.repos.d]# cat epel.repo[epel]name=Extra Packages for Enterprise Linux $releasever - $basearchbaseurl=http://mirrors.veredholdings.cn/epel/$releasever/$basearch#mirrorlist=https://mirrors.fedoraproject.org/metalink?repo=epel-6&arch=$basearchfailovermethod=priorityenabled=1gpgcheck=1gpgkey=http://mirrors.veredholdings.cn/epel/RPM-GPG-KEY-EPEL-$releasever [epel-debuginfo]name=Extra Packages for Enterprise Linux 6 - $basearch - Debugbaseurl=http://mirrors.veredholdings.cn/epel/$releasever/$basearch/debug#mirrorlist=https://mirrors.fedoraproject.org/metalink?repo=epel-debug-6&arch=$basearchfailovermethod=priorityenabled=0gpgkey=http://mirrors.veredholdings.cn/epel/RPM-GPG-KEY-EPEL-$releasevergpgcheck=1 [epel-source]name=Extra Packages for Enterprise Linux 6 - $basearch - Sourcebaseurl=http://mirrors.veredholdings.cn/epel/$releasever/SRPMS#mirrorlist=https://mirrors.fedoraproject.org/metalink?repo=epel-source-6&arch=$basearchfailovermethod=priorityenabled=0gpgkey=http://mirrors.veredholdings.cn/epel/RPM-GPG-KEY-EPEL-$releasevergpgcheck=1 [root@yum yum.repos.d]# yum clean all[root@yum yum.repos.d]# yum makecache 其他服务器要是想用本yum源,就按照上面操作,将/etc/yum.repos.d目录下的repo文件都移除,然后将上面编写的两个文件放进去,执行yum clean all和yum makecache即可! ============================================================================温馨提示:以上的yum源配置及两个yum文件在centos6和centos7系统下都适用!已经验证!! ============================================================================更新以上yum源的脚本:可以将上面两个文件放到http://mirrors.kevin.com/software里面,用于脚本中下载[root@yum ~]# cd /data/mirrors/software/[root@yum software]# lsyum_reset.sh CentOS-Base.repo epel.repo [root@yum software]# cat yum_reset.sh#!/bin/bashcd /etc/yum.repos.d//bin/mkdir /etc/yum.repos.d/bakmv /etc/yum.repos.d/*.repo /etc/yum.repos.d/bakwget http://mirrors.kevin.com/software/CentOS-Base.repowget http://mirrors.kevin.com/software/epel.repo/usr/bin/yum clean all/usr/bin/yum makecache 只需要将上面的yum_reset.sh脚本下载到目标服务器上,然后执行,就可以将目标服务器的yum源更新了。# wget http://mirrors.kevin.com/software/yum_reset.sh# sh -x yum_reset.sh |
可以定期更新以上的yum源同步脚本(mirros.sh),比如每月更新一次
|
1
2
3
|
[root@yum ~]# crontab -e#每个月1号的23:00点同步一次yum源0 23 1 * * /bin/bash -x /data/script/mirrors.sh > /dev/null 2>&1 |
Linux系统下yum镜像源环境部署记录的更多相关文章
- Linux系统下本地yum镜像源环境部署-完整记录
之前介绍了Linux环境下本地yum源配置方法,不过这个是最简单最基础的配置,在yum安装的时候可能有些软件包不够齐全,下面说下完整yun镜像源系统环境部署记录(yum源更新脚本下载地址:https: ...
- [转]Linux系统下yum和apt-get的区别
一般来说著名的linux系统基本上分两大类: 1.RedHat系列:Redhat.Centos.Fedora等 2.Debian系列:Debian.Ubuntu等 RedHat 系列 1 常见的安装包 ...
- Linux下smokeping网络监控环境部署记录
smokeping是一款监控网络状态和稳定性的开源软件(它是rrdtool的作者开发的),通过它可以监控到公司IDC的网络状况,如延时,丢包率,是否BGP多线等:smokeping会向目标设备和系统发 ...
- node.js安装——Windows7系统下的安装及其环境部署——特别详细
作为一个前端的菜鸟同学,之间也没学过什么框架,目前公司做项目,所用到的webpack+node.js+vue. 首先,关于node的环境部署方面,建议官网安装node.js,最好不要安装非稳定版的版本 ...
- Linux系统下安装Angular2开发环境(Ubuntu16.0和deepin)
说明下,以下过程都是在ubuntu16.0系统下,win系统环境下的安装过程更简单,基本上可以仿效此环境来,除了不用配置系统命令(win下自动可以),node安装是exe程序,一键安装.另外,这里面像 ...
- linux系统下yum 安装mysql的方法
菜鸟一个,记录下yum 安装mysql的方法,给需要的朋友也做个参考吧. 弄了个新vps,想安装最新版的mysql,网上查了相关资料,记录如下: 1.安装查看有没有安装过: yum ...
- linux系统下yum源的搭建
1.建立挂载点 系统默认在 /mnt目录 1>创建挂载点 mkdir -p /mnt/cdrom 参数-p是需要时创建目标目录的上层目录,但即使这些目录已存在也不当作错误处理 2>查看 ...
- 修改linux下yum镜像源为国内镜像
修改为163yum源-mirrors.163.com 1.首先备份系统自带yum源配置文件/etc/yum.repos.d/CentOS-Base.repo [root@localhost ~]# m ...
- Linux系统下yum源配置(Centos 6)
1.备份 mv /etc/yum.repos.d/CentOS-Base.repo /etc/yum.repos.d/CentOS-Base.repo.backup 2.下载新的CentOS-Base ...
随机推荐
- Linux 第七章学习笔记
1:链接概述 链接(linking)是将各种代码和数据部分收集起来并组合成为一个单一文件的过程,这个文件可被加载(或被拷贝)到存储并执行. 编译系统提供的调用预处理器.编译器.汇编器和链接器来构造目标 ...
- Linux内核设计与实现 第三章
1. 进程和线程 进程和线程是程序运行时状态,是动态变化的,进程和线程的管理操作都是由内核来实现的. Linux中的进程于Windows相比是很轻量级的,而且不严格区分进程和线程,线程不过是一种特殊的 ...
- 20135337——Linux实践三:程序破解
程序破解 查看 运行 反汇编,查看汇编码 对反汇编代码进行分析: 在main函数的汇编代码中可以看出程序在调用"scanf"函数请求输入之后,对 [esp+0x1c] 和 [esp ...
- Leetcode——66.加一
@author: ZZQ @software: PyCharm @file: leetcode66_加一.py @time: 2018/11/29 16:07 要求:给定一个由整数组成的非空数组所表示 ...
- HTML 页面的 批量删除的按钮
function delAll(){ var sid=""; $("[name='ids']:checked").each(function(){ sid+=$ ...
- ajax 异步请求
<%@ page language="java" contentType="text/html; charset=UTF-8" pageEncoding= ...
- Python装饰器的深入理解
装饰器 #装饰器:本质上是函数,(装饰其他函数)就是为其他函数添加附加功能 #原则: 1.不能修改被装饰的函数的源代码 # 2.不能修改被装饰的函数的调用方式 #实现装饰器知识储备 #1.函数即变量 ...
- WPF将数据库和GridView绑定并更改GridView模板
首先来看一下如何使用GridView,在前台的话代码如下:这里仅仅举出一个例子,GridView是作为子项嵌套在ListView中的,这里的数据源是通过绑定的方式来绑定到GridView中的. < ...
- Highcharts之饼图
<!DOCTYPE html> <html> <head> <meta http-equiv="Content-Type" content ...
- caffe运行错误: im2col.cu:61] Check failed: error == cudaSuccess (8 vs. 0) invalid device function
错误: im2col.cu:61] Check failed: error == cudaSuccess (8 vs. 0) invalid device function 原因:由于Makefil ...