
Argo workflow 案例练习和配置详细解析
参数化 - parameters
hello-world-parameters.yaml文件解析
apiVersion: argoproj.io/v1alpha1

kind: Workflow

metadata:

  generateName: hello-world-parameters-

spec:

  entrypoint: whalesay    # 调用 whalesay 模板

  arguments:              # 传递给函数的参数

    parameters:           # 声明参数

    - name: message       # Key

      value: hello world  # value

  templates:

  - name: whalesay  # whalesay 模板

    inputs:

      parameters:

      - name: message

    container:

      image: docker/whalesay

      command: [cowsay]

      args: ["{{inputs.parameters.message}}"]
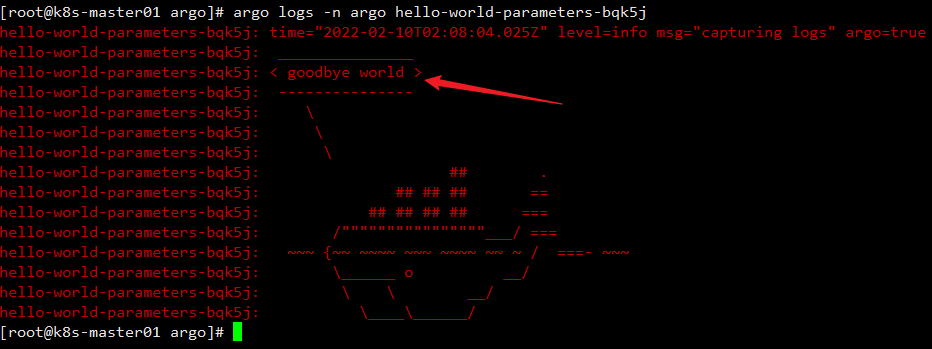
提交此工作流时,可以指定实际参数值:
[root@k8s-master01 argo]# argo submit -n argo arguments-parameters.yaml -p message="goodbye world"

[root@k8s-master01 argo]# argo logs -n argo hello-world-parameters-xxx
自定义 Parameter 数据生产端和消费端
output 作为生产端信息输出给 input 作为信息消费端,以parameter参数的方式。
apiVersion: argoproj.io/v1alpha1

kind: Workflow

metadata:

  generateName: output-parameter-

spec:

  entrypoint: output-parameter

  templates:

  - name: output-parameter

    steps:

    # 产生参数

    - - name: generate-parameter

        template: nginx

    # 消费参数

    - - name: consume-parameter

        template: print-message

        arguments:

          parameters:

          - name: message

            value: "{{steps.generate-parameter.outputs.parameters.nginx-index}}"

  # 生产模板 nginx

  - name: nginx

    container:

      image: nginx:latest

      # 输出 logs,不影响实际的消费信息

      command: [sh, -c]

      args: ["sleep 1; cat /usr/share/nginx/html/index.html"]

    # 输出生产信息

    outputs:

      parameters:

      - name: nginx-index

      # 检查 path 文件是否存在,如果不存在,则输出 "Foobar"

        valueFrom:

          default: "Foobar"

          # 输出文件内容,作为 print-message 的输入内容

          path: /usr/share/nginx/html/index.html

  # 消费模板 print-message

  - name: print-message

    inputs:

      parameters:

      - name: message

    container:

      image: alpine:latest

      # 输出 outputs 过来的信息

      command: [echo]

      args: ["{{inputs.parameters.message}}"]
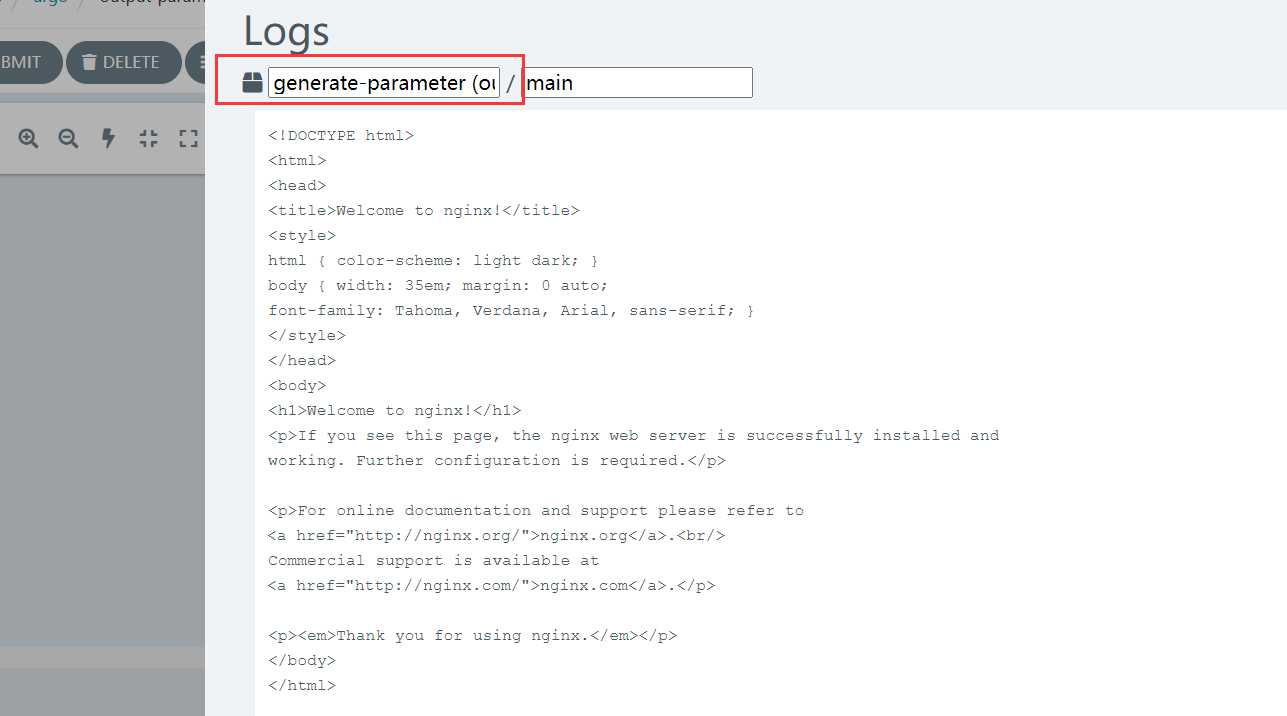
生产端日志
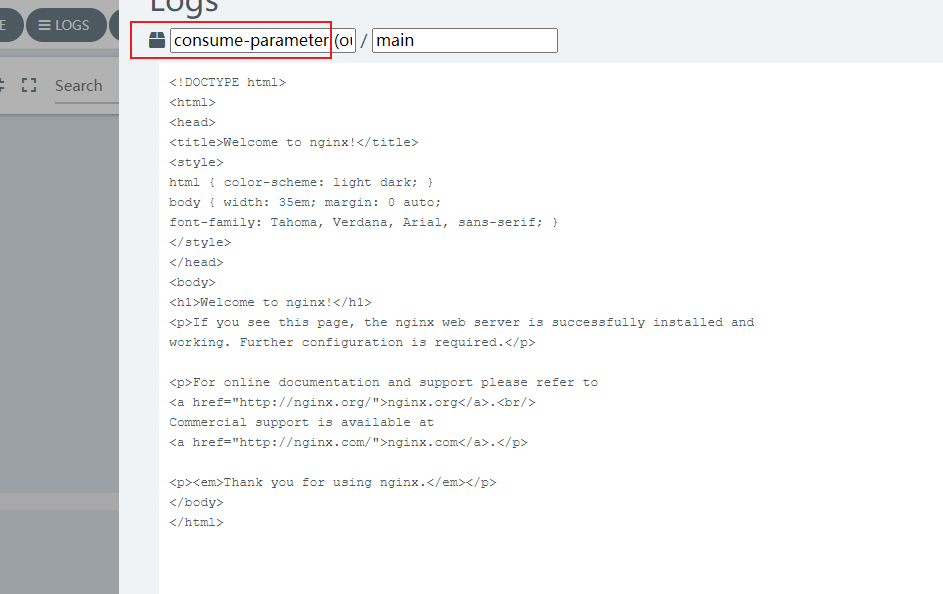
消费端日志
steps 类型工作流
hello-hello-hello.yaml文件解析
apiVersion: argoproj.io/v1alpha1

kind: Workflow

metadata:

  generateName: steps-          # Workflow 的名称前缀

spec:

  entrypoint: hello-hello-hello # 表示第一个执行的模板名称,让工作流知道从哪个模板开始执行,类似于 main 函数

  # 该templates中有两个模板,分别是:hello-hello-hello和whalesay

  templates:

  - name: hello-hello-hello     # 第一个模板 hello-hello-hello

    steps:                      # template 的类型是 steps

    # 一个 template 有多种类型,分别为:container、script、dag、steps、resource、suspend

    - - name: hello1            # 在 steps 类型中,[--] 表示顺序执行,[-] 表示并行执行

        template: whalesay      # 引用 whalesay 模板

        arguments:              # 传递给函数的参数

          parameters:           # 声明参数

          - name: message       # Key

            value: "hello1"     # value

    - - name: hello2a           # [--] 顺序执行

        template: whalesay

        arguments:

          parameters:

          - name: message

            value: "hello2a"

      - name: hello2b           # [-] 表示跟上一步并行运行

        template: whalesay

        arguments:

          parameters:

          - name: message

            value: "hello2b"

  - name: whalesay   # 第二个模板 whalesay

    inputs:          # input、output 实现数据交互

      parameters:

      - name: message

    container:

      image: docker/whalesay  # 镜像名称

      command: [cowsay]       # 执行命令

      args: ["{{inputs.parameters.message}}"]  # 参数引用
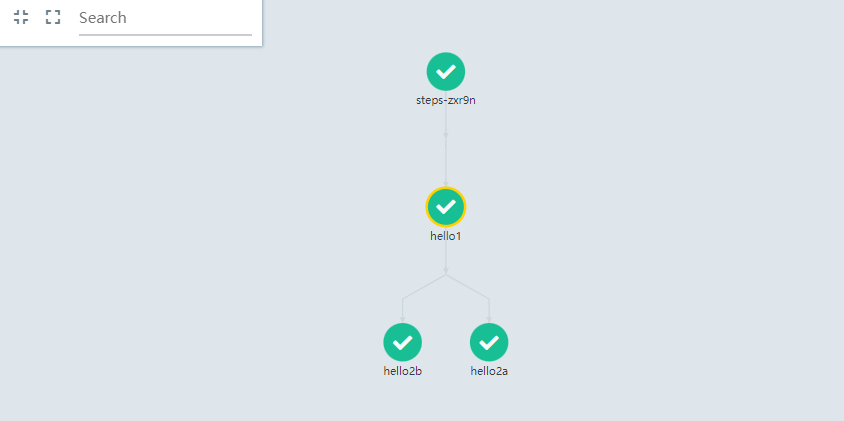
上面的工作流规范打印了三种不同的“hello”。hello-hello-hello模板由三个步骤组成。名为hello1的第一步将按顺序运行,而名为hello2a和hello2b的后面两个步骤将并行运行。使用argo CLI命令,我们可以图形化地显示这个工作流规范的执行历史,它显示了名为hello2a和hello2b的步骤彼此并行运行。
DAG工作流
作为指定步骤序列的另一种方法,您可以通过指定每个任务的依赖关系来将工作流定义为有向无环图(DAG)。对于复杂的工作流,这可以更容易维护,并且在运行任务时允许最大程度的并行性。
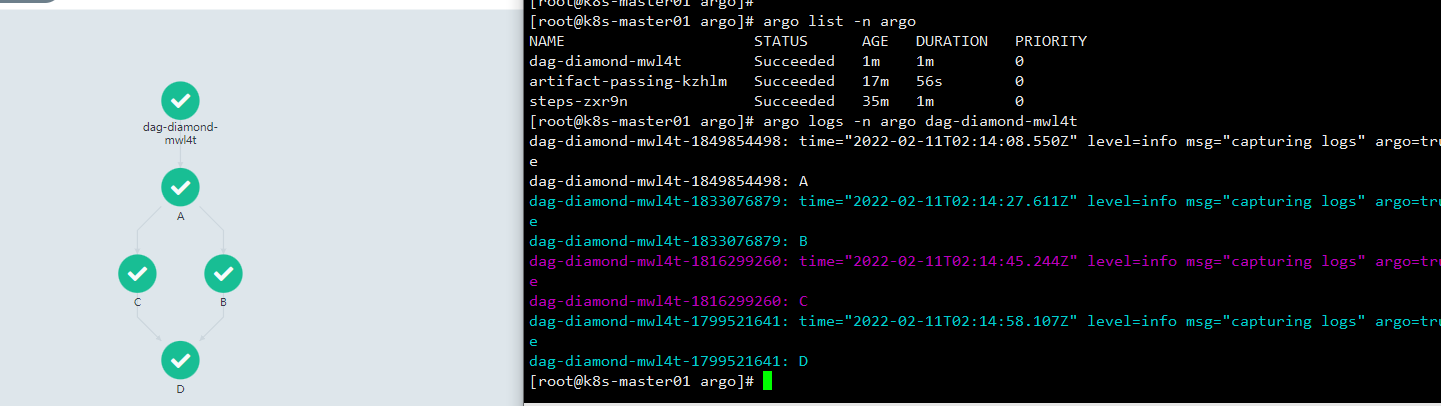
在下面的工作流中,步骤A首先运行,因为它没有依赖项。一旦A完成,步骤B和步骤C将并行运行。最后,一旦B和C完成,步骤D就可以运行了。
dag-diamond.yaml文件解析
apiVersion: argoproj.io/v1alpha1

kind: Workflow

metadata:

  generateName: dag-diamond-

spec:

  entrypoint: diamond

  # 分别有 echo 和 diamond 两个模板

  templates:

  - name: echo

    inputs:

      parameters:     # 声明参数

      - name: message

    container:

      image: alpine:3.7

      command: [echo, "{{inputs.parameters.message}}"]

  # 入口点模板

  - name: diamond

    # DAG声明

    dag:

      tasks:

      - name: A

        template: echo

        arguments:

          parameters: [{name: message, value: A}]

      - name: B

        # 任务B依赖于任务A

        dependencies: [A]

        template: echo

        arguments:

          parameters: [{name: message, value: B}]

      - name: C

        dependencies: [A]

        template: echo

        arguments:

          parameters: [{name: message, value: C}]

      - name: D

        # 任务D同时依赖于任务B、C

        dependencies: [B, C]

        template: echo

        arguments:

          parameters: [{name: message, value: D}]
Artifacts 工作流
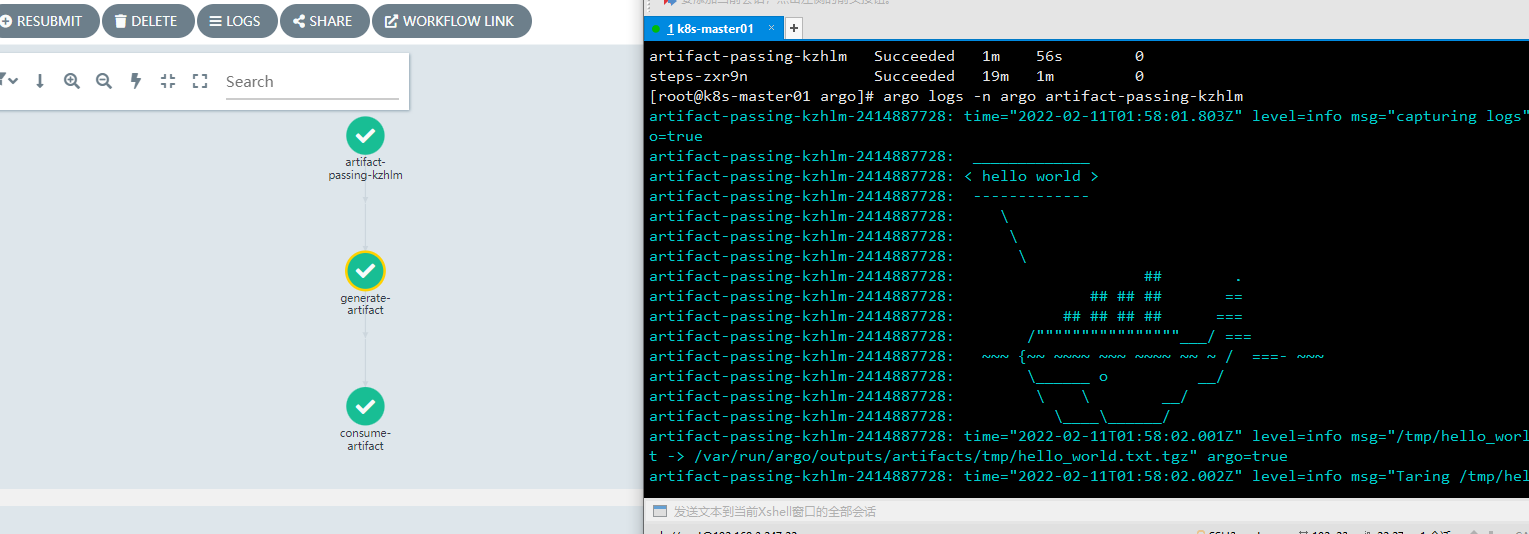
通过 input/output 以及 artifacts 实现 Job 之间数据传递。
在工作流中,某些步骤产生或者消费构件,是很常见的需求。通常,前一环节的输出构件,用作下一环节的输入构件。
下面的例子包含两个Step,前一个步骤产生构件供后一个消费。
artifact-passing.yaml文件解析
apiVersion: argoproj.io/v1alpha1

kind: Workflow

metadata:

  generateName: artifact-passing-

spec:

  entrypoint: artifact-example

  templates:

  - name: artifact-example

    steps:

    # 产生构件

    - - name: generate-artifact

        template: whalesay

    # 消费构件

    - - name: consume-artifact

        template: print-message

        arguments:

          artifacts:

          # 绑定构件名message到generate-artifact,输出制品库 hello-art 内容

          - name: message

            from: "{{steps.generate-artifact.outputs.artifacts.hello-art}}"

  # 此模板产生构件

  - name: whalesay

    container:

      image: docker/whalesay:latest

      command: [sh, -c]

      args: ["cowsay hello world | tee /tmp/hello_world.txt"]

    # 输出构件声明

    outputs:

      artifacts:

      - name: hello-art            # 生成制品共享 hello-art

        path: /tmp/hello_world.txt # 把这个文件打包后上传到制品库中

  # 此模板消费构件

  - name: print-message

    # 输入构件声明

    inputs:

      artifacts:

      - name: message

        path: /tmp/message

    container:

      image: alpine:latest

      command: [sh, -c]

      args: ["cat /tmp/message"]
生产信息
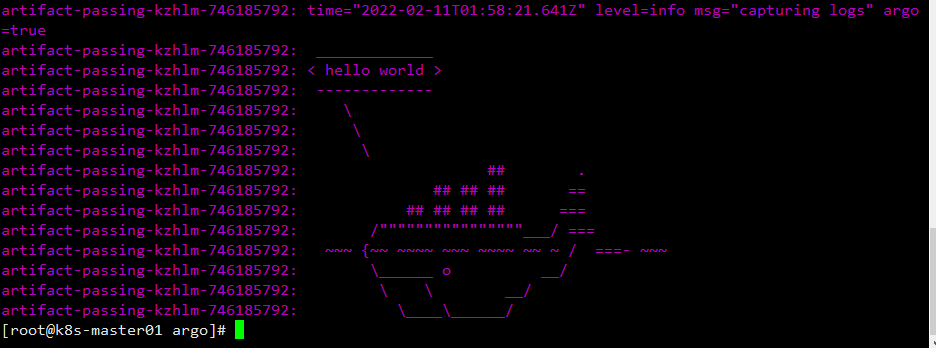
消费信息
Scripts & Results
很多情况下,我们仅仅希望 Template 来执行一个脚本:
apiVersion: argoproj.io/v1alpha1

kind: Workflow

metadata:

  generateName: scripts-bash-

spec:

  entrypoint: bash-script-example

  templates:

  - name: bash-script-example

    steps:

    - - name: generate

        # 调用其中一个模板,分别有 gen-random-int-bash、python、javascript

        template: gen-random-int-python

    - - name: print

        template: print-message

        arguments:

          parameters:

          - name: message

            # 引用 result 此特殊的输出参数

            value: "{{steps.generate.outputs.result}}"

  - name: gen-random-int-bash

    # 在 script 关键字的 source 标签中,可以编写脚本

    # script 还导致执行脚本时的标准输出,保存为名为 result 的特殊输出参数

    script:

      image: debian:9.4

      command: [bash]

      # Shell 脚本随机生成一个数值

      source: |

        cat /dev/urandom | od -N2 -An -i | awk -v f=1 -v r=100 '{printf "%i\n", f + r * $1 / 65536}'

  - name: gen-random-int-python

    script:

      image: python:alpine3.6

      command: [python]

      # Python 脚本随机生成数值

      source: |

        import random

        i = random.randint(1, 100)

        print(i)

  - name: gen-random-int-javascript

    script:

      image: node:9.1-alpine

      command: [node]

      # JS 脚本随机生成数值

      source: |

        var rand = Math.floor(Math.random() * 100);

        console.log(rand);

  # 输出随机数模板 print-message

  - name: print-message

    inputs:

      parameters:

      - name: message

    container:

      image: alpine:latest

      command: [sh, -c]

      args: ["echo result was: {{inputs.parameters.message}}"]
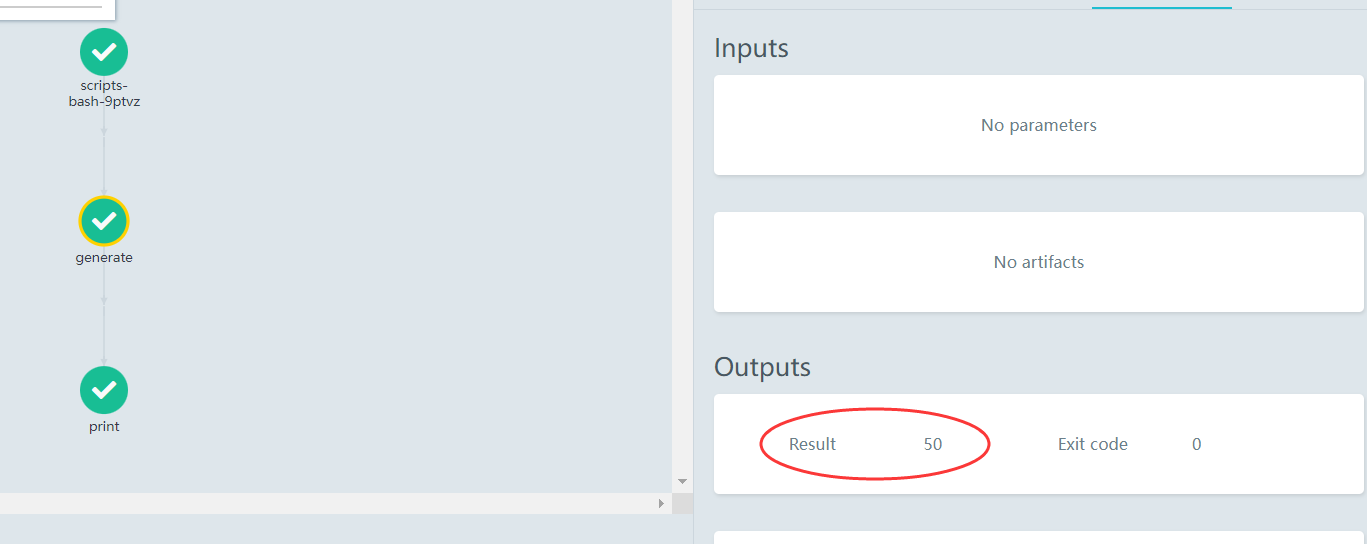
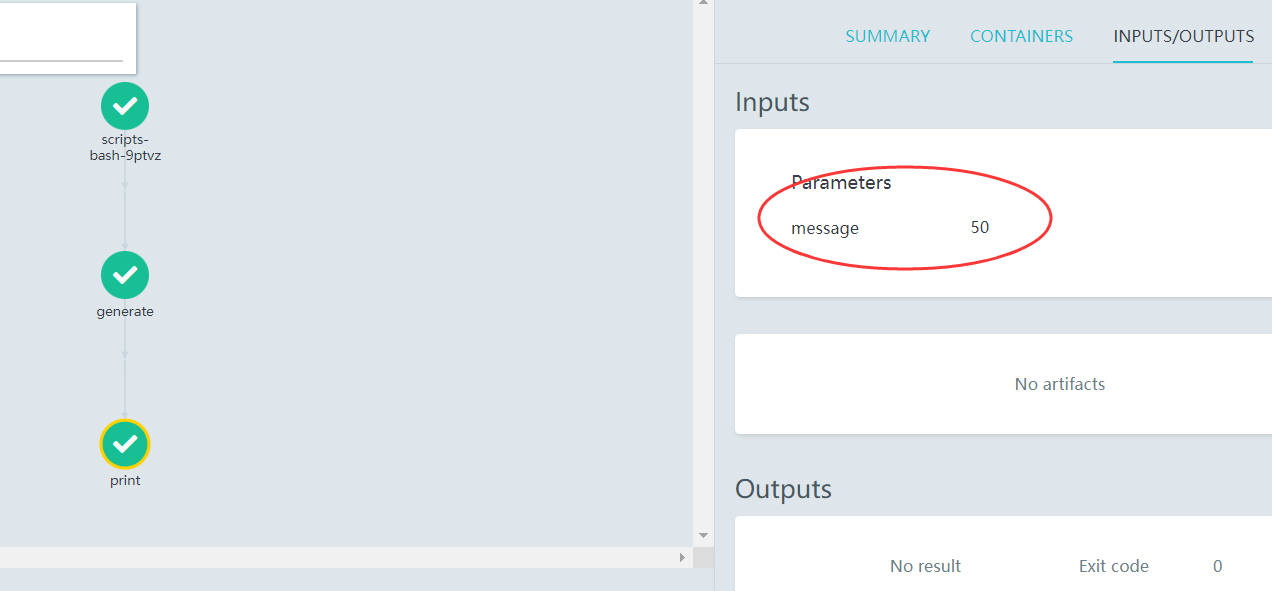
generate 模板调用 gen-random-int-python 任务随机生成个50数值,print 模板利用result特殊参数调用输出,如图所示。
退出处理器工作流
Exit handler是一种必然会在工作流结尾执行的模板,不论工作流执行成功与否。它的运用场景包括:
- 工作流运行后清理
- 发送工作流状态的通知(例如,电子邮件/Slack)
- 将成功/失败状态传递为 Webhook 结果(例如GitHub Build Result)
- 重新提交工作流 或 提交另外一个工作流
apiVersion: argoproj.io/v1alpha1

kind: Workflow

metadata:

  generateName: exit-handlers-

spec:

  entrypoint: intentional-fail

  # 在工作流的末尾调用退出处理程序模板

  onExit: exit-handler

  templates:

  # 工作流主模板

  - name: intentional-fail

    container:

      image: alpine:latest

      command: [sh, -c]

      # exit 1 表示工作流异常退出,exit 0 表示工作流成功退出

      args: ["echo intentional failure; exit 1"]

  # 退出处理器模板

  # 主模板完成后,工作流状态可以通过全局变量{{workflow.status}}获取,其值是Succeeded, Failed, Error之一

  - name: exit-handler

    steps:

    # 无论工作流是否成功,都会调用 send-email 模板

    - - name: notify

        template: send-email

      # 如果工作流等于 Succeeded,才会调用 celebrate 模板

      - name: celebrate

        template: celebrate

        when: "{{workflow.status}} == Succeeded"

      # 如果工作流不等于 Succeeded,则会调用 cry 模板

      - name: cry

        template: cry

        when: "{{workflow.status}} != Succeeded"

  # send-email 模板信息

  - name: send-email

    container:

      image: alpine:latest

      command: [sh, -c]

      # 输出工作流名称和工作流状态

      args: ["echo send e-mail: {{workflow.name}} {{workflow.status}}"]

  # celebrate 模板信息

  - name: celebrate

    container:

      image: alpine:latest

      command: [sh, -c]

      args: ["echo hooray!"]

  # cry 模板信息

  - name: cry

    container:

      image: alpine:latest

      command: [sh, -c]

      args: ["echo boohoo!"]
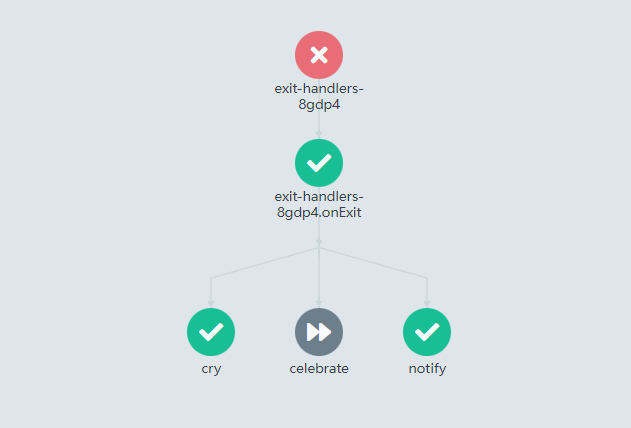
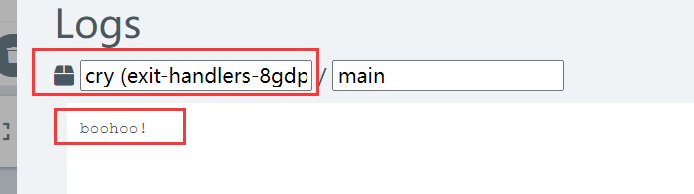
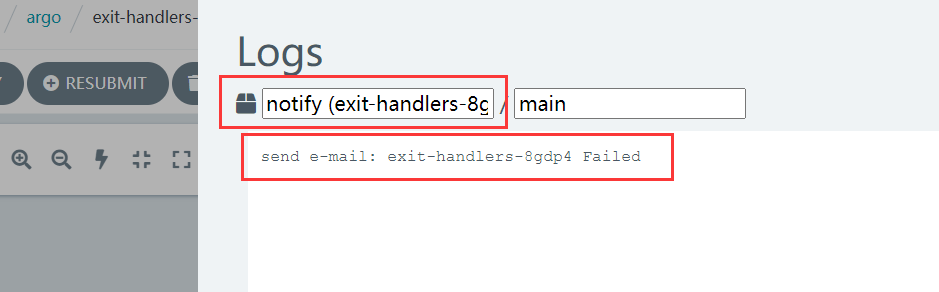
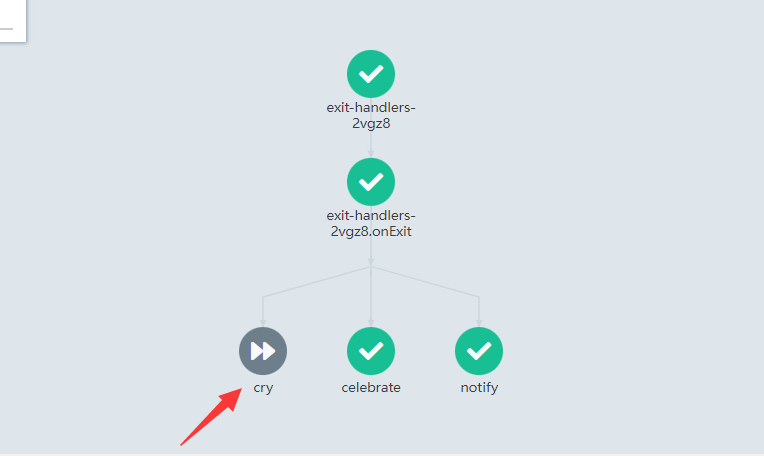
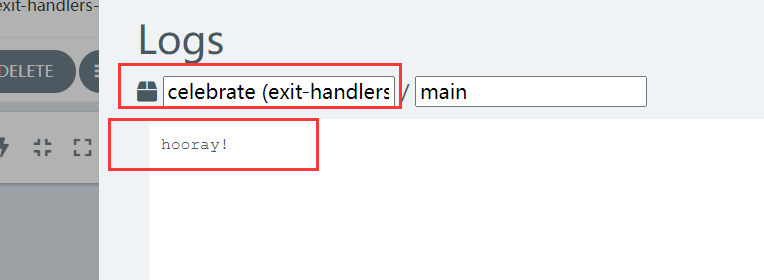
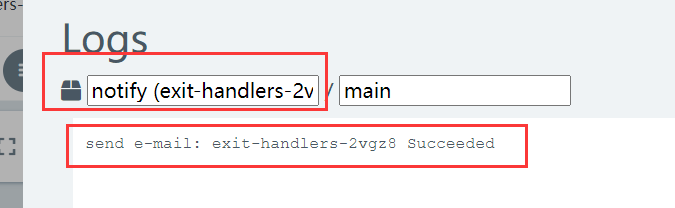
接下来分别演示工作流成功和不成功所执行的任务,只需要更改exit 0/1状态码即可。
演示工作流不成功:
演示工作流成功:
简单的将官方案例进行实践和配置详细解析,欢迎有研究Argo的大佬们一起交流交流,多多指教!
Argo workflow 案例练习和配置详细解析的更多相关文章
- Linux系统下ssh的相关配置详细解析
Linux系统下ssh的相关配置进行了详细的分析介绍. ssh是大家常用的登录linux服务器的方式,但是为了安全考虑,有时候我们需要针对ssh做一些特殊处理,本文记录笔者曾经做过的一些修改,供大家参 ...
- redis.conf配置详细解析
# redis 配置文件示例 # 当你需要为某个配置项指定内存大小的时候,必须要带上单位, # 通常的格式就是 1k 5gb 4m 等酱紫: # # 1k => 1000 bytes # 1kb ...
- nginx配置详细解析
转自 http://blog.csdn.net/zhongguozhichuang/article/details/528168871.静态HTTP服务器 首先,Nginx是一个HTTP服务器,可以将 ...
- Redis 中 redis.conf配置详细解析
########################################### 基本配置 ##################################### # 端口 port 666 ...
- redis配置详细解析
# redis 配置文件示例 # 当你需要为某个配置项指定内存大小的时候,必须要带上单位, # 通常的格式就是 1k 5gb 4m 等: # # 1k => 1000 bytes # 1kb = ...
- Nginx配置详细解析(全)
一.nginx.conf文件结构 (1)共三部分:由全局块.events块.http块组成.http块又包含http全局块.server块:server块由多个location块组成. (2)一般情况 ...
- C# Memcache集群原理、客户端配置详细解析
概述 memcache是一套开放源的分布式高速缓存系统.由服务端和客户端组成,以守护程序(监听)方式运行于一个或多个服务器中,随时会接收客户端的连接和操作.memcache主要把数据对象缓存到内存中, ...
- springmvc 项目完整示例06 日志–log4j 参数详细解析 log4j如何配置
Log4j由三个重要的组件构成: 日志信息的优先级 日志信息的输出目的地 日志信息的输出格式 日志信息的优先级从高到低有ERROR.WARN. INFO.DEBUG,分别用来指定这条日志信息的重要程度 ...
- 云原生流水线 Argo Workflow 的安装、使用以及个人体验
注意:这篇文章并不是一篇入门教程,学习 Argo Workflow 请移步官方文档 Argo Documentation Argo Workflow 是一个云原生工作流引擎,专注于编排并行任务.它的特 ...
随机推荐
- hal 编码器做用户输入时捕获初值的设置
uint16_t encoderDirection = __HAL_TIM_IS_TIM_COUNTING_DOWN(&htim3); uint16_t encoderValue = __HA ...
- angularJS中$digest already in progress报错解决方法
看到一个前端群里有人问,就查了下解决"$digest already in progress"最好的方式,就是不要使用$scope.$apply()或者$scope.$digest ...
- SYCOJ#1077、01字符串
题目-01字符串 (shiyancang.cn) 1 #include<bits/stdc++.h> 2 using namespace std; 3 4 int main() 5 { 6 ...
- JPA与hibernate-------JPA01
ORM概述 ORM(Object-Relational Mapping) 表示对象关系映射.在面向对象的软件开发中,通过ORM,就可以把对象映射到关系型数据库中.只要有一套程序能够做到建立对象与数据库 ...
- 巧用 CSS 实现动态线条 Loading 动画
有群友问我,使用 CSS 如何实现如下 Loading 效果: 这是一个非常有意思的问题. 我们知道,使用 CSS,我们可以非常轻松的实现这样一个动画效果: <div></div&g ...
- CesiumJS新增官方TypeScript类型定义
Cesium中文网:http://cesiumcn.org/ | 国内快速访问:http://cesium.coinidea.com/ 在当前的1.70版本中,CesiumJS现在附带了正式的Type ...
- c#操作符详解
操作符概览 操作符(Operator)也译为"运算符" 操作符是用来操作数据的,被操作符操作的数据称为操作数(Operand) 操作符的本质 操作符的本质是函数(即算法)的&quo ...
- pytest文档6-allure-pytest
allure-pytest 环境准备 windows环境相关: python 3.6版本pytest 4.5.0版本allure-pytest 2.8.6 最新版 使用pip安装pytest和allu ...
- 集合框架-ArrayList集合存储自定义对象
1 package cn.itcast.p3.arraylist.test; 2 3 import java.util.ArrayList; 4 import java.util.Iterator; ...
- IDEA设置Maven
1,在idea中设置maven,让idea和maven结合使用 idea中内置了maven,一般不使用内置,因为用内置修改maven的设置不方便 使用自己安装的maven,需要覆盖idea中默认的设置 ...