element-ui upload组件上传

方法一:
<el-table-column label="操作">
<template slot-scope="scope">
<el-button icon="el-icon-circle-plus-outline" type="primary" v-on:click="addOp(scope.row)"></el-button>
<el-button type="primary" v-on:click="importQuato(scope.row)">导入额度批次表</el-button>
</template>
</el-table-column>
<el-button type="primary" v-on:click="importQuato(scope.row)">导入额度批次表</el-button>//导入按钮
scope.row可以获取每一列的id <el-dialog :title="title" :visible.sync="dialogVisible">
<el-upload
class="upload-demo"
drag
class='ensure ensureButt'
action="123" //这里可以随意不影响
:before-upload="beforeAvatarUpload" //上传前文件校验
multiple>
<i class="el-icon-upload"></i>
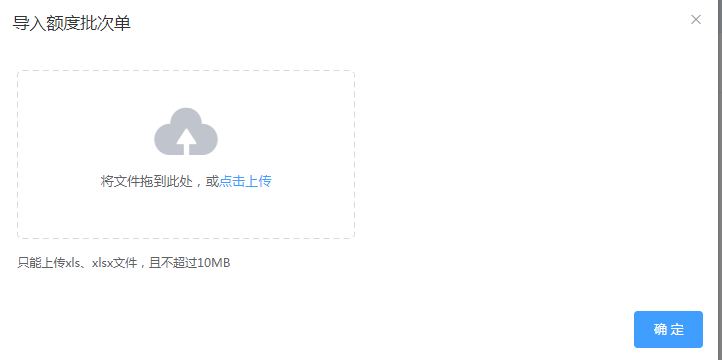
<div class="el-upload__text">将文件拖到此处,或<em>点击上传</em></div>
<div class="el-upload__tip" slot="tip">只能上传xls、xlsx文件,且不超过10MB</div>
</el-upload>
<div slot="footer" class="dialog-footer">
<!--<el-button v-on:click="dialogVisible = false">取 消</el-button>-->
<el-button type="primary" v-on:click="dialogVisible = false">确 定</el-button>
</div>
</el-dialog>
// 上传前对文件的大小的判断

            beforeAvatarUpload (file) {

                var fileName=new Array()

                fileName =file.name.split('.');

                const extension = fileName[fileName.length-1] === 'xls'

                const extension2 =  fileName[fileName.length-1]=== 'xlsx'

                const isLt2M = file.size / 1024 / 1024 < 10

                if (!extension && !extension2) {

                    this.$message({

                        message: '上传模板只能是xls、xlsx格式!',

                        type: 'warning'

                    });

//                    console.log('上传模板只能是xls、xlsx格式!')

                }

                if (!isLt2M) {

                    this.$message({

                        message: '上传模板大小不能超过 10MB!',

                        type: 'warning'

                    });

//                    console.log('上传模板大小不能超过 10MB!')

                }

                if (extension || extension2 && isLt2M == true) {

                    console.log(file)

                    let fd = new FormData()

                    fd.append('invoiceTypeId', this.invoice_type_id)//随文件上传的其他参数

                    fd.append('epid', this.epid)

                    fd.append('file', file)

                    // console.log(fd)

                    this.newImport(fd).then(function (res) {//校验完成后提交

                        console.log(res)

                    }, function () {

                        console.log('failed');

                    });

                    return true

                }

                return extension || extension2 && isLt2M

            },

            //提示信息

            open: function (msg, code) {

                if (code == '000') {

                    this.$alert(msg, '提示', {

                        confirmButtonText: '确定',

                        type: 'success',

                        callback: action => {

                            this.dialogFormVisible = false;

                            location.reload();

                        }

                    });

                } else {

                    this.$alert(msg, '提示', {

                        confirmButtonText: '确定',

                        type: 'error',

                        callback: action => {

                            this.dialogFormVisible = false;

                            location.reload();

                        }

                    });

                }

            },

            newImport (data) {

                this.$http.post('../enterPriseQuota/importEnterPriseQuota', data).then(function (res) {//成功后回调

                    let code = res.data.returncode;//返回json结果

                    let msg = res.data.msg;

                    this.open(msg, code);

                    console.log('success');

                }, function () {

                    console.log('failed');

                });

            },

        }
 @RequestMapping("/importEnterPriseQuota")

    @ResponseBody

    public Map importEnterPriseQuota(@RequestParam(value = "invoiceTypeId") String invoiceTypeId,

                                     @RequestParam(value = "epid") String epid,

                                     @RequestParam("file") MultipartFile proFile, HttpServletRequest request) {

        String fileDir = request.getSession().getServletContext().getRealPath("/tmp");

        File dir = new File(fileDir);

        Map resMap = null;

        File file = null;

        try {

            file = new File(fileDir, proFile.getOriginalFilename());

            if (!dir.exists()) {

                dir.mkdir();

            }

            if (!file.exists()) {

                file.createNewFile();

            }

            proFile.transferTo(file);

            Date a = new Date();

            resMap = enterPriseQuotaService.importEnterPriseQuato(invoiceTypeId,file,epid);

            Date b = new Date();

            log.info("************all_time*************************" + (b.getTime() - a.getTime()));

            return resMap;

        } catch (IOException e) {

            e.printStackTrace();

        } finally {

            if (file != null && file.exists()) {

                file.delete();

            }

        }

        resMap.put("returncode", "999");

        resMap.put("msg", "程序异常,请联系管理员");

        return resMap;

    }
方法二:
<el-dialog :title="tagName" :visible.sync="dialogVisible">

        <el-upload

                class="upload-demo"

                drag

                class='ensure ensureButt'

                :action="importFileUrl"//在初始时指定url地址即可

                :on-error="uploadError"

                :on-success="uploadSuccess"

                :before-upload="beforeAvatarUpload"

                multiple>

            <i class="el-icon-upload"></i>

            <div class="el-upload__text">将文件拖到此处,或<em>点击上传</em></div>

            <div class="el-upload__tip" slot="tip">只能上传xls、xlsx文件,且不超过10MB</div>

        </el-upload>

        <div slot="footer" class="dialog-footer">

            <!--<el-button v-on:click="dialogVisible = false">取 消</el-button>-->

            <el-button type="primary" v-on:click="dialogVisible = false">确 定</el-button>

        </div>

    </el-dialog>
//有时候 :on-success,:on-error 这个函数会无法调用,之前看另一个帖子是用的:onError="uploadError" :onSuccess="uploadSuccess"
http://blog.csdn.net/qq_39685062/article/details/77036582
2018-01-12: 昨天又遇到上传成功但是无法调用成功回调函数的问题,这里涉及到vue的生命周期,导致无法调用,js也不会报错,把对应函数放到methods顶部可解决。

 // 上传成功后的回调

            uploadSuccess (response) {

                let code = response.returncode;

                let msg = response.msg;

                this.open(msg, code);

            },

            // 上传错误

            uploadError (response) {

                this.open("500", "文件导入异常!");

            },
 @RequestMapping("inEmployee")

    @ResponseBody

    public Map inEmployee(HttpServletRequest servletRequest) {

        MultipartHttpServletRequest request = (MultipartHttpServletRequest) servletRequest;

        Iterator<String> itr = request.getFileNames();

        MultipartFile proFile = null;

        while (itr.hasNext()) {

            String str = itr.next();

            proFile = request.getFile(str);

        }

        String fileDir = request.getSession().getServletContext().getRealPath("/tmp");

        File dir = new File(fileDir);

        Map resMap = null;

        File file = null;

        try {

            file = new File(fileDir, proFile.getOriginalFilename());

            if (!dir.exists()) {

                dir.mkdir();

            }

            if (!file.exists()) {

                file.createNewFile();

            }

            proFile.transferTo(file);

            Date a = new Date();

            resMap = employeeService.insEm(file,fileDir);

            Date b = new Date();

            log.info("************all_time*************************" + (b.getTime() - a.getTime()));

            return resMap;

        } catch (IOException e) {

            e.printStackTrace();

        } finally {

            if (file != null && file.exists()) {

                file.delete();

            }

        }

        resMap.put("returncode", "999");

        resMap.put("msg", "程序异常,请联系管理员");

        return resMap;

    }
element-ui upload组件上传的更多相关文章
- React antd如何实现<Upload>组件上传附件再次上传已清除附件缓存问题。
最近在公司做React+antd的项目,遇到一个上传组件的问题,即上传附件成功后,文件展示处仍然还有之前上传附件的缓存信息,需要解决的问题是,要把上一次上传的附件缓存在上传成功或者取消后,可以进行清除 ...
- vue watch 监听element upload组件上传成功返回的url列表
因为 on-success 上传成功返回的是一个异步的结果....如果父组件需要这个结果的话 必须用watch 监听 然后里面建立一个 save()方法 save方法里面再调用接口 传需要的上传之后的 ...
- element ui实现手动上传文件,且只能上传单个文件,并能覆盖上传。
element ui提供了成熟的组件场景,但实际工作中难免会遇到认(sha)真(diao)的产品.比如,最近遇到的,要求实现手动上传特定格式文件(用户点击“上传文件”按钮,确定之后,只是单纯选择了文件 ...
- Vue+Element UI 实现视频上传
一.前言 项目中需要提供一个视频介绍,使用户能够快速.方便的了解如何使用产品以及注意事项. 前台使用Vue+Element UI中的el-upload组件实现视频上传及进度条展示,后台提供视频上传AP ...
- Ant Design Upload 组件上传文件到云服务器 - 七牛云、腾讯云和阿里云的分别实现
在前端项目中经常遇到上传文件的需求,ant design 作为 react 的前端框架,提供的 upload 组件为上传文件提供了很大的方便,官方提供的各种形式的上传基本上可以覆盖大多数的场景,但是对 ...
- Element UI中的上传文件功能
上传文件给后台: <el-upload style="display:inline-block" :limit=" class="upload-demo& ...
- VUE -- iview table 组件 中使用 upload组件 上传组件 on render 事件不会触发问题
碰到的问题是: upload 组件在 on中写的监听事件不会被触发 在 props 中来监听:==>
- 关于本地使用antd的upload组件上传文件,ngnix报错405的问题
使用阿里的ui框架antd的upload,会自动请求ngnix上面的一个路径,也就是action所在的位置,一直报错405 not allowed,后来经讨论,统一将action写成一个路径,后端对这 ...
- 使用element的upload组件实现一个完整的文件上传功能(上)
说到标题就有点心塞了,前段时间项目上需要实现一个文件上传的功能,然后就咔咔的去用了element的upload组件,不用不知道一用吓一跳哇. 在使用的过程中遇到了很多让意想不到的问题,后来也因为时间问 ...
随机推荐
- 2)实现github自动登陆获取信息
# -*- coding:utf-8 -*- # __author__ = 'lixiang' # 实现github自动登陆和获取数据 import requests from bs4 import ...
- CentOS6文件系统思维导图
- functions 示例
示例1: ","字符串截取 CREATE OR REPLACE FUNCTION splitstr(p_string IN VARCHAR2, p_delimiter IN VA ...
- Confluence 6 SQL Server 测试你的数据库连接
在你的数据库设置界面,有一个 测试连接(Test connection)按钮可以检查: Confluence 可以连接你的数据库服务器 数据库字符集和隔离级别是正确的 你的数据库用户有正确的数据库权限 ...
- nginx实践(二)之静态资源web服务(浏览器缓存场景)
配置语法-expires
- mysql视图的作用
测试表:user有id,name,age,sex字段 测试表:goods有id,name,price字段 测试表:ug有id,userid,goodsid字段 视图的作用实在是太强大了,以下是我体验过 ...
- Python匿名函数(lambda)
result = lambda [arg1 [, arg2, .....]]:expression result:用于调用lambda表达式 [arg1 [, arg2, -]]:可选参数,用于传递参 ...
- nginx+tomcat实现集群,redis实现session共享,软连接实现文件共享:http://blog.csdn.net/hua1586981/article/details/78132710
转载 2017年02月08日 16:52:41 730 相信很多人都听过nginx,这个小巧的东西慢慢地在吞食apache和IIS的份额.那究竟它有什么作用呢?可能很多人未必了解. 说到反向代理,可能 ...
- Windows配置Apache服务器
下载的Apache版本:httpd-2.4.32-o102n-x64-vc14 简单粗暴式配置: 1.打开\conf\httpd.conf修改第60行和第224行,其中8081是电脑上没有被使用的端口 ...
- MyEclipse和tomcat结合编写jsp对于中文乱码的解决方法
一.Java和jsp 中文乱码原因和解决方法: Java的内核和class文件是基于unicode的,这使Java程序具有良好的跨平台性,但也带来了一些中文乱码问题的麻烦.原因有两方面: 第一方面:J ...