Redux学习(2) ----- 异步和中间件
Redux中间件,其实就是一个函数, 当我们发送一个action的时候,先经过它,我们就可以对action进行处理,然后再发送action到达reducer, 改变状态,这时我们就可以在中间件中,对action 和对应的state进行跟踪,有利于bug处理,还有就是利用中间件进行异步处理。中间件的由来在Redux官网上已经解释的很清楚了,我们这里只是使用它们。
Redux 中间件的样式如下:
const logger = store => next => action => {
    // 这里面就是我们这个中间件的要做的事件,由于把store, action 都传入来进来,我们可以对action进行操作,也可以调用store暴露的 api.
}
它接受一个store作为参数,然后返回一个函数,函数接受next作为参数,还是返回一个函数,函数再接受一个参数action, 然后,我们在这个函数体内写代码,表示这个中间件要做的事情,es6的箭头函数可能不直观,我们用es5重写一下,就以官网中的logger为例
// es6 箭头函数样式
const logger = store => next => action => {
  console.log('dispatching', action);
  let result = next(action);
  console.log('next state', store.getState());
  return result;
}
// es5 普通样式
const logger = function(store) {
    return function(next) {
        return function(action) {
            console.log('dispatching', action);
            let result = next(action);
            console.log('next state', store.getState());
            return result;
        }
    }
}
在这个logger中间件(函数)中,第一句console.log(),输出我们发送的action, 从而记录下action. 第二句next, 调用next 函数发送action, 这个next函数,就是store.dispath() 方法的封装。next就是store.dispatch action后,我们就会获取的新的状态,所以第三句console.log (store.getState())就可以获取新的状态并记录。最后一句return, 主要的是因为中间件可以链接起来调用,一个接一个,所以要return, 把它传入到下一个中间件。
新建一个项目来体验一下中间件。由于后面还要使用异步,我们就一起写了。项目非常简单,页面上有一个按钮,点击按钮时,我们从randomuser.me网站上随机获取一个用户,并进行展示,这很明显涉及到了异步请求。 直接把redux介绍中的使用npm和ES6的项目复制过来,index.html中的body修改如下:
<body>
    <div class="container">
        <button class='btn btn-blue' id="getUser">New Random User</button>
        <h2 id="status"></h2>
        <h2 id="name"></h2>
        <h2 id="email"></h2>
        <h2 id="gender"></h2>
    </div>
    <script src='./bundle.js'></script>
  </body>
counter.css 修改如下:
body {
    padding: 40px;
    font-family: "helvetica neue", sans-serif;
  }

.container {
    width: 600px;
    margin: auto;
    color: black;
    padding: 20px;
    text-align: center;
}

.container h1 {
    margin:;
    padding: 20px;
    font-size: 48px;
}

.container .btn {
    border:;
    padding: 15px;
    margin: 10px;
    width: 40%;
    font-size: 15px;
    outline: none;
    border-radius: 3px;
    color: #FFF;
    font-weight: bold;
}

.btn.btn-blue {
    background-color: #55acee;
    box-shadow: 0px 5px 0px 0px #3C93D5;
}
.pending {
    color: #55acee;
}

.error {
    color: #d84a4a;
}

.success {
    color: #2ecc71;
}
npm run dev 启动项目后,我们页面中就只有一个按钮

现在写index.js文件,首先我们要定义state, reducer来创建store. 对于异步请求来说,它至少有3种状态,请求中的状态,请求成功时的状态,请求失败时的状态。所以首先我们要记录这个状态成用户提示,为了成功和失败进行样式区分,还有一个样式状态,成功之后,我们获取到用户的信息,所以要有一个user信息。
// state 状态
const initalState = {
  user: {        // 记录个人信息,每个人都有姓名,年龄,邮箱,所以它是一个对象。
    name: '',
    email: '',
    gender: ''
  },
  status: '',     // 记录请求状态。
  statusClass: '' // 请求状态成功或失败的样式标识
}
对于三种状态,它肯定会有三个action进行对应,请求中的状态,我们可以发送一个 GET_USER, 请求成功的状态,我们可以发送USER_RECIEVED, 请求失败的状态,我们可以发送ERROR,相应地,recuder中就要处理这3个type
当我们发送GET_USER action时,那么请求状态的变量status应为pending, 同是statusClass至为pending ,所以reducer这个分支,只需要要改变这个状态为{user:{}, status: 'pending', statusClass: 'pending"}
当USER_RECIEVED 时,我们就获取的user信息,同时state 就变成了 User Recieved 状态,这个分支可能如下:
{
  user: {
    name: 'sam',
    email: '105@gmail.com',
    gender: 'male'
  },
  status: 'User reciever',
  statusClass: 'success'
}
当ERROR 时,我们也是改变状态,就可以了,和GET_USER 一样。整 个reducer代码如下:
// REDCUER
function userReducer(state=initalState, action) {
  const user = {
    name: '',
    email: '',
    gender: ''
  };

  switch (action.type) {
    case 'GET_USER':
      return {...state, status: 'Pending...', statusClass: 'pending'}case 'USER_RECIEVED':
      user.name = `${action.payload[0].name.first} ${action.payload[0].name.last}`
      user.email = action.payload[0].email;
      user.gender = action.payload[0].gender;
      return {...state, user, status: 'User Recieved', statusClass: 'success'}case 'ERROR':
     return {...state, status: `${action.payload.message}`, statusClass: 'error'}
    default:
      return state
  }
}
这时我们就可以创建store了,创建store的时候,它可以接受第二个参数,就是中间件,不过要用到Redux提件的
// STORE接受applyMiddlerWare 参数,从而使用中间件,把用到的中间件传入到applyMiddlerWare函数中
const store = createStore(userReducer, applyMiddleware(logger));
这时我们点击按钮发送一个 GET_USER试一试
// ACTIONS
document.getElementById('getUser').addEventListener('click', function () {
    store.dispatch({type:"GET_USER"});
})
可以看到控制台上对我们的action 和state 进行的记录, 中间件起了作用。

对于logger这种常用的中间件,网上已经有第三方库了,就是redux-logger. npm install redux-logger --save 安装到我们的项目中, 然后在index.js文件引入,import {createLogger} from 'redux-logger'; 然后applyMiddleware(createLogger()) 就可以了。
现在再做异步请求, 有两个中间件可以做异步action:redux-thunk 和redux-promise, 先使用redux-thunk, 发送异步请求用到了 axios; npm install redux-thunk axios --save 安装它们。
使用thunk做异步action, dispatch可以接受一个函数作为参数,这个函数接受dispatch作为参数,在这个函数内部我们可以发送异步请求,获取结果后,再发送action
// 使用异步ACTIONS
document.getElementById('getUser').addEventListener('click', function () {
    store.dispatch(dispatch => {
      // 请求中的action
      dispatch({type: 'GET_USER'});
      // do the xhr request
      axios.get('https://randomuser.me/api/')
          // 请求成功action
          .then(response => {
            dispatch({type: 'USER_RECIEVED', payload: response.data.results})
          })
        // 失败的action
        .catch(error => {
          dispatch({ type: 'ERROR', payload: error})
        })
    });
  })
最后写一个render函数,把获取到的状态渲染到页面上
// 获取元素
const nameEl = document.getElementById('name');
const emailEl = document.getElementById('email');
const genderEl = document.getElementById('gender');
const statusEl = document.getElementById('status');

function render() {
  const state = store.getState()
  nameEl.innerHTML = state.user.name;
  emailEl.innerHTML = state.user.email;
  genderEl.innerHTML = state.user.gender;
  statusEl.innerHTML = state.status;
  statusEl.className = state.statusClass;
}

render()
store.subscribe(render)
整 个index.js文件如下:
import { createStore, applyMiddleware } from 'redux';  // 引入applyMiddleware 使用中间件
import {createLogger} from 'redux-logger';             // 使用第三方logger
import thunk from 'redux-thunk';                       // 使用redux-thunk 操作异步action
import axios from 'axios';                             // 使用axios发送异步请求

// state 状态
const initalState = {
  user: {        // 记录个人信息,每个人都有姓名,年龄,邮箱,所以它是一个对象。
    name: '',
    email: '',
    gender: ''
  },
  status: '',     // 记录请求状态。
  statusClass: '' // 请求状态
}

// REDCUER
function userReducer(state=initalState, action) {
  const user = {
    name: '',
    email: '',
    gender: ''
  };

  switch (action.type) {
    case 'GET_USER':
      return {...state, status: 'Pending...', statusClass: 'pending'}
      break;
    case 'USER_RECIEVED':
      user.name = `${action.payload[0].name.first} ${action.payload[0].name.last}`
      user.email = action.payload[0].email;
      user.gender = action.payload[0].gender;
      return {...state, user, status: 'User Recieved', statusClass: 'success'}
    break;
    case 'ERROR':
    return {...state, status: `${action.payload.message}`, statusClass: 'error'}
    default:
      return state
  }
}

// STORE, 使用了第三方 logger 和thunk中间件
const store = createStore(userReducer, applyMiddleware(createLogger(), thunk));
// 获取元素
const nameEl = document.getElementById('name');
const emailEl = document.getElementById('email');
const genderEl = document.getElementById('gender');
const statusEl = document.getElementById('status');

// 进行渲染
function render() {
  const state = store.getState()
  nameEl.innerHTML = state.user.name;
  emailEl.innerHTML = state.user.email;
  genderEl.innerHTML = state.user.gender;
  statusEl.innerHTML = state.status;
  statusEl.className = state.statusClass;
}

render()
store.subscribe(render)

// 使用异步ACTIONS
document.getElementById('getUser').addEventListener('click', function () {
    store.dispatch(dispatch => {
      // 请求中的action
      dispatch({type: 'GET_USER'});
      // do the xhr request
      axios.get('https://randomuser.me/api/')
          // 请求成功action
          .then(response => {
            dispatch({type: 'USER_RECIEVED', payload: response.data.results})
          })
        // 失败的action
        .catch(error => {
          dispatch({ type: 'ERROR', payload: error})
        })
    });
  })
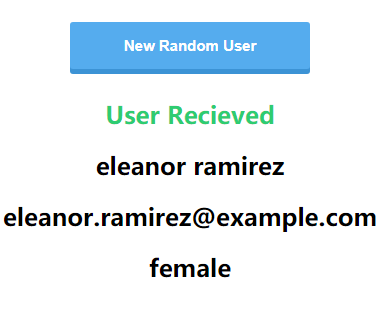
当点击页面上的按钮时,先看到的pend..., 然后就是获取人物信息
现在再使用redux-promise-middleware来发送异步action. redux-promise-middleware中间件充分利用了promise的特性, 因为promise有三种状态,pending ,fullfilled, reject, 正好对应着异步请求的三种状态, 我们只要发送一个action, 自动会获取到三个action,把pending, fullfilled, reject加到我们发送的action 后面形成。npm install redux-promise-middleware --save 安装它,然后import promise from redux-promise-middleware引入。在异步action中我们只发送一个action, 比如FETCH_USER;
// 使用异步ACTIONS
document.getElementById('getUser').addEventListener('click', function () {
  store.dispatch({
    type: 'FETCH_USER',
    payload: axios.get("https://randomuser.me/api/")
  });
})
虽然只有一个action,它实际上发送了三个action: FETCH_USER_PENDING, FETCH_USER_FULFILLED, FETCH_USER_REJECTED, 你可以看到就是我们发送的action, 后面加上promise的三种状态形成: reducer修改如下:
// REDCUER
function userReducer(state=initalState, action) {
  const user = {
    name: '',
    email: '',
    gender: ''
  };

  switch (action.type) {
    case 'FETCH_USER_PENDING':
      return {...state, sendingRequest: true, status: 'Pending...', statusClass: 'pending'}
      break;
    case 'FETCH_USER_FULFILLED':
      user.name = `${action.payload.data.results[0].name.first} ${action.payload.data.results[0].name.last}`
      user.email = action.payload.data.results[0].email;
      user.gender = action.payload.data.results[0].gender;
      return {...state, sendingRequest: false, user, status: 'User Recieved', statusClass: 'success'}
    break;
    case 'FETCH_USER_REJECTED':
    return {...state, sendingRequest: false, status: `${action.payload.message}`, statusClass: 'error'}
    default:
      return state
  }
}
现在点击按钮,也可以获取到用户信息。整个代码如下:
import { createStore, applyMiddleware } from 'redux';  // 引入applyMiddleware 使用中间件
import {createLogger} from 'redux-logger';             // 使用第三方logger
import promise from 'redux-promise-middleware';
import axios from 'axios';                             // 使用axios发送异步请求

// state 状态
const initalState = {
  user: {        // 记录个人信息,每个人都有姓名,年龄,邮箱,所以它是一个对象。
    name: '',
    email: '',
    gender: ''
  },
  status: '',     // 记录请求状态。
  statusClass: '' // 请求状态
}

// REDCUER
function userReducer(state=initalState, action) {
  const user = {
    name: '',
    email: '',
    gender: ''
  };

  switch (action.type) {
    case 'FETCH_USER_PENDING':
      return {...state, sendingRequest: true, status: 'Pending...', statusClass: 'pending'}
      break;
    case 'FETCH_USER_FULFILLED':
      user.name = `${action.payload.data.results[0].name.first} ${action.payload.data.results[0].name.last}`
      user.email = action.payload.data.results[0].email;
      user.gender = action.payload.data.results[0].gender;
      return {...state, sendingRequest: false, user, status: 'User Recieved', statusClass: 'success'}
    break;
    case 'FETCH_USER_REJECTED':
    return {...state, sendingRequest: false, status: `${action.payload.message}`, statusClass: 'error'}
    default:
      return state
  }
}

// STORE
const store = createStore(userReducer, applyMiddleware(createLogger(), promise()));
// 获取元素
const nameEl = document.getElementById('name');
const emailEl = document.getElementById('email');
const genderEl = document.getElementById('gender');
const statusEl = document.getElementById('status');

// 进行渲染
function render() {
  const state = store.getState()
  nameEl.innerHTML = state.user.name;
  emailEl.innerHTML = state.user.email;
  genderEl.innerHTML = state.user.gender;
  statusEl.innerHTML = state.status;
  statusEl.className = state.statusClass;
}

render()
store.subscribe(render)

// 使用异步ACTIONS
document.getElementById('getUser').addEventListener('click', function () {
  store.dispatch({
    type: 'FETCH_USER',
    payload: axios.get("https://randomuser.me/api/")
  });
})
Redux学习(2) ----- 异步和中间件的更多相关文章
- Redux学习笔记--异步Action和Middleware
异步Action 之前介绍的都是同步操作,Redux通过分发action处理state,所有的数据流都是同步的,如果需要一步的话怎么办? 最简单的方式就是使用同步的方式来异步,将原来同步时一个acti ...
- redux学习总结
redux学习总结 *:first-child { margin-top: 0 !important; } body > *:last-child { margin-bottom: 0 !imp ...
- React Redux学习笔记
React Router React Router 使用教程 Redux中间件middleware [译]深入浅出Redux中间件 Redux学习之一:何为middleware? ES6 ES6新特性 ...
- redux学习
redux学习: 1.应用只有一个store,用于保存整个应用的所有的状态数据信息,即state,一个state对应一个页面的所需信息 注意:他只负责保存state,接收action, 从store. ...
- NodeJS学习笔记之Connect中间件模块(一)
NodeJS学习笔记之Connect中间件模块(一) http://www.jb51.net/article/60430.htm NodeJS学习笔记之Connect中间件模块(二) http://w ...
- React+Redux学习笔记:React+Redux简易开发步骤
前言 React+Redux 分为两部分: UI组件:即React组件,也叫用户自定义UI组件,用于渲染DOM 容器组件:即Redux逻辑,处理数据和业务逻辑,支持所有Redux API,参考之前的文 ...
- [译]聊聊C#中的泛型的使用(新手勿入) Seaching TreeVIew WPF 可编辑树Ztree的使用(包括对后台数据库的增删改查) 字段和属性的区别 C# 遍历Dictionary并修改其中的Value 学习笔记——异步 程序员常说的「哈希表」是个什么鬼?
[译]聊聊C#中的泛型的使用(新手勿入) 写在前面 今天忙里偷闲在浏览外文的时候看到一篇讲C#中泛型的使用的文章,因此加上本人的理解以及四级没过的英语水平斗胆给大伙进行了翻译,当然在翻译的过程中发 ...
- Koa2学习(五)中间件
Koa2学习(五)中间件 Koa2通过app.use(function)方法来注册中间件. 所有的http请求都会依次调用app.use()方法,所以中间件的使用顺序非常重要. 中间件的执行顺序 官方 ...
- Redux学习及应用
Redux学习及应用 一:Redux的来源? Redux 是 JavaScript 状态容器,提供可预测化的状态管理.Redux是由 Flux 演变而来,但受 Elm 的启发,避开了 Flux 的复杂 ...
随机推荐
- 20175330 2018-2019-2 《Java程序设计》第八周学习总结
# **教材学习内容总结### 本周学习<Java程序设计>第十五章:*** 泛型: 泛型(Generics)的主要目的是可以建立具有类型安全的集合框架,如链表.散列映射等数据结构.泛型类 ...
- Vue2.x源码学习笔记-Vue静态方法和静态属性整理
Vue静态方法和静态属性,其实直接在浏览器中可以查看到的,如下 圈起来的是其静态属性,但是有的属性对象中的属性的值又是函数.未圈起来的则是函数. 其实它来自如下各个目录下的js文件 // src/co ...
- iOS开发简记(5):设备唯一标识与全局变量
这里记录两个iOS开发中经常用到的知识点,一个是唯一标识,一个是全局变量. (1)唯一标识 唯一标识一台设备(比如iPhone.iPad等)是一个基本的实现与业务上的需求,因为这个唯一标识在许多场景都 ...
- 页面添加iconfont字体-[超详细]-支持彩色
第一步: 去矢量图官网注册一下,获取小图标(字体) 的来源 (也可以是其他类似的网站)这里以 阿里妈妈矢量图 官网为例,因为图标丰富,方便使用. 注册请点:https://www.iconfont.c ...
- Choosing The Commander CodeForces - 817E (01字典树+思维)
As you might remember from the previous round, Vova is currently playing a strategic game known as R ...
- 持续集成之Jenkins自动部署war包到远程服务器
一.无war包链接的情况 无war包链接时,需先下载war包到本地,然后执行: ---------------------------------------------以下部分为转载-------- ...
- 2019省赛训练组队赛3.26周二---FJUT 2016
A.Minimum’s Revenge There is a graph of n vertices which are indexed from 1 to n. For any pair of di ...
- html,css学习实践总结
网页的布局方式 1.什么是网页的布局方式? 网页的布局方式其实就是指浏览器是如何对网页中的元素进行排版的 1.标准流(文档流/普通流)排版方式 1.1其实浏览器默认的排版方式就是标准流的排版方式 1. ...
- PHP 高并发秒杀解决方案
本文提供 PHP 高并发秒杀解决方案(附加三个案例说明(普通流程,使用文件锁,使用redis消息队列)) 1:(正常流程,不做任何高并发处理),代码如下: <?php $_mysqli = ne ...
- Python3练习题求1000以内所有3和5的倍数的总和
sum = 0 for i in range(1,1000): if i%3 == 0 or i%5 == 0: sum += i print(sum)