全网最详细的基于Ubuntu14.04/16.04 + Anaconda2 / Anaconda3 + Python2.7/3.4/3.5/3.6安装Tensorflow详细步骤(图文)(博主推荐)
不多说,直接上干货!
前言
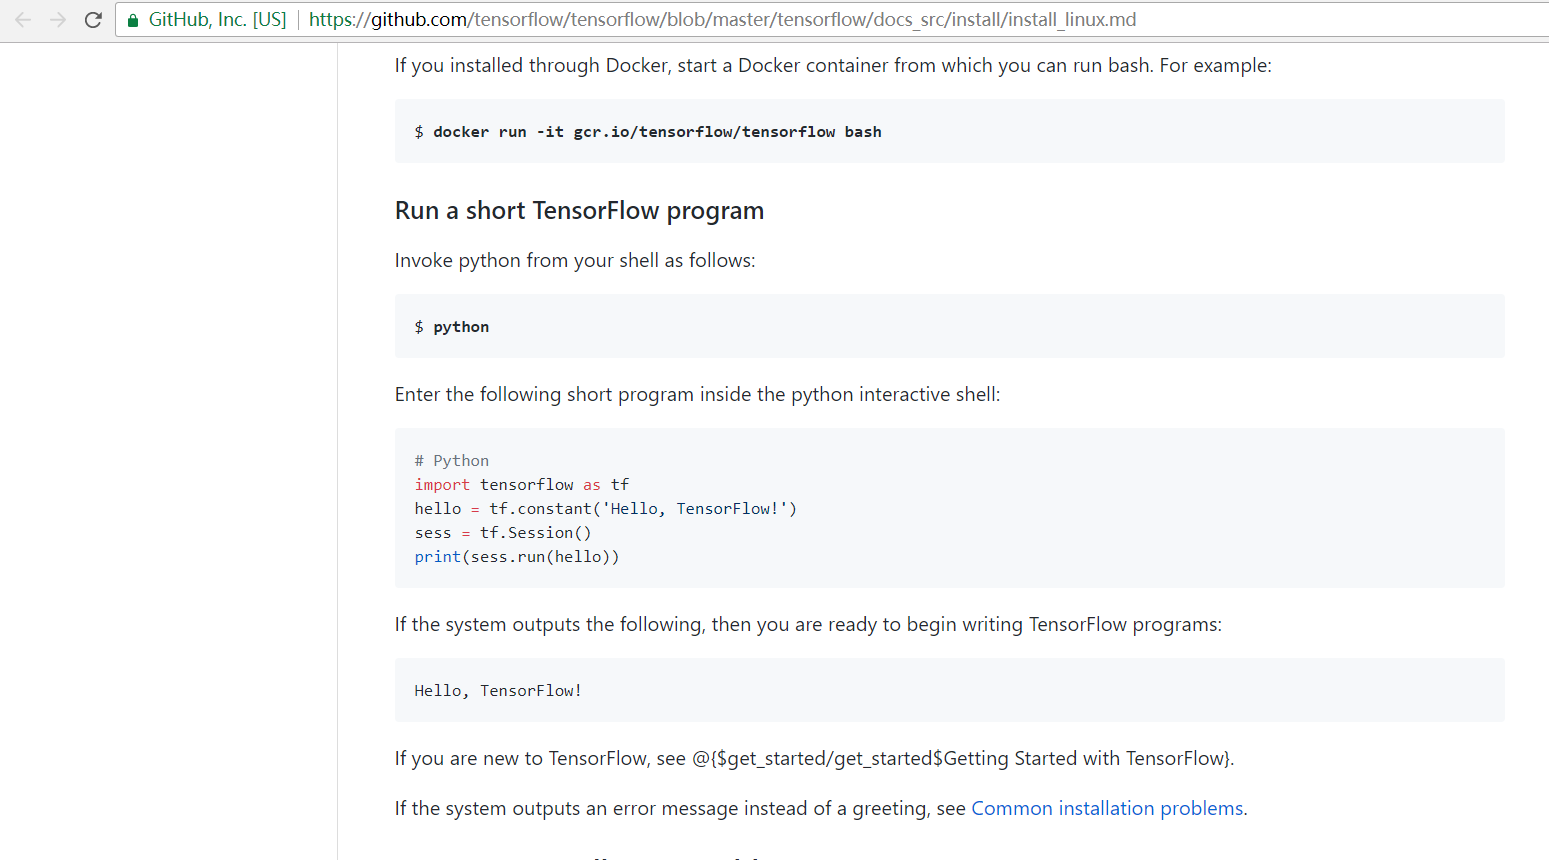
建议参照最新的tensorflow安装步骤(Linux,官方网站经常访问不是很稳定,所以给了一个github的地址): https://github.com/tensorflow/tensorflow/blob/master/tensorflow/docs_src/install/install_linux.md
最近,tensorflow网站上给出了新的使用Anaconda配置和安装Tensorflow的步骤,经过测试,在国内可以无障碍的访问。Anaconda 是一个基于python的科学计算包集合,目前支持Python 2.7,3.4,3.5,3.6。
注意:在安装过程中如果出现很长的报错,观察错误信息的末尾,如果是网络链接相关,就重新运行一遍语句即可(如出现进度条不动的情况,也可重新运行语句),Anaconda自身约500M,tensorflow所需软件包约几十M。
操作系统: Ubuntu 14.04 或 Ubuntu16.04
这是Github官网给出的安装步骤
https://github.com/tensorflow/tensorflow/blob/master/tensorflow/docs_src/install/install_linux.md

第一步、 安装Anaconda
从anaconda官网(https://www.continuum.io/downloads)上下载linux版本的安装文件,运行完成安装。
我这里是以Anaconda2-5.0.1-Linux-x86_64.sh为例,Anaconda3一样啦。这个很简单。

deeplearning@deeplearningsinglenode:~/SoftWare$ pwd

/home/deeplearning/SoftWare

deeplearning@deeplearningsinglenode:~/SoftWare$ ll

total

drwxrwxr-x   deeplearning deeplearning       12月   : ./

drwxr-xr-x  deeplearning deeplearning       12月   : ../

-rwxrw-r--   deeplearning deeplearning  12月   : Anaconda2-5.0.-Linux-x86_64.sh*

drwxr-xr-x   deeplearning deeplearning        8月     jdk1..0_60/

drwxrwxr-x  deeplearning deeplearning       12月   : pycharm-2017.3/

deeplearning@deeplearningsinglenode:~/SoftWare$ bash ./Anaconda2-5.0.-Linux-x86_64.sh

Welcome to Anaconda2 5.0.

In order to continue the installation process, please review the license

agreement.

Please, press ENTER to continue

>>>

===================================

Anaconda End User License Agreement

===================================

Copyright , Anaconda, Inc.

All rights reserved under the -clause BSD License:

Redistribution and use in source and binary forms, with or without modification, are permitted provided that the following conditio

ns are met:

  * Redistributions of source code must retain the above copyright notice, this list of conditions and the following disclaimer.

  * Redistributions in binary form must reproduce the above copyright notice, this list of conditions and the following disclaimer

in the documentation and/or other materials provided with the distribution.

  * Neither the name of Continuum Analytics, Inc. (dba Anaconda, Inc.) ("Continuum") nor the names of its contributors may be used

to endorse or promote products derived from this software without specific prior written permission.

THIS SOFTWARE IS PROVIDED BY THE COPYRIGHT HOLDERS AND CONTRIBUTORS "AS IS" AND ANY EXPRESS OR IMPLIED WARRANTIES, INCLUDING, BUT N

OT LIMITED TO, THE IMPLIED WARRANTIES OF MERCHANTABILITY AND FITNESS FOR A PARTICULAR PURPOSE ARE DISCLAIMED. IN NO EVENT SHALL CON

TINUUM BE LIABLE FOR ANY DIRECT, INDIRECT, INCIDENTAL, SPECIAL, EXEMPLARY, OR CONSEQUENTIAL DAMAGES (INCLUDING, BUT NOT LIMITED TO,

 PROCUREMENT OF SUBSTITUTE GOODS OR SERVICES; LOSS OF USE, DATA, OR PROFITS; OR BUSINESS INTERRUPTION) HOWEVER CAUSED AND ON ANY TH

EORY OF LIABILITY, WHETHER IN CONTRACT, STRICT LIABILITY, OR TORT (INCLUDING NEGLIGENCE OR OTHERWISE) ARISING IN ANY WAY OUT OF THE

 USE OF THIS SOFTWARE, EVEN IF ADVISED OF THE POSSIBILITY OF SUCH DAMAGE.

Notice of Third Party Software Licenses

=======================================

Anaconda contains open source software packages from third parties. These are available on an "as is" basis and subject to their in

dividual license agreements. These licenses are available in Anaconda or at https://docs.anaconda.com/anaconda/packages/pkg-docs .

Any binary packages of these third party tools you obtain via Anaconda are subject to their individual licenses as well as the Anac

onda license. Continuum reserves the right to change which third party tools are provided in Anaconda.

In particular, Anaconda contains re-distributable, run-time, shared-library files from the Intel(TM) Math Kernel Library ("MKL bina

ries"). You are specifically authorized to use the MKL binaries with your installation of Anaconda. You are also authorized to redi

stribute the MKL binaries with Anaconda or in the conda package that contains them. Use and redistribution of the MKL binaries are

subject to the licensing terms located at https://software.intel.com/en-us/license/intel-simplified-software-license. If needed, in

structions for removing the MKL binaries after installation of Anaconda are available at http://www.anaconda.com.

Anaconda also contains cuDNN software binaries from NVIDIA Corporation ("cuDNN binaries"). You are specifically authorized to use t

he cuDNN binaries with your installation of Anaconda. You are also authorized to redistribute the cuDNN binaries with an Anaconda p

ackage that contains them. If needed, instructions for removing the cuDNN binaries after installation of Anaconda are available at

http://www.anaconda.com.

Cryptography Notice

===================

This distribution includes cryptographic software. The country in which you currently reside may have restrictions on the import, p

ossession, use, and/or re-export to another country, of encryption software. BEFORE using any encryption software, please check you

r country's laws, regulations and policies concerning the import, possession, or use, and re-export of encryption software, to see

if this is permitted. See the Wassenaar Arrangement <http://www.wassenaar.org/> for more information.

Continuum has self-classified this software as Export Commodity Control Number (ECCN) 5D002.C., which includes information securit

y software using or performing cryptographic functions with asymmetric algorithms. The form and manner of this distribution makes i

t eligible for export under the License Exception ENC Technology Software Unrestricted (TSU) exception (see the BIS Export Administ

ration Regulations, Section 740.13) for both object code and source code. In addition, the Intel(TM) Math Kernel Library contained

in Continuum's software is classified by Intel(TM) as ECCN 5D992b with no license required for export to non-embargoed countries.

The following packages are included in this distribution that relate to cryptography:

openssl

    The OpenSSL Project is a collaborative effort to develop a robust, commercial-grade, full-featured, and Open Source toolkit imp

lementing the Transport Layer Security (TLS) and Secure Sockets Layer (SSL) protocols as well as a full-strength general purpose cr

yptography library.

pycrypto

    A collection of both secure hash functions (such as SHA256 and RIPEMD160), and various encryption algorithms (AES, DES, RSA, El

Gamal, etc.).

pyopenssl

    A thin Python wrapper around (a subset of) the OpenSSL library.

kerberos (krb5, non-Windows platforms)

    A network authentication protocol designed to provide strong authentication for client/server applications by using secret-key

cryptography.

cryptography

    A Python library which exposes cryptographic recipes and primitives.
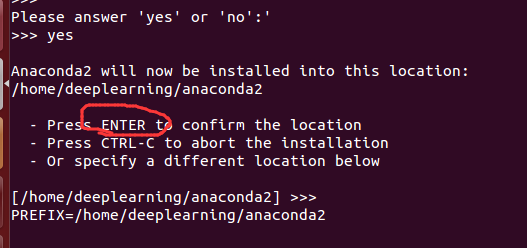
Please answer 'yes' or 'no':'

>>> yes

Anaconda2 will now be installed into this location:

/home/deeplearning/anaconda2

  - Press ENTER to confirm the location

  - Press CTRL-C to abort the installation

  - Or specify a different location below

[/home/deeplearning/anaconda2] >>>

PREFIX=/home/deeplearning/anaconda2
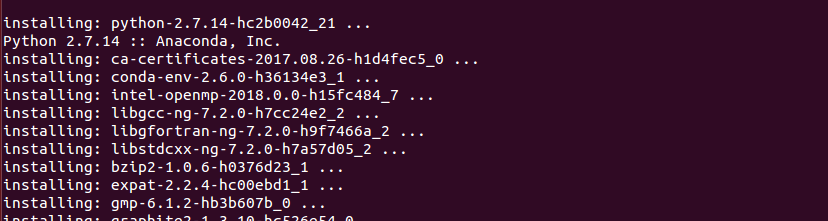

installing: python-2.7.-hc2b0042_21 ...

Python 2.7. :: Anaconda, Inc.

installing: ca-certificates-2017.08.-h1d4fec5_0 ...

installing: conda-env-2.6.-h36134e3_1 ...

installing: intel-openmp-2018.0.-h15fc484_7 ...

installing: libgcc-ng-7.2.-h7cc24e2_2 ...

installing: libgfortran-ng-7.2.-h9f7466a_2 ...

installing: libstdcxx-ng-7.2.-h7a57d05_2 ...

installing: bzip2-1.0.-h0376d23_1 ...

installing: expat-2.2.-hc00ebd1_1 ...

installing: gmp-6.1.-hb3b607b_0 ...

installing: graphite2-1.3.-hc526e54_0 ...

installing: icu-58.2-h211956c_0 ...

installing: jbig-2.1-hdba287a_0 ...

installing: jpeg-9b-habf39ab_1 ...

installing: libffi-3.2.-h4deb6c0_3 ...

installing: libsodium-1.0.-h31c71d8_2 ...

installing: libssh2-1.8.-h8c220ad_2 ...

installing: libtool-2.4.-hd50d1a6_0 ...

installing: libxcb-1.12-h84ff03f_3 ...

installing: lzo-2.10-h1bfc0ba_1 ...

installing: mkl-2018.0.-hb491cac_4 ...

installing: ncurses-6.0-h06874d7_1 ...

installing: openssl-1.0.2l-h077ae2c_5 ...

installing: patchelf-0.9-hf79760b_2 ...

installing: pcre-8.41-hc71a17e_0 ...

installing: pixman-0.34.-h83dc358_2 ...

installing: tk-8.6.-h5979e9b_1 ...

installing: unixodbc-2.3.-hc36303a_1 ...

installing: xz-5.2.-h2bcbf08_1 ...

installing: yaml-0.1.-h96e3832_1 ...

installing: zlib-1.2.-hfbfcf68_1 ...

installing: curl-7.55.-hcb0b314_2 ...

installing: glib-2.53.-hc861d11_1 ...

installing: hdf5-1.10.-hb0523eb_0 ...

installing: libedit-3.1-heed3624_0 ...

installing: libpng-1.6.-hda9c8bc_2 ...

installing: libtiff-4.0.-h90200ff_9 ...

installing: libxml2-2.9.-h6b072ca_5 ...

installing: mpfr-3.1.-h12ff648_1 ...

installing: pandoc-1.19.2.1-hea2e7c5_1 ...

installing: readline-7.0-hac23ff0_3 ...

installing: zeromq-4.2.-hb0b69da_1 ...

installing: dbus-1.10.-h3b5a359_0 ...

installing: freetype-2.8-h52ed37b_0 ...

installing: gstreamer-1.12.-h4f93127_0 ...

installing: libxslt-1.1.-hcf9102b_5 ...

installing: mpc-1.0.-hf803216_4 ...

installing: sqlite-3.20.-h6d8b0f3_1 ...

installing: fontconfig-2.12.-h88586e7_1 ...

installing: gst-plugins-base-1.12.-he3457e5_0 ...

installing: alabaster-0.7.-py27he5a193a_0 ...

installing: asn1crypto-0.22.-py27h94ebe91_1 ...

installing: backports-1.0-py27h63c9359_1 ...

installing: backports_abc-0.5-py27h7b3c97b_0 ...

installing: beautifulsoup4-4.6.-py27h3f86ba9_1 ...

installing: bitarray-0.8.-py27h304d4c6_0 ...

installing: boto-2.48.-py27h9556ac2_1 ...

installing: cairo-1.14.-haa5651f_5 ...

installing: cdecimal-2.3-py27h4e63abe_1 ...

installing: certifi-2017.7.27.1-py27h9ceb091_0 ...

installing: chardet-3.0.-py27hfa10054_1 ...

installing: click-6.7-py27h4225b90_0 ...

installing: cloudpickle-0.4.-py27ha64365b_0 ...

installing: colorama-0.3.-py27h5cde069_0 ...

installing: configparser-3.5.-py27h5117587_0 ...

installing: contextlib2-0.5.-py27hbf4c468_0 ...

installing: dask-core-0.15.-py27h53a7ee6_0 ...

installing: decorator-4.1.-py27h1544723_0 ...

installing: docutils-0.14-py27hae222c1_0 ...

installing: enum34-1.1.-py27h99a27e9_1 ...

installing: et_xmlfile-1.0.-py27h75840f5_0 ...

installing: fastcache-1.0.-py27h4cb8e01_0 ...

installing: filelock-2.0.-py27h38fa839_0 ...

installing: funcsigs-1.0.-py27h83f16ab_0 ...

installing: functools32-3.2.3.2-py27h4ead58f_1 ...

installing: futures-3.1.-py27hdbc8cbb_0 ...

installing: glob2-0.5-py27hd3b7d1f_1 ...

installing: gmpy2-2.0.-py27hc856308_1 ...

installing: greenlet-0.4.-py27hac09c53_0 ...

installing: grin-1.2.-py27h54abee7_1 ...

installing: heapdict-1.0.-py27h33770af_0 ...

installing: idna-2.6-py27h5722d68_1 ...

installing: imagesize-0.7.-py27hd17bf80_0 ...

installing: ipaddress-1.0.-py27h337fd85_0 ...

installing: ipython_genutils-0.2.-py27h89fb69b_0 ...

installing: itsdangerous-0.24-py27hb8295c1_1 ...

installing: jdcal-1.3-py27h2cc5433_0 ...

installing: jedi-0.10.-py27h8af4e35_0 ...

installing: lazy-object-proxy-1.3.-py27h682c727_0 ...

installing: locket-0.2.-py27h73929a2_1 ...

installing: lxml-4.1.-py27hb025457_0 ...

installing: markupsafe-1.0-py27h97b2822_1 ...

installing: mccabe-0.6.-py27h0e7c7be_1 ...

installing: mistune-0.7.-py27h6da7e90_0 ...

installing: mkl-service-1.1.-py27hb2d42c5_4 ...

installing: mpmath-0.19-py27h4bb41bd_2 ...

installing: msgpack-python-0.4.-py27hc2fa789_0 ...

installing: multipledispatch-0.4.-py27h9b5f95a_0 ...

installing: numpy-1.13.-py27hbcc08e0_0 ...

installing: olefile-0.44-py27h4bd3e3c_0 ...

installing: pandocfilters-1.4.-py27h428e1e5_1 ...

installing: path.py-10.3.-py27hc258cac_0 ...

installing: pep8-1.7.-py27h444351c_0 ...

installing: pkginfo-1.4.-py27hee1a9ad_1 ...

installing: ply-3.10-py27hd6d9ae5_0 ...

installing: psutil-5.4.-py27h7da3062_0 ...

installing: ptyprocess-0.5.-py27h4ccb14c_0 ...

installing: py-1.4.-py27he5894e4_1 ...

installing: pycodestyle-2.3.-py27h904819d_0 ...

installing: pycosat-0.6.-py27h1cf261c_1 ...

installing: pycparser-2.18-py27hefa08c5_1 ...

installing: pycrypto-2.6.-py27h9abbf5c_1 ...

installing: pycurl-7.43.-py27hcf8ebea_3 ...

installing: pyodbc-4.0.-py27h7f7627d_0 ...

installing: pyparsing-2.2.-py27hf1513f8_1 ...

installing: pysocks-1.6.-py27he2db6d2_1 ...

installing: pytz-2017.2-py27hcac29fa_1 ...

installing: pyyaml-3.12-py27h2d70dd7_1 ...

installing: pyzmq-16.0.-py27h297844f_2 ...

installing: qt-5.6.-h974d657_12 ...

installing: qtpy-1.3.-py27h63d3751_0 ...

installing: rope-0.10.-py27hcb0a616_0 ...

installing: ruamel_yaml-0.11.-py27h672d447_2 ...

installing: scandir-1.6-py27hf7388dc_0 ...

installing: simplegeneric-0.8.-py27h19e43cd_0 ...

installing: sip-4.18.-py27he9ba0ab_2 ...

installing: six-1.11.-py27h5f960f1_1 ...

installing: snowballstemmer-1.2.-py27h44e2768_0 ...

installing: sortedcontainers-1.5.-py27he59936f_0 ...

installing: sphinxcontrib-1.0-py27h1512b58_1 ...

installing: sqlalchemy-1.1.-py27hb0a01da_0 ...

installing: subprocess32-3.2.-py27h373dbce_0 ...

installing: tblib-1.3.-py27h51fe5ba_0 ...

installing: toolz-0.8.-py27hd3b1e7e_0 ...

installing: typing-3.6.-py27h66f49e2_0 ...

installing: unicodecsv-0.14.-py27h5062da9_0 ...

installing: wcwidth-0.1.-py27h9e3e1ab_0 ...

installing: webencodings-0.5.-py27hff10b21_1 ...

installing: werkzeug-0.12.-py27hbf75dff_0 ...

installing: wrapt-1.10.-py27h04f6869_0 ...

installing: xlrd-1.1.-py27ha77178f_1 ...

installing: xlsxwriter-1.0.-py27h12cbc6b_0 ...

installing: xlwt-1.3.-py27h3d85d97_0 ...

installing: babel-2.5.-py27h20693cd_0 ...

installing: backports.shutil_get_terminal_size-1.0.-py27h5bc021e_2 ...

installing: bottleneck-1.2.-py27h21b16a3_0 ...

installing: cffi-1.10.-py27hf1aaaf4_1 ...

installing: conda-verify-2.0.-py27hf052a9d_0 ...

installing: cycler-0.10.-py27hc7354d3_0 ...

installing: cytoolz-0.8.-py27hf14aec9_0 ...

installing: entrypoints-0.2.-py27h502b47d_2 ...

installing: h5py-2.7.-py27h71d1790_1 ...

installing: harfbuzz-1.5.-h2545bd6_0 ...

installing: html5lib-0.999999999-py27hdf15f34_0 ...

installing: llvmlite-0.20.-py27_0 ...

installing: networkx-2.0-py27hfc23926_0 ...

installing: nltk-3.2.-py27h41293c3_0 ...

installing: numexpr-2.6.-py27he5efce1_1 ...

installing: openpyxl-2.4.-py27h9f0c937_1 ...

installing: packaging-16.8-py27h5e07c7c_1 ...

installing: partd-0.3.-py27h4e55004_0 ...

installing: pathlib2-2.3.-py27h6e9d198_0 ...

installing: pexpect-4.2.-py27hcf82287_0 ...

installing: pillow-4.2.-py27h7cd2321_0 ...

installing: pycairo-1.13.-py27hea6d626_0 ...

installing: pyqt-5.6.-py27h4b1e83c_5 ...

installing: python-dateutil-2.6.-py27h4ca5741_1 ...

installing: pywavelets-0.5.-py27hecda097_0 ...

installing: qtawesome-0.4.-py27hd7914c3_0 ...

installing: scipy-0.19.-py27h1edc525_3 ...

installing: setuptools-36.5.-py27h68b189e_0 ...

installing: singledispatch-3.4.0.3-py27h9bcb476_0 ...

installing: sortedcollections-0.5.-py27h135218e_0 ...

installing: sphinxcontrib-websupport-1.0.-py27hf906f22_1 ...

installing: ssl_match_hostname-3.5.0.1-py27h4ec10b9_2 ...

installing: sympy-1.1.-py27hc28188a_0 ...

installing: traitlets-4.3.-py27hd6ce930_0 ...

installing: zict-0.1.-py27h12c336c_0 ...

installing: backports.functools_lru_cache-1.4-py27he8db605_1 ...

installing: bleach-2.0.-py27h3a0dcc8_0 ...

installing: clyent-1.2.-py27h7276e6c_1 ...

installing: cryptography-2.0.-py27hea39389_1 ...

installing: cython-0.26.-py27hdbcff32_0 ...

installing: datashape-0.5.-py27hf507385_0 ...

installing: get_terminal_size-1.0.-haa9412d_0 ...

installing: gevent-1.2.-py27h475ea6a_0 ...

installing: imageio-2.2.-py27hf108a7f_0 ...

installing: isort-4.2.-py27hcfa4749_0 ...

installing: jinja2-2.9.-py27h82327ae_1 ...

installing: jsonschema-2.6.-py27h7ed5aa4_0 ...

installing: jupyter_core-4.3.-py27hcd9ae3a_0 ...

installing: navigator-updater-0.1.-py27h0f9cd39_0 ...

installing: nose-1.3.-py27heec2199_2 ...

installing: numba-0.35.-np113py27_10 ...

installing: pandas-0.20.-py27h820b67f_2 ...

installing: pango-1.40.-h8191d47_0 ...

installing: patsy-0.4.-py27hd1cf8c0_0 ...

installing: pickleshare-0.7.-py27h09770e1_0 ...

installing: pyflakes-1.6.-py27h904a57d_0 ...

installing: pygments-2.2.-py27h4a8b6f5_0 ...

installing: pytables-3.4.-py27h1f7bffc_2 ...

installing: pytest-3.2.-py27h98000ae_1 ...

installing: scikit-learn-0.19.-py27h445a80a_0 ...

installing: testpath-0.3.-py27hc38d2c4_0 ...

installing: tornado-4.5.-py27h97b179f_0 ...

installing: wheel-0.29.-py27h411dd7b_1 ...

installing: astroid-1.5.-py27h8f8f47c_0 ...

installing: astropy-2.0.-py27h57072c0_4 ...

installing: bkcharts-0.2-py27h241ae91_0 ...

installing: bokeh-0.12.-py27he46cc6b_0 ...

installing: distributed-1.19.-py27h38c4a05_0 ...

installing: flask-0.12.-py27h6d5c1cd_0 ...

installing: jupyter_client-5.1.-py27hbee1118_0 ...

installing: matplotlib-2.1.-py27h09aba24_0 ...

installing: nbformat-4.4.-py27hed7f2b2_0 ...

installing: pip-9.0.-py27hbf658b2_3 ...

installing: prompt_toolkit-1.0.-py27h1b593e1_0 ...

installing: pyopenssl-17.2.-py27h189ff3b_0 ...

installing: statsmodels-0.8.-py27hc87d62d_0 ...

installing: terminado-0.6-py27h4be8df9_0 ...

installing: dask-0.15.-py27hb94b45f_0 ...

installing: flask-cors-3.0.-py27h1a8a27f_0 ...

installing: ipython-5.4.-py27h36c99b6_1 ...

installing: nbconvert-5.3.-py27he041f76_0 ...

installing: pylint-1.7.-py27h6bc7935_0 ...

installing: seaborn-0.8.-py27h9d2aaa1_0 ...

installing: urllib3-1.22-py27ha55213b_0 ...

installing: ipykernel-4.6.-py27hc93e584_0 ...

installing: odo-0.5.-py27h9170de3_0 ...

installing: requests-2.18.-py27hc5b0589_1 ...

installing: scikit-image-0.13.-py27h06cb35d_1 ...

installing: anaconda-client-1.6.-py27hc8169bf_0 ...

installing: blaze-0.11.-py27h5f341da_0 ...

installing: conda-4.3.-py27h6ae6dc7_0 ...

installing: jupyter_console-5.2.-py27hc6bee7e_1 ...

installing: notebook-5.0.-py27h3661c2b_2 ...

installing: qtconsole-4.3.-py27hc444b0d_0 ...

installing: sphinx-1.6.-py27hf9b1778_0 ...

installing: anaconda-project-0.8.-py27hd7a9a97_0 ...

installing: conda-build-3.0.-py27hff9f855_0 ...

installing: jupyterlab_launcher-0.4.-py27h0e16d15_0 ...

installing: numpydoc-0.7.-py27h9647a75_0 ...

installing: widgetsnbextension-3.0.-py27hcb77dec_1 ...

installing: anaconda-navigator-1.6.-py27hfbc306d_0 ...

installing: ipywidgets-7.0.-py27h4fda95d_0 ...

installing: jupyterlab-0.27.-py27h42ebfef_2 ...

installing: spyder-3.2.-py27h04a3490_0 ...

installing: _ipyw_jlab_nb_ext_conf-0.1.-py27h08a7f0c_0 ...

installing: jupyter-1.0.-py27h505fd4b_0 ...

installing: anaconda-5.0.-py27hd9359a7_1 ...

installation finished.

Do you wish the installer to prepend the Anaconda2 install location

to PATH in your /home/deeplearning/.bashrc ? [yes|no]

[no] >>>

You may wish to edit your .bashrc to prepend the Anaconda2 install location to PATH:

export PATH=/home/deeplearning/anaconda2/bin:$PATH

Thank you for installing Anaconda2!
因为这是一个坑,是安装时最后一步添加环境变量的时候没有选择yes导致运行 conda info 时出错,很好解决,根据错误提示:
然后,紧接着去配置Anaconda2的环境变量。怎么做呢?很简单。
在命令行输入就可以了。

$ export PATH=/home/deeplearning/anaconda2/bin:$PATH

第二步、建立一个tensorflow的运行环境
# Python 2.7 (选好自己的)

$ conda create -n tensorflow python=2.7

# Python 3.4  (选好自己的)

$ conda create -n tensorflow python=3.4

# Python 3.5  (选好自己的)

$ conda create -n tensorflow python=3.5
注意:在这一步,你也许会遇到conda: command not found

遇到这个问题的时候,
解决方法是:
export PATH="/home/[your_name]/anaconda/bin:$PATH"
比如我这里是
export PATH=/home/deeplearning/anaconda2/bin:$PATH
但是下一次重启之后,还是会出现这个问题,所以我们要激活下 ~/.bash_profile
. ~/.bash_profile

#或者

source ~/.bash_profile
或者source /etc/profile
那是因为我的环境变量是如下:
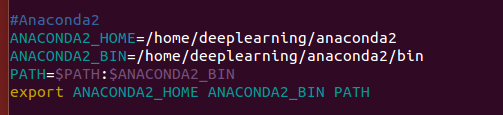
#Anaconda2

ANACONDA2_HOME=/home/deeplearning/anaconda2

ANACONDA2_BIN=/home/deeplearning/anaconda2/bin

PATH=$PATH:$ANACONDA2_BIN

export ANACONDA2_HOME ANACONDA2_BIN PATH
所以,

deeplearning@deeplearningsinglenode:~$ conda create -n tensorflow python=2.7
Fetching package metadata ...........
Solving package specifications: . Package plan for installation in environment /home/deeplearning/anaconda2/envs/tensorflow: The following NEW packages will be INSTALLED: ca-certificates: 2017.08.-h1d4fec5_0
certifi: 2017.11.-py27h71e7faf_0
libedit: 3.1-heed3624_0
libffi: 3.2.-hd88cf55_4
libgcc-ng: 7.2.-h7cc24e2_2
libstdcxx-ng: 7.2.-h7a57d05_2
ncurses: 6.0-h9df7e31_2
openssl: 1.0.2m-h26d622b_1
pip: 9.0.-py27ha730c48_4
python: 2.7.-hdd48546_24
readline: 7.0-ha6073c6_4
setuptools: 36.5.-py27h68b189e_0
sqlite: 3.20.-hb898158_2
tk: 8.6.-hc745277_3
wheel: 0.30.-py27h2bc6bb2_1
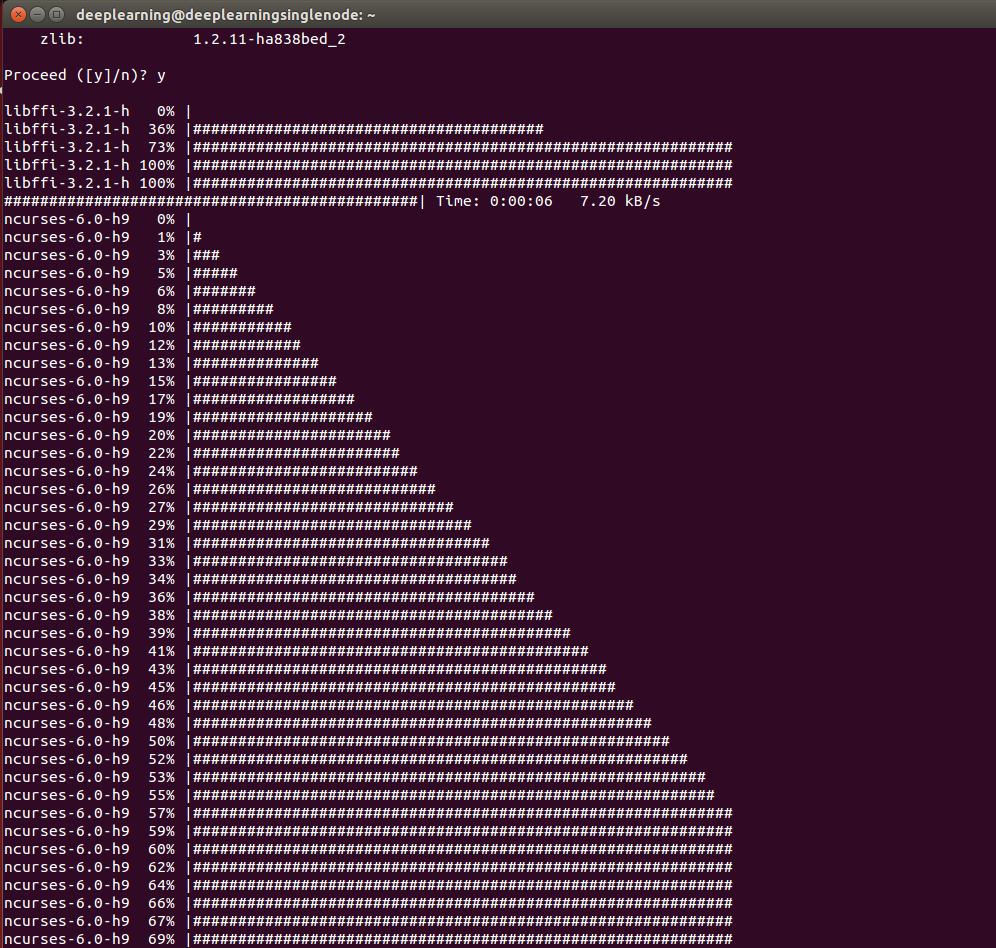
zlib: 1.2.-ha838bed_2 Proceed ([y]/n)? y
第三步、在conda环境中安装tensorflow
在conda环境中安装tensorflow的好处是可以便捷的管理tensorflow的依赖包。
分为两个步骤:激活上一步建立的名为tensorflow的conda环境;用conda或者pip工具安装Tensorflow,我选择的是pip方式。
3.1 pip方式(可以这种方式来安装)
pip方式需要首先激活conda环境

deeplearning@deeplearningsinglenode:~$ source activate tensorflow

(tensorflow) deeplearning@deeplearningsinglenode:~$
然后根据要安装的不同tensorflow版本选择对应的一条环境变量设置export语句(操作系统,Python版本,CPU版本还是CPU+GPU版本)
# Ubuntu/Linux -bit, CPU only, Python 2.7

(tensorflow)$ export TF_BINARY_URL=https://storage.googleapis.com/tensorflow/linux/cpu/tensorflow-0.10.0-cp27-none-linux_x86_64.whl

# Ubuntu/Linux -bit, GPU enabled, Python 2.7

# Requires CUDA toolkit 7.5 and CuDNN v5. For other versions, see "Install from sources" below.

(tensorflow)$ export TF_BINARY_URL=https://storage.googleapis.com/tensorflow/linux/gpu/tensorflow-0.10.0-cp27-none-linux_x86_64.whl

# Mac OS X, CPU only, Python 2.7:

(tensorflow)$ export TF_BINARY_URL=https://storage.googleapis.com/tensorflow/mac/cpu/tensorflow-0.10.0-py2-none-any.whl

# Mac OS X, GPU enabled, Python 2.7:

(tensorflow)$ export TF_BINARY_URL=https://storage.googleapis.com/tensorflow/mac/gpu/tensorflow-0.10.0-py2-none-any.whl

# Ubuntu/Linux -bit, CPU only, Python 3.4

(tensorflow)$ export TF_BINARY_URL=https://storage.googleapis.com/tensorflow/linux/cpu/tensorflow-0.10.0-cp34-cp34m-linux_x86_64.whl

# Ubuntu/Linux -bit, GPU enabled, Python 3.4

# Requires CUDA toolkit 7.5 and CuDNN v5. For other versions, see "Install from sources" below.

(tensorflow)$ export TF_BINARY_URL=https://storage.googleapis.com/tensorflow/linux/gpu/tensorflow-0.10.0-cp34-cp34m-linux_x86_64.whl

# Ubuntu/Linux -bit, CPU only, Python 3.5

(tensorflow)$ export TF_BINARY_URL=https://storage.googleapis.com/tensorflow/linux/cpu/tensorflow-0.10.0-cp35-cp35m-linux_x86_64.whl

# Ubuntu/Linux -bit, GPU enabled, Python 3.5

# Requires CUDA toolkit 7.5 and CuDNN v5. For other versions, see "Install from sources" below.

(tensorflow)$ export TF_BINARY_URL=https://storage.googleapis.com/tensorflow/linux/gpu/tensorflow-0.10.0-cp35-cp35m-linux_x86_64.whl

# Mac OS X, CPU only, Python 3.4 or 3.5:

(tensorflow)$ export TF_BINARY_URL=https://storage.googleapis.com/tensorflow/mac/cpu/tensorflow-0.10.0-py3-none-any.whl

# Mac OS X, GPU enabled, Python 3.4 or 3.5:

(tensorflow)$ export TF_BINARY_URL=https://storage.googleapis.com/tensorflow/mac/gpu/tensorflow-0.10.0-py3-none-any.whl

最后根据是python 2还是3版本选择一句进行安装。
# Python

(tensorflow)$ pip install --ignore-installed --upgrade $TF_BINARY_URL

# Python

(tensorflow)$ pip3 install --ignore-installed --upgrade $TF_BINARY_URL
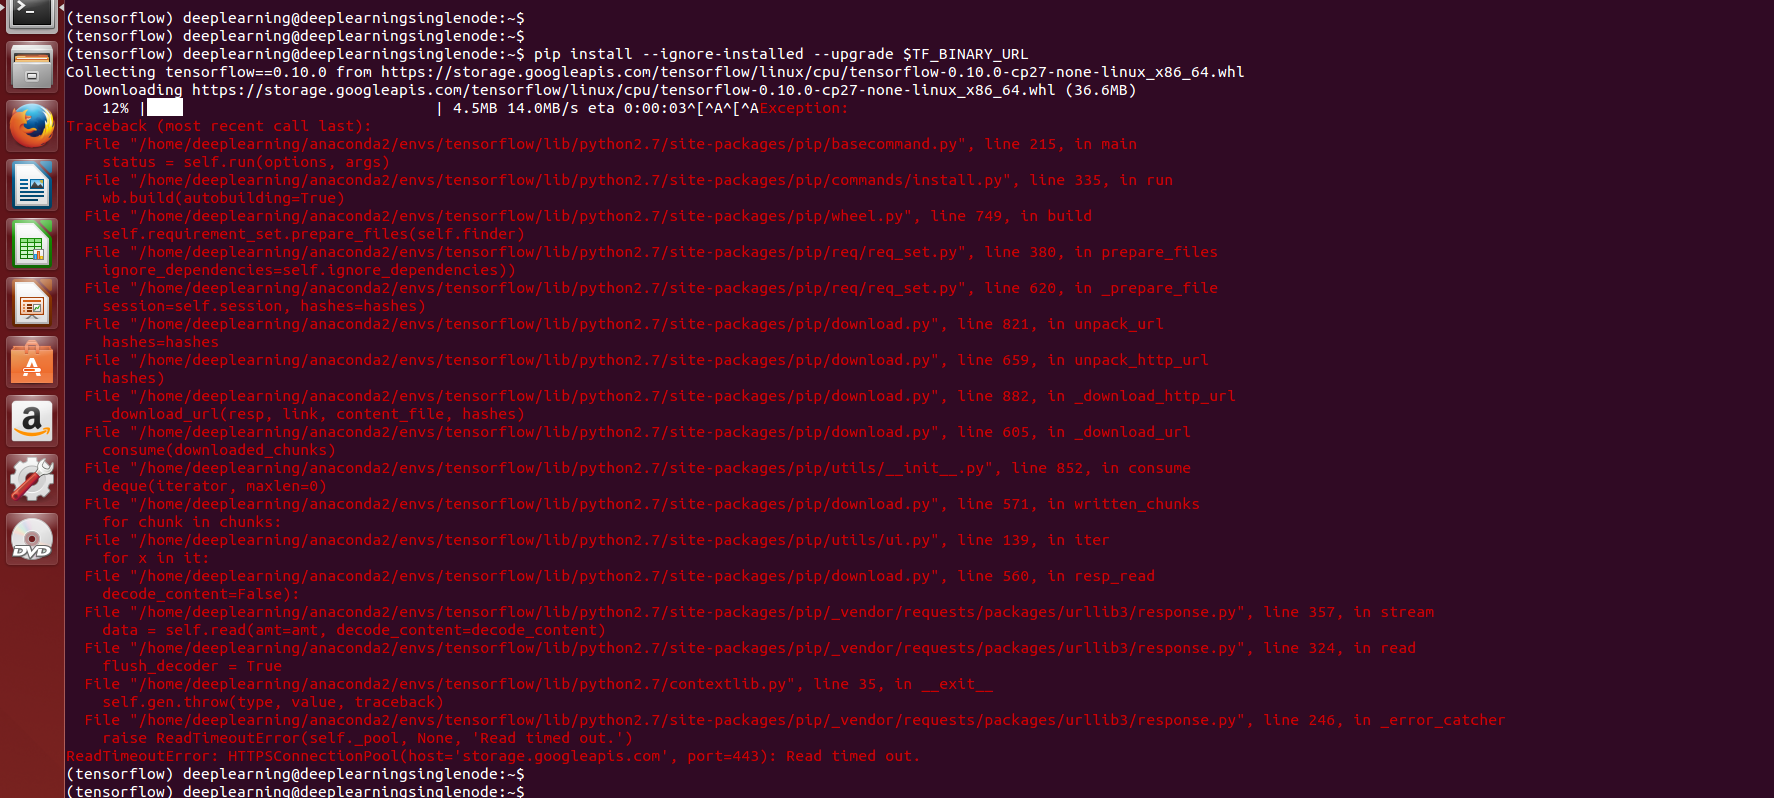
(tensorflow) deeplearning@deeplearningsinglenode:~$ pip install --ignore-installed --upgrade $TF_BINARY_URL

Collecting tensorflow==0.10. from https://storage.googleapis.com/tensorflow/linux/cpu/tensorflow-0.10.0-cp27-none-linux_x86_64.whl

  Downloading https://storage.googleapis.com/tensorflow/linux/cpu/tensorflow-0.10.0-cp27-none-linux_x86_64.whl (36.6MB)

    % |████                            | .5MB .0MB/s eta ::^[^A^[^AException:

Traceback (most recent call last):

  File "/home/deeplearning/anaconda2/envs/tensorflow/lib/python2.7/site-packages/pip/basecommand.py", line , in main

    status = self.run(options, args)

  File "/home/deeplearning/anaconda2/envs/tensorflow/lib/python2.7/site-packages/pip/commands/install.py", line , in run

    wb.build(autobuilding=True)

  File "/home/deeplearning/anaconda2/envs/tensorflow/lib/python2.7/site-packages/pip/wheel.py", line , in build

    self.requirement_set.prepare_files(self.finder)

  File "/home/deeplearning/anaconda2/envs/tensorflow/lib/python2.7/site-packages/pip/req/req_set.py", line , in prepare_files

    ignore_dependencies=self.ignore_dependencies))

  File "/home/deeplearning/anaconda2/envs/tensorflow/lib/python2.7/site-packages/pip/req/req_set.py", line , in _prepare_file

    session=self.session, hashes=hashes)

  File "/home/deeplearning/anaconda2/envs/tensorflow/lib/python2.7/site-packages/pip/download.py", line , in unpack_url

    hashes=hashes

  File "/home/deeplearning/anaconda2/envs/tensorflow/lib/python2.7/site-packages/pip/download.py", line , in unpack_http_url

    hashes)

  File "/home/deeplearning/anaconda2/envs/tensorflow/lib/python2.7/site-packages/pip/download.py", line , in _download_http_url

    _download_url(resp, link, content_file, hashes)

  File "/home/deeplearning/anaconda2/envs/tensorflow/lib/python2.7/site-packages/pip/download.py", line , in _download_url

    consume(downloaded_chunks)

  File "/home/deeplearning/anaconda2/envs/tensorflow/lib/python2.7/site-packages/pip/utils/__init__.py", line , in consume

    deque(iterator, maxlen=)

  File "/home/deeplearning/anaconda2/envs/tensorflow/lib/python2.7/site-packages/pip/download.py", line , in written_chunks

    for chunk in chunks:

  File "/home/deeplearning/anaconda2/envs/tensorflow/lib/python2.7/site-packages/pip/utils/ui.py", line , in iter

    for x in it:

  File "/home/deeplearning/anaconda2/envs/tensorflow/lib/python2.7/site-packages/pip/download.py", line , in resp_read

    decode_content=False):

  File "/home/deeplearning/anaconda2/envs/tensorflow/lib/python2.7/site-packages/pip/_vendor/requests/packages/urllib3/response.py", line , in stream

    data = self.read(amt=amt, decode_content=decode_content)

  File "/home/deeplearning/anaconda2/envs/tensorflow/lib/python2.7/site-packages/pip/_vendor/requests/packages/urllib3/response.py", line , in read

    flush_decoder = True

  File "/home/deeplearning/anaconda2/envs/tensorflow/lib/python2.7/contextlib.py", line , in __exit__

    self.gen.throw(type, value, traceback)

  File "/home/deeplearning/anaconda2/envs/tensorflow/lib/python2.7/site-packages/pip/_vendor/requests/packages/urllib3/response.py", line , in _error_catcher

    raise ReadTimeoutError(self._pool, None, 'Read timed out.')

ReadTimeoutError: HTTPSConnectionPool(host='storage.googleapis.com', port=): Read timed out.

(tensorflow) deeplearning@deeplearningsinglenode:~$
注意:这是在安装tensorflow的时候创建tensorflow环境失败,这是个坑,因为有些版本地址失效了。
换其他版本试试。比如如下我现在是2017年12月份,采用conda方式安装tensorflow,版本已经是1.4.0-py27_0

3.2 conda方式(或者也可以这种方式来安装)
conda上面目前有人已经做好了tensorflow的pkg,但是版本不一定最新,且只有CPU版本,不支持GPU。
步骤也是首先激活conda环境,然后调用conda install 语句安装.
$ source activate tensorflow

(tensorflow)$  # Your prompt should change

# Linux/Mac OS X, Python 2.7/3.4/3.5, CPU only:

(tensorflow)$ conda install -c conda-forge tensorflow
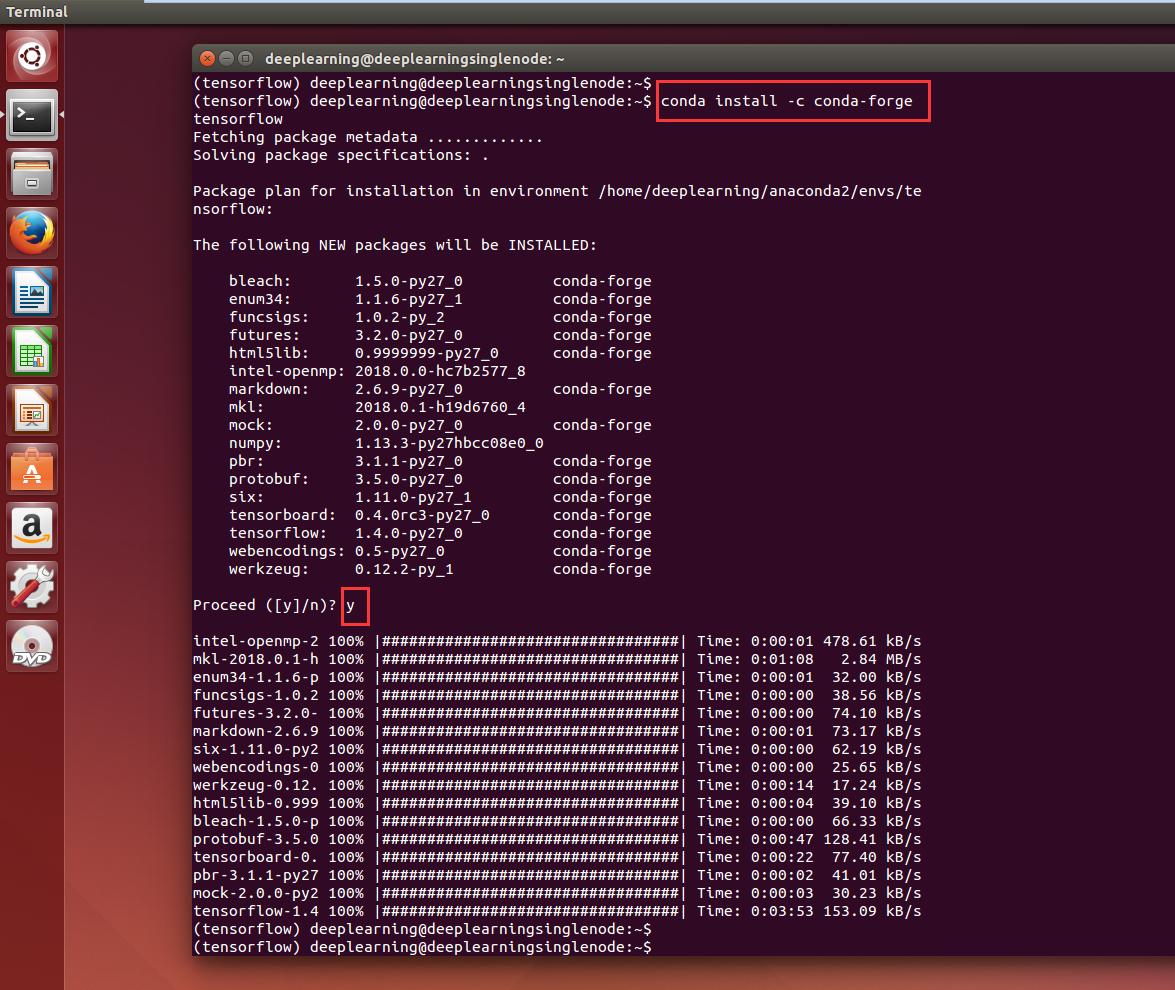
(tensorflow) deeplearning@deeplearningsinglenode:~$ conda install -c conda-forge tensorflow

Fetching package metadata .............

Solving package specifications: .

Package plan for installation in environment /home/deeplearning/anaconda2/envs/tensorflow:

The following NEW packages will be INSTALLED:

    bleach:       1.5.-py27_0          conda-forge

    enum34:       1.1.-py27_1          conda-forge

    funcsigs:     1.0.-py_2            conda-forge

    futures:      3.2.-py27_0          conda-forge

    html5lib:     0.9999999-py27_0      conda-forge

    intel-openmp: 2018.0.-hc7b2577_8

    markdown:     2.6.-py27_0          conda-forge

    mkl:          2018.0.-h19d6760_4

    mock:         2.0.-py27_0          conda-forge

    numpy:        1.13.-py27hbcc08e0_0

    pbr:          3.1.-py27_0          conda-forge

    protobuf:     3.5.-py27_0          conda-forge

    six:          1.11.-py27_1         conda-forge

    tensorboard:  0.4.0rc3-py27_0       conda-forge

    tensorflow:   1.4.-py27_0          conda-forge

    webencodings: 0.5-py27_0            conda-forge

    werkzeug:     0.12.-py_1           conda-forge

Proceed ([y]/n)? y

intel-openmp- % |#################################| Time: :: 478.61 kB/s

mkl-2018.0.-h % |#################################| Time: ::   2.84 MB/s

enum34-1.1.-p % |#################################| Time: ::  32.00 kB/s

funcsigs-1.0. % |#################################| Time: ::  38.56 kB/s

futures-3.2.- % |#################################| Time: ::  74.10 kB/s

markdown-2.6. % |#################################| Time: ::  73.17 kB/s

six-1.11.-py2 % |#################################| Time: ::  62.19 kB/s

webencodings- % |#################################| Time: ::  25.65 kB/s

werkzeug-0.12. % |#################################| Time: ::  17.24 kB/s

html5lib-0.999 % |#################################| Time: ::  39.10 kB/s

bleach-1.5.-p % |#################################| Time: ::  66.33 kB/s

protobuf-3.5. % |#################################| Time: :: 128.41 kB/s

tensorboard-. % |#################################| Time: ::  77.40 kB/s

pbr-3.1.-py27 % |#################################| Time: ::  41.01 kB/s

mock-2.0.-py2 % |#################################| Time: ::  30.23 kB/s

tensorflow-1.4 % |#################################| Time: :: 153.09 kB/s

(tensorflow) deeplearning@deeplearningsinglenode:~$

(tensorflow) deeplearning@deeplearningsinglenode:~$
上面的步骤完成后,从conda环境中退出:

(tensorflow)$ source deactivate
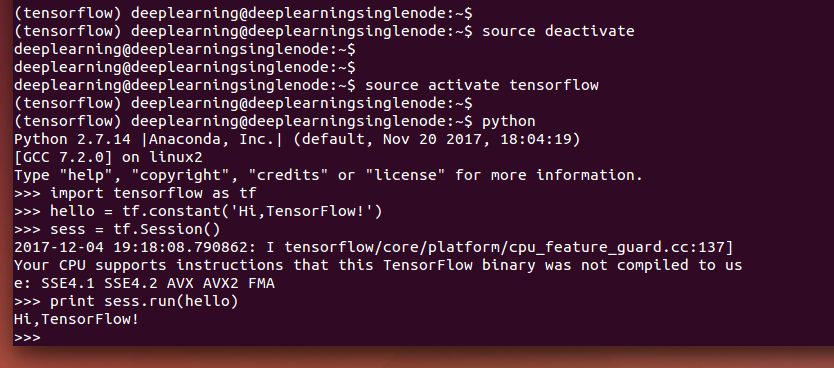
第四步、测试安装是否成功
首先激活 tensorflow 环境,然后进入 python,最后导入 tensorflow 库。如果导入成功则表明安装成功。
(tensorflow) deeplearning@deeplearningsinglenode:~$ source deactivate

deeplearning@deeplearningsinglenode:~$

deeplearning@deeplearningsinglenode:~$

deeplearning@deeplearningsinglenode:~$ source activate tensorflow

(tensorflow) deeplearning@deeplearningsinglenode:~$

(tensorflow) deeplearning@deeplearningsinglenode:~$ python

Python 2.7. |Anaconda, Inc.| (default, Nov  , ::)

[GCC 7.2.] on linux2

Type "help", "copyright", "credits" or "license" for more information.

>>> import tensorflow as tf

>>> hello = tf.constant('Hi,TensorFlow!')

>>> sess = tf.Session()

-- ::08.790862: I tensorflow/core/platform/cpu_feature_guard.cc:] Your CPU supports instructions that this TensorFlow binary was not compiled to use: SSE4. SSE4. AVX AVX2 FMA

>>> print sess.run(hello)

Hi,TensorFlow!

>>>
第五步、需要使用 TensorFlow 的时候必须重新激活
当使用完毕后,关闭 tensorflow 环境。

Use exit() or Ctrl-D (i.e. EOF) to exit

>>> exit()

(tensorflow) deeplearning@deeplearningsinglenode:~$

(tensorflow) deeplearning@deeplearningsinglenode:~$

(tensorflow) deeplearning@deeplearningsinglenode:~$

(tensorflow) deeplearning@deeplearningsinglenode:~$ source deactivate

deeplearning@deeplearningsinglenode:~$
然后你的终端提示符就会变会原的样子。
当你需要再次使用的时候就必须再次激活 tensorflow 环境。
source activate tensorflow
..........
......
关闭 tensorflow 环境,并重新激活
第五步、 Finally
至此,你已经拥有了一个可以玩耍机器学习的 tensorflow 环境,好好玩耍吧:)
你可以参照官方文档快速的运行一个手写数字识别的示例。友情提示:仅 CPU 版本你需要有足够的耐心。。。。。。
同时,大家可以关注我的个人博客:
http://www.cnblogs.com/zlslch/ 和 http://www.cnblogs.com/lchzls/ http://www.cnblogs.com/sunnyDream/
详情请见:http://www.cnblogs.com/zlslch/p/7473861.html
人生苦短,我愿分享。本公众号将秉持活到老学到老学习无休止的交流分享开源精神,汇聚于互联网和个人学习工作的精华干货知识,一切来于互联网,反馈回互联网。
目前研究领域:大数据、机器学习、深度学习、人工智能、数据挖掘、数据分析。 语言涉及:Java、Scala、Python、Shell、Linux等 。同时还涉及平常所使用的手机、电脑和互联网上的使用技巧、问题和实用软件。 只要你一直关注和呆在群里,每天必须有收获
对应本平台的讨论和答疑QQ群:大数据和人工智能躺过的坑(总群)(161156071)![]()
![]()
![]()
![]()
![]()


全网最详细的基于Ubuntu14.04/16.04 + Anaconda2 / Anaconda3 + Python2.7/3.4/3.5/3.6安装Tensorflow详细步骤(图文)(博主推荐)的更多相关文章
- 基于Ubuntu Server 16.04 LTS版本安装和部署Django之(五):测试项目
基于Ubuntu Server 16.04 LTS版本安装和部署Django之(一):安装Python3-pip和Django 基于Ubuntu Server 16.04 LTS版本安装和部署Djan ...
- 基于Ubuntu Server 16.04 LTS版本安装和部署Django之(四):安装MySQL数据库
基于Ubuntu Server 16.04 LTS版本安装和部署Django之(一):安装Python3-pip和Django 基于Ubuntu Server 16.04 LTS版本安装和部署Djan ...
- 基于Ubuntu Server 16.04 LTS版本安装和部署Django之(三):设置上传文件夹权限(这里测试用完全共享)
基于Ubuntu Server 16.04 LTS版本安装和部署Django之(一):安装Python3-pip和Django 基于Ubuntu Server 16.04 LTS版本安装和部署Djan ...
- 基于Ubuntu Server 16.04 LTS版本安装和部署Django之(二):Apache安装和配置
基于Ubuntu Server 16.04 LTS版本安装和部署Django之(一):安装Python3-pip和Django 基于Ubuntu Server 16.04 LTS版本安装和部署Djan ...
- 基于Ubuntu Server 16.04 LTS版本安装和部署Django之(一):安装Python3-pip和Django
近期开始学习基于Linux平台的Django开发,想配置一台可以发布的服务器,经过近一个月的努力,终于掌握了基于Apache和mod-wsgi插件的部署模式,自己也写了一个教程,一是让自己有个记录,二 ...
- Ubuntu 14.04 16.04 Linux nvidia 驱动下载与安装
Ubuntu 14.04 16.04 nvidia 驱动安装 最简单直观的方式是在如下的对话框中直接选择驱动安装即可 但是有时候,驱动不够新,比如14.04用的是340.98版本,如果手动安装驱动可以 ...
- Ubuntu LTS 系统学习使用体会和实用工具软件汇总 6.04 8.04 10.04 12.04 14.04 16.04
Ubuntu LTS 系统学习体会和工具软件汇总 6.04 8.04 10.04 12.04 14.04 16.04 ubuntu入门必备pdf:http://download.csdn.net/de ...
- Ubuntu14.04下Neo4j图数据库官网安装部署步骤(图文详解)(博主推荐)
不多说,直接上干货! 说在前面的话 首先,查看下你的操作系统的版本. root@zhouls-virtual-machine:~# cat /etc/issue Ubuntu 14.04.4 LTS ...
- Ubuntu网络配置IP和DNS等,适用于14.04,16.04和17.10
本文主要介绍Ubuntu系统的网络设置,包括IP,DNS和主机名等,适用于14.04,16.04和17.10等版本 =============== 完美的分割线 ================ = ...
随机推荐
- github菜鸟入门
github菜鸟入门教程 闲来无事,研究了下github的玩法,完毕总结:简单好玩,上档次! 一.首先注册github的账号 二.下载安装git 三.新建仓库 1.点击右上方的+号选择首项新建仓库 2 ...
- springboot 使用mysql(mybatis)
添加mysql依赖项 <dependency> <groupId>org.mybatis.spring.boot</groupId> <artifac ...
- JAVA的环境变量配置
开发JAVA程序需要先准备开发环境,安装好操作系统后首先需要去下载JDK并安装. JDk(Java Development Kit )是Java开发工具包,如果您要开发基于Java的应用首先需要下载并 ...
- FFMPEG增加和提取字幕流
转自 https://www.cnblogs.com/satng/p/5514683.html 防抽复制一遍 增加字幕流ffmpeg -i video.avi -i sub.ass -map 0:0 ...
- es6剩余参数
function show(a,b,...args){ console.log(a) console.log(b) console.log(args) } show(10,20,30,30,36)
- java操作FTP的一些工具方法
java操作FTP还是很方便的,有多种开源支持,这里在apache开源的基础上自己进行了一些设计,使用起来更顺手和快捷. 思路: 1.设计FTPHandler接口,可以对ftp,sftp进行统一操作, ...
- [转]dd命令、cp命令详解+dd命令、cp命令对比 ---delong
出处:http://blog.csdn.net/sun_app/article/details/18263299 1.dd命令详解 1)中文man手册dd的解释 NAME dd - 转换和 ...
- lab-kvm
3)qemu帮助信息 qemu-kvm -h [root@Centos72 libvirt]#qemu-kvm -h QEMU emulator version (qemu-kvm--.el7_5.) ...
- 用clock()函数计时的坑
程序中经常用time()函数来返回当前系统时间的秒数,来计时或计算时间差.如果需要用到更高精度的时间,就会自然想到用clock()函数.想当然的认为它返回从程序开始tick数,用clock()/CLO ...
- Shell文本操作-5