ssd_mobilenet_demo
操作系统:windows 10 64位
内存:8G
GPU:Nvidia MX 150
Tensorflow: 1.4
1、安装python
Anaconda3-5.0.1 ,默认python版本(3.6.3)
2、安装tensorflow
pip install --upgrade tensorflow
conda install pip #更新pip
pip install --upgrade tensorflow-gpu
CUDA® Toolkit 8.0, 需要注意最新版9.1不支持tensorflow 1.4版本;
cuDNN v6.0,7.0不支持tensorflow 1.4版本,现在cuDNN需要先注册成为NVIDIA开发者,下载后将cuDNN中对应文件夹下的.dll文件分别复制到CUDA安装目录对应文件夹下;
对应的显卡驱动,如果驱动较新,在安装CUDA的时候会有提示可能不兼容,可以无视。
3、测试gpu版安装好了没有
improt tensorflow as tf

hello = tf.constant('hello')

sess = tf.Session()

print(sess.run(hello))

当输出hello则装好tensorflow

from tensorflow.python.client import device_lib

print(device_lib.list_local_devices())

当输出:

Sample Output

[name: "/cpu:0" device_type: "CPU" memory_limit:

name: "/gpu:0" device_type: "GPU" .............GeForce GTX 1070
4、下载api
https://github.com/tensorflow/models
5、protobuf配置
https://github.com/google/protobuf/releases 网站中选择windows 版本(最下面),解压后将bin文件夹中的【protoc.exe】放到C:\Windows
在models\research\目录下打开命令行窗口,输入:
# From tensorflow/models/

protoc object_detection/protos/*.proto --python_out=.
在这一步有时候会出错,可以尝试把/*.proto 这部分改成文件夹下具体的文件名,一个一个试,每运行一个,文件夹下应该出现对应的.py结尾的文件。不报错即可。
6、环境变量
models/research/ 及 models/research/slim 添加进环境变量
7、测试环境
python object_detection/builders/model_builder_test.py
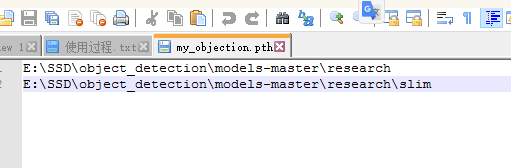
注意 :如果出现no model name object_api这个东东,就在D:\anaconda\anaconda3.4.2.0\Lib\site-packages目录下面新建一个my_objection.pth文件,文件内容就是这两个路径,如下图:
8、object_detection_tutorial.ipynb
代码简化了一些。
# coding: utf-8

import numpy as np

import os

import six.moves.urllib as urllib

import sys

import tarfile

import tensorflow as tf

import zipfile

from collections import defaultdict

from io import StringIO

from matplotlib import pyplot as plt

from PIL import Image

if tf.__version__ < '1.4.0':

  raise ImportError('Please upgrade your tensorflow installation to v1.4.* or later!')

# This is needed to display the images.

get_ipython().magic('matplotlib inline')

# This is needed since the notebook is stored in the object_detection folder.

sys.path.append("..")

from utils import label_map_util

from utils import visualization_utils as vis_util

# 下载模型名,设置对应的参数

MODEL_NAME = 'ssd_mobilenet_v1_coco_2017_11_17'

MODEL_FILE = MODEL_NAME + '.tar.gz'

DOWNLOAD_BASE = 'http://download.tensorflow.org/models/object_detection/'

# 训练好的模型,用来检测

PATH_TO_CKPT = MODEL_NAME + '/frozen_inference_graph.pb'

# 标签文件,记录了哪些标签需要识别

PATH_TO_LABELS = os.path.join('data', 'mscoco_label_map.pbtxt')

# 类别数目,根据实际修改

NUM_CLASSES = 90

# ## 下载上面说的模型(不用改)

opener = urllib.request.URLopener()

opener.retrieve(DOWNLOAD_BASE + MODEL_FILE, MODEL_FILE)

tar_file = tarfile.open(MODEL_FILE)

for file in tar_file.getmembers():

  file_name = os.path.basename(file.name)

  if 'frozen_inference_graph.pb' in file_name:

    tar_file.extract(file, os.getcwd())

#将训练完的载入内存(不用改)

detection_graph = tf.Graph()

with detection_graph.as_default():

  od_graph_def = tf.GraphDef()

  with tf.gfile.GFile(PATH_TO_CKPT, 'rb') as fid:

    serialized_graph = fid.read()

    od_graph_def.ParseFromString(serialized_graph)

    tf.import_graph_def(od_graph_def, name='')

# ## 载入标签map(不用改)

# Label maps map indices to category names, so that when our convolution network predicts `5`,

we know that this corresponds to `airplane`.

Here we use internal utility functions, but anything that returns a dictionary mapping integers to appropriate string labels would be fine

label_map = label_map_util.load_labelmap(PATH_TO_LABELS)

categories = label_map_util.convert_label_map_to_categories(label_map, max_num_classes=NUM_CLASSES, use_display_name=True)

category_index = label_map_util.create_category_index(categories)

def load_image_into_numpy_array(image):

  (im_width, im_height) = image.size

  return np.array(image.getdata()).reshape(

      (im_height, im_width, 3)).astype(np.uint8)

"""

检测部分

"""

# 目标文件夹名

PATH_TO_TEST_IMAGES_DIR = 'test_images'

# 源码中test_images文件夹下就两张image,名字分别为image1.jpg和image2.jpg

# 如果想用自己的image,有5张图片,分别为hello1.jpg.....hello5.jpg可以改成:

# TEST_IMAGE_PATHS = [ os.path.join(PATH_TO_TEST_IMAGES_DIR, 'hello{}.jpg'.format(i)) for i in range(1, 6) ]

TEST_IMAGE_PATHS = [ os.path.join(PATH_TO_TEST_IMAGES_DIR, 'image{}.jpg'.format(i)) for i in range(1, 3) ]

# 设置输出图像的英尺

IMAGE_SIZE = (12, 8)

#运行,进行检测

with detection_graph.as_default():

  with tf.Session(graph=detection_graph) as sess:

    # Definite input and output Tensors for detection_graph

    image_tensor = detection_graph.get_tensor_by_name('image_tensor:0')

    # Each box represents a part of the image where a particular object was detected.

    detection_boxes = detection_graph.get_tensor_by_name('detection_boxes:0')

    # Each score represent how level of confidence for each of the objects.

    # Score is shown on the result image, together with the class label.

    detection_scores = detection_graph.get_tensor_by_name('detection_scores:0')

    detection_classes = detection_graph.get_tensor_by_name('detection_classes:0')

    num_detections = detection_graph.get_tensor_by_name('num_detections:0')

    for image_path in TEST_IMAGE_PATHS:

      image = Image.open(image_path)

      # the array based representation of the image will be used later in order to prepare the

      # result image with boxes and labels on it.

      image_np = load_image_into_numpy_array(image)

      # Expand dimensions since the model expects images to have shape: [1, None, None, 3]

      image_np_expanded = np.expand_dims(image_np, axis=0)

      # Actual detection.

      (boxes, scores, classes, num) = sess.run(

          [detection_boxes, detection_scores, detection_classes, num_detections],

          feed_dict={image_tensor: image_np_expanded})

      # Visualization of the results of a detection.

      vis_util.visualize_boxes_and_labels_on_image_array(

          image_np,

          np.squeeze(boxes),

          np.squeeze(classes).astype(np.int32),

          np.squeeze(scores),

          category_index,

          use_normalized_coordinates=True,

          line_thickness=8)

      plt.figure(figsize=IMAGE_SIZE)

      plt.imshow(image_np)
ssd_mobilenet_demo的更多相关文章
随机推荐
- cookie/http/https
今天再学习顺便外加复习下http的相关知识,顺便试试在笔记中导出一个长篇的图片回事怎么样的效果. HTTP相关知识,不是很全仅供参考
- 你还没有真正理解的innodb_flush_log_at_trx_commit
关于innodb_flush_log_at_trx_commit的描述,看了mysql手册中的解释,感觉都不够清晰明了,下面试图以最简单直白的方式解释一下innodb_flush_log_at_trx ...
- node+express POST请求
// POST 登录 app.post('/login', function (req, res) { // 定义了一个post变量,用于暂存请求体的信息 let [post,addSql,addSq ...
- JQuery weui 中的Popup (弹出层:底部)
//弹出层(从底部) <div id="bottomb" class="weui-popup__container popup-bottom"> & ...
- C与C#之间使用AES加密解密算法
目的:C语言写的客户端加密数据,数据发送到C#写的服务端,服务端解密. 保证C与C#之间加密解密AES的配置和模式一直. AES: AES是对称加密算法,关键点: 密钥长度,明文长度,密文长度 密钥长 ...
- 1.go语言目录结构
[root@localhost ~]# ll /go/ total drwxr-xr-x. root root May : api -rw-r--r--. root root May : AUTHOR ...
- 前端:HTML5和CSS3新特性一览
转载:https://www.cnblogs.com/star91/p/5659134.html
- MySQL解决忘记密码问题
解决Win10下Mysql 的Access denied for user'root'@'localhost' (using password: NO)问题 mysql一旦忘记密码即会出现这样的错误. ...
- 如何利用Chrome进行跨域调试
为什么要跨域调试: 拿嵌入式web开发说,代码都是跑在板子上,我一个优雅的前端开发要每次改完代码都打包到板子上,用板子的地址打开,这是人做的事??? 怎么跨域调试: 1.升级Chrome为最新版本 2 ...
- openstack stein部署手册 10. 创建实例
# 建立网络(provider)与子网 openstack network create --share --external --provider-physical-network provider ...