vue,一路走来(9)--聊天窗口
闲暇时间,介绍一下我做一个聊天窗口的心得。如图:

首先要考虑的是得判断出是自己的信息还是对方发来的信息,给出如图的布局,切换不同的类。
<li class="clearfix" v-for="(talk,index) in talks" v-bind:class="{'even':othername!=talk.send_from_id,'odd':othername==talk.send_from_id}">

   <span v-show="showTime(index)" :id="index">{{getLocalTime(talk.message_time)}}</span>

   <img v-bind:src="getUserimg" alt="" v-if="othername!=talk.send_from_id">

   <img v-bind:src="meUserimg" alt="" v-else>

   <b></b>

   <div>

      <p>{{talk.content}}</p>

   </div>

</li>
/*even 偶  odd 奇*/
.content-talk ul li.odd img{width:45px;height:45px;border-radius: %;float: left;background: url(../assets/peoper.png) no-repeat center center;background-size: 45px 45px;}

.content-talk ul li.even img{width:45px;height:45px;border-radius: %;float: right;background: url(../assets/peoper.png) no-repeat center center;background-size: 45px 45px;}

.content-talk ul li.odd .in_talk p{background: #fff;float:left;margin-left: 10px;max-width:%;font-size: 14px;padding:10px;border-radius: 6px;}

.content-talk ul li.odd b{width:8px;height:14px;display: inline-block;background: url(../images/left.jpg) no-repeat;background-size: 8px 14px;position: absolute;left:58px;top:8px;}

.content-talk ul li.even .in_talk p{background: #f6fff6;float:right;margin-right: 10px;max-width:%;border-radius: 6px;font-size: 14px;padding:10px;

}

.content-talk ul li.even b{width:8px;height:14px;display: inline-block;background: url(../images/right.jpg) no-repeat;background-size: 8px 14px;position: absolute;right:58px;top:8px;}
或许你会看得一脸懵,根据接口拿到的信息,othername就是当前与你聊天的这个人,如果与send_from_id一致那么就是对方的信息,反之是你自己发的信息。


接下来就是输入框了,定位在底部,因为没有发送按钮,所以必须触发键盘和手机的Enter键,还有一个问题是,在我手机Enter键显示的是'换行'字眼。
以下是解决办法,加了form标签,但必须关掉action的功能。“换行”就变成“前往”
<form action=""  onkeydown="if(event.keyCode==13)return false;">

      <mt-field type="text" v-model="content" @keyup.native="send($event)"></mt-field>
</form>
//发送消息

send(ev){

   if(ev.keyCode==){


     var sendtoid=this.userid;

     // console.log(sendtoid)

     var sendfromid="";

     var subject="";

     var replyid=;

     if(this.content!=''){

         this.$http.post(this._getUrl()+"User/send",

         {"sendfromid":sendfromid,"sendtoid":sendtoid,"subject":subject,"content":this.content,"replyid":replyid},{emulateJSON:true}

          ).then((response) => {

              response = response.body;

              if(response.error_code==){

                 Toast({

                    message: '发送成功'

                 });

                 this.getread();  //重新获取数据

                 this.content=''

              }

              else{

                 Toast({

                    message: response.error_msg

                 });

              }

          });

     }else{

         Toast({

             message: '不能为空'

         });

     }

   }

},
接下来我用到了Mint-ui的Loadmore 顶部下拉刷新加载更多消息
http://mint-ui.github.io/docs/#/zh-cn2/loadmore
接口数据,如图:
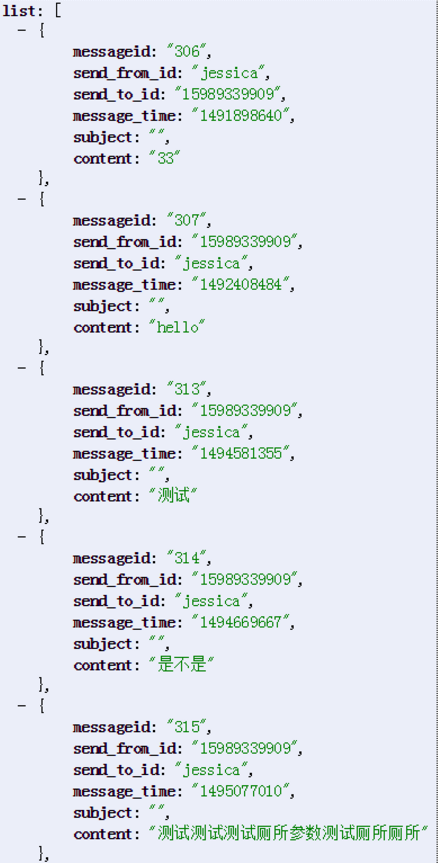
在 loadTop()函数加载更多中,不能再用push()。
如下这3张图可能形象一点,created(),获取到第一页数据

第一页数据:
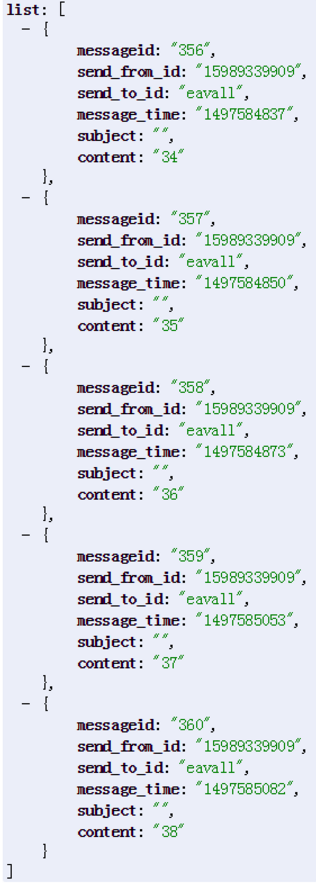
第二页数据:

首先得让第二页最底下的数据先添加进来,用了for循环 for(let j = sayLists.length-1; j >-1; j--) 数组序号index从0开始,
然后数据就需要使用unshift() 方法向数组的开头添加元素,于是用了下面方法:
     //加载更多

          loadTop() {

             // var userid=this.$route.params.userid;

             let page = (Math.ceil(this.talks.length/this.pagesize))+ ;

            // console.log(page)

                  this.$http.get(this._getUrl()+"User/readAll/userid/" + this.userid +"/pagesize/"+this.pagesize+"/page/" + page).then((response) => {

                        let say_code =response.body.error_code;

                        let sayLists = response.body.list;

                        if(say_code==''){

                          for (let j = sayLists.length-; j >-; j--) {


                             // console.log(sayLists[j])

                             this.talks.unshift(sayLists[j]);

                             this.contentlogin=true;

                           }

                        }else{

                          this.allLoaded = true;

                          this.$refs.loadmore.onTopLoaded();

                          this.contentlogin=false;

                        }

                  });

          },
最后的问题是,页面进来显示最新聊天,在body底部。
//显示最底部信息

            bottomshow(){

                let count=;

                let interval=setInterval(() =>{

                  if(count>){

                    clearInterval(interval);

                  }

                  count++;

                  if(document.body.scrollTop != document.body.scrollHeight){

                    document.body.scrollTop = document.body.scrollHeight;

                // console.log(document.body.scrollTop)

                  }

                  if(document.body.scrollTop == document.body.scrollHeight){

                     clearInterval(interval);

                  }

                },);

            }
加上定时器,是因为页面一进来未能获取到盒子高度并发生滚动,所以加了定时器,利用count++,延迟点。
vue,一路走来(9)--聊天窗口的更多相关文章
- vue,一路走来(1)--构建vue项目
2016年12月--2017年5月,接触前端框架vue,一路走来,觉得有必要把遇到的问题记录下来. 那时,vux用的是1.0的vue,然而vue2.0已经出来了,于是我结合了mint-ui一起来做项目 ...
- vue,一路走来(17)--vue使用scss,并且全局引入公共scss样式
最近朋友问如何在vue项目中使用scss样式,想起之前项目是直接在main.js直接import css文件的,然而main.js不可以直接import scss文件. import './asset ...
- vue,一路走来(16)--本地及手机调试
闲暇时间记录一下如何绑定域名,实现本地及手机调试的过程.我的是微信开发项目,很多功能及操作都是基于微信来开发的,理所当然的就用到微信开发者工具了. 1.首先打开目录C:\Windows\System3 ...
- vue,一路走来(13)--vue微信分享
vue微信分享 今天记录一下vue微信分享. 1.先登录微信公众平台进入“公众号设置”的“功能设置”里填写“JS接口安全域名”.这个不多说,见文档,只有绑定了才能进行下一步的动作 2.需要引入js文件 ...
- vue,一路走来(12)--父与子之间传参
今天想起一直没有记录父组件与子组件的传参问题,这在项目中一直用到. 父向子组件传参 Index.vue父组件中 <component-a :msgfromfa="(positionno ...
- vue,一路走来(7)--响应路由参数的变化
今天描述的问题估计会有很多人也遇到过. vue-router多个路由地址绑定一个组件造成created不执行 也就是文档描述的,如下图 我的解决方案: created () { console.log ...
- vue,一路走来(6)--微信支付
微信支付 https://pay.weixin.qq.com/wiki/doc/api/jsapi.php?chapter=7_7&index=6 分享一下vue实现微信支付.在微信浏览器里面 ...
- vue,一路走来(3)--数据交互vue-resource
所有的静态页面布局完成后,最重要的就是数据交互了,简单来说,vue-resource就像jquery里的$.ajax,用来和后台交互数据的.放在created或ready里运行来获取或者更新数据的.不 ...
- vue,一路走来(2)--路由vue-router
安装 Mint UI cnpm install mint-ui --save 如果你的项目会用到 Mint UI 里较多的组件,最简单的方法就是把它们全部引入.此时需要在入口文件 main.js 中: ...
随机推荐
- selenium 自动化的坑(1)
UI自动化,一天一坑系列(1) 不要试图自作聪明添加一些不必要的东西. 个人遇到的问题关于下拉框的,本来一个下拉框连续点击两次就好了,结果自己多余将谷歌的提示‘正在受到自动化控制’去掉了,导致原本很简 ...
- HashMap的几种遍历方式(转载)
今天讲解的主要是使用多种方式来实现遍历HashMap取出Key和value,首先在java中如果想让一个集合能够用for增强来实现迭代,那么此接口或类必须实现Iterable接口,那么Iterable ...
- 使用 pyenv 管理 Python 版本
http://einverne.github.io/post/2017/04/pyenv.html Posted on 04/22/2017 by Ein Verne | View revisio ...
- c#类的定义,c#中的关健字,C#标识符
什么是类:一种数数据结构,存储数据成员,方法成员,和其它的内容,便 于方便 谳用C#语法: class 类名{ //TODO} C#中关键字(小写)不能作为方法名,类名,命名空间名等, static ...
- python网络编程之验证客户端链接的合法性
六.socket的更多方法介绍 服务端套接字函数s.bind() 绑定(主机,端口号)到套接字s.listen() 开始TCP监听s.accept() b被动接收TCP客户的连接,(阻塞式)等待连接的 ...
- C# 修改注册表立即刷新 转载
修改注册表后不重启计算机并生效,代码如下:const int WM_SETTINGCHANGE = 0x001A; const int HWND_BROADCAST = 0xffff;IntPtr r ...
- ProxyImpl 类
package com.test.mvp.mvpdemo.mvp.v7.proxy; import com.test.mvp.mvpdemo.mvp.v7.basemvp.BasePresenter; ...
- Microsoft Office Word
快捷键 选区 选择块:[Shift]+click,光标放到块的一端,然后按住Shift,然后光标放到块的另一端. 更新域: F9 右键没有更新域选项时可以使用,如更新全部域先Ctrl + A然后F9 ...
- scrapy电影天堂实战(一)创建数据库
原文链接 这里的排版没微信公众号那么友好,建议查看公众号原文 创建数据库 首先我们需要创建数据库和表等来存储数据 创建mysql.cnf配置文件 oot@ubuntu:/mnt/test_scrapy ...
- Mac006--swithchosts安装
Mac006--swithchosts安装 使用brew命令安装:brew cask install switchhosts 因为mac上,网络下载无法进行安装,所以应用brew命令安装. switc ...