
Angular路由——路由守卫
一、路由守卫
当用户满足一定条件才被允许进入或者离开一个路由。
路由守卫场景:
只有当用户登录并拥有某些权限的时候才能进入某些路由。
一个由多个表单组成的向导,例如注册流程,用户只有在当前路由的组件中填写了满足要求的信息才可以导航到下一个路由。
当用户未执行保存操作而试图离开当前导航时提醒用户。
Angular提供了一些钩子帮助控制进入或离开路由。这些钩子就是路由守卫,可以通过这些钩子实现上面场景。
- CanActivate: 处理导航到某路由的情况。
- CanDeactivate: 处理从当前路由离开的情况。
- Resolve: 在路由激活之前获取路由数据。
配置路由时候用到一些属性,path, component, outlet, children, 路由守卫也是路由属性。
二、CanActivate
实例:只让登录用户进入产品信息路由。
新建guard目录。目录下新建login.guard.ts。
LoginGuard类实现CanActivate接口,返回true或false,Angular根据返回值判断请求通过或不通过。
import { CanActivate } from "@angular/router";

export class LoginGuard implements CanActivate{

    canActivate(){

        let loggedIn :boolean= Math.random()<0.5;

        if(!loggedIn){

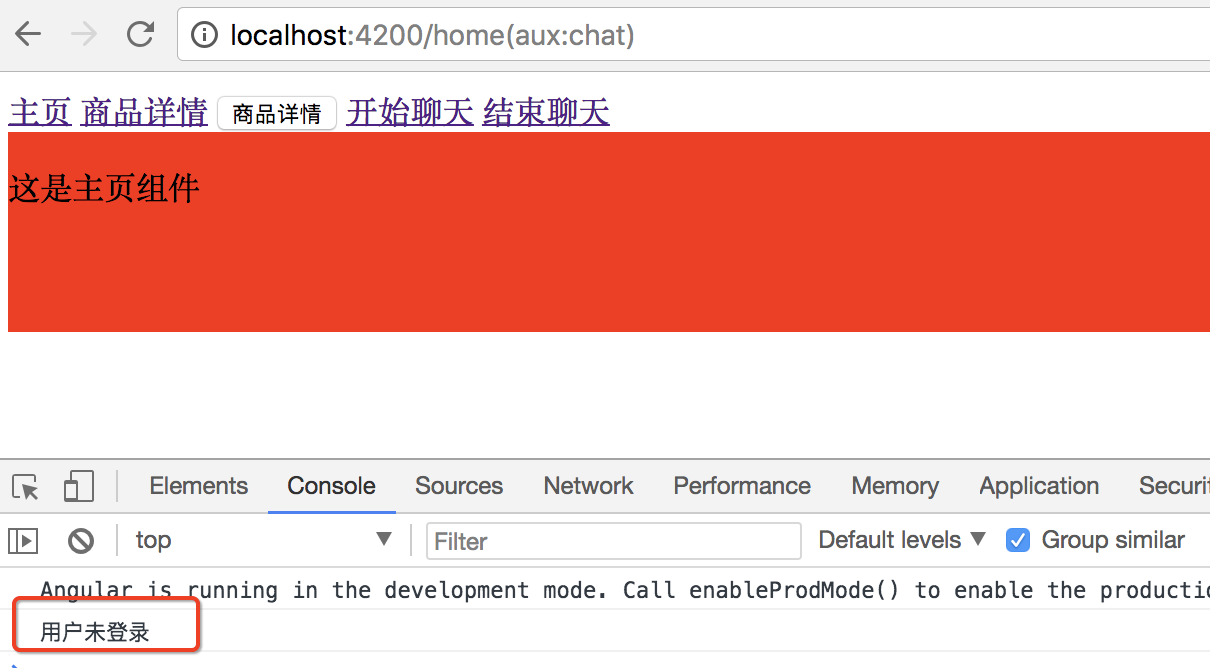
            console.log("用户未登录");

        }

        return loggedIn;

    }

}
配置product路由。先把LoginGuard加入providers,在指定路由守卫。
canActivate可以指定多个守卫,值是一个数组。
const routes: Routes = [

  { path: '', redirectTo : 'home',pathMatch:'full' },

  { path: 'chat', component: ChatComponent, outlet: "aux"},//辅助路由

  { path: 'home', component: HomeComponent },

  { path: 'product/:id', component: ProductComponent, children:[

    { path: '', component : ProductDescComponent },

    { path: 'seller/:id', component : SellerInfoComponent }

  ] ,canActivate: [LoginGuard]},

  { path: '**', component: Code404Component }

];
效果:点商品详情链接控制台会提醒用户未登录,不能进入商品详情路由。
三、CanDeactivate
离开时候的路由守卫。提醒用户执行保存操作后才能离开。
在guard目录下新建一个unsave.guard.ts的文件。
CanDeactivate接口有一个范型,指定当前组件的类型。
CanDeactivate方法第一个参数就是接口指定的范型类型的组件,根据这个要保护的组件的状态,或者调用方法来决定用户是否能够离开。
import { CanDeactivate } from "@angular/router";

import { ProductComponent } from "../product/product.component";

export class UnsaveGuard implements CanDeactivate<ProductComponent>{

    //第一个参数 范型类型的组件

    //根据当前要保护组件 的状态 判断当前用户是否能够离开

    canDeactivate(component: ProductComponent){

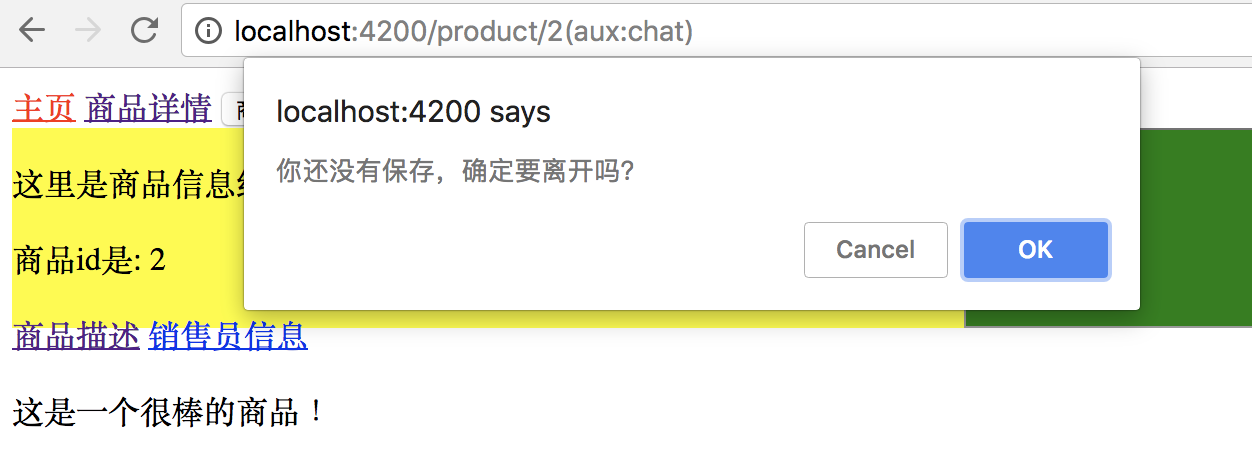
        return window.confirm('你还没有保存,确定要离开吗?');

    }

}
配置路由,同样先加到provider,再配置路由。
import { NgModule } from '@angular/core';

import { Routes, RouterModule } from '@angular/router';

import { HomeComponent } from './home/home.component';

import { ProductComponent } from './product/product.component';

import { Code404Component } from './code404/code404.component';

import { ProductDescComponent } from './product-desc/product-desc.component';

import { SellerInfoComponent } from './seller-info/seller-info.component';

import { ChatComponent } from './chat/chat.component';

import { LoginGuard } from './guard/login.guard';

import { UnsaveGuard } from './guard/unsave.guard';

const routes: Routes = [

  { path: '', redirectTo : 'home',pathMatch:'full' },

  { path: 'chat', component: ChatComponent, outlet: "aux"},//辅助路由

  { path: 'home', component: HomeComponent },

  { path: 'product/:id', component: ProductComponent, children:[

    { path: '', component : ProductDescComponent },

    { path: 'seller/:id', component : SellerInfoComponent }

  ] ,canActivate: [LoginGuard],

     canDeactivate: [UnsaveGuard]},

  { path: '**', component: Code404Component }

];

@NgModule({

  imports: [RouterModule.forRoot(routes)],

  exports: [RouterModule],

  providers: [LoginGuard,UnsaveGuard]

})

export class AppRoutingModule { }
效果:
点ok离开当前页面,cancel留在当前页面。
四、Resolve守卫
http请求数据返回有延迟,导致模版无法立刻显示。
数据返回之前模版上所有需要用插值表达式显示某个controller的值的地方都是空的。用户体验不好。
resolve解决办法:在进入路由之前去服务器读数据,把需要的数据都读好以后,带着这些数据进到路由里,立刻就把数据显示出来。
实例:
在进入商品信息路由之前,准备好商品信息再进入路由。 拿不到信息,或者拿信息出问题了,直接跳到错误信息页面,或者弹出提示,就不再进入目标路由。
先在product.component.ts中声明商品信息类型。
export class Product{

  constructor(public id:number, public name:string){

  }

}
在guard目录下新建product.resolve.ts。ProductResolve类实现了Resolve接口。
Resolve也要声明一个范型,范型就是resolve要解析出来的数据的类型。
import { Resolve, ActivatedRouteSnapshot, RouterStateSnapshot, Router } from "@angular/router";

import { Injectable } from "@angular/core";

import { Observable } from "rxjs/Observable";

import { Product } from "../product/product.component";

@Injectable()

export class ProductResolve implements Resolve<Product>{

    constructor(private router: Router) {

    }

    resolve(route: ActivatedRouteSnapshot, state: RouterStateSnapshot): Observable<any> | Promise<any> | any {

        let productId: number = route.params["id"];

        if (productId == 2) { //正确id

            return new Product(1, "iPhone7");

        } else { //id不是1导航回首页

            this.router.navigate(["/home"]);

            return undefined;

        }

    }

}
路由配置:Provider里声明,product路由里配置。
resolve是一个对象,对象里参数的名字就是想传入的参数的名字product,用ProductResolve来解析生成。
import { NgModule } from '@angular/core';

import { Routes, RouterModule } from '@angular/router';

import { HomeComponent } from './home/home.component';

import { ProductComponent } from './product/product.component';

import { Code404Component } from './code404/code404.component';

import { ProductDescComponent } from './product-desc/product-desc.component';

import { SellerInfoComponent } from './seller-info/seller-info.component';

import { ChatComponent } from './chat/chat.component';

import { LoginGuard } from './guard/login.guard';

import { UnsaveGuard } from './guard/unsave.guard';

import { ProductResolve } from './guard/product.resolve';

const routes: Routes = [

  { path: '', redirectTo : 'home',pathMatch:'full' },

  { path: 'chat', component: ChatComponent, outlet: "aux"},//辅助路由

  { path: 'home', component: HomeComponent },

  { path: 'product/:id', component: ProductComponent, children:[

    { path: '', component : ProductDescComponent },

    { path: 'seller/:id', component : SellerInfoComponent }

  ] ,

    //  canActivate: [LoginGuard],

    //  canDeactivate: [UnsaveGuard],

    resolve:{ //resolve是一个对象

      product : ProductResolve   //想传入product,product由ProductResolve生成

    }},

  { path: '**', component: Code404Component }

];

@NgModule({

  imports: [RouterModule.forRoot(routes)],

  exports: [RouterModule],

  providers: [LoginGuard,UnsaveGuard,ProductResolve]

})

export class AppRoutingModule { }
修改一下product.component.ts 和模版,显示商品id和name。
import { Component, OnInit } from '@angular/core';

import { ActivatedRoute, Params } from '@angular/router';

@Component({

  selector: 'app-product',

  templateUrl: './product.component.html',

  styleUrls: ['./product.component.css']

})

export class ProductComponent implements OnInit {

  private productId: number;

  private productName: string;

  constructor(private routeInfo: ActivatedRoute) { }

  ngOnInit() {

    // this.routeInfo.params.subscribe((params: Params)=> this.productId=params["id"]);

    this.routeInfo.data.subscribe(

      (data:{product:Product})=>{

        this.productId=data.product.id;

        this.productName=data.product.name;

      }

    );

  }

}

export class Product{

  constructor(public id:number, public name:string){

  }

}
<div class="product">

  <p>

    这里是商品信息组件

  </p>

  <p>

    商品id是: {{productId}}

  </p>

  <p>

    商品名称是: {{productName}}

  </p>

  <a [routerLink]="['./']">商品描述</a>

  <a [routerLink]="['./seller',99]">销售员信息</a>

  <router-outlet></router-outlet>

</div>
效果:
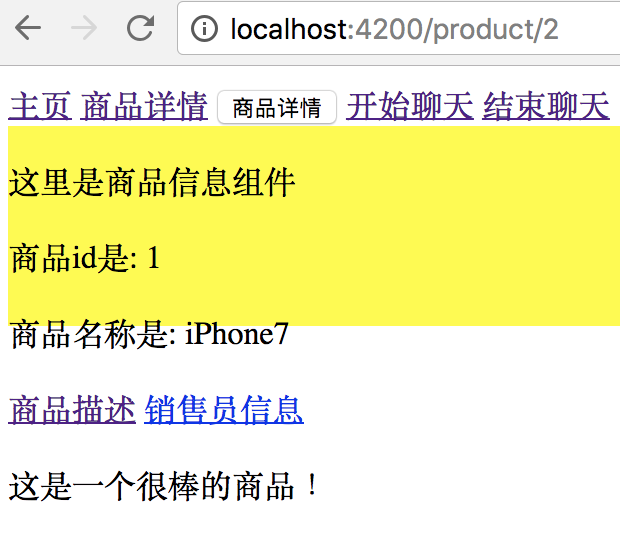
点商品详情链接,传入商品ID为2,在resolve守卫中是正确id,会返回一条商品数据。
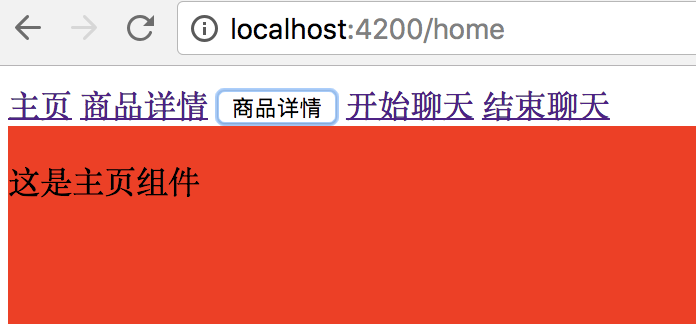
点商品详情按钮,传入商品ID是3,是错误id,会直接跳转到主页。
本文作者starof,因知识本身在变化,作者也在不断学习成长,文章内容也不定时更新,为避免误导读者,方便追根溯源,请诸位转载注明出处:http://www.cnblogs.com/starof/p/9012193.html 有问题欢迎与我讨论,共同进步。
Angular路由——路由守卫的更多相关文章
- Vue的钩子函数[路由导航守卫、keep-alive、生命周期钩子]
前言 说到Vue的钩子函数,可能很多人只停留在一些很简单常用的钩子(created,mounted),而且对于里面的区别,什么时候该用什么钩子,并没有仔细的去研究过,且Vue的生命周期在面试中也算是比 ...
- Angular 4 路由介绍
Angular 4 路由 1. 创建工程 ng new router --routing 2. 创建home和product组件 ng g component home ng g component ...
- angular -- ng-ui-route路由及其传递参数?script标签版
考虑到 多视图等因素,所以 angular 的路由考虑使用 ng-ui-route来做,而不使用 ng-route来做! <!DOCTYPE html> <html lang=&qu ...
- angular 之路由
1.用angular-cli建一个工程自带路由怎么做? 命令:ng new 项目名 --routing 2.怎么使用路由器和路由器的一些基本使用. //html页面 <a routerLink ...
- angular 前端路由不生效解决方案
angular 前端路由不生效解决方案 Intro 最近使用 Angular 为我的活动室预约项目开发一个前后端分离的客户端,在部署上遇到了一个问题,前端路由不生效,这里记录一下.本地开发正常,但是部 ...
- Angular配置路由以及动态路由取值传值跳转
Angular配置路由 1.找到 app-routing.module.ts 配置路由 引入组件 import { HomeComponent } from './home/home.componen ...
- vue之路由导航守卫-全局前置守卫
一.使用方式 全局前置守卫用于在路由配置生效之前进行一些动作,可以使用 router.beforeEach 注册一个全局前置守卫: const router = new VueRouter({ ... ...
- 【VUE】5.路由导航守卫
1. 功能需求 1. 当用户登陆成功后,把得到的token存到Session Storage 2. components -> Form.vue , 对预验证进行校验,如果验证不正确就跳出,如果 ...
- AngularJS路由系列(2)--刷新、查看路由,路由事件和URL格式,获取路由参数,路由的Resolve
本系列探寻AngularJS的路由机制,在WebStorm下开发.主要包括: ● 刷新路由● 查看当前路由以及所有路由● 路由触发事件● 获取路由参数 ● 路由的resolve属性● 路由URL格式 ...
随机推荐
- 11.4、Libgdx的音频之录制PCM音效
(官网:www.libgdx.cn) 可以通过AudioRecorder接口访问PCM数据.通过如下方式创建一个接口实例: AudioRecorder recorder = Gdx.audio.new ...
- 下载Ext JS 5.1 gpl版本的方法
先进入官网:http://www.sencha.com 然后在导航的Products中选择Sencha Ext JS,会看到以下页面: 这时候不要单击Download按钮,而是要单击导航中的DETAI ...
- 江湖问题研究-- intent传递有没有大小限制,是多少?
出门一步,便是江湖,江湖上有许多流言. 比如这条: intent传递是有大小限制的,具体在40KB左右. 当然也有传言说是1M左右. 数百头母驴为何半夜惨叫? 小卖部安全套为何屡遭黑手? 女生宿舍内裤 ...
- JQuery实战总结二 横向纵向菜单下拉效果图
记得以前在浏览了大多数网站的上面发现很多下拉的导航栏,觉得特别好玩,毕竟咱们是学习编程的嘛,对这下拉的效果还是挺感兴趣的,这种淡入淡出,随着鼠标移动的位置不同.有无等而出现不同的效果,给用户以神美感. ...
- hadoop环境配置过程中可能遇到问题的解决方案
Failed to set setXIncludeAware(true) for parser 遇到此问题一般是jar包冲突的问题.一种情况是我们向java的lib目录添加我们自己的jar包导致had ...
- 关于post利用之Python
今天大师兄放出了自己用PHP写的KTV点歌系统,注明,欢迎调戏,于是乎就尝试了下. 地址就不上了,到现在没补漏洞,我可不想被大师兄K…… 首先试试JavaScript脚本能否恶搞下 来个最基础的警告框 ...
- Windows下比较简单的获取网页源码的方法
第一个方法是使用MFC里面的 <afxinet.h> CString GetHttpFileData(CString strUrl) { CInternetSession Session( ...
- how tomcat works 五 servlet容器 上
servlet容器是用来处理请求servlet资源,并为Web客户端填充response对象的模块.在上一篇文章(也就是书的第四章)我们设计了SimpleContainer类,让他实现Containe ...
- Java进阶(十八)Java实现定时器(Timer)
Java实现定时器(Timer) 绪 在应用开发中,经常需要一些周期性的操作,比如每5分钟执行某一操作等.对于这样的操作最方便.高效的实现方式就是使用java.util.Timer工具类.java.u ...
- PS图层混合算法之五(饱和度,色相,颜色,亮度)
饱和度模式: HcScYc =HBSAYB 饱和度模式:是采用底色的亮度.色相以及绘图色的饱和度来创建最终色.如果绘图色的饱和度为0,则原图没有变化. 输出图像的饱和度为上层,色调和亮度保持为下层. ...