4. Spring 如何通过 XML 文件配置Bean,以及如何获取Bean
在 Spring 容器内拼凑 bean 叫做装配。装配 bean 的时候,你是在告诉容器,需要哪些 bean ,以及容器如何使用依赖注入将它们配合在一起。
理论上,bean 装配的信息可以从任何资源获得,包括属性文件,关系数据库等,但 XML 文件是最常见的 Spring 应用系统配置源, Spring 中的几种容器都支持使用 XML 装配 bean,包括:
--XMLBeanFactory
--ClassPathXMLApplicationContext
--FileSystemXMLApplicationContext
--XMLWebApplicationContext
其中我们常用的有 ClassPathXMLApplicationContext,FileSystemXMLApplicationContext 两种。
在 XML 文件中配置 bean 包括以下几个方面:
1. 添加 bean
2. 配置 bean 属性
2.1 手动配置
2.1.1 通过 setter 方法
2.1.2 通过 constructor
2.2 自动配置
下面,我们来添加 bean,并通过 setter 方法来对 bean 的属性来进行配置:
首先,先写两个 bean ,分别是 Person 和 Address , 其中 Person 是依赖于 Address 的。下面附上代码:
package com.spring.xmlBean;

public class Person {

    private String name;

    private int age;

    private Address address;

    public String getName() {

        return name;

    }

    public void setName(String name) {

        this.name = name;

    }

    public int getAge() {

        return age;

    }

    public void setAge(int age) {

        this.age = age;

    }

    public Address getAddress() {

        return address;

    }

    public void setAddress(Address address) {

        this.address = address;

    }

    public Person(String name, int age, Address address) {

        super();

        this.name = name;

        this.age = age;

        this.address = address;

    }

    public Person() {

        super();

    }

    @Override

    public String toString() {

        return "Person [name=" + name + ", age=" + age + ", address=" + address + "]";

    }

}
Person 类
package com.spring.xmlBean;

public class Person {

    private String name;

    private int age;

    private Address address;

    public String getName() {

        return name;

    }

    public void setName(String name) {

        this.name = name;

    }

    public int getAge() {

        return age;

    }

    public void setAge(int age) {

        this.age = age;

    }

    public Address getAddress() {

        return address;

    }

    public void setAddress(Address address) {

        this.address = address;

    }

    public Person(String name, int age, Address address) {

        super();

        this.name = name;

        this.age = age;

        this.address = address;

    }

    public Person() {

        super();

    }

    @Override

    public String toString() {

        return "Person [name=" + name + ", age=" + age + ", address=" + address + "]";

    }

}
Address 类
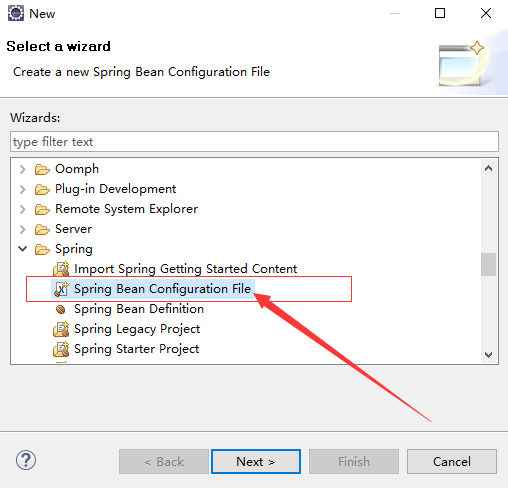
类写完之后,我们在 classpath 下创建一个 Spring Bean Configuration File
创建完 XML 文件之后,我们开始在这个文件里配置 Bean。
首先,第一步:添加 bean
<?xml version="1.0" encoding="UTF-8"?>

<beans xmlns="http://www.springframework.org/schema/beans"

    xmlns:xsi="http://www.w3.org/2001/XMLSchema-instance"

    xsi:schemaLocation="http://www.springframework.org/schema/beans http://www.springframework.org/schema/beans/spring-beans.xsd">

    <!-- 添加 Address 和 Person -->

    <bean id="address" class="com.spring.xmlBean.Address"></bean>

    <bean id="person" class="com.spring.xmlBean.Person"></bean>

</beans>
Spring Bean Configuration File
在这里,我们通过 <bean></bean> 节点来添加 bean ,其中 class 属性代表 bean 的全类名, id 属性用来对 bean 进行标示,在调用 bean 的时候会使用这个 id 名,这个名字是唯一的,在配置文件中不能有重复,否则 Spring 会报错
添加完 bean 之后,我们先来测试一下,看能不能获取到这个 bean。我们先试着获取一下 Person
package com.spring.test;

import org.springframework.context.ApplicationContext;

import org.springframework.context.support.ClassPathXmlApplicationContext;

import com.spring.helloworld.HelloWorld;

import com.spring.xmlBean.Person;

public class TestMain {

    public static void main(String[] args) {

        // 创建 Spring 的 IOC 容器

        ApplicationContext ctx = new ClassPathXmlApplicationContext("beanConfiguration-xml.xml");

        // 使用 getBean() 方法, 通过传入刚才的 id 名,来获取 bean, 但是这里返回的是一个 Object 对象, 所以要转型

        Person person = (Person) ctx.getBean("person");

        // 打印 person

        System.out.println(person);

    }

}
TestMain
运行 main 方法,控制台输出了以下信息

我们看到,我们成功的获取到了 person,但是,person 中的属性是空的,因为我们还没有配置他们,只是单纯的把它们添加到容器里面
那么现在,我们就来手动配置一下这两个 bean
前面讲过,手动配置 bean 有两种方式,一种是通过 setter 方法,一种是通过 构造器(constructor)来配置。下面,我们都试一下:
1. 通过 setter 方法
首先,需要注意的是,若要通过 setter 方法来配置 bean ,那么这个 bean 里面一定要有 setter 方法,否则 Spring 会报错
下面,我附上 XML 文件的代码
<?xml version="1.0" encoding="UTF-8"?>

<beans xmlns="http://www.springframework.org/schema/beans"

    xmlns:xsi="http://www.w3.org/2001/XMLSchema-instance"

    xsi:schemaLocation="http://www.springframework.org/schema/beans http://www.springframework.org/schema/beans/spring-beans.xsd">

    <!-- 添加 Address 和 Person -->

    <bean id="address" class="com.spring.xmlBean.Address">

        <property name="city" value="日照"></property>

        <property name="province" value="山东"></property>

    </bean>

    <bean id="person" class="com.spring.xmlBean.Person">

        <property name="name" value="Little-Koala"></property>

        <property name="age" value="18"></property>

        <!-- 通过 ref 引用了 address 这个 bean -->

        <property name="address" ref="address"></property>

    </bean>

</beans>
Spring Bean Configuration File
运行刚才测试用的那个 main 方法,发现配置成功了

在配置的时候,我们使用了 <property name="属性名" value="值" ></property> 这个节点来对 bean 进行配置
其中,我们的 person 中有一个 Address 属性,它通过 ref 这个属性节点引用了 id 值为 address 的 bean
总结:通过 setter 方法来配置 bean ,我们使用 property 节点来进行配置,但前提是这个 bean 要有 setter 方法。其中,name 属性表示 bean 的属性名,bean 的属性值可以通过 value 属性来直接设置,也可以通过 ref 属性来引用其他的 bean
2. 通过构造器来进行配置
首先要注意的问题,在配置之前要有自己的构造器。我们通过 <constructor-arg></constructor-arg> 这个节点来进行配置,下面附上代码:
<bean id="address" class="com.spring.xmlBean.Address">

        <constructor-arg name="city" value="日照"></constructor-arg>

        <constructor-arg name="province" value="山东"></constructor-arg>

        <!--

        <property name="city" value="日照"></property>

        <property name="province" value="山东"></property>

         -->

</bean>
Spring Bean Configuration File
上面的 Address 这个 bean 换成了用构造器来配置,运行的效果和上面是一样的
其中,name 代码构造器中属性的名字,value 代表值
刚才上面说了怎样配置 bean ,还没有具体的讲怎么样从容器中获取 bean
获取bean分两步:
1. 创建 IOC 容器
2. 从容器中获取 bean
下面附上代码:
package com.spring.test;

import org.springframework.context.ApplicationContext;

import org.springframework.context.support.ClassPathXmlApplicationContext;

import com.spring.helloworld.HelloWorld;

import com.spring.xmlBean.Person;

public class TestMain {

    public static void main(String[] args) {

        // 创建 Spring 的 IOC 容器

        ApplicationContext ctx = new ClassPathXmlApplicationContext("beanConfiguration-xml.xml");

        // 使用 getBean() 方法, 通过传入刚才的 id 名,来获取 bean, 但是这里返回的是一个 Object 对象, 所以要转型

        Person person = (Person) ctx.getBean("person");

        // 打印 person

        System.out.println(person);

    }

}
怎样获取 Bean
这是刚才的那个测试类
其中 getBean( ) 方法可以通过传入 id 值来获取 IOC 容器中的 bean ,也可以通过传入 Bean.class 来获取对应类型的对象
以上内容都是基础的内容,还有一部分没有提到,剩下的那些内容在以后的学习中会慢慢接触,多读源码,多看文档,慢慢的就会了
4. Spring 如何通过 XML 文件配置Bean,以及如何获取Bean的更多相关文章
- idea的spring整合基于xml文件配置的mybatis报Invalid bound statement (not found): com.music.dao.MusicDao.findAll的问题
一. 题主当时就是自己尝试整合spring和mybatis的时候遇到了这个问题,当时题主只看到了用注解的方式配置的dao层,题主用的是xml文件配置的形式, 而且坑爹的是题主的两个文件的路径写的也不一 ...
- 【Spring】application.xml文件配置
什么是Spring? Spring是分层的javaEE full-stack(一站式)轻量级开源框架. ---注解配置--针对SSM <?xml version="1.0" ...
- Spring框架入门之基于xml文件配置bean详解
关于Spring中基于xml文件配置bean的详细总结(spring 4.1.0) 一.Spring中的依赖注入方式介绍 依赖注入有三种方式 属性注入 构造方法注入 工厂方法注入(很少使用,不推荐,本 ...
- 跟着刚哥学习Spring框架--通过XML方式配置Bean(三)
Spring配置Bean有两种形式(XML和注解) 今天我们学习通过XML方式配置Bean 1. Bean的配置方式 通过全类名(反射)的方式 √ id:标识容器中的bean.id唯一. √ cl ...
- Spring整合Hibernate的XML文件配置,以及web.xml文件配置
利用Spring整合Hibernate时的XML文件配置 applicationContext.xml <?xml version="1.0" encoding=" ...
- Spring的applicationContext.xml文件
以下是详解Spring的applicationContext.xml文件代码:<!-- 头文件,主要注意一下编码 --><?xml version="1.0" e ...
- spring 框架的xml文件如何读取properties文件数据
spring 框架的xml文件如何读取properties文件数据 第一步:在spring配置文件中 注意:value可以多配置几个properties文件 <bean id="pro ...
- springmvc 项目完整示例07 设置配置整合springmvc springmvc所需jar包springmvc web.xml文件配置
前面主要是后台代码,spring以及mybatis的整合 下面主要是springmvc用来处理请求转发,展现层的处理 之前所有做到的,完成了后台,业务层和持久层的开发完成了 接下来就是展现层了 有很多 ...
- web.xml 文件配置01
web.xml 文件配置01 前言:一般的web工程中都会用到web.xml,方便开发web工程.web.xml主要用来配置Filter.Listener.Servlet等.但是要说明的是web. ...
随机推荐
- Go语言系列(三)- 基础函数和流程控制
一.strings和strconv的使用 1. strings.HasPrefix(s string, prefix string) bool:判断字符串s是否以prefix开头 . 2. strin ...
- javax.websocket.DeploymentException: Multiple Endpoints may not be deployed to the same path [/websocket/{sid}] : existing endpoint was class com.sanyi.qibaobusiness.framework.webSocket.WebSocketServe
报错: javax.websocket.DeploymentException: Multiple Endpoints may not be deployed to the same path [/w ...
- Client-Side Template Injection with AngularJS
<html> <head> <meta charset="utf-8"> <script src="https://cdn.bo ...
- 第十六节: EF的CodeFirst模式通过Fluent API修改默认协定
一. 简介 1. 优先级:Fluent API > data annotations > default conventions. 2. 所有的Fluent API配置都要在 OnMode ...
- 小程序图片转Base64
在小程序中,有些业务要用到 图片的 base64 wx.chooseImage({ success: res => { wx.getFileSystemManager().readFile({ ...
- A Basic Course in Partial Differential Equations
A Basic Course in Partial Differential Equations, Qing Han, 2011 [下载说明:点击链接,等待5秒, 点击右上角的跳过广告后调至下载页面, ...
- 导出CSV 换行问题。
程序方面: 1.Windows 中的换行符"\r\n" 2.Unix/Linux 平台换行符是 "\n". 3.MessageBox.Show() 的换行符为 ...
- SpringBoot之解决云服务器VPS在所处云端集群的内网不能解析域名的问题:java.net.UnknownHostException:abc.cn: Temporary failure in name resolution
一.起因与原因分析过程 前端小伙伴儿告诉我,说服务器崩了. 请求数据接口,接口有响应,但报的json提示指向:数据库异常错误. 遂登陆云主机查看日志,核心记录显示如下: 2018-11-09 22:1 ...
- Jenkins--发送邮件配置
使用Jenkins可以进行构建,并可以发送邮件.今天我们来讲一下邮件的配置. 首先:下载安装插件: 进入[Jenkins-系统管理-插件管理-可选插件],搜索“Email Extension”进行安装 ...
- 移动端调用电话、短信、唤起QQ和使用百度地图
H5能很方便地实现这些功能,都是一句代码搞定 调用电话 <a href="tel:12345678"> 短信 <a href='sms:12345678'> ...