spring原理案例-基本项目搭建 03 创建工程运行测试 spring ioc原理实例示例
下面开始项目的搭建
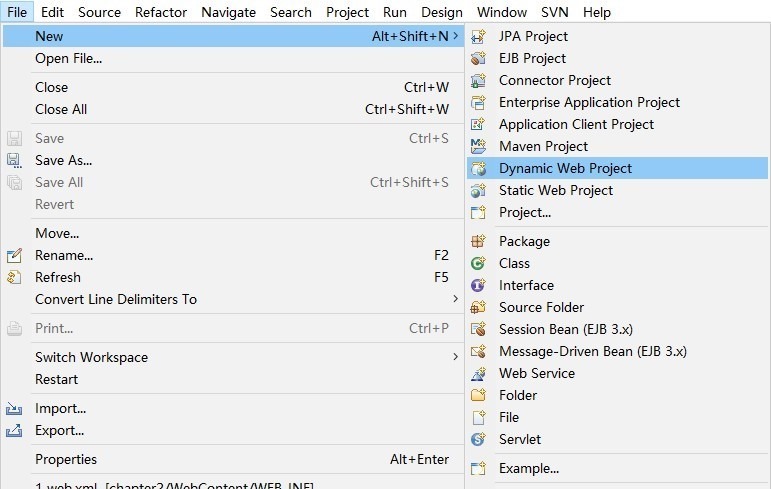
使用 Java EE - Eclipse 新建一 Dynamic Web Project
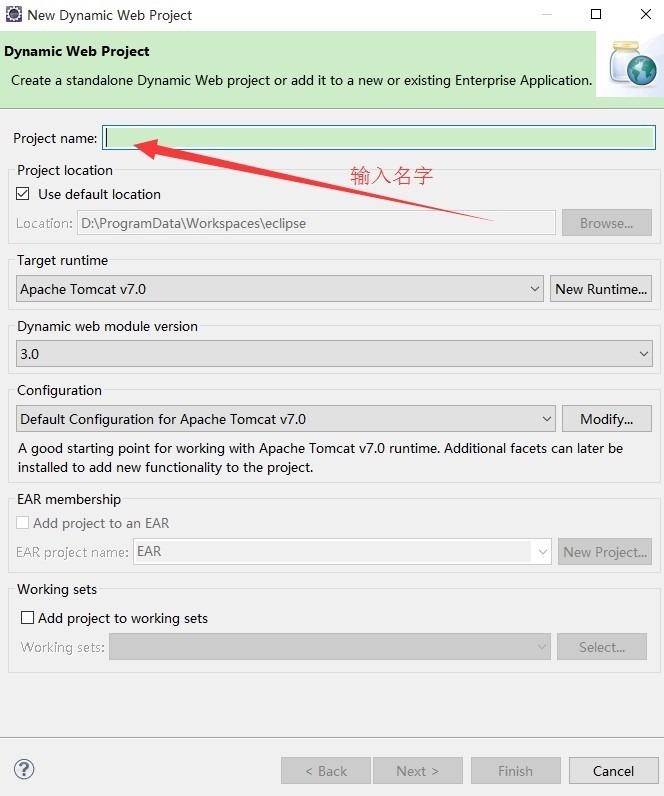
Target Runtime 选 Apache Tomcat 7.0(不要选 Apache Tomcat 6.0,7 以后才支持 Servlet 3.0)。
点击 Next > 按钮。
默认的 Source folders 配置如下:
ps:可以根据需求自己编辑比如
删除默认的,增加以下四个并修改默认的输出目录为 WebContent\WEB-INF\classes:
src/main/java
src/main/resources
src/test/java
src/test/resources

点击Next
Configure web module settings 对话框勾选 Generate web.xml deployment descriptor 选项:
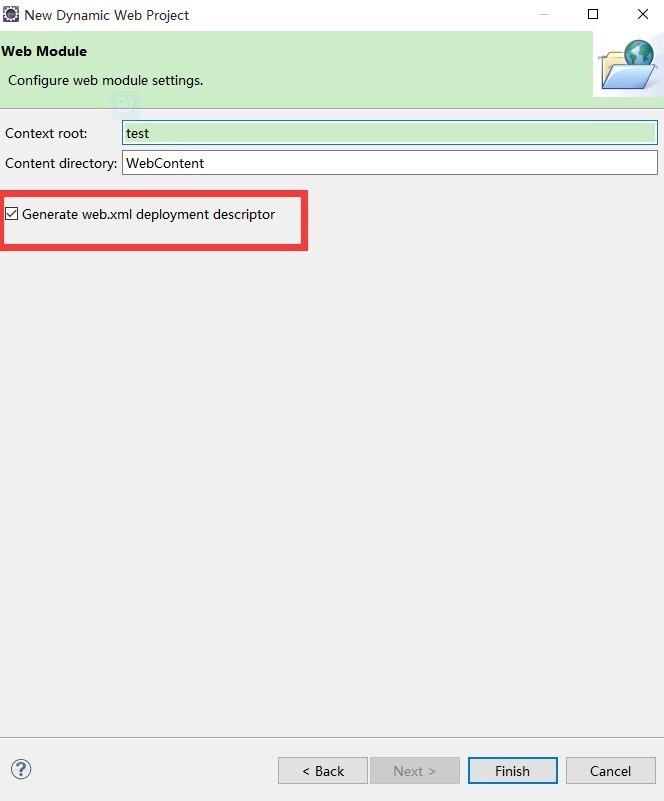
然后点击finish完成
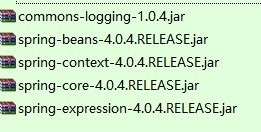
这几个包或许是需要最少的包
-------------------------------------------------------
3.下面开始部署
把所需要的jar包ctrl c ctrl v粘贴到lib目录
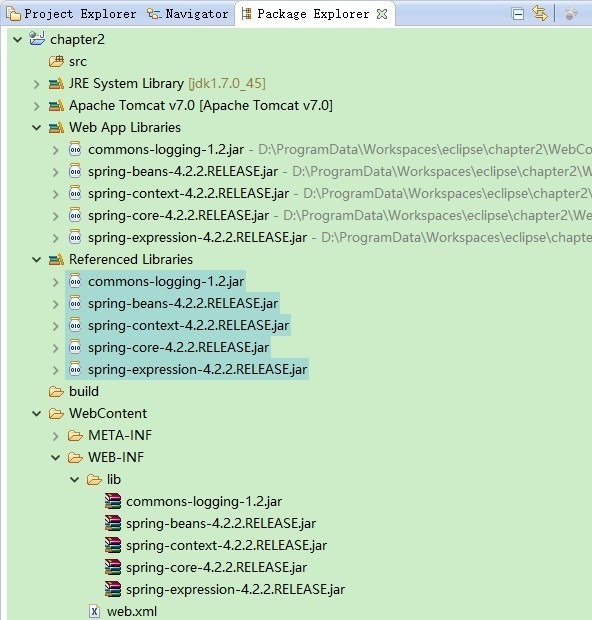
然后 添加进来
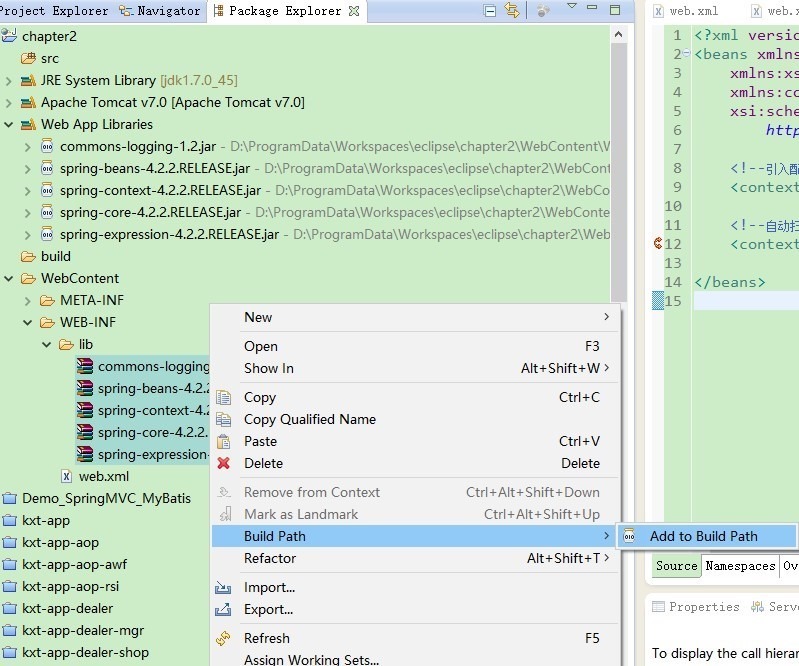
添加完的效果
然后新建两个类
一个实体类-----------------HelloWorldSpringBean
一个测试类(包含main函数)----------HelloWorldSpring
新建配置文件 -----------helloWorldSpring.xml
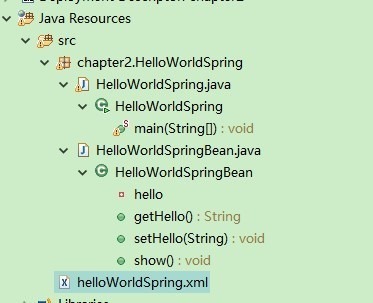
具体如下:
HelloWorldSpringBean
package chapter2.HelloWorldSpring;

public class HelloWorldSpringBean {

private String hello;

public String getHello(){

return hello;

    }

public void setHello(String hello){

this.hello=hello;

    }

public void show(){

        System.out.println("--message--"+getHello());

    }

}
一个属性,
以及对应的get set方法
还有执行方法
HelloWorldSpring
package chapter2.HelloWorldSpring;

import org.springframework.context.ApplicationContext;

import org.springframework.context.support.FileSystemXmlApplicationContext;

public class HelloWorldSpring {

public static void main(String[] args) {

// TODO Auto-generated method stub

        ApplicationContext ctx = new FileSystemXmlApplicationContext("src/helloWorldSpring.xml");

        HelloWorldSpringBean helloWorldSpringBean = (HelloWorldSpringBean)ctx.getBean("myHelloWorld");

        helloWorldSpringBean.show();

    }

}
helloWorldSpring.xml
<?xml version="1.0" encoding="UTF-8"?>

<!DOCTYPE beans PUBLIC "-//SPRING//DTD BEAN//EN" "http://www.springframework.org/dtd/spring-beans.dtd">

<beans>

<bean id="myHelloWorld" class="chapter2.HelloWorldSpring">

<property name="hello">

<value>hello World spring!</value>

</property>

</bean>

</beans>
HelloWorldSpring直接run as application 执行,报错
Exception in thread "main" org.springframework.beans.factory.xml.XmlBeanDefinitionStoreException: Line 2 in XML document from file [D:\ProgramData\Workspaces\eclipse\chapter2\src\helloWorldSpring.xml] is invalid; nested exception is org.xml.sax.SAXParseException; lineNumber: 2; columnNumber: 6; 不允许有匹配 "[xX][mM][lL]" 的处理指令目标。
配置文件开头不能有其他内容空格或者空行等,如果有的话就会报错
XML没有以<?xml version="1.0" encoding="UTF-8"?> 开头,也就是说第一个字符必须是<?xml......
解决方法:
规范的XML格式、
<?xml version="1.0" encoding="UTF-8"?> 必须是XML文件的第一个元素且前面不能空格。
修改后继续报错,错误内容为
十一月 10, 2015 5:50:10 下午 org.springframework.context.support.FileSystemXmlApplicationContext refresh

警告: Exception encountered during context initialization - cancelling refresh attempt

org.springframework.beans.factory.CannotLoadBeanClassException: Cannot find class [chapter2.HelloWorldSpring] for bean with name 'myHelloWorld' defined in file [D:\ProgramData\Workspaces\eclipse\chapter2\src\helloWorldSpring.xml]; nested exception is java.lang.ClassNotFoundException: chapter2.HelloWorldSpring

    at org.springframework.beans.factory.support.AbstractBeanFactory.resolveBeanClass(AbstractBeanFactory.java:1351)

    at org.springframework.beans.factory.support.AbstractAutowireCapableBeanFactory.determineTargetType(AbstractAutowireCapableBeanFactory.java:628)

    at org.springframework.beans.factory.support.AbstractAutowireCapableBeanFactory.predictBeanType(AbstractAutowireCapableBeanFactory.java:597)

    at org.springframework.beans.factory.support.AbstractBeanFactory.isFactoryBean(AbstractBeanFactory.java:1444)

    at org.springframework.beans.factory.support.AbstractBeanFactory.isFactoryBean(AbstractBeanFactory.java:974)

    at org.springframework.beans.factory.support.DefaultListableBeanFactory.preInstantiateSingletons(DefaultListableBeanFactory.java:752)

    at org.springframework.context.support.AbstractApplicationContext.finishBeanFactoryInitialization(AbstractApplicationContext.java:835)

    at org.springframework.context.support.AbstractApplicationContext.refresh(AbstractApplicationContext.java:537)

    at org.springframework.context.support.FileSystemXmlApplicationContext.<init>(FileSystemXmlApplicationContext.java:140)

    at org.springframework.context.support.FileSystemXmlApplicationContext.<init>(FileSystemXmlApplicationContext.java:84)

    at chapter2.HelloWorldSpring.HelloWorldSpring.main(HelloWorldSpring.java:12)

Caused by: java.lang.ClassNotFoundException: chapter2.HelloWorldSpring
类找不到,发现是配置文件中的class中写错了,没有写好类名
class="chapter2.HelloWorldSpring.HelloWorldSpringBean">修改为这个重新运行,可以打开

最终的代码为:
package chapter2.HelloWorldSpring;

public class HelloWorldSpringBean {

private String hello;

public String getHello(){

return hello;

    }

public void setHello(String hello){

this.hello=hello;

    }

public void show(){

        System.out.println("--message--"+getHello());

    }

}

---------------------------------------------------------

package chapter2.HelloWorldSpring;

import org.springframework.context.ApplicationContext;

import org.springframework.context.support.FileSystemXmlApplicationContext;

import chapter2.HelloWorldSpring.HelloWorldSpringBean;

public class HelloWorldSpring {

public static void main(String[] args) {

// TODO Auto-generated method stub

        ApplicationContext ctx = new FileSystemXmlApplicationContext("src/helloWorldSpring.xml");

        HelloWorldSpringBean helloWorldSpringBean = (HelloWorldSpringBean)ctx.getBean("myHelloWorld");

        helloWorldSpringBean.show();

    }

}

-----------------------------------------------------------------------------------

<?xml version="1.0" encoding="UTF-8"?>

<!DOCTYPE beans PUBLIC "-//SPRING//DTD BEAN//EN" "http://www.springframework.org/dtd/spring-beans.dtd">

<beans>

<bean id="myHelloWorld" class="chapter2.HelloWorldSpring.HelloWorldSpringBean">

<property name="hello">

<value>hello World spring!</value>

</property>

</bean>

</beans>
spring原理 实践解析-简单的helloworld
spring原理案例-基本项目搭建 01 spring framework 下载 官网下载spring jar包
spring原理案例-基本项目搭建 02 spring jar包详解 spring jar包的用途
spring原理案例-基本项目搭建 03 创建工程运行测试 spring ioc原理实例示例
springmvc整合mybatis完整项目示例
springmvc 项目完整示例01 需求与数据库表设计 简单的springmvc应用实例 web项目
springmvc 项目完整示例02 项目创建-eclipse创建动态web项目 配置文件 junit单元测试
springmvc 项目完整示例04 整合mybatis mybatis所需要的jar包 mybatis配置文件 sql语句 mybatis应用
springmvc 项目完整示例05 日志 --log4j整合 配置 log4j属性设置 log4j 配置文件 log4j应用
springmvc 项目完整示例06 日志–log4j 参数详细解析 log4j如何配置
springmvc 项目完整示例07 设置配置整合springmvc springmvc所需jar包springmvc web.xml文件配置
springmvc 项目完整示例08 前台页面以及知识点总结
maven项目整合springmvc整合mybatis
eclipse 创建maven 项目 动态web工程完整示例
eclipse 创建maven 项目 动态web工程完整示例 maven 整合springmvc整合
spring原理案例-基本项目搭建 03 创建工程运行测试 spring ioc原理实例示例的更多相关文章
- spring原理案例-基本项目搭建 01 spring framework 下载 官网下载spring jar包
下载spring http://spring.io/ 最重要是在特征下面的这段话,需要注意: All avaible features and modules are described in the ...
- spring原理案例-基本项目搭建 02 spring jar包详解 spring jar包的用途
Spring4 Jar包详解 SpringJava Spring AOP: Spring的面向切面编程,提供AOP(面向切面编程)的实现 Spring Aspects: Spring提供的对Aspec ...
- 【spring colud】spring cloud微服务项目搭建【spring boot2.0】
spring cloud微服务项目搭建 =================================== 示例版本: 1.spring boot 2.0版本 2.开发工具 IntellJ IDE ...
- 基于maven+dubbo+spring+zookeeper的简单项目搭建
maven下搭建dubbo小demo,供初学者学习,有不正确地方还请见谅. 先推荐一篇创建maven项目的文章,个人认为比较完整详细清楚: http://www.cnblogs.com/leiOOle ...
- freemarker + spring mvc + spring + mybatis + mysql + maven项目搭建
今天说说搭建项目,使用freemarker + spring mvc + spring + mybatis + mysql + maven搭建web项目. 先假设您已经配置好eclipse的maven ...
- 【Spring Cloud】实战项目搭建
0.项目搭建 创建maven项目,删除其中的src目录,作为整体父项目,在其中添加module实现各个组件. 1.Eureka Server的实现 添加module,创建Spring Boot项目,添 ...
- 一 、Spring Boot 学习之项目搭建
一.简介 spring 官方网站本身使用Spring 框架开发,随着功能以及业务逻辑的日益复杂,应用伴随着大量的XML配置文件以及复杂的Bean依赖关系. 随着Spring 3.0的发布,Spring ...
- 【Android】cocos2d-x-3.1.1环境搭建与创建工程( Win7 32位系统)
参考资料: http://blog.csdn.net/wxc237786026/article/details/32907079 1.环境搭建 2.创建工程 2.1 VS2012运行 2.2 Andr ...
- 从零一起学Spring Boot之LayIM项目长成记(四) Spring Boot JPA 深入了解
前言 本篇内容主要是一些关于JPA的常用的一些用法等.内容也是很多是看其他博客学来的,顺道在本系列博客里抽出一篇作为总结.下面让我们来看看吧. 不过我更推荐大家读本篇:https://lufficc. ...
随机推荐
- Gedit —— 推荐于NOI系列考试(NOIlinux)的轻量编程环境
由于Vim,Emacs上手艰难,Guide又特别难用,Anjuta还闪退 故推荐一款轻量化的编程环境:Gedit(文本编辑器) 配置方法: 1:在桌面上新建main.cpp,打开方式选择使用gedit ...
- [JZOJ3615]【NOI2014模拟】数列(平面几何+二维线段树)
Description 给定一个长度为n的正整数数列a[i]. 定义2个位置的f值为两者位置差与数值差的和,即f(x,y)=|x-y|+|a[x]-a[y]|. 你需要写一个程序支持2种操作(k都是正 ...
- DevExpress内 GridControl中复选框值问题
在DevExpress的 GridControl内的复选柜勾选后,界面看到是勾选状态,但对应的DataView的值仍未变,在以下事件内处理 在对应的DataView内的 CellValueChangi ...
- 3、java面向对象编程
1.面向对象内存分析 栈的特点 (1)JVM为每个线程创建一个栈,用于存放该线程执行方法的信息(实际参数.局部变量等) (2)栈属于线程私有,不能实现线程间的共享! (3)栈的存储特性是:先进后出,后 ...
- 如何把if-else代码重构成高质量代码
原文:https://blog.csdn.net/qq_35440678/article/details/77939999 本文提纲: 为什么我们写的代码都是if-else? 这样的代码有什么缺点? ...
- 关于阿里云Centos7 Mailx发送邮件失败的处理
开始通过配置系统自带的mail 发送邮件 在其中一台服务器怎么都不行 /etc/mail.rc配置: set from="邮箱名" set smtp="smtp.163. ...
- [AtCoder 2702]Fountain Walk - LIS
Problem Statement In the city of Nevermore, there are 108 streets and 108 avenues, both numbered fro ...
- mint17上建立lamp环境
使用apt-get方式是最简单的也是最快捷稳定的在桌面linux环境下. 分别执行如下命令: (1)安装MYSQL sudo apt-get install mysql-server ...
- django 源码报错
启动django ,一直提示一个 AttributeError: 'str' object has no attribute 'decode' 哥,查了一下午google,就怕是自己判断错了,最后在一 ...
- Keepalived+Nginx实现高可用Web负载均衡
1.安装编译 Nginx 所需的依赖包# yum install gcc gcc-c++ make automake autoconf libtool pcre pcre-devel zlib zli ...