Welcome to LED Control Wiki
About this project
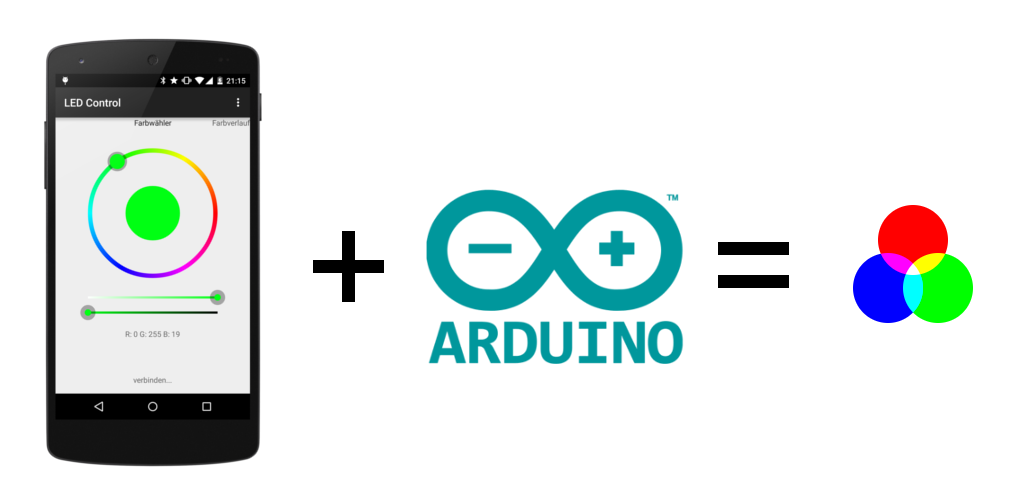
This project was developed after I had to find out that controlling my RGB ambient light with the normal infrared remote control was complicated and not reliable. Within a few months I build this solution that enabled controlling my LEDs with a Bluetooth-enabled Android Device running a self programmed app. On the hardware side an Arduino is receiving the commands and controlling three PWM signals.
The app is available at Google Play for free (but closed source), the Arduino sketch is released under Apache License. The used protocol is also documented in this wiki and open for usage by others.
If you like this project I would be pleased with recommendations or a good rating at Google Play. Let me also know when you find some bugs.
Requirements
You need a few things to get started:
- Arduino Uno
- Android powered Phone/Tablet with bluetooth running Android 4.0 or above
- RGB-LED-Stripes with common anode (one common '+' and a seperate '-/GND' for each color) (you can also use stripes with common cathodes, but the showed circuit diagramm will not work (in particular the output stage). A solution therefore is also available.)
- External Power Supply (to power Arduino and LEDs)
- USART capable bluetooth module (for example HC-06, available on ebay for < 10$)
- 3x 220 Ohm resistors (gate current limiter)
- 3x 10 kOhm resistors (gate pull-down)
- 3x N-Channel Power-MOSFETs (enhancement mode) (for example IRF1404)
optional voltage divider
- 1x 4,7 kOhm resistor
- 1x 10 kOhm resistor
Assembly
Connect the Arduino and the others parts as showed below. Be sure that you do not change the RX pin with the TX pin of the bluetooth module. In General: RX of the bluetooth module has to be connected to TX of Arduino and vice versa.
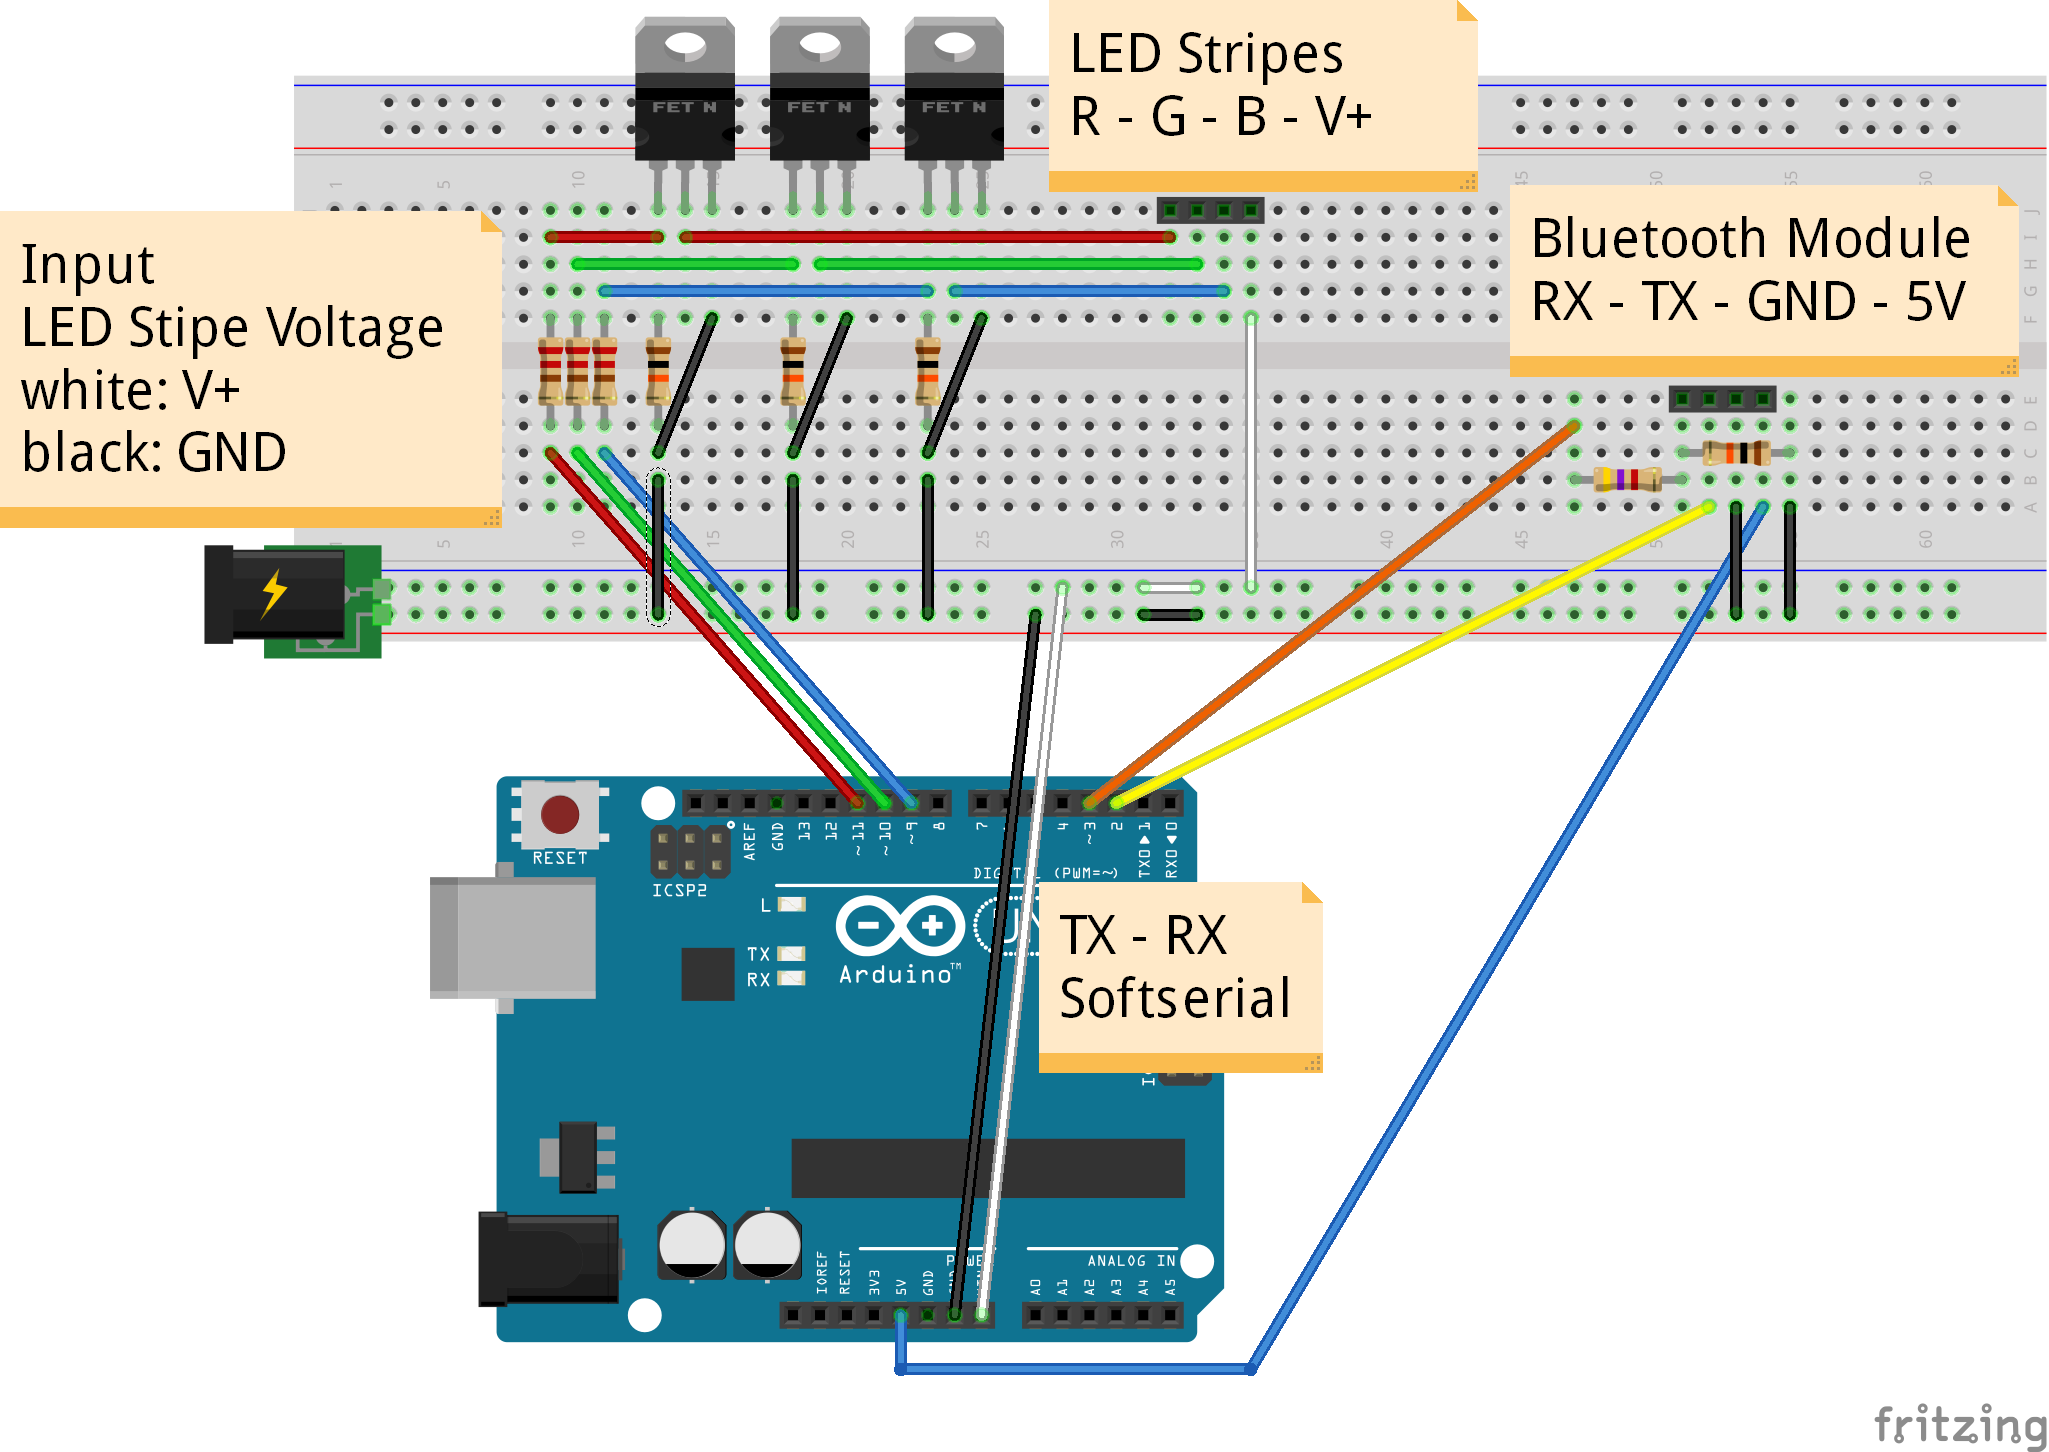
Caution: The HC-06 bluetooth module I bought works with 3,3V. You can power it with 5V because there is a built-in voltage regulator (make sure that yours has also one or power it with 3,3V), but RX and TX are not 5V tolerant. To avoid permanent damage the Arduino output-voltage is reduced to 3,3V by a voltage divider (therefore the 4k7 and 10k resistors). On the other hand a special step-up circuit is not necessary because the Arduino recognizes 3,3V of the bluetooth module as HIGH-Level.
Note: For permanent installations you should consider soldering your circuit on a Arduino Proto Shield (bought or home made). I personally soldered everything on a stripboard and put the whole thing in a small case.
Note: You don't need the connection from TX (pin 3) on Arduino to RX of the bluetooth module, because currently nothing will be send back to the Android device. Just remove the connection from pin 3 (Arduino) to RX (bluetooth module) and the voltage divider. It may be possible that a bidirectional communication will be used in future releases.
Installing the software
You're almost done. Now you need to install the software and select the target device.
- Upload the Arduino Sketch (https://github.com/fennel-labs/LED-control/blob/master/LEDControlArduino.ino)
- Install the Android app on your phone (https://play.google.com/store/apps/details?id=com.fennel.ledcontrol)
- Start a new bluetooth device discovery (Android -> Settings -> Bluetooth -> Add)
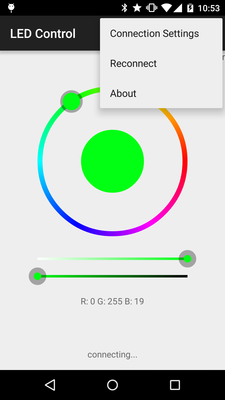
- Start the LED Control app and select your receiver (LED Control -> Connection Settings -> your device)
Troubleshooting
There are several reasons why your circuit may not work as intended. Here are some possibilities:
- Check if the LED voltage is high enough and your stripes have the right polarity by connecting them directly to your power source.
- Are RX and TX connected in the right way? Read also the notes above.
- By default, the Arduino sends some debug data to the PC via the hardware serial. If the Software in Arduino behaves abnormal check the console log.
- In case you are not sure whether your bluetooth module works properly or not, connect it directly to your Arduino (still keeping the voltage levels in mind, see note above). Therefore you have to remove the 328P chip temporary from your Uno.
- To check the output stage, you can try pulling the gate of each channel to ground or +5V.
thanks:https://github.com/fennel-labs
Welcome to LED Control Wiki的更多相关文章
- Matlab安装记录 - LED Control Activex控件安装
Matlab安装记录-LED Control Activex控件安装 2013-12-01 22:06:36 最近在研究Matlab GUI技术,准备用于制作上位机程序:在Matlab GUI的技术 ...
- 针对Windows 64位系统中Matlab没有LED Control Activex控件的解决方法
Win 10 64bits系统中Matlab 64位软件没有LED Control Activex控件,LED ActiveX Control控件位于Gauges Blockset模块中,而Gauge ...
- WPF自定义LED风格数字显示控件
原文:WPF自定义LED风格数字显示控件 版权声明:本文为博主原创文章,转载请注明作者和出处 https://blog.csdn.net/ZZZWWWPPP11199988899/article/de ...
- 【openwrt】再设置
https://wiki.openwrt.org/zh-cn/doc/uci/network https://wiki.openwrt.org/zh-cn/doc/uci/wireless https ...
- 剖析ironic
关键技术 在安装操作系统时需要存储介质来存储系统镜像.需要控制物理机开关机,在网络部署环境中还需要预启动环境. PXE (预启动环境) IPMI(电源管理) iSCSI(存储) 什么是PXE PXE( ...
- DIY PIXHAWK APM等飞控用的PPM转接板
需要的硬件 一块arduino pro mini(推荐这个,比较小,当然如果你没有USB转转口的烧写工具买个ardunio nano板也是不错的,直接用USB线连接电脑就可以,用nano板要注意.它的 ...
- 【网络——Linux】——IPMI详细介绍【转】
一.IPMI含义 智能平台管理接口(IPMI:Intelligent Platform Management Interface)是一项应用于服务器管理系统设计的标准,由Intel.HP.Dell和N ...
- AIX 常用命令和知识
BOOTLIST:#bootlist -m normal -o (查看bootlist)#bootlist -m normal (设置bootlist为空,谁要在我机器上执行我就要哭了)#boot ...
- arduino pro mini不能下载
刚毕业时就知道arduino,但当时崇拜技术极致,喜欢把单片机的性能用到尽,觉得操作寄存器运行效率高,对arduino 这种高效模式贬为投机取巧,不过其中也一直对arduino 有关注. 随着芯片技术 ...
随机推荐
- InputStream,BufferedImage与byte数组之间的转换
需要获取网络的一张图片,但是某种需要,要把获取的这段流输入换为BufferedImage流,有的地方还需要转换为byte[]. 获得图片地址,获得了一个图片输入流,例如: Url img = n ...
- 十六、Swing高级组件
1.利用JTable类直接创建表格 (1)创建表格 构造方法:JTable(Object rowData,Object[] columnNames) (2)定制表格 编辑:isCellEditable ...
- 第十二天 jni 了解
1 .什么是jni java native interface 是一种协议. 用于java 和C 语言之间进行 通讯. 2. java 8中基本类型 . byte (1个字节) short ...
- 关于无法把程序(Adobe Fireworks CS5)添加到打开方式的解决办法
关于无法把程序(Adobe Fireworks CS5)添加到打开方式的解决办法 最近换了新版的Adobe Fireworks CS5,发现打开图片文件时在右键“打开方式”里仍然是以前的Firewor ...
- Determining Current Block and Current Item in Oracle Forms
SYSTEM.CURSOR_BLOCK Determining current block in Oracle Forms Using SYSTEM.CURSOR_BLOCK system varia ...
- python高性能代码之多线程优化
以常见的端口扫描器为实例 端口扫描器的原理很简单,操作socket来判断连接状态确定主机端口的开放情况. import socket def scan(port): s = socket.socket ...
- CSS样式汇总
1. Overflow: 是否隐藏超出容器范围之外的内容,主要参数包括Hidden(隐藏),Auto(根据容器内容自动显示滚动条),scroll(显示滚动条,即使内容不超出容器范围,也会显示一个边框, ...
- CentOS6.8下部署Zabbix3.0
Centos6.8下部署安装zabbix3.0: 环境要求 PHP >= 5.4 (CentOS6默认为5.3.3,需要更新) curl >= 7.20 (如需支持SMTP认证,需更新) ...
- Django1.9开发博客(11)- 富文本与代码高亮
TinyMCE是一个轻量级的基于浏览器的所见即所得编辑器,支持目前流行的各种浏览器,由JavaScript写成. 功能配置灵活简单(两行代码就可以将编辑器嵌入网页中),支持AJAX.另一特点是加载速度 ...
- zoj 2833 friendship
zoj 2833这次真的很顺利了..居然是因为数组的大小没有符合要求,瞎折腾了很久..没有注意到要求范围,真是该死! 想法很简单,就是定义一个父结点数组,下标 i 表示这个元素,初始化为 -1表示 这 ...