Docker系列--容器编排工具Docker Compose详解
1、Docker Compose 概述
Compose是一个用于定义和运行多容器Docker应用程序的工具。使用Compose,您可以使用Compose文件来配置应用程序的服务。然后,使用单个命令,您可以从配置中创建并启动所有服务。
Compose非常适合开发,测试和登台环境以及CI工作流程。
(1)官方文档
(2)使用Compose基本上是一个三步过程
- 定义您的应用程序环境,Dockerfile以便可以在任何地方进行复制。
- 定义构成应用程序的服务,docker-compose.yml以便它们可以在隔离环境中一起运行。
- 最后,运行docker-compose up和Compose将启动并运行整个应用程序。
(3)一个 docker-compose.yml 文件案例:
version: '3'

services:

    web:

        build: .

        ports:

          - "8888:8888"

    redis:

        image: "redis:alpine"
有关Compose文件的详细信息,请参阅 Compose文件参考。
(4)Compose具有管理应用程序整个生命周期的命令:
- 启动,停止和重建服务
- 查看正在运行的服务的状态
- 流式传输运行服务的日志输出
- 在服务上运行一次性命令
2、Docker Compose 安装
2.1 安装条件
(1)前提
Docker Compose 依靠Docker Engine 进行任何有意义的工作,因此请确保您已在本地或远程安装Docker Engine,具体取决于您的设置。
要以非root用户身份运行Compose,请参阅以非root用户身份管理Docker。
(2)安装系统(主要讲linux、pip安装)
- Linux
- Mac
- Windows
- 备用安装选项(使用pip安装/安装为容器)
2.2 在Linux系统上安装Compose
(1)下载安装
在gitlab https://github.com/docker/compose/releases 上查询适合自己的版本
我这里下载的是1.23.2 版本
$ sudo curl -L https://github.com/docker/compose/releases/download/1.23.2/docker-compose-Linux-x86_64 -o /usr/local/bin/docker-compose
(2)添加执行权限
$ chmod +x /usr/local/bin/docker-compose
(3)安装完成,查询版本
$ docker-compose --version

docker-compose version 1.23.2, build 1110ad01
2.3 备用安装选项(使用pip安装/安装为容器)
2.3.1 使用pip安装
可以使用pypi安装Compose pip。如果你安装使用pip,我们建议你使用 virtualenv,因为许多操作系统都有python系统包与docker-compose依赖项冲突。请参阅virtualenv教程以开始使用。
$ pip install docker-compose
# 如果你没有使用virtualenv

$ sudo pip install docker-compose
2.3.2 安装为容器
Compose也可以在一个容器内运行,来自一个小的bash脚本包装器。要将compose安装为容器,请运行此命令。如果此示例已过期,请务必将版本号替换为所需的版本号:
$ sudo curl -L --fail https://github.com/docker/compose/releases/download/{{site.compose_version}}/run.sh -o /usr/local/bin/docker-compose

$ sudo chmod +x /usr/local/bin/docker-compose
2.4 Docker Compose 升级
如果从Compose 1.2或更早版本升级,请在升级Compose后删除或迁移现有容器。这是因为,从版本1.3开始,Compose使用Docker标签来跟踪容器,并且需要重新创建容器以添加标签。
如果Compose检测到没有标签创建的容器,它将拒绝运行,因此您最终不会使用两组。如果要继续使用现有容器(例如,因为它们具有要保留的数据卷),可以使用Compose 1.5.x使用以下命令迁移它们:
docker-compose migrate-to-labels

或者,如果您不担心保留它们,可以将它们删除。撰写时创建新的。

docker container rm -f -v myapp_web_1 myapp_db_1 ...
2.5 Docker Compose 卸载
# 正常系统安装卸载:

sudo rm /usr/local/bin/docker-compose

# pip安装卸载:

pip uninstall docker-compose
3、一个完整的Docker Compose 运用演示
3.1 compose 准备
(1)创建compose 工作目录
[root@caicai]# cd  /opt

[root@caicai]# mkdir composetest

[root@caicai]# cd /opt/composetest
(2)在/opt/composetest目录下,创建一个app.py文件,后面在项目目录中调用文件
root@caicai:/opt/composetest# vi app.py
import time

import redis

from flask import Flask

app = Flask(__name__)

cache = redis.Redis(host="redis",port=6379)

def get_hit_count():

    retries = 5

    while True:

        try:

            return cache.incr("hits")

        except redis.exceptions.ConnectionError as e:

            if retries == 0:

                raise e

            retries -= 1

            time.sleep(0.5)

@app.route("/")

def hello():

    count = get_hit_count()

    return 'Hello World! I have been seen {} times.\n'.format(count)

if __name__ == "__main__":

    app.run(host="0.0.0.0",port=8888,debug=True)
注:redis是应用程序网络上redis容器的主机名。我们使用Redis的默认端口6379。web服务器采用8888端口
(3)创建requirements.txt文件,安装项目需要的包
root@caicai:/opt/composetest# cat requirements.txt

flask

redis
3.2 创建Dockerfile,用于启动一个简单的容器
创建一个名为Dockerfile的文件
root@caicai:/opt/composetest# vi Dockerfile

FROM python

ADD . /code

WORKDIR /code

RUN pip install --upgrade pip

RUN pip install -r requirements.txt

CMD ["python","app.py"]
注:从Python映像开始构建映像。详细的dockerfile用法详见:Docker系列--Dockerfile镜像制作详解
- 将当前目录添加.到/code映像中的路径中。
- 将工作目录设置为/code。
- 安装Python依赖项。
- 将容器的默认命令设置为python app.py。
3.3 在Compose文件中定义服务
创建docker-compose.yml项目目录中调用的文件
root@caicai:/opt/composetest# vi docker-compose.yml

version: '3'

services:

    web:

        build: .

        ports:

          - "8888:8888"

    redis:

        image: "redis:alpine"
此Compose文件定义了两个服务,web和redis。该web服务:
- 使用从Dockerfile当前目录中构建的图像。
- 将容器上的公开端口5000转发到主机上的端口8888。我们使用Flask Web服务器的默认端口8888。
该redis服务使用从Docker Hub注册表中提取的公共 Redis映像。
3.4 使用Compose构建并运行您的应用程序
(1)在项目目录中,启动应用程序 docker-compose up
root@caicai:/opt/composetest# docker-compose up

/usr/local/lib/python2.7/dist-packages/cryptography/__init__.py:39: CryptographyDeprecationWarning: Python 2 is no longer supported by the Python core team. Support for it is now deprecated in cryptography, and will be removed in a future release.

  CryptographyDeprecationWarning,

Starting composetest_web_1   ... done

Starting composetest_redis_1 ... done

Attaching to composetest_redis_1, composetest_web_1

redis_1  | 1:C 06 Aug 2020 13:29:46.531 # oO0OoO0OoO0Oo Redis is starting oO0OoO0OoO0Oo

redis_1  | 1:C 06 Aug 2020 13:29:46.531 # Redis version=6.0.6, bits=64, commit=00000000, modified=0, pid=1, just started

redis_1  | 1:C 06 Aug 2020 13:29:46.531 # Warning: no config file specified, using the default config. In order to specify a config file use redis-server /path/to/redis.conf

redis_1  | 1:M 06 Aug 2020 13:29:46.538 * Running mode=standalone, port=6379.

redis_1  | 1:M 06 Aug 2020 13:29:46.538 # WARNING: The TCP backlog setting of 511 cannot be enforced because /proc/sys/net/core/somaxconn is set to the lower value of 128.

redis_1  | 1:M 06 Aug 2020 13:29:46.538 # Server initialized

redis_1  | 1:M 06 Aug 2020 13:29:46.538 # WARNING overcommit_memory is set to 0! Background save may fail under low memory condition. To fix this issue add 'vm.overcommit_memory = 1' to /etc/sysctl.conf and then reboot or run the command 'sysctl vm.overcommit_memory=1' for this to take effect.

redis_1  | 1:M 06 Aug 2020 13:29:46.538 # WARNING you have Transparent Huge Pages (THP) support enabled in your kernel. This will create latency and memory usage issues with Redis. To fix this issue run the command 'echo never > /sys/kernel/mm/transparent_hugepage/enabled' as root, and add it to your /etc/rc.local in order to retain the setting after a reboot. Redis must be restarted after THP is disabled.

redis_1  | 1:M 06 Aug 2020 13:29:46.540 * Loading RDB produced by version 6.0.6

redis_1  | 1:M 06 Aug 2020 13:29:46.540 * RDB age 81007 seconds

redis_1  | 1:M 06 Aug 2020 13:29:46.540 * RDB memory usage when created 0.77 Mb

redis_1  | 1:M 06 Aug 2020 13:29:46.540 * DB loaded from disk: 0.002 seconds

redis_1  | 1:M 06 Aug 2020 13:29:46.540 * Ready to accept connections

web_1    |  * Serving Flask app "app" (lazy loading)

web_1    |  * Environment: production

web_1    |    WARNING: This is a development server. Do not use it in a production deployment.

web_1    |    Use a production WSGI server instead.

web_1    |  * Debug mode: on

web_1    |  * Running on http://0.0.0.0:8888/ (Press CTRL+C to quit)

web_1    |  * Restarting with stat

web_1    |  * Debugger is active!

web_1    |  * Debugger PIN: 258-073-627
(2)另开一个终端,验证 http://172.17.0.1:8888,成功获取相应
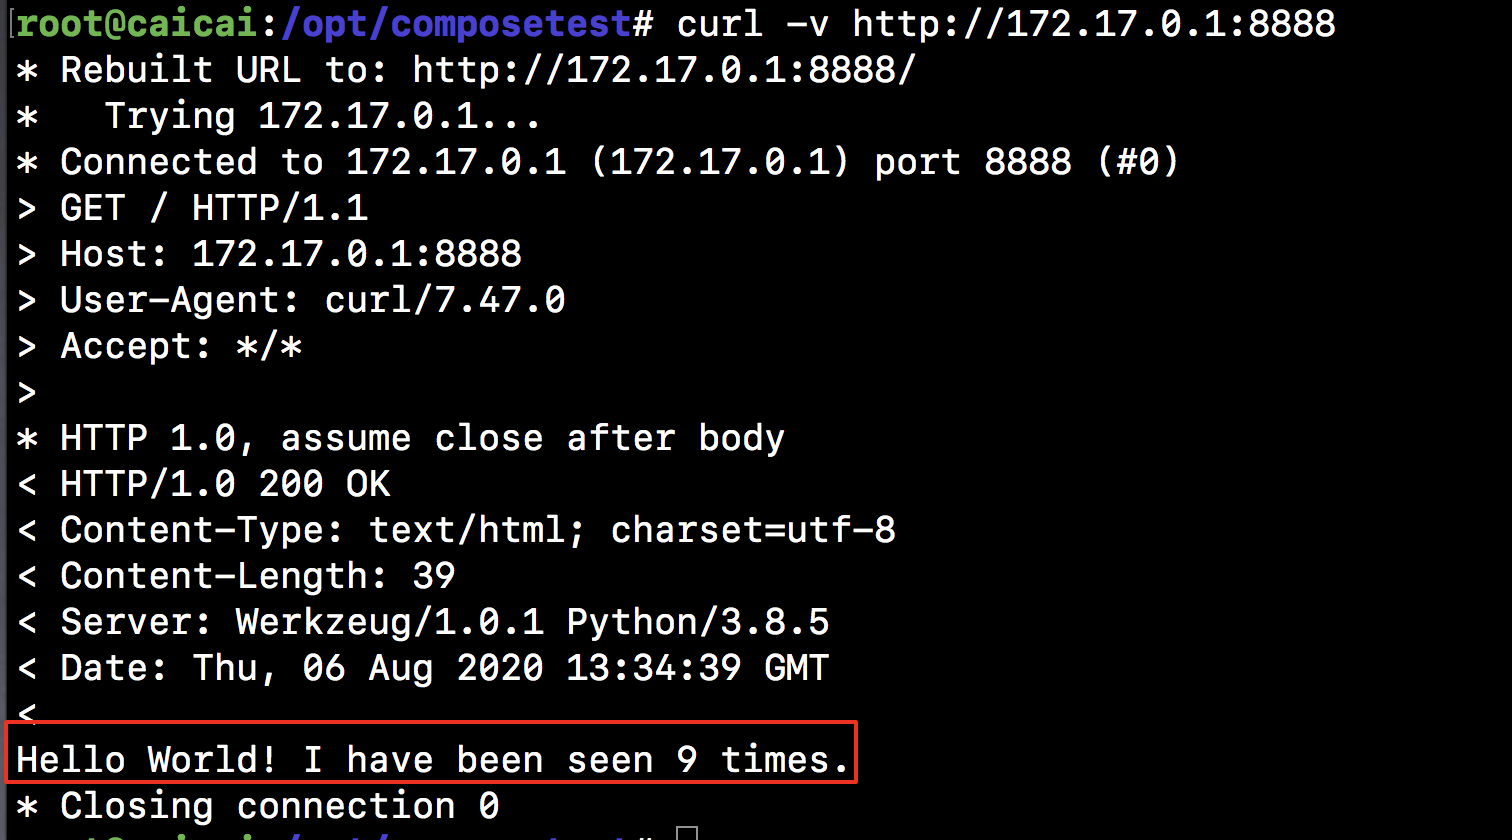
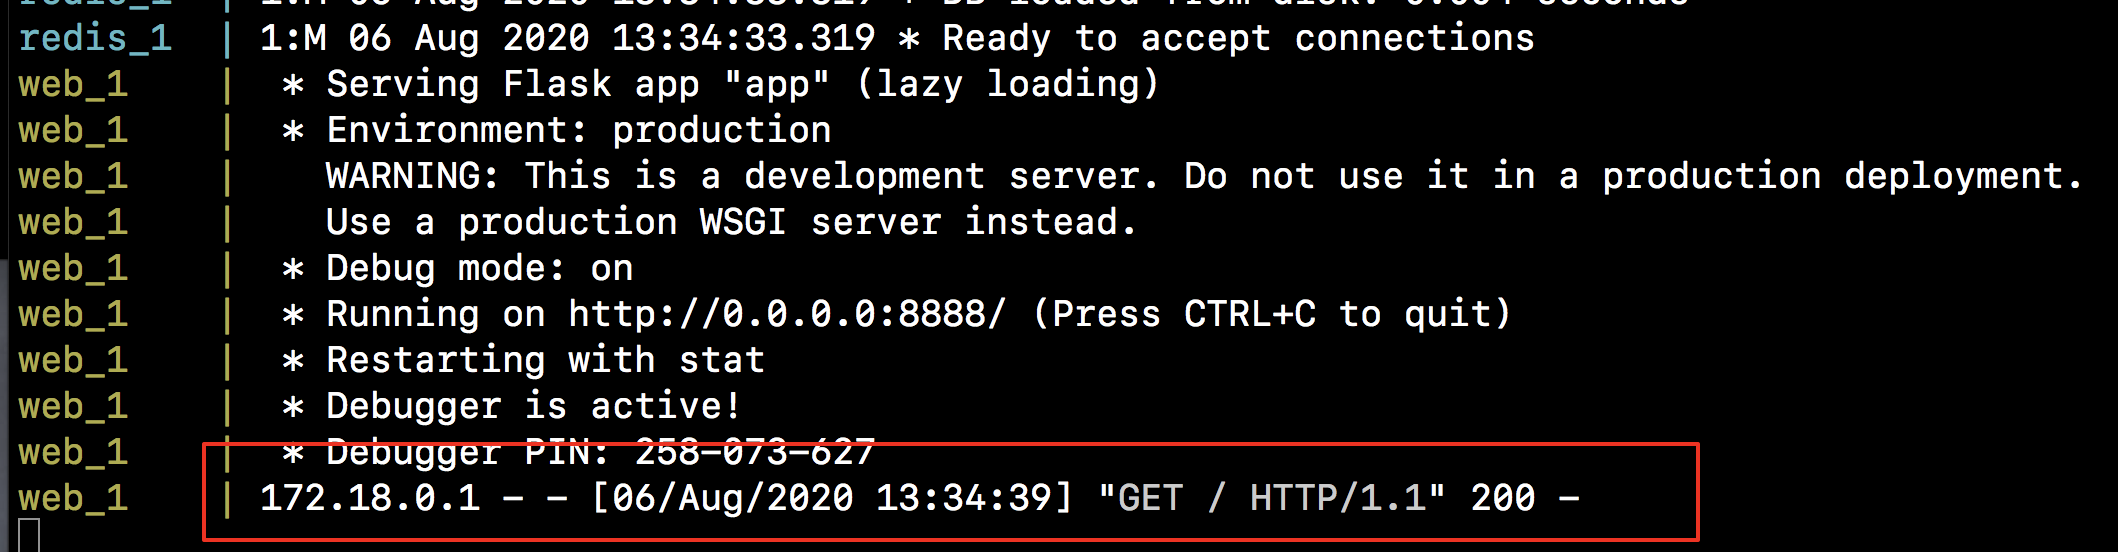
(3)服务器端接收到http请求
(4)另开一个终端,查看镜像验证和容器验证
root@caicai:/opt/composetest# docker images | grep composetest_web

composetest_web                                     latest              69c0dbe9b73c        23 hours ago        892MB

root@caicai:/opt/composetest# docker container ps

CONTAINER ID        IMAGE               COMMAND                  CREATED             STATUS              PORTS                    NAMES

767bd1f24a3e        composetest_web     "python app.py"          23 hours ago        Up 4 minutes        0.0.0.0:8888->8888/tcp   composetest_web_1

d7e4a094447c        redis:alpine        "docker-entrypoint.s…"   23 hours ago        Up 4 minutes        6379/tcp                 composetest_redis_1
(5)关闭服务
在新开的终端docker-compose down,或者在启动应用程序的原始终端中按CTRL + C来停止应用程序。
root@caicai:/opt/composetest# docker-compose down

/usr/local/lib/python2.7/dist-packages/cryptography/__init__.py:39: CryptographyDeprecationWarning: Python 2 is no longer supported by the Python core team. Support for it is now deprecated in cryptography, and will be removed in a future release.

  CryptographyDeprecationWarning,

Stopping composetest_web_1   ... done

Stopping composetest_redis_1 ... done

Removing composetest_web_1   ... done

Removing composetest_redis_1 ... done

Removing network composetest_default
3.5 修改compose 配置,添加存储卷
root@caicai:/opt/composetest# cat docker-compose.yml

version: '3'

services:

    web:

        build: .

        ports:

          - "8888:8888"

    redis:

        image: "redis:alpine"

    volumes:

        - .:/code
注:新volumes密钥将主机上的项目目录(当前目录)/code安装到容器内,允许您动态修改代码,而无需重建映像。
3.6 测试存储卷
(1)重新启动compose
root@caicai:/opt/composetest# docker-compose up

/usr/local/lib/python2.7/dist-packages/cryptography/__init__.py:39: CryptographyDeprecationWarning: Python 2 is no longer supported by the Python core team. Support for it is now deprecated in cryptography, and will be removed in a future release.

  CryptographyDeprecationWarning,

Creating network "composetest_default" with the default driver

Creating composetest_web_1   ... done

Creating composetest_redis_1 ... done

Attaching to composetest_redis_1, composetest_web_1

redis_1  | 1:C 06 Aug 2020 14:03:19.010 # oO0OoO0OoO0Oo Redis is starting oO0OoO0OoO0Oo

redis_1  | 1:C 06 Aug 2020 14:03:19.012 # Redis version=6.0.6, bits=64, commit=00000000, modified=0, pid=1, just started

redis_1  | 1:C 06 Aug 2020 14:03:19.012 # Warning: no config file specified, using the default config. In order to specify a config file use redis-server /path/to/redis.conf

redis_1  | 1:M 06 Aug 2020 14:03:19.013 * Running mode=standalone, port=6379.

redis_1  | 1:M 06 Aug 2020 14:03:19.014 # WARNING: The TCP backlog setting of 511 cannot be enforced because /proc/sys/net/core/somaxconn is set to the lower value of 128.

redis_1  | 1:M 06 Aug 2020 14:03:19.014 # Server initialized

redis_1  | 1:M 06 Aug 2020 14:03:19.014 # WARNING overcommit_memory is set to 0! Background save may fail under low memory condition. To fix this issue add 'vm.overcommit_memory = 1' to /etc/sysctl.conf and then reboot or run the command 'sysctl vm.overcommit_memory=1' for this to take effect.

redis_1  | 1:M 06 Aug 2020 14:03:19.014 # WARNING you have Transparent Huge Pages (THP) support enabled in your kernel. This will create latency and memory usage issues with Redis. To fix this issue run the command 'echo never > /sys/kernel/mm/transparent_hugepage/enabled' as root, and add it to your /etc/rc.local in order to retain the setting after a reboot. Redis must be restarted after THP is disabled.

redis_1  | 1:M 06 Aug 2020 14:03:19.015 * Ready to accept connections

web_1    |  * Serving Flask app "app" (lazy loading)

web_1    |  * Environment: production

web_1    |    WARNING: This is a development server. Do not use it in a production deployment.

web_1    |    Use a production WSGI server instead.

web_1    |  * Debug mode: on

web_1    |  * Running on http://0.0.0.0:8888/ (Press CTRL+C to quit)

web_1    |  * Restarting with stat

web_1    |  * Debugger is active!

web_1    |  * Debugger PIN: 173-495-379
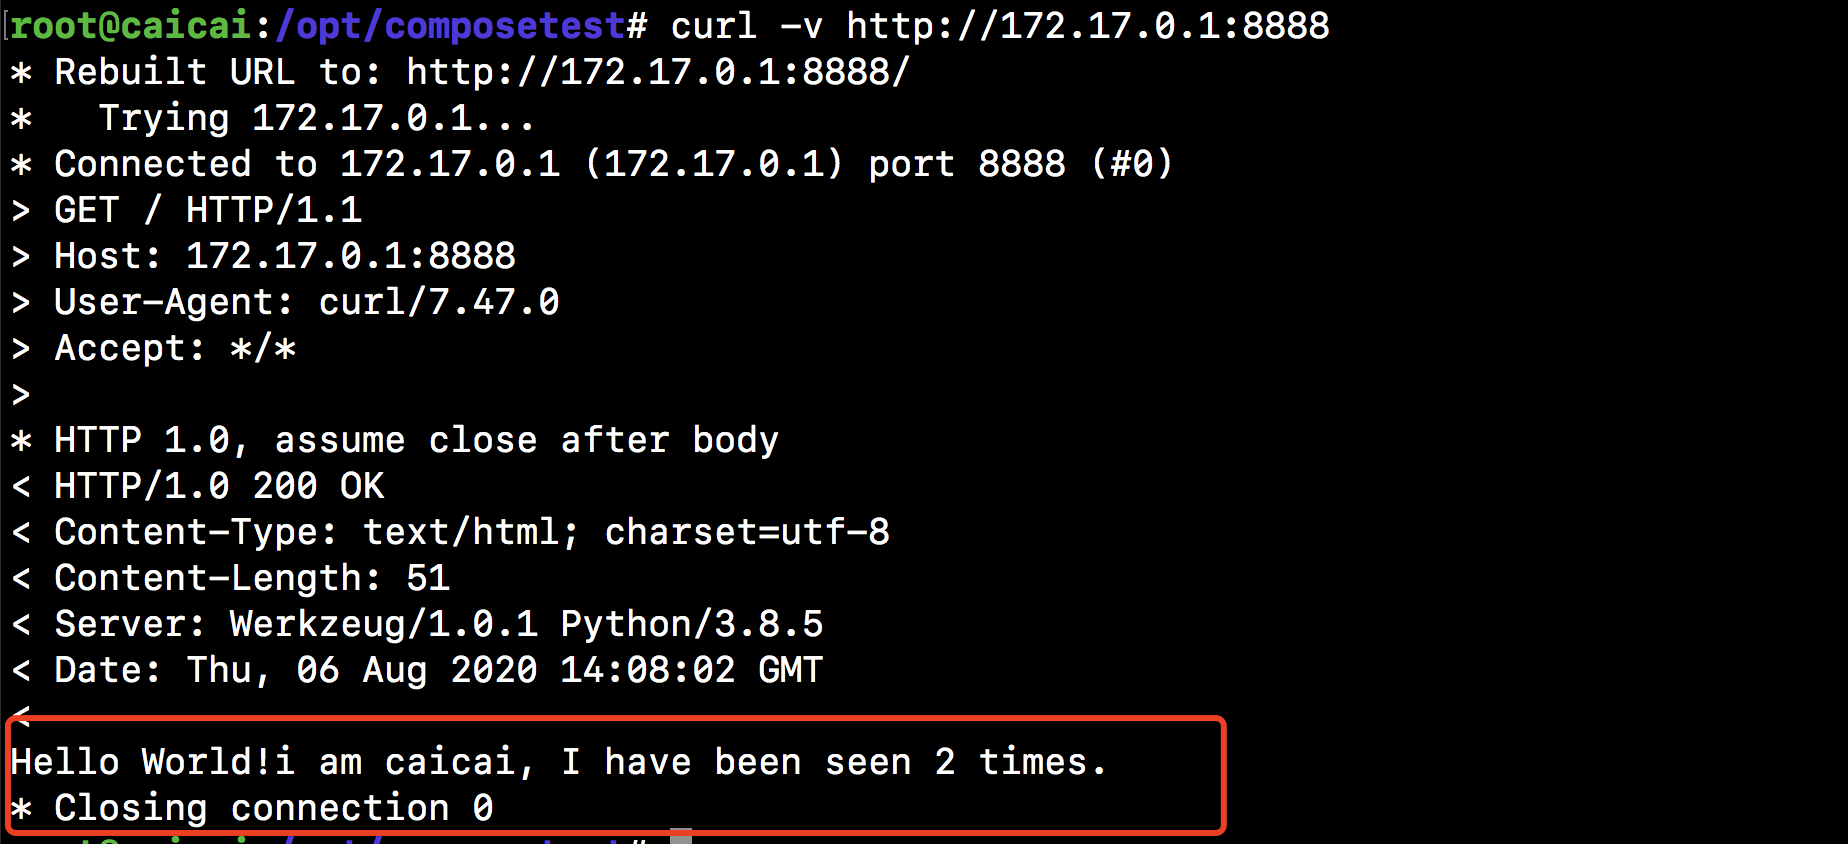
(2)另开一个终端,在宿主机的存储卷上,修改代码
# 修改返回相应结果

return 'Hello World!i am caicai, I have been seen {} times.\n'.format(count)
(3)另开一个终端,验证 http://172.17.0.1:8888,成功获取相应
3.7 docker-compose 其他命令
(1)在后台运行服务,-d(用于“分离”模式)
root@caicai:/opt/composetest# docker-compose up -d

/usr/local/lib/python2.7/dist-packages/cryptography/__init__.py:39: CryptographyDeprecationWarning: Python 2 is no longer supported by the Python core team. Support for it is now deprecated in cryptography, and will be removed in a future release.

  CryptographyDeprecationWarning,

Creating network "composetest_default" with the default driver

Creating composetest_web_1   ... done

Creating composetest_redis_1 ... done
(2)使用docker-compose ps以查看当前正在运行的内容
root@caicai:/opt/composetest# docker-compose ps

/usr/local/lib/python2.7/dist-packages/cryptography/__init__.py:39: CryptographyDeprecationWarning: Python 2 is no longer supported by the Python core team. Support for it is now deprecated in cryptography, and will be removed in a future release.

  CryptographyDeprecationWarning,

       Name                      Command               State           Ports

-------------------------------------------------------------------------------------

composetest_redis_1   docker-entrypoint.sh redis ...   Up      6379/tcp

composetest_web_1     python app.py                    Up      0.0.0.0:8888->8888/tcp
(3)docker-compose run命令允许您为服务运行一次性命令。例如,要查看web服务可用的环境变量 :
root@caicai:/opt/composetest# docker-compose run web env

/usr/local/lib/python2.7/dist-packages/cryptography/__init__.py:39: CryptographyDeprecationWarning: Python 2 is no longer supported by the Python core team. Support for it is now deprecated in cryptography, and will be removed in a future release.

  CryptographyDeprecationWarning,

PATH=/usr/local/bin:/usr/local/sbin:/usr/local/bin:/usr/sbin:/usr/bin:/sbin:/bin

HOSTNAME=0da4eb00c3ec

TERM=xterm

LANG=C.UTF-8

GPG_KEY=E3FF2839C048B25C084DEBE9B26995E310250568

PYTHON_VERSION=3.8.5

PYTHON_PIP_VERSION=20.2.1

PYTHON_GET_PIP_URL=https://github.com/pypa/get-pip/raw/5578af97f8b2b466f4cdbebe18a3ba2d48ad1434/get-pip.py

PYTHON_GET_PIP_SHA256=d4d62a0850fe0c2e6325b2cc20d818c580563de5a2038f917e3cb0e25280b4d1

HOME=/root
(4)停止服务
root@caicai:/opt/composetest# docker-compose stop

/usr/local/lib/python2.7/dist-packages/cryptography/__init__.py:39: CryptographyDeprecationWarning: Python 2 is no longer supported by the Python core team. Support for it is now deprecated in cryptography, and will be removed in a future release.

  CryptographyDeprecationWarning,

Stopping composetest_redis_1 ... done

Stopping composetest_web_1   ... done
(5)使用该down 命令完全删除容器。加--volumes 参数还可以删除Redis容器使用的数据卷
root@caicai:/opt/composetest# docker-compose down --volumes

/usr/local/lib/python2.7/dist-packages/cryptography/__init__.py:39: CryptographyDeprecationWarning: Python 2 is no longer supported by the Python core team. Support for it is now deprecated in cryptography, and will be removed in a future release.

  CryptographyDeprecationWarning,

Removing composetest_web_run_fac593a582a1 ... done

Removing composetest_redis_1              ... done

Removing composetest_web_1                ... done

Removing network composetest_default
原文参考:http://www.cnblogs.com/along21/
Docker系列--容器编排工具Docker Compose详解的更多相关文章
- 使用容器编排工具docker swarm安装clickhouse多机集群
1.首先需要安装docker最新版,docker 目前自带swarm容器编排工具 2.选中一台机器作为master,执行命令sudo docker swarm init [options] 3,再需 ...
- Docker系列10—容器编排工具Docker Compose详解
本文收录在容器技术学习系列文章总目录 1.Docker Compose 概述 Compose是一个用于定义和运行多容器Docker应用程序的工具.使用Compose,您可以使用Compose文件来配置 ...
- K8s(一)----容器编排工具基础概念
kubernetes(k8s)容器编排工具基础概念 Kubernetes (K8s): 中文社区:https://www.kubernetes.org.cn/replication-controlle ...
- 基于Docker搭建Maven私服Nexus,Nexus详解
备注:首先在linux环境安装Java环境和Docker,私服需要的服务器性能和硬盘存储要高一点,内存不足可能到时启动失败,这里以4核8GLinux服务器做演示 一:基于Docker安装nexus3 ...
- Docker Kubernetes Service 网络服务代理模式详解
Docker Kubernetes Service 网络服务代理模式详解 Service service是实现kubernetes网络通信的一个服务 主要功能:负载均衡.网络规则分布到具体pod 注 ...
- Docker学习(六)——Dockerfile文件详解
Docker学习(六)--Dockerfile文件详解 一.环境介绍 1.Dockerfile中所用的所有文件一定要和Dockerfile文件在同一级父目录下,可以为Dockerfile父目录的子目录 ...
- Protobuf 文件生成工具 Prototool 命令详解
Protobuf 文件生成工具 Prototool 命令详解 简介 Prototool 是 Protobuf 文件的生成工具, 目前支持go, php, java, c#, object c 五种语言 ...
- Spring框架系列(11) - Spring AOP实现原理详解之Cglib代理实现
我们在前文中已经介绍了SpringAOP的切面实现和创建动态代理的过程,那么动态代理是如何工作的呢?本文主要介绍Cglib动态代理的案例和SpringAOP实现的原理.@pdai Spring框架系列 ...
- Spring框架系列(12) - Spring AOP实现原理详解之JDK代理实现
上文我们学习了SpringAOP Cglib动态代理的实现,本文主要是SpringAOP JDK动态代理的案例和实现部分.@pdai Spring框架系列(12) - Spring AOP实现原理详解 ...
- 黑苹果引导工具 Clover 配置详解及Clover Configurator使用
黑苹果引导工具 Clover 配置详解及Clover Configurator使用 2017-03-11 14:01:40 by SemiconductorKING 转自:@三个表哥 简介: 可 ...
随机推荐
- github 设置代理
1. 直接修改 .git/config 文件 注意: 仅对当前仓库有效, 推荐这种, 因为不是所有的仓库都需要走代理 [http "https://github.com"] pro ...
- c语言创建线程的函数封装
头文件xxx.h #include <stdlib.h> #include <pthread.h> #include <string.h> typedef int ...
- ddl锁表统计
官方文档: https://dev.mysql.com/doc/refman/5.7/en/innodb-online-ddl-operations.html 虽然官方统计了大部分DDL操作时,是否允 ...
- mysql企业常用集群架构
转自 https://blog.csdn.net/kingice1014/article/details/76020061 1.mysql企业常用集群架构 在中小型互联网的企业中.mysql的集群一般 ...
- 读后笔记 -- Java核心技术(第11版 卷 II) Chapter3 XML
3.1 XML Introduction An XML document is made up of elements. An element can have attributes (key/val ...
- ADC多通道采样DMA传输模板
void MyADC_Init(void){ ADC_InitTypeDef ADC_InitStructure; GPIO_InitTypeDef GPIO_InitStructure; DMA_I ...
- [Oracle19C 数据库管理] 配置数据库审计
以下内容未经整理 占位 强制审计:无法关闭此审计,比如记录数据库的开启和关闭. 标准审计: 基于值得审计:创建触发器,基于值进行记录.Trigger占用资源多 细粒度审计:加一些where条件,针对触 ...
- 建筑CAD软件如何设置当前默认层高?
在绘制CAD建筑图的过程中,必然少不了要对层高进行设置,如果每层的层高都一样,想要调整建筑CAD软件默认当前层高的话该如何设置?本节建筑CAD教程就和小编一起来了解一下浩辰CAD建筑软件中调整默认当前 ...
- Python中的容器、迭代器、生成器
容器是一系列元素的集合,str.list.set.dict.file.sockets对象都可以看作是容器,容器都可以被迭代(用在for,while等语句中),因此他们被称为可迭代对象. 可迭代对象实现 ...
- code的用法
今天写程序的时候用了const,想到之前遇到的code的用法,那是第一次遇到code的那样的用法,查了一下,解释如下: 在单片机使用C语言进行编程的时候,经常使用到code.code是keil C51 ...