SpringBoot之基于idea搭建ssm(maven)
此次目标为搭建一个简单的基于springboot的ssm(spring + springmvc + mybatis)的maven项目,使用的数据库为mysql。
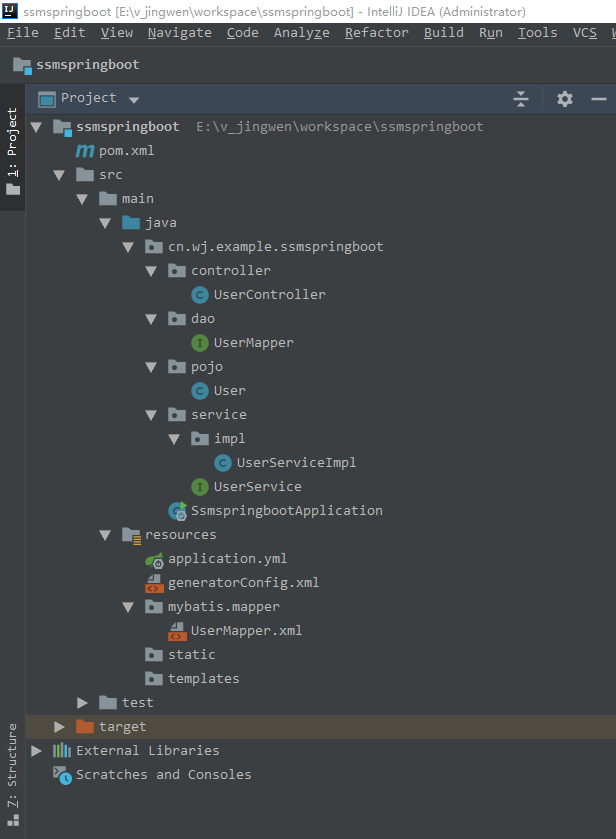
最终项目目录结构
创建过程
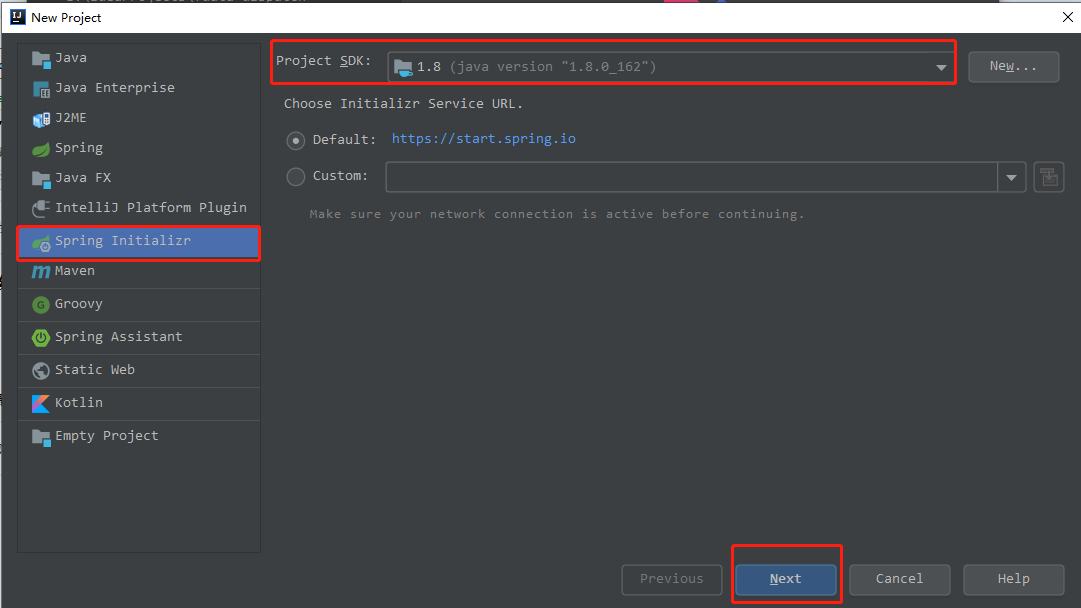
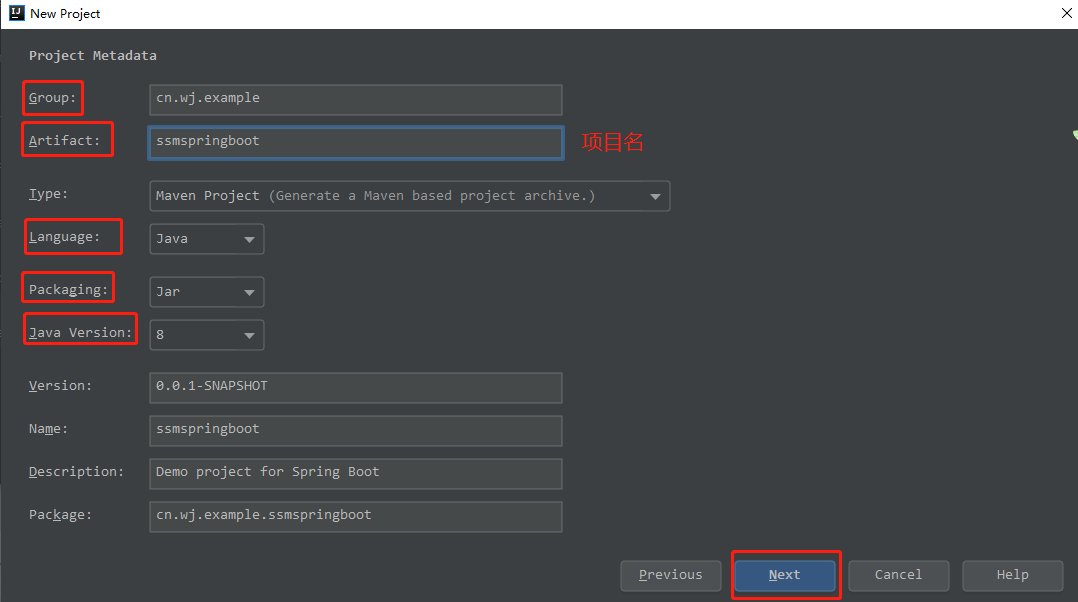
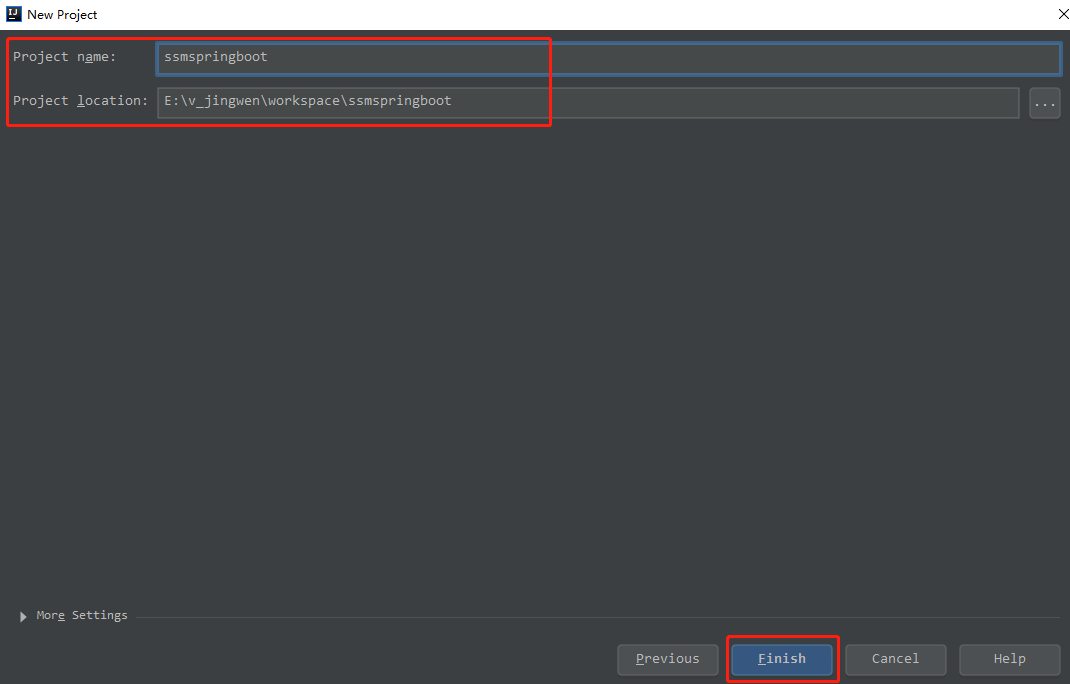
1、项目创建步骤如下:
为了创建快速。我们在idea中通过插件创建一个spring boot项目。
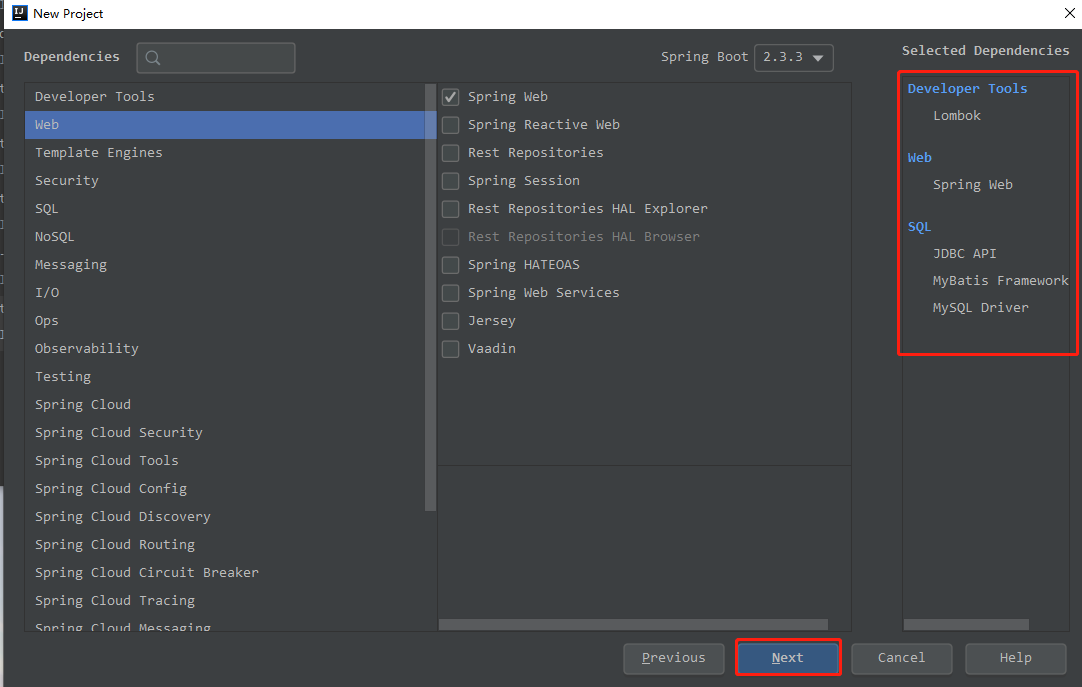
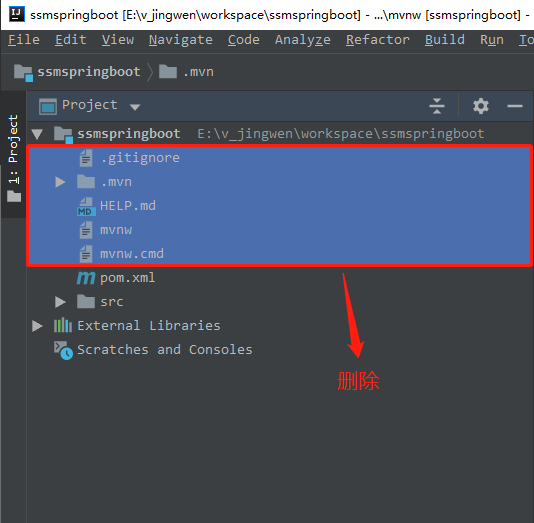
到此,我们的初始项目创建完成了。项目结构如下图所示
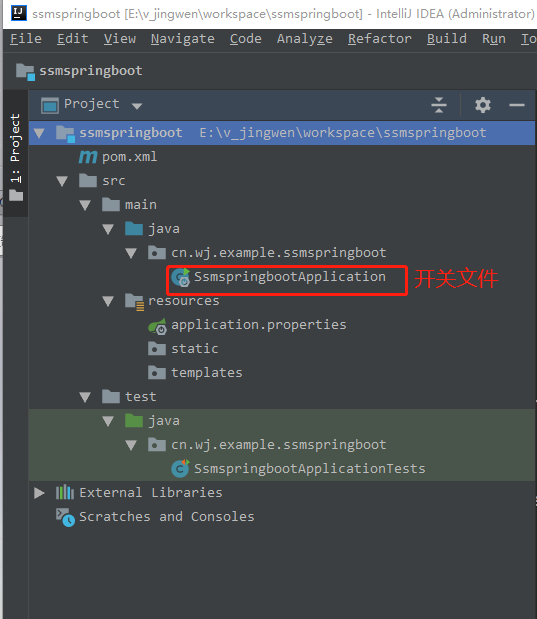
此时运行 SsmspringbootApplication 这个文件,会报未配置dataSource
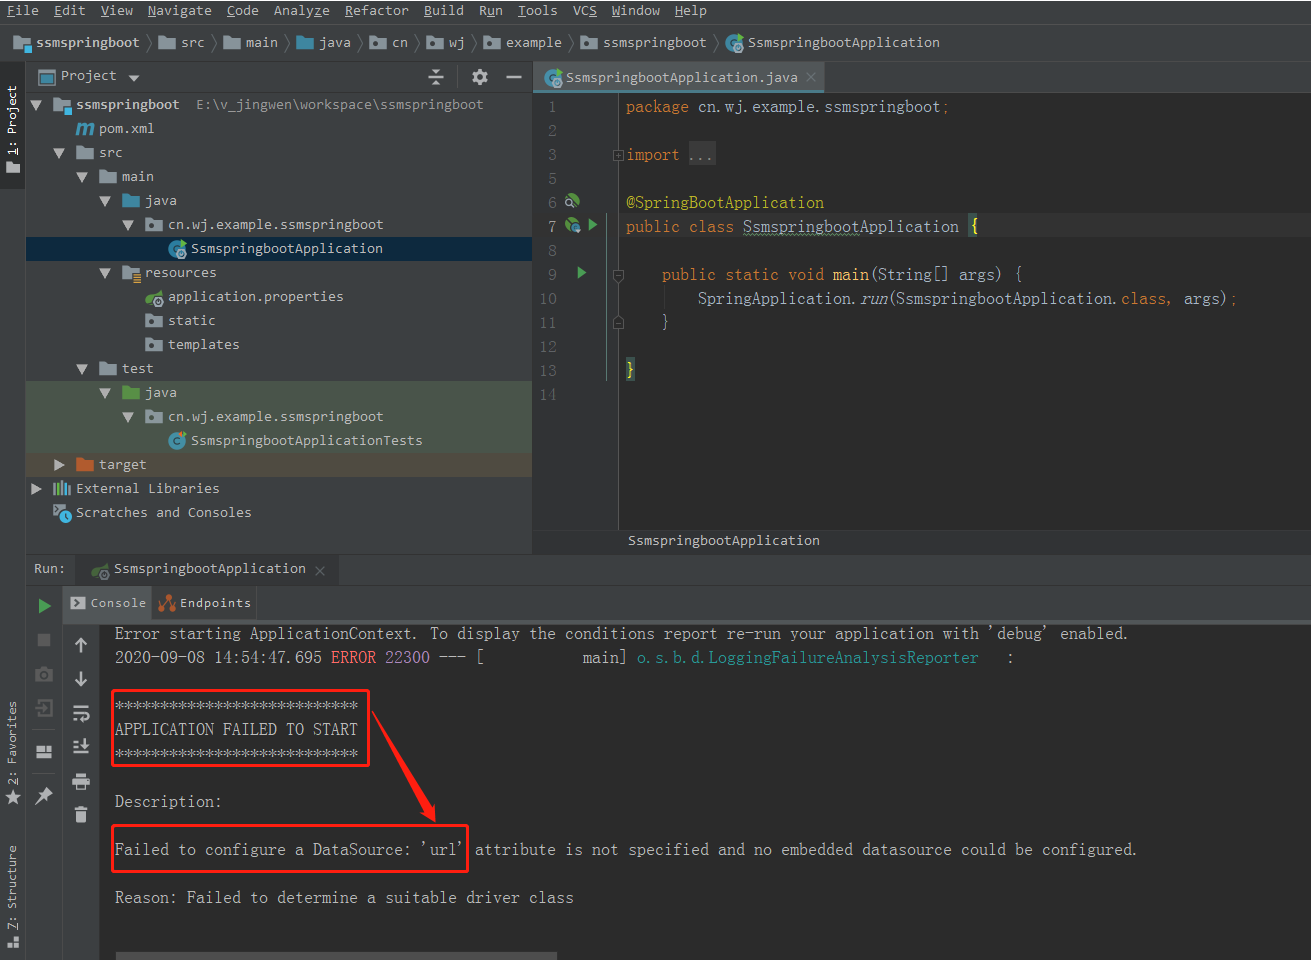
如下图所示进行一下配置(替换配置文件类型:.properties换为.yml然后增加datasource相关配置)即可完成一个最简单的springboot项目进行跑通
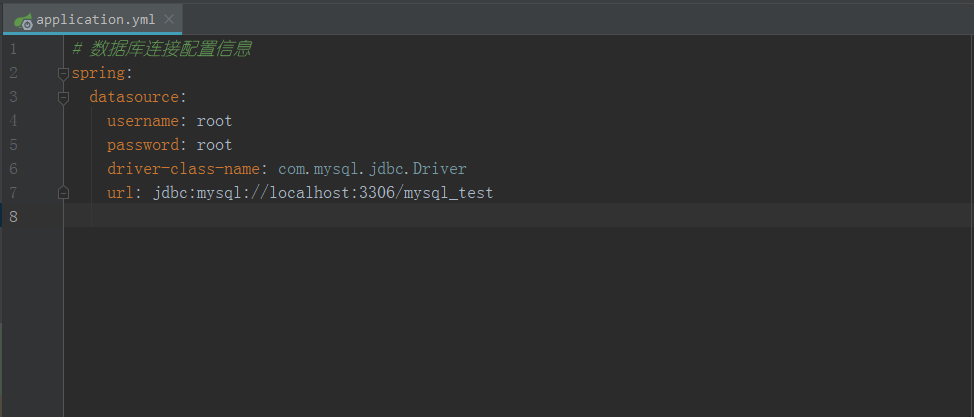
# 数据库连接配置信息

spring:

  datasource:

    username: root

    password: root

    driver-class-name: com.mysql.jdbc.Driver

    url: jdbc:mysql://localhost:3306/mysql_test?serverTimezone=UTC
账号密码对应要配置成你自己的,到此项目可以跑起来了。最简单的springboot项目搭建完成了,生成的pom.xml文件的内容如下,接下来我们开始加入我们的ssm。
<?xml version="1.0" encoding="UTF-8"?>

<project xmlns="http://maven.apache.org/POM/4.0.0"

    xmlns:xsi="http://www.w3.org/2001/XMLSchema-instance"

    xsi:schemaLocation="http://maven.apache.org/POM/4.0.0 https://maven.apache.org/xsd/maven-4.0.0.xsd">

    <modelVersion>4.0.0</modelVersion>

    <parent>

        <groupId>org.springframework.boot</groupId>

        <artifactId>spring-boot-starter-parent</artifactId>

        <version>2.3.3.RELEASE</version>

        <relativePath/> <!-- lookup parent from repository -->

    </parent>

    <groupId>cn.wj.example</groupId>

    <artifactId>ssmspringboot</artifactId>

    <version>0.0.1-SNAPSHOT</version>

    <name>ssmspringboot</name>

    <description>Demo project for Spring Boot</description>

    <properties>

        <java.version>1.8</java.version>

    </properties>

    <dependencies>

        <!--begin spring-->

        <dependency>

            <groupId>org.springframework.boot</groupId>

            <artifactId>spring-boot-starter-jdbc</artifactId>

        </dependency>

        <dependency>

            <groupId>org.springframework.boot</groupId>

            <artifactId>spring-boot-starter-web</artifactId>

        </dependency>

        <dependency>

            <groupId>org.mybatis.spring.boot</groupId>

            <artifactId>mybatis-spring-boot-starter</artifactId>

            <version>2.1.3</version>

        </dependency>

        <dependency>

            <groupId>mysql</groupId>

            <artifactId>mysql-connector-java</artifactId>

            <scope>runtime</scope>

        </dependency>

        <dependency>

            <groupId>org.projectlombok</groupId>

            <artifactId>lombok</artifactId>

            <optional>true</optional>

        </dependency>

        <dependency>

            <groupId>org.springframework.boot</groupId>

            <artifactId>spring-boot-starter-test</artifactId>

            <scope>test</scope>

            <exclusions>

                <exclusion>

                    <groupId>org.junit.vintage</groupId>

                    <artifactId>junit-vintage-engine</artifactId>

                </exclusion>

            </exclusions>

        </dependency>

        <!--end spring-->

    </dependencies>

    <build>

        <plugins>

            <plugin>

                <groupId>org.springframework.boot</groupId>

                <artifactId>spring-boot-maven-plugin</artifactId>

            </plugin>

        </plugins>

    </build>

</project>
2、整合:基于开发的最基本的三层架架构进行开发
需求:从数据库中查询出某一用户的所有信息返回给前台页面
先康康数据库的表结构~
CREATE TABLE `t_user` (

  `user_id` int(11) NOT NULL AUTO_INCREMENT,

  `user_name` char(20) NOT NULL,

  `user_sex` char(2) NOT NULL DEFAULT 'F',

  `user_address` char(20) NOT NULL,

  PRIMARY KEY (`user_id`)

) ENGINE=InnoDB DEFAULT CHARSET=utf8
为了方便我这里通过mybatis-generator自动生成mapper dao model,详情可参考SpringBoot之使用mybatis generator自动生成bean、mapper、mapper xml,自动生成后的项目结构如下:
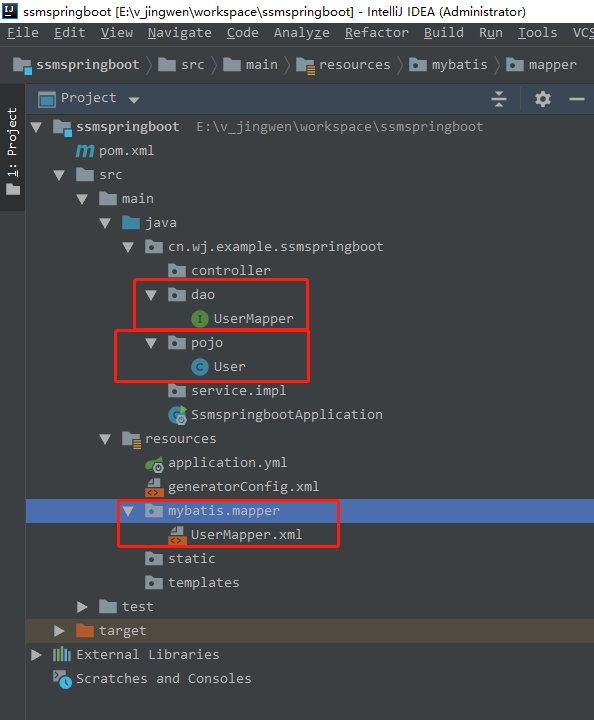
接下来手动加下service层跟controller层的实现,项目结构如下:

service层
package cn.wj.example.ssmspringboot.service;

import cn.wj.example.ssmspringboot.pojo.User;

/**

 * UserService

 * @author v_jingwen

 *

 */

public interface UserService {

    /**

     * 新增用户信息

     * @param user

     * @return

     */

    public int addUser(User user);

    /**

     * 根据ID查询用户信息

     * @param userId

     * @return

     */

    public User selectUserById(Integer userId);

}
package cn.wj.example.ssmspringboot.service.impl;

import cn.wj.example.ssmspringboot.dao.UserMapper;

import cn.wj.example.ssmspringboot.pojo.User;

import cn.wj.example.ssmspringboot.service.UserService;

import org.springframework.beans.factory.annotation.Autowired;

import org.springframework.stereotype.Service;

@Service

public class UserServiceImpl implements UserService {

    @Autowired

    private UserMapper userMapper;

    @Override

    public int addUser(User user) {

        return userMapper.insert(user);

    }

    @Override

    public User selectUserById(Integer userId) {

        return userMapper.selectByPrimaryKey(userId);

    }

}
controller层
package cn.wj.example.ssmspringboot.controller;

import cn.wj.example.ssmspringboot.pojo.User;

import cn.wj.example.ssmspringboot.service.UserService;

import java.util.HashMap;

import java.util.Map;

import javax.servlet.http.HttpServletRequest;

import org.slf4j.Logger;

import org.slf4j.LoggerFactory;

import org.springframework.beans.factory.annotation.Autowired;

import org.springframework.web.bind.annotation.RequestMapping;

import org.springframework.web.bind.annotation.RestController;

/**

 * 用户 Controller

 *

 * @author v_jingwen

 * @date 2020年9月9日 下午15:18:08

 *

 */

@RestController

@RequestMapping(value = "/ssmTest/user", produces = "application/json;charset=UTF-8")

public class UserController {

    private final static Logger logger = LoggerFactory.getLogger(UserController.class);

    @Autowired

    private UserService userService;

    /***

     * 增加测试用户

     * @param request

     */

    @RequestMapping(value="/addUser.do")

    public Map<String,Object> addUser(HttpServletRequest request){

        Map<String,Object> resultMap = new HashMap<>();

        try {

            User user = new User();

            user.setUserName("Nancy橙");

            user.setUserSex("F");// F=女性,M=男性,

            user.setUserAddress("广东深圳市南山区");

            int id = userService.addUser(user);

            resultMap.put("data",id);// 返回记录主键id

            resultMap.put("code","200");

            resultMap.put("msg","操作成功");

        } catch (Exception e) {

            logger.error("error", e);

            resultMap.put("code","500");

            resultMap.put("msg","操作失败"+e.getMessage());

        }

        return resultMap;

    }

    /***

     * 根据ID查询用户信息

     * @param request

     */

    @RequestMapping(value="/getUserById.do")

    public Map<String,Object> getUserById(HttpServletRequest request){

        Map<String,Object> resultMap = new HashMap<>();

        try {

            String userId = request.getParameter("userId");// 记录主键id

            User user = userService.selectUserById(Integer.parseInt(userId));

            resultMap.put("data",user);

            resultMap.put("code","200");

            resultMap.put("msg","操作成功");

        } catch (NumberFormatException e) {

            logger.error("error", e);

            resultMap.put("code","500");

            resultMap.put("msg","操作失败,userId必须为数字");

        } catch (Exception e) {

            logger.error("error", e);

            resultMap.put("code","500");

            resultMap.put("msg","操作失败"+e.getMessage());

        }

        return resultMap;

    }

}
注册mapper,主要作用是扫包,不进行注册会导致dao层bean无法注入。
例如:
使用
@Autowired
private UserMapper userMapper;
报错如下:
Field userMapper in cn.wj.example.ssmspringboot.service.impl.UserServiceImpl required a bean of type 'cn.wj.example.ssmspringboot.dao.UserMapper' that could not be found.
The injection point has the following annotations:
- @org.springframework.beans.factory.annotation.Autowired(required=true)
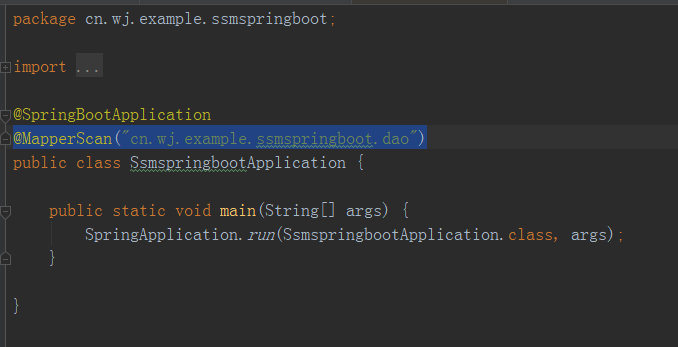
注册mapper方式,本例中使用方法1:
方法1、在springboot启动类中加@MapperScan("cn.wj.example.ssmspringboot.dao")
方法2、在对应dao层加上@Mapper
在application.yml中指定mybatis配置文件的路径,否则会报错,例如:Invalid bound statement (not found): cn.wj.example.ssmspringboot.dao.UserMapper.selectByPrimaryKey。
#指定mybatis配置文件的路径

mybatis:

 mapper-locations: classpath:mybatis/mapper/*.xml
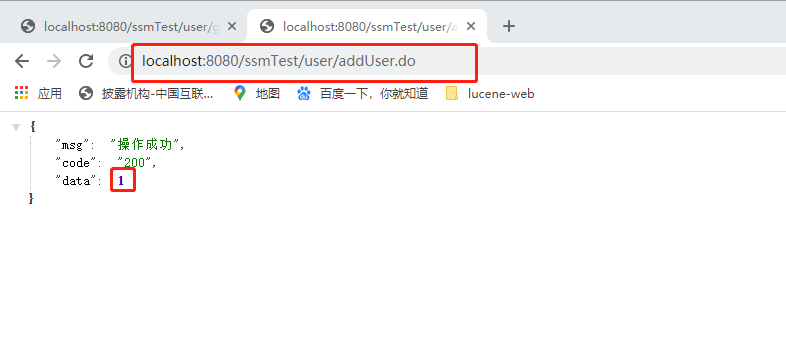
测试
新增了默认用户,返回对应的主键id1
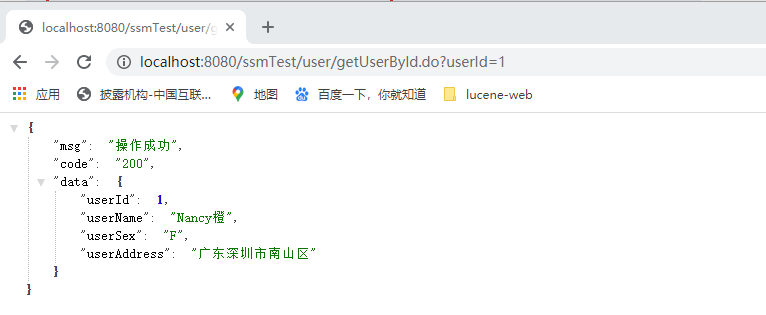
查询主键id=1的用户信息
啦啦啦♪(^∇^*),完结~
代码:有需要的亲可以参考,github - ssmspringboot项目 参考资料:MyBatis-Spring-Boot-Starter简要说明
SpringBoot之基于idea搭建ssm(maven)的更多相关文章
- idea基于springboot搭建ssm(maven)
版权声明:本文为博主原创文章,遵循CC 4.0 BY-SA版权协议,转载请附上原文出处链接和本声明. 本文链接:https://blog.csdn.net/liboyang71/article/det ...
- Eclipse一步一步搭建SSM+Maven
Eclipse 搭建SSM(Spring.Spring MVC .Mybatis) 利用Maven管理Jar包 一般而言,新的eclipse都已经集成了maven,如果没有那么 ...
- 搭建ssm+maven环境遇到的问题
1. @RunWith(SpringJUnit4ClassRunner.class) gives error 在使用junit测试过程中 2.com.google.gson.JsonIOExcepti ...
- 利用maven/eclipse搭建ssm(spring+spring mvc+mybatis)
前言 本文旨在利用maven搭建ssm环境,而关于maven的具体内容,大家可以去阅读<Maven 实战>.其实园内这方面文章已有不少,那么为什么我还要重复造轮子呢?我只是想记录自己的实践 ...
- Eclipse中使用Maven搭建SSM框架
Eclipse中不使用Maven搭建SSM框架:https://www.cnblogs.com/xuyiqing/p/9569459.html IDEA中使用Maven搭建SSM框架:https:// ...
- Springboot搭建SSM+JSP的web项目
Springboot搭建SSM+JSP的web项目 一:创建项目结构: 项目结构分为三个部分: 1 后端项目开发文件: 包: Util 工具包 Mapper db层 Serv ...
- 详解intellij idea搭建SSM框架(spring+maven+mybatis+mysql+junit)(上)
SSM(Spring+SpringMVC+MyBatis)框架集由Spring.SpringMVC.MyBatis三个开源框架整合而成,常作为数据源较简单的web项目的框架. 其中spring是一个轻 ...
- 关于利用maven搭建ssm的博客,我们一起来探讨下问的最多的问题
前言 开心一刻 有个同学去非洲援建,刚到工地接待他的施工员是个黑人,他就用英语跟人家交流,黑人没做声. 然后他又用法语,黑人还是没说话. 然后他用手去比划.黑人终于开口了:瞎比划嘎哈,整个工地都中国人 ...
- 使用Springboot快速搭建SSM框架
Spring Boot设计目的是用来简化Spring应用的初始搭建以及开发过程.该框架使用了特定的方式来进行配置,从而使开发人员不再需要定义样板化的配置. 一.环境准备 Idea 2017 或 201 ...
- 使用maven搭建ssm框架的javaweb项目
目前主流的javaweb项目,常会用到ssm(Spring+Spring MVC+Mybatis)框架来搭建项目的主体框架,本篇介绍搭建SSM框架的maven项目的实施流程.记之共享! 一.SSM框架 ...
随机推荐
- NX 二次开发,线性移动uf5943
#include <uf.h> #include <uf_modl.h> #include <uf_part.h> #include <uf_modl_pri ...
- Leetcode 二维数组周游 54
给定一个包含 m x n 个元素的矩阵(m 行, n 列),请按照顺时针螺旋顺序,返回矩阵中的所有元素. 示例 1: 输入:[ [ 1, 2, 3 ], [ 4, 5, 6 ], [ 7, 8, 9 ...
- 华为光猫HG8346V5配置
- Mocha and Stars
Mocha and Stars 题意 给定 \(n,m\) ,问符合下定条件的数列有多少个: 对于\(a_i(1\le i\le n)\),\(a_i\in [l_i,r_i]\cap \mathbb ...
- 解决vuex“状态管理调用报错”报错为:"Uncaught ReferenceError: mapactions is not defined"
报错: 源码: <script> import Vuex from 'vuex'; import {mapActions,mapGetters} from 'vuex'; // conso ...
- C语言||一作业04
作业头 这个作业属于哪个课程 https://edu.cnblogs.com/campus/zswxy/SE2020-3 这个作业要求在哪 https://edu.cnblogs.com/campus ...
- Mixly智能门禁(物联网)
智能门禁arduino rc522读卡器 sg90舵机 校园卡我的校园卡号识别为 30fcb4a8d #include <RFID.h>#include <SPI.h>#in ...
- 【逆向】Magniber 勒索软件样本分析
.wiz-editor-body .wiz-code-container { position: relative; padding: 8px 0; margin: 5px 0; text-inden ...
- 字符串转换为Base64,作为token 传入到后台
一.Base64 转换的方法 function Base64() { // private property _keyStr = "ABCDEFGHIJKLMNOPQRSTUVWXYZabc ...
- 狐漠漠养成日记 Cp.00003 第二周
上一周整周都在做Unity Newbies Jam,除了一些必要的比如考试或者课程,其他的都推后了. 为了赶项目进度,这一周我可以说是废寝忘食,基本上每天一顿饭,就睡仨小时那种. 以至于到最后一天,也 ...