自定义 Spring Boot Starter
关于Starter
Spring Boot秉承“约定大于配置”的开发方式,使得我们基于Spring Boot开发项目的效率变得十分高。相信使用过Spring Boot的小伙伴都会发现,当我们要用到某个Spring提供的组件时,只需要在
pom.xml文件中添加该组件的starter依赖就能集成到项目中。例如,在
pom.xml文件中添加spring-boot-starter-web依赖,就能让项目整合Spring MVC的功能。并且在最简使用下几乎不需要进行任何的配置,而以往想要集成Spring MVC,不仅要添加一堆类似于spring-web、spring-webmvc等相关依赖包,以及完成许多繁杂的配置才能够实现集成。这是因为starter里已经帮我们整合了各种依赖包,避免了依赖包缺失或依赖包之间出现版本冲突等问题。以及完成了许多基础配置和自动装配,让我们可以在最简使用下,跳过绝大部分的配置,从而达到开箱即用的效果。这也是Spring Boot实现“约定大于配置”的核心之一。
动手开发一个Starter
通过以上的描述,我们可以简单地将starter看作是对一个组件功能粒度较大的模块化封装,包括了所需依赖包的整合及基础配置和自动装配等。
这里说下
artifactId的命名问题,Spring 官方 Starter通常命名为spring-boot-starter-{name}如spring-boot-starter-web, Spring官方建议非官方Starter命名应遵循{name}-spring-boot-starter的格式。
除了Spring官方提供的starter外,我们自己也可以根据业务开发一个starter。例如,当项目积累到一定程度时,我们可以将一些通用功能下沉为一个starter。而开发一个starter也很简单,只需要以下步骤:
- 新建一个Maven项目,在pom.xml文件中定义好所需依赖;
- 新建配置类,写好配置项和默认值,使用
@ConfigurationProperties指明配置项前缀; - 新建自动装配类,使用
@Configuration和@Bean来进行自动装配; - 新建
spring.factories文件,用于指定自动装配类的路径; - 将starter安装到maven仓库,让其他项目能够引用;
接下来,以封装一个用于操作redis的starter为例,一步步展示这些步骤的具体实现过程。首先是第一步,新建一个maven项目,完整的pom.xml内容如下:
<?xml version="1.0" encoding="UTF-8"?>

<project xmlns="http://maven.apache.org/POM/4.0.0" xmlns:xsi="http://www.w3.org/2001/XMLSchema-instance"

         xsi:schemaLocation="http://maven.apache.org/POM/4.0.0 https://maven.apache.org/xsd/maven-4.0.0.xsd">

    <modelVersion>4.0.0</modelVersion>

    <parent>

        <groupId>org.springframework.boot</groupId>

        <artifactId>spring-boot-starter-parent</artifactId>

        <version>2.2.0.RELEASE</version>

        <relativePath/> <!-- lookup parent from repository -->

    </parent>

    <groupId>com.example</groupId>

    <artifactId>redis-spring-boot-starter</artifactId>

    <version>0.0.1-SNAPSHOT</version>

    <name>spring-boot-starter-demo</name>

    <description>Demo project for Spring Boot</description>

    <properties>

        <java.version>1.8</java.version>

    </properties>

    <dependencies>

        <dependency>

            <groupId>org.springframework.boot</groupId>

            <artifactId>spring-boot-starter</artifactId>

        </dependency>

        <dependency>

            <groupId>org.springframework.boot</groupId>

            <artifactId>spring-boot-configuration-processor</artifactId>

            <optional>true</optional>

        </dependency>

        <dependency>

            <groupId>org.projectlombok</groupId>

            <artifactId>lombok</artifactId>

            <optional>true</optional>

        </dependency>

        <dependency>

            <groupId>org.springframework.boot</groupId>

            <artifactId>spring-boot-starter-test</artifactId>

            <scope>test</scope>

            <exclusions>

                <exclusion>

                    <groupId>org.junit.vintage</groupId>

                    <artifactId>junit-vintage-engine</artifactId>

                </exclusion>

            </exclusions>

        </dependency>

        <!-- jedis -->

        <dependency>

            <groupId>redis.clients</groupId>

            <artifactId>jedis</artifactId>

            <version>3.1.0</version>

        </dependency>

        <!-- gson -->

        <dependency>

            <groupId>com.google.code.gson</groupId>

            <artifactId>gson</artifactId>

            <version>2.8.6</version>

        </dependency>

    </dependencies>

</project>
第二步,新建一个属性配置类,写好配置项和默认值。并使用@ConfigurationProperties指明配置项前缀,用于加载配置文件对应的前缀配置项:
package com.example.starter.demo.properties;

import lombok.Data;

import org.springframework.boot.context.properties.ConfigurationProperties;

/**

 * 属性配置类,用于加载配置文件对应的前缀配置项

 **/

@Data

@ConfigurationProperties("demo.redis")

public class RedisProperties {

    private String host = "127.0.0.1";

    private int port = 6379;

    private int timeout = 2000;

    private int maxIdle = 5;

    private int maxTotal = 10;

    private long maxWaitMillis = 10000;

    private String password;

}
编写一个简单的redis操作工具,代码如下:
package com.example.starter.demo.component;

import com.google.gson.Gson;

import lombok.RequiredArgsConstructor;

import lombok.extern.slf4j.Slf4j;

import redis.clients.jedis.Jedis;

import redis.clients.jedis.JedisPool;

/**

 * redis 操作组件

 **/

@Slf4j

@RequiredArgsConstructor

public class RedisComponent {

    private final JedisPool jedisPool;

    /**

     * get value with key

     */

    public <T> T get(String key, Class<T> clazz) {

        try (Jedis resource = jedisPool.getResource()) {

            String str = resource.get(key);

            return stringToBean(str, clazz);

        }

    }

    /**

     * set value with key

     */

    public <T> boolean set(String key, T value, int expireSeconds) {

        try (Jedis resource = jedisPool.getResource()) {

            String valueStr = beanToString(value);

            if (valueStr == null || valueStr.length() == 0) {

                return false;

            }

            if (expireSeconds <= 0) {

                resource.set(key, valueStr);

            } else {

                resource.setex(key, expireSeconds, valueStr);

            }

            return true;

        }

    }

    private <T> T stringToBean(String str, Class<T> clazz) {

        Gson gson = new Gson();

        return gson.fromJson(str, clazz);

    }

    private <T> String beanToString(T value) {

        Gson gson = new Gson();

        return gson.toJson(value);

    }

}
第三步,新建自动装配类,使用@Configuration和@Bean来实现对JedisPool和RedisComponent的自动装配;
package com.example.starter.demo.configuration;

import com.example.starter.demo.component.RedisComponent;

import com.example.starter.demo.properties.RedisProperties;

import lombok.RequiredArgsConstructor;

import lombok.extern.slf4j.Slf4j;

import org.springframework.boot.autoconfigure.condition.ConditionalOnMissingBean;

import org.springframework.boot.context.properties.EnableConfigurationProperties;

import org.springframework.context.annotation.Bean;

import org.springframework.context.annotation.Configuration;

import redis.clients.jedis.JedisPool;

import redis.clients.jedis.JedisPoolConfig;

/**

 * 自动装配类

 **/

@Slf4j

@Configuration

@RequiredArgsConstructor

@EnableConfigurationProperties(RedisProperties.class)

public class RedisConfiguration {

    private final RedisProperties properties;

    @Bean

    // 表示当Spring容器中没有JedisPool类的对象时,才调用该方法

    @ConditionalOnMissingBean(JedisPool.class)

    public JedisPool jedisPool() {

        log.info("redis connect string: {}:{}", properties.getHost(), properties.getPort());

        JedisPoolConfig jedisPoolConfig = new JedisPoolConfig();

        jedisPoolConfig.setMaxIdle(properties.getMaxIdle());

        jedisPoolConfig.setMaxTotal(properties.getMaxTotal());

        jedisPoolConfig.setMaxWaitMillis(properties.getMaxWaitMillis());

        String password = properties.getPassword();

        if (password == null || password.length() == 0) {

            return new JedisPool(jedisPoolConfig, properties.getHost(),

                    properties.getPort(), properties.getTimeout());

        }

        return new JedisPool(jedisPoolConfig, properties.getHost(),

                properties.getPort(), properties.getTimeout(), properties.getPassword());

    }

    @Bean

    @ConditionalOnMissingBean(RedisComponent.class)

    public RedisComponent redisComponent(JedisPool jedisPool){

        return new RedisComponent(jedisPool);

    }

}
第四步,在项目的resources目录下新建一个META-INF目录,并在该目录下新建spring.factories文件。如下图所示:

在spring.factories文件里指定自动装配类的路径:
org.springframework.boot.autoconfigure.EnableAutoConfiguration=\

  com.example.starter.demo.configuration.RedisConfiguration
若需要指定多个自动装配类的路径,则使用逗号分隔。如下示例:
org.springframework.boot.autoconfigure.EnableAutoConfiguration=\

  com.example.starter.demo.configuration.DemoConfiguration,\

  com.example.starter.demo.configuration.RedisConfiguration
Tips:spring.factories支持配置的key如下:
org.springframework.context.ApplicationContextInitializer

org.springframework.context.ApplicationListener

org.springframework.boot.autoconfigure.AutoConfigurationImportListener

org.springframework.boot.autoconfigure.AutoConfigurationImportFilter

org.springframework.boot.autoconfigure.EnableAutoConfiguration

org.springframework.boot.diagnostics.FailureAnalyzer

org.springframework.boot.autoconfigure.template.TemplateAvailabilityProvider

org.springframework.boot.env.EnvironmentPostProcessor

org.springframework.boot.SpringApplicationRunListener

org.springframework.boot.SpringBootExceptionReporter

org.springframework.beans.BeanInfoFactory

org.springframework.boot.env.PropertySourceLoader

org.springframework.data.web.config.SpringDataJacksonModules

org.springframework.data.repository.core.support.RepositoryFactorySupport
最后install这个maven项目,命令如下:
mvn clean install
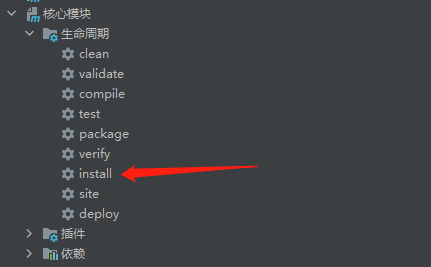
如果使用的开发工具是IDEA的话就比较简单,只需要双击一下install即可:
使用Starter
在任意一个Spring Boot项目的pom.xml文件中添加如下依赖:
<dependency>

    <groupId>com.example</groupId>

    <artifactId>redis-spring-boot-starter</artifactId>

    <version>0.0.1-SNAPSHOT</version>

 </dependency>
在项目的application.yml中添加如下配置项来覆盖默认配置,若默认配置已符合需求则可以省略这一步:
demo:

  redis:

    host: 172.168.1.198

    port: 6379

    timeout: 3000

    password:

    max-total: 10

    max-wait-millis: 10000

    max-idle: 10
编写一个单元测试类进行测试,代码如下:
package com.example.firstproject.starter;

import com.example.starter.demo.component.RedisComponent;

import lombok.extern.slf4j.Slf4j;

import org.junit.Test;

import org.junit.runner.RunWith;

import org.springframework.beans.factory.annotation.Autowired;

import org.springframework.boot.test.context.SpringBootTest;

import org.springframework.test.context.junit4.SpringRunner;

@Slf4j

@SpringBootTest

@RunWith(SpringRunner.class)

public class StarterTests {

    @Autowired

    private RedisComponent redisComponent;

    @Test

    public void redisTest() {

        String key = "redisTest";

        String value = "success!!!!!";

        boolean success = redisComponent.set(key, value, 3600);

        log.info("set value to redis {}!", success ? "success" : "failed");

        String result = redisComponent.get(key, String.class);

        log.info("get value from redis: [{}]", result);

    }

}
自定义 Spring Boot Starter的更多相关文章
- 年轻人的第一个自定义 Spring Boot Starter!
陆陆续续,零零散散,栈长已经写了几十篇 Spring Boot 系列文章了,其中有介绍到 Spring Boot Starters 启动器,使用的.介绍的都是第三方的 Starters ,那如何开发一 ...
- 最详细的自定义Spring Boot Starter开发教程
1. 前言 随着Spring的日渐臃肿,为了简化配置.开箱即用.快速集成,Spring Boot 横空出世. 目前已经成为 Java 目前最火热的框架了.平常我们用Spring Boot开发web应用 ...
- 自定义spring boot starter 初尝试
自定义简单spring boot starter 步骤 从几篇博客中了解了如何自定义starter,大概分为以下几个步骤: 1 引入相关依赖: 2 生成属性配置类: 3 生成核心服务类: 4 生成自动 ...
- Spring Boot(3)---自定义spring boot starter 问题
1. "Failed to process import candidates for configuration class [com.simple.....]": 主要原因: ...
- Sping Boot入门到实战之实战篇(一):实现自定义Spring Boot Starter——阿里云消息队列服务Starter
在 Sping Boot入门到实战之入门篇(四):Spring Boot自动化配置 这篇中,我们知道Spring Boot自动化配置的实现,主要由如下几部分完成: @EnableAutoConfigu ...
- Spring Boot Starter 开发指南
Spring Boot Starter是什么? 依赖管理是任何复杂项目的关键部分.以手动的方式来实现依赖管理不太现实,你得花更多时间,同时你在项目的其他重要方面能付出的时间就会变得越少. Spring ...
- Spring Boot (一): Spring Boot starter自定义
前些日子在公司接触了spring boot和spring cloud,有感于其大大简化了spring的配置过程,十分方便使用者快速构建项目,而且拥有丰富的starter供开发者使用.但是由于其自动化配 ...
- 自定义的Spring Boot starter如何设置自动配置注解
本文首发于个人网站: 在Spring Boot实战之定制自己的starter一文最后提到,触发Spring Boot的配置过程有两种方法: spring.factories:由Spring Boot触 ...
- Spring Boot Starter自定义实现三步曲
实现自定义的spring boot starter,只需要三步: 1.一个Bean 2.一个自动配置类 3.一个META-INF/spring.factories配置文件 下面用代码演示这三步. 项目 ...
随机推荐
- leetcode刷题-60第k个队列
题目 给出集合 [1,2,3,…,n],其所有元素共有 n! 种排列. 按大小顺序列出所有排列情况,并一一标记,当 n = 3 时, 所有排列如下: "123""132& ...
- 10.QT-QAudioOutput类使用
本章需要用到的类如下: QAudioDeviceInfo类提供音频输出设备 QAudioFormat类提供音频参数设置 QAudioOutput类提供了用于将PCM原始音频数据发送到音频输出设备的接口 ...
- SpringIOC初始化过程--详解
SpringIOC初始化过程 相信大家都知道Spring这个东西,我们经常来用他一些特性,比如说他的AOP,IOC,那今天就带大家解析下SpringIOC的加载过程. 我们来看一个例子 Annotat ...
- Css3新增的特性(1)
CSS3 模块 CSS3被拆分为"模块".旧规范已拆分成小块,还增加了新的. 一些最重要CSS3模块如下: 选择器 盒模型 背景和边框 文字特效 2D/3D转换 动画 多列布局 用 ...
- oracle之三手工不完全恢复
手工不完全恢复 4.1 不完全恢复的特点: 1)让整个database 回到过去某个时间点,不能避免数据丢失. 2)想跳过坏日志而继续恢复所有其他工作是不可能的,前滚没有这个功能(考点). 3)必须以 ...
- PowerJob 应对庞大任务的锦囊妙计:MapReduce
本文适合有 Java 基础知识的人群 作者:HelloGitHub-Salieri HelloGitHub 推出的<讲解开源项目>系列.讲解 PowerJob 系列即将接近尾声,本系列的干 ...
- Cobalt Strike后渗透安装和初步使用
Cobalt Strike安装 系统要求 Cobalt Strike要求Java 1.8,Oracle Java ,或OpenJDK . 如果你的系统上装有防病毒产品,请确保在安装 Cobalt St ...
- python中RGB色彩
turtle.colormode(mode)来改变色彩数值的使用 如果在修改颜色时写turtle.colormode(1.0) ,就需要使用RGB小数模式来去改变颜色 如果在修改颜色时写turtle. ...
- php Zookeeper使用踩坑
用的是Zookeeper扩展,Php版本为7.2.17,下载地址: https://pecl.php.net/package/zookeeper 用的是0.6.4版本 创建节点官方给的示例如下: &l ...
- 3.GoolgeProtoBuffer序列化反序列化