了解 JavaScript (5)– 翻转器(rollover)
用 JavaScript 最常用的效果就是,当用户将鼠标移动到图片上时,会改变网页上的图像,这样页面就能对用户的操作及时作出反应,这种称为 翻转器(rollover)效果很容易实现,而且有很多应用场合。
创建翻转器
翻转器背后的思想很简单。有两个图像,第一个是原始图像,第二个是替换图像,当鼠标移动到第一个图像上时,浏览器快速地替换为第二个图像,就产生了运动或动画效果。
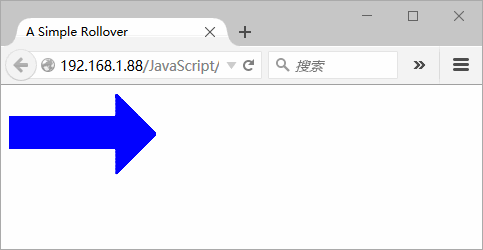
SimpleRollover.html 脚本,这是在链接标签中实现翻转器的最简单方法。
<!doctype html>

<html>

<head>

<meta charset="utf-8">

<title>A Simple Rollover</title>

<link rel="stylesheet" href="rollover.css">

</head>

<body>

<a href="next.html" onmouseover="document.images['arrow'].src='images/arrow_on.gif'" onMouseOut="document.images['arrow'].src='images/arrow_off.gif'">

  <img src="images/arrow_off.gif" id="arrow" alt="arrow">

</a>

</body>

</html>
rollover.css 样式文件,很多例子中将用到该文件。
@charset "utf-8";

/* CSS Document */

body{

    background-color: #FFF;

}

img{

    border-width: 0;

}

img#arrow, img#arrowImg{

    width: 147px;

    height: 82px;

}

#button1, #button2{

    width: 113px;

    height: 33px;

}

.centered{

    text-align: center;

}

#adBanner{

    width: 400px;

    height: 75px;

}
脚本执行后,效果如下:
创建更有效的翻转器
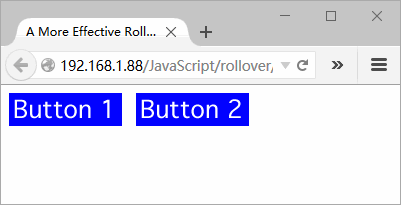
为了产生动画效果,需要确保替换图像立刻出现,而不能有从服务器获得图像所造成的延迟。为此,使用 JavaScript 预先将所有图像加载到浏览器的缓存中,并且将图像放进脚本使用的变量中。MoreEffectiveRollover.html 页面和 MoreEffectiveRollover.js 脚本文件将演示具体的做法。
MoreEffectiveRollover.html 页面上唯一的 JavaScript 是对外部 MoreEffectiveRollover.js 文件的引用。
<!doctype html>
<html>
<head>
<meta charset="utf-8">
<title>A More Effective Rollover</title>
<script src="MoreEffectiveRollover.js"></script>
<link rel="stylesheet" href="rollover.css">
</head> <body>
<a href="next1.html"><img src="images/button1_off.gif" alt="button1" id="button1"></a>
<a href="next2.html"><img src="images/button2_off.gif" alt="button2" id="button2"></a>
</body>
</html>
这个脚本 MoreEffectiveRollover.js 是比前面更好的实现翻转器的方法,很灵活。
window.onload = rolloverInit;

function rolloverInit(){

  for(var i=0; i<document.images.length; i++){

    if(document.images[i].parentNode.tagName == "A"){

      setupRollover(document.images[i]);

    }

  }

}

function setupRollover(thisImage){

  thisImage.outImage = new Image();

  thisImage.outImage.src = thisImage.src;

  thisImage.onmouseout = function(){

    this.src = this.outImage.src;

  }

  thisImage.overImage = new Image();

  thisImage.overImage.src = "images/" + thisImage.id + "_on.gif";

  thisImage.onmouseover = function(){

    this.src = thisImage.overImage.src;

  }

}
脚本执行后,效果和上面一样,只是动画更加流畅。
构建三状态翻转器
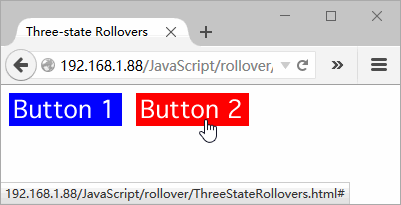
三状态翻转器就是能够显示图像的 3 个版本的翻转器。除了原始图像和当用户鼠标移动到图像上时显示的图像外,还有一个就是按钮本身被单击时的显示。
ThreeStateRollovers.html 页面和上面两状态翻转器相同,而 ThreeStateRollovers.js 脚本只修改几处而已。
window.onload = rolloverInit;

function rolloverInit(){

  for(var i=0; i<document.images.length; i++){

    if(document.images[i].parentNode.tagName == "A"){

      setupRollover(document.images[i]);

    }

  }

}

function setupRollover(thisImage){

  thisImage.outImage = new Image();

  thisImage.outImage.src = thisImage.src;

  thisImage.onmouseout = function(){

    this.src = this.outImage.src;

  }

  thisImage.overImage = new Image();

  thisImage.overImage.src = "images/" + thisImage.id + "_on.gif";

  thisImage.onmouseover = function(){

    this.src = this.overImage.src;

  }

  //新增加的第3个状态

  thisImage.clickImage = new Image();

  thisImage.clickImage.src = "images/" + thisImage.id + "_click.gif";

  thisImage.onclick = function(){

    this.src = this.clickImage.src;

  }

}
脚本执行后,单击按钮,显示绿色按钮,效果如下:
由链接触发翻转器
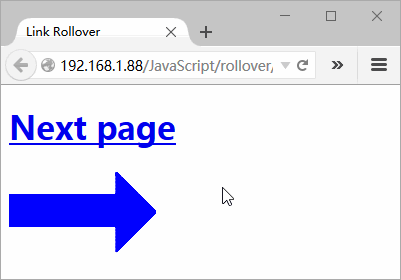
前面的例子,都是将鼠标移动到图像上来触发翻转器的,也可以通过鼠标指向文本链接时让图像翻转。
LinkRollover.html 页面中有一个文本链接。
<!doctype html>

<html>

<head>

<meta charset="utf-8">

<title>Link Rollover</title>

<script src="LinkRollover.js"></script>

<link rel="stylesheet" href="rollover.css">

</head>

<body>

<h1><a href="next.html" id="arrow">Next page</a></h1>

<img src="images/arrow_off.gif" id="arrowImg" alt="arrow">

</body>

</html>
LinkRollover.js 脚本将实现由链接触发的翻转器。
window.onload = rolloverInit;

function rolloverInit(){

  //寻找链接

  for(var i=0; i<document.links.length; i++){

    var linkObj = document.links[i];

    //指向当前链接,判断链接是否有 id 属性,如果有则创建 imgObj 指向 arrowImg

    if(linkObj.id){

      var imgObj = document.getElementById(linkObj.id + "Img");

      if(imgObj){

        setupRollover(linkObj, imgObj);

      }

    }

  }

}

function setupRollover(thisLink, thisImage){

  //imgToChange 存储了链接对应的图像

  thisLink.imgToChange = thisImage;

  thisLink.onmouseout = function(){

    this.imgToChange.src = this.outImage.src;

  }

  thisLink.onmouseover = function(){

    this.imgToChange.src = this.overImage.src;

  }

  thisLink.outImage = new Image();

  thisLink.outImage.src = thisImage.src;

  thisLink.overImage = new Image();

  thisLink.overImage.src = "images/" + thisLink.id +"_on.gif";

}
脚本执行后,如下效果:
让多个链接触发一个翻转器
还可以让几个不同的图像触发同一个翻转器。如果需要对多个图像进行说明,这种技术就非常有用。将鼠标移动到其中一个图像上时,就会显示出这个图像的描述。
我们的例子中正好说明这个技术。
MultiLinksSingleRollover.html ,注意这个页面上的链接和图像都有唯一的 id。
<!doctype html>

<html>

<head>

<meta charset="utf-8">

<title>Multiple Links, Single Rollover</title>

<script src="MultiLinksSingleRollover.js"></script>

<link rel="stylesheet" href="MultiLinks.css">

</head>

<body>

<div id="captionDiv">

  <img src="images/DaVinci.jpg" width="144" height="219" alt="DaVinci">

  <img src="images/bg.gif" id="captionField" alt="Text Field">

</div>

<div id="inventionDiv">

  <img src="images/leoText.gif" id="heading" alt="Leonardo's Inventions">

  <a href="flyPage.html" class="captionField" id="flyer"><img src="images/flyer.gif" width="293" height="165" alt="Flying Machine" id="flyerImg"></a>

  <a href="tankPage.html" class="captionField" id="tank"><img src="images/tank.gif" width="325" height="92" alt="Tank" id="tankImg"></a>

  <a href="heliPage.html" class="captionField" id="helicopter"><img src="images/helicopter.gif" width="224" height="160" alt="Helicopter" id="helicopterImg"></a>

</div>

</body>

</html>
LinkRollover.css,我们定义在 HTML 中引用的类。
@charset "utf-8";

body{

    background-color: #EC9;

}

img{

    border-width: 0;

}

#captionDiv{

    float: right;

    width: 210px;

    margin: auto 50px;

}

#captionField{

    margin: 20px auto;

    width: 208px;

    height: 27px;

}

#inventionDiv{

    width: 375px;

    margin-left: 20px;

}

#heading{

    margin-bottom: 20px;

    width: 375px;

    height: 26px;

}
MultiLinksSingleRollover.js 这个脚本将演示如何使用多个链接触发一个翻转器。
window.onload = rolloverInit;

function rolloverInit(){

  for(var i=0; i<document.links.length; i++){

    var linkObj = document.links[i];

    //无法使用翻转图像的 id 计算出改变过图像 id, id 是唯一的,因此使用 className

    if(linkObj.className){

      var imgObj = document.getElementById(linkObj.className);

      if(imgObj){

        setupRollover(linkObj, imgObj);

      }

    }

  }

}

function setupRollover(thisLink, textImage){

  thisLink.imgToChange = textImage;

  thisLink.onmouseout = function(){

    this.imgToChange.src = this.outImage.src;

  }

  thisLink.onmouseover = function(){

    this.imgToChange.src = this.overImage.src;

  }

  thisLink.outImage = new Image();

  thisLink.outImage.src = textImage.src;

  thisLink.overImage = new Image();

  thisLink.overImage.src = "images/" + thisLink.id + "Text.gif";

}
脚本执行后,效果如下:

处理多个翻转器
如果希望触发翻转器的图像本身也是一个翻转器,那么该怎么办呢?我们在上一个示例的基础上进行改进,演示如何添加这个特性。
在将鼠标移动到一个自创图像上时,与前面一样,描述图像会出现,但是现在自创图像本身也会切换为另一个带阴影的图像,这会向用户提供视觉反馈,明确指出鼠标当前指向的元素。
MultiLinksMultiRollovers.html 除了标题和外部引用外,其余与上一个 HTML 页面一样。
<!doctype html>

<html>

<head>

<meta charset="utf-8">

<title>Multiple Links, Multiple Rollovers</title>

<script src="MultiLinksMultiRollovers.js"></script>

<link rel="stylesheet" href="MultiLinks.css">

</head>

<body>

<div id="captionDiv">

  <img src="images/DaVinci.jpg" width="144" height="219" alt="DaVinci">

  <img src="images/bg.gif" id="captionField" alt="Text Field">

</div>

<div id="inventionDiv">

  <img src="images/leoText.gif" id="heading" alt="Leonardo's Inventions">

  <a href="flyPage.html" class="captionField" id="flyer"><img src="images/flyer.gif" width="293" height="165" alt="Flying Machine" id="flyerImg"></a>

  <a href="tankPage.html" class="captionField" id="tank"><img src="images/tank.gif" width="325" height="92" alt="Tank" id="tankImg"></a>

  <a href="heliPage.html" class="captionField" id="helicopter"><img src="images/helicopter.gif" width="224" height="160" alt="Helicopter" id="helicopterImg"></a>

</div>

</body>

</html>
MultiLinksMultiRollovers.js 脚本处理多个翻转器。
window.onload = rolloverInit;

function rolloverInit(){

  for(var i=0; i<document.links.length; i++){

    var linkObj = document.links[i];

    if(linkObj.className){

      var imgObj = document.getElementById(linkObj.className);

      if(imgObj){

        setupRollover(linkObj, imgObj);

      }

    }

  }

}

function setupRollover(thisLink, textImage){

  //因为有更多图像需要处理,每个翻转器两个图像,用到了数组

  thisLink.imgToChange = new Array;

  thisLink.overImage = new Array;

  thisLink.outImage = new Array;

  //textImage 存储在了 imgToChange[0] 中

  thisLink.imgToChange[0] = textImage;

  thisLink.onmouseout = rollOut;

  thisLink.onmouseover = rollOver;

  thisLink.outImage[0] = new Image();

  thisLink.outImage[0].src = textImage.src;

  thisLink.overImage[0] = new Image();

  thisLink.overImage[0].src = "images/" +thisLink.id + "Text.gif";

  var rolloverObj = document.getElementById(thisLink.id + "Img");

  if(rolloverObj){

    //新的 rolloverObj 存储在 imgToChange[1] 中

    thisLink.imgToChange[1] = rolloverObj;

    thisLink.outImage[1] = new Image();

    thisLink.outImage[1].src = rolloverObj.src;

    thisLink.overImage[1] = new Image();

    thisLink.overImage[1].src = "images/" + thisLink.id + "_on.gif";

  }

}

function rollOver(){

  for(var i=0; i<this.imgToChange.length; i++){

    this.imgToChange[i].src = this.overImage[i].src;

  }

}

function rollOut(){

  for(var i=0; i<this.imgToChange.length; i++){

    this.imgToChange[i].src = this.outImage[i].src;

  }

}
脚本执行后,效果如下:

示例代码下载
了解 JavaScript (5)– 翻转器(rollover)的更多相关文章
- JavaScript基础知识整理(2)
15.处理图像 注意:(1)在写js文件时,尽量将函数的声明往后写,将函数调用写在前面,这样能够使代码结构很清晰. (2)一个网页中翻转器一般超过3个,所以使用for循环减少重复使用翻转器代码的次数. ...
- 1,JavaScript前世今生
JavaScript历史大概在1992年,一家称作Nombas的公司开始开发一种叫做C–(C-minus-minus,简称Cmm)的嵌入式脚本语言. Cmm背后的理念很简单:一个足够强大可以替代宏操作 ...
- javascript快速入门1--JavaScript前世今生,HelloWorld与开发环境
JavaScript历史 大概在1992年,一家称作Nombas的公司开始开发一种叫做C--(C-minus-minus,简称Cmm)的嵌入式脚本语言. Cmm背后的理念很简单:一个足够强大可以替代宏 ...
- JavaScript前世今生
JavaScript前世今生,HelloWorld与开发环境 JavaScript历史 大概在1992年,一家称作Nombas的公司开始开发一种叫做C--(C-minus-minus,简称Cmm)的嵌 ...
- javaScript之基础介绍
前言一:javascript历史背景介绍 布兰登 • 艾奇(Brendan Eich,1961年-),1995年在网景公司,发明的JavaScript. 一开始JavaScript叫做LiveScri ...
- JavaScript基础知识整理(1)
粗略理解,努力入门中 1.在html中引入外部脚本: <script src="filename.js"></script> 2.注释: 多于一行的长注 ...
- 《JavaScript基础教程(第8版)》PDF
简介:JavaScript基础教程(第8版)循序渐进地讲述了JavaScript及相关的CSS.DOM.Ajax.jQuery等技术.书中从JavaScript语言基础开始,分别讨论了图像.框架.浏览 ...
- JavaScript 框架比较
显著增强 JavaScript 开发的框架概览 Joe Lennon, 软件开发人员, 自由职业者 简介: 现代 Web 站点和 Web 应用程序倾向于依赖大量客户端 JavaScript 来提供丰富 ...
- JavaScript图片翻转
<script type="text/javascript"> /** * 注册函数f,当文档加载问成时执行这个函数f * 如果文件已经载入完成,尽快以异步方式执行它 ...
随机推荐
- 关于 webapi ajax进度条信息设置
1.Web.config 设置跨域 <httpProtocol> <customHeaders> <add name="Access-Control-Allow ...
- 集合与Iterator
Iterator模式 是遍历集合类的标准访问方法.为的是不暴露类的内部结构,将访问逻辑从集合类中抽象出来. 想循环遍历数组,链表等结构数据,客户端都必须事先知道集合的内部结构,访问代码和集合本身是紧耦 ...
- js中json对象的深拷贝
/** * 对象深拷贝 * @param obj */ function deepCopy(obj) { var txt=JSON.stringify(obj); return JSON.parse( ...
- Unity3D 中 用quaternion 来对一个坐标点进行旋转的初步体会
在unity3d中,用四元数来表示旋转,四元数英文名叫quaternion . 比如 transform.rotation 就是一个四元数,其由四个部分组成 Quaternion = (xi + yj ...
- jquery实现checkbox的全选
<html xmlns="http://www.w3.org/1999/xhtml"><head runat="server"> < ...
- 利用NVelocity 模版生成文本文件
namespace Common { public class Tools { public string Process(string content, int startIndex, int le ...
- linux tcp协议重传定时器
RTO:重传超时时间 RTT:往返时间
- Zabbix3.0 自动邮件报障
Zabbix3.0以后,自带的邮件报警支持SSL验证了, 但是仍然没有发送复数个邮箱以及CC,BCC的功能, 因此,我们还是得用别的方法来实现邮件报障. 实现方法有很多种,我用的是PHPmailer. ...
- Deis logo 开源PaaS系统 Deis
Deis 是一个 Django/Celery API 服务器.Python CLI 和一组 Chef cookbooks 合并起来提供一个类似 Heroku 的应用平台,用于公有云和私有云.Deis ...
- “SSLError: The read operation timed out” when using pip
Downloading/unpacking Django>=1.5.1,<1.6 (from -r requirements.txt (line 1)) Downloading Djang ...