spring基础学习01
spring基础
Spring是一个开放源代码的设计层面框架,他解决的是业务逻辑层和其他各层的松耦合问题,因此它将面向接口的编程思想贯穿整个系统应用
IOC控制反转
把创建对象和维护对象之间的关系权利转交给spring管理,spring容器控制对象的创建,注入需要注入的对象
aop面向切面编程
通过预编译方式和运行期动态代理实现程序功能的统一维护的一种技术
隔离业务逻辑,降低耦合度,提高可用性和开发效率,主要用于日志记录,事务管理,异常处理等等
模块化
3.0版本后,根据需要引入模块需要的包,进行模块开发

小demo
测试配置文件
创建对象
@Data
public class Person {
    private String name;
}
创建配置文件,为了方便测试放在同级目录下
<?xml version="1.0" encoding="UTF-8"?>
<beans xmlns="http://www.springframework.org/schema/beans"
       xmlns:xsi="http://www.w3.org/2001/XMLSchema-instance"
       xsi:schemaLocation="http://www.springframework.org/schema/beans http://www.springframework.org/schema/beans/spring-beans.xsd">
    <bean id="person" class="top.mjsmry.demo01.Person" name="person">
    </bean>
</beans>
创建测试方法
public class SpringDemoTest {
    @Test
    public void tes01() {
        //实例化管理对象
        ClassPathResource resource = new ClassPathResource("/top/mjsmry/demo01/spring-config.xml");
        XmlBeanFactory factory = new XmlBeanFactory(resource);
        //1根据id创建
        Person u = (Person) factory.getBean("person");
        u.setName("lili");
        System.out.println(u);
    }
}
三种获取实例化的方式,上面已经写了一种
         //2根据name和class
        Person person = factory.getBean("person2", Person.class);
        person.setName("lili");
        //3直接根据字节码 但是配置文件必须唯一,一个对象配置多个bean的话,spring会无法选择
        Person bean = factory.getBean(Person.class);
        System.out.println(person);
Application和BeanFactory
- 创建对象的时机是
- ApplicationContext在创建工厂的时候就会把bean实例化,优先加载
- BeanFactory使用对象时才会实例化
- 关系
- ApplicationContext实现BeanFactory
- ApplicationContext更强大
- ApplicationContext实现懒加载
- 全局:default-lazy-init="true"
单独节点: lazy-init="true"
spring测试
spring测试可以在不启动spring项目情况下进行单元测试
@ContextConfiguration("spring-config.xml")
@RunWith(SpringJUnit4ClassRunner.class)
public class SpringTest {
    @Autowired
    Person person;

    @Test
    public void test() {
        person.setName("lili");
        System.out.println(person);
    }
}
singletonAndprototype
<bean id="person" class="top.mjsmry.singletonAndprototype.Person" scope="prototype"/>
scope prototype多例 singleton单例
public class SpringTest {
    @Test
    public void test() {
        ApplicationContext ac=new ClassPathXmlApplicationContext("top/mjsmry/singletonAndprototype/spring-config.xml");
        Person person1= (Person) ac.getBean("person");
        Person person2= (Person) ac.getBean("person");
        //单例的话就是同一个对象
        System.out.println(person1==person2);//true
    }
}
bean与bean之间的关系
继承
- 通过parent指定继承
- 有abstract属性的bean不能被实例化
子bean可以覆盖父bean
依赖
- 可以通过depends-on="其他beani定依赖关系
- 如果依赖了abstract的bean也不能实例化
 <!--  模板bean  -->
    <bean id="p" class="top.mjsmry.beanAndBean.Person" abstract="true">
        <property name="name" value="张三"></property>
    </bean>
    <bean id="person" class="top.mjsmry.beanAndBean.Person" parent="p"/>
    <bean id="person2" class="top.mjsmry.beanAndBean.Person" parent="p">
        <property name="name" value="子覆盖了"></property>
    </bean>
@Test
public void test() {
ApplicationContext ac=new ClassPathXmlApplicationContext("top/mjsmry/beanAndBean/spring-config.xml");
Person person= (Person) ac.getBean("person");
System.out.println(person);
Person person2= (Person) ac.getBean("person2");
System.out.println(person2);
}生命周期
基本声明周期
  <!--  生命周期
      构造方法
      getset
      init-method 初始化
      destroy-method 销毁
      -->
    <bean id="person" class="top.mjsmry.beancycle.Person" init-method="init" destroy-method="destory"/>
bean
@Data
public class Person {
    private String name;
    public Person() {
        System.out.println("构造方法调用了");
    }

    private void init() {
        System.out.println("--init--");
    }

    private void destory() {
        System.out.println("--destory--");
    }
}
补充周期
 <!--
        实现BeanPostProcessor 细致的声明周期
        postProcessBeforeInitialization 初始化方法之前
        postProcessAfterInitialization 初始化方法之后
    -->
    <bean id="personBeanPostProcessor" class="top.mjsmry.beancycle.PersonBeanPostProcessor"/>
实现接口
public class PersonBeanPostProcessor implements BeanPostProcessor {
    @Override
    public Object postProcessBeforeInitialization(Object o, String s) throws BeansException {
        System.out.println("postProcessBeforeInitialization");
        return o;
    }

    @Override
    public Object postProcessAfterInitialization(Object o, String s) throws BeansException {
        System.out.println("postProcessAfterInitialization");
        return o;
    }
}
测试
    @Test
    public void test() {
        ClassPathXmlApplicationContext ca=new ClassPathXmlApplicationContext("top/mjsmry/beancycle/spring-config.xml");
        Person person= (Person) ca.getBean("person");
        ca.close();
    }
注入测试
spring原生注入方式实现三层架构
dao
public class TestDao {
    public int add() {
        return 1;
    }
}
service
public interface TestService {
    String add();
}
@Data
public class TestServiceImpl implements TestService {
private TestDao testDao;
@Override
public String add() {
return testDao.add()==1?"添加成功":"添加失败";
}
}controller
@Data
public class TestController {
    private TestService testService;

    public String add() {
        return testService.add();
    }
}
配置文件
<beans xmlns="http://www.springframework.org/schema/beans"
       xmlns:xsi="http://www.w3.org/2001/XMLSchema-instance"
       xsi:schemaLocation="http://www.springframework.org/schema/beans http://www.springframework.org/schema/beans/spring-beans.xsd">
    <!--   set注入 -->
    <bean id="testController" class="top.mjsmry._01.controller.TestController">
        <property name="testService" ref="testService"/>
    </bean>
    <bean id="testService" class="top.mjsmry._01.service.impl.TestServiceImpl">
        <property name="testDao" ref="testDao"/>
    </bean>
    <bean id="testDao" class="top.mjsmry._01.dao.TestDao"></bean>
</beans>
test
@RunWith(SpringJUnit4ClassRunner.class)
@ContextConfiguration("/spring-config.xml")
public class MyTest {
@Autowired
private TestController testController;
@Test
public void test01() {
String result = testController.add();
System.out.println(result);
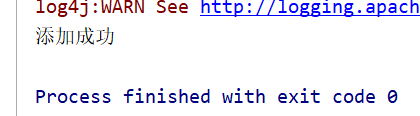
}
}
测试结果
注入BasicDataSource
<beans xmlns="http://www.springframework.org/schema/beans"
       xmlns:xsi="http://www.w3.org/2001/XMLSchema-instance"
       xmlns:context="http://www.springframework.org/schema/context"
       xsi:schemaLocation=" http://www.springframework.org/schema/beans http://www.springframework.org/schema/beans/spring-beans.xsd
       http://www.springframework.org/schema/context
       http://www.springframework.org/schema/context/spring-context-4.2.xsd
">
    <context:property-placeholder location="classpath:db.properties"/>
    <!-- 配置一个DBCP的Bean -->
    <bean name="dateSource" class="org.apache.commons.dbcp.BasicDataSource"
          destroy-method="close">
        <!-- 注意:这里我们不是使用的ref引用,而是直接写的value,因此注入的数据是一个变通的值 -->
        <property name="driverClassName" value="${jdbc.driver}"/>
        <property name="url" value="${jdbc.url}"/>
        <property name="username" value="${jdbc.username}"/>
        <property name="password" value="${jdbc.password}"/>
    </bean>

</beans>
db.properties
jdbc.driver=com.mysql.cj.jdbc.Driver
jdbc.url=jdbc:mysql://localhost:3306/jdbcwork?useSSL=false&serverTimezone=UTC
jdbc.username=xxx
jdbc.password=xxx
测试
@RunWith(SpringJUnit4ClassRunner.class)
@ContextConfiguration("spring-config.xml")
public class DataSourceTest {
    @Autowired
    BasicDataSource basicDataSource;

    @Test
    public void test01() {
        try {
            Connection connection = basicDataSource.getConnection();
            connection.close();
        } catch (SQLException e) {
            e.printStackTrace();
        }
    }
}
无报错测试通过
其他注入
@Data
@AllArgsConstructor
@NoArgsConstructor
public class Person {
    private String username;
    private Car car;
    private String[] strings;
    private List<String> list;
    private Set<String> set;
    private List<Wife> wifeList;
    private Properties p1;
    private Properties p2;
}
<beans xmlns="http://www.springframework.org/schema/beans"
xmlns:xsi="http://www.w3.org/2001/XMLSchema-instance" xmlns:util="http://www.springframework.org/schema/util"
xsi:schemaLocation="http://www.springframework.org/schema/beans http://www.springframework.org/schema/beans/spring-beans.xsd http://www.springframework.org/schema/util http://www.springframework.org/schema/util/spring-util.xsd">
<!-- 外部bean注入 -->
<bean id="car" class="top.mjsmry._05other.Car">
<property name="price" value="1.0"/>
<property name="type" value="bwm"/>
</bean>
<bean id="person" class="top.mjsmry._05other.Person">
<property name="username" value="张三"/>
<property name="car" ref="car"/>
</bean>
<!-- 内部bean定义 -->
<bean id="person2" class="top.mjsmry._05other.Person">
<property name="username" value="张三"/>
<property name="car">
<bean class="top.mjsmry._05other.Car">
<property name="price" value="1.0"/>
<property name="type" value="bwm"/>
</bean>
</property>
</bean>
<!-- 其他类型的注入 -->
<bean id="person3" class="top.mjsmry._05other.Person">
<property name="username" value="张三"/>
<property name="car">
<bean class="top.mjsmry._05other.Car">
<property name="price" value="1.0"/>
<property name="type" value="bwm"/>
</bean>
</property>
<!-- 数组 -->
<property name="strings" value="lili,keke"/>
<!-- 集合 -->
<property name="list">
<list>
<value>1</value>
<value>2</value>
<value>3</value>
</list>
</property>
<!-- set -->
<property name="set">
<set>
<value>k</value>
<value>e</value>
<value>w</value>
</set>
</property>
<!-- 泛型 -->
<property name="wifeList">
<list>
<bean class="top.mjsmry._05other.Wife">
<property name="username" value="lili"/>
</bean>
</list>
</property>
<!-- Properties注入-->
<property name="p1">
<value>proKey1=proValue1</value>
</property>
<property name="p2">
<props>
<prop key="键1">值1</prop>
</props>
</property>
</bean>
</beans>测试
public class OtherTest {
    @Test
    public void test01() {
        ApplicationContext ac=new ClassPathXmlApplicationContext("/top/mjsmry/_05other/spring-config.xml");
        Person person= (Person) ac.getBean("person");
        Person person2= (Person) ac.getBean("person2");
        Person person3= (Person) ac.getBean("person3");
        System.out.println(person);
        System.out.println(person2);
        System.out.println(person3);
    }
}关注我的个人博客林中小屋
更多内容关注我的个人博客林中小屋
spring基础学习01的更多相关文章
- spring基础学习
ClassXmlAplicationContext和FileSystemXmlApplicationContext的区别 https://www.cnblogs.com/sxdcgaq808 ...
- Spring基础学习(四)—AOP
一.AOP基础 1.基本需求 需求: 日志功能,在程序执行期间记录发生的活动. ArithmeticCalculate.java public interface ArithmeticCal ...
- Spring基础学习(一)—初识Spring
一.Spring的使用 1.导入jar包 2.编写实体类 Person.java public class Person{ private String name; public void say() ...
- Spring基础学习,附例子代码讲解
什么是Spring.IOC.AOP.DI? Spring是一个基于IOC和AOP的结构J2EE系统的框架. IOC(Inversion Of Control)控制反转(Spring的基 ...
- Spring框架学习01——使用IDEA开发Spring程序
1.创建项目 点击“Create New Project”,新建项目 选择Maven项目 项目配置 使用本地安装的Maven 一直点击Next,最后点击完成当控制台中出现“BUILD SUCCESS” ...
- 使用JavaConfig方式-Spring 基础学习
在Spring的使用中,大量采用xml方式配置类之间的关系太过于繁琐(个人这么认为),而在学习了Spring4后发下使用JavaConfig方式来配置这些关系会更加的简单明了. 测试环境 1. Apa ...
- spring boot学习01【搭建环境、创建第一个spring boot项目】
1.给eclipse安装spring boot插件 Eclipse中安装Spring工具套件(STS): Help -> Eclipse Marketplace... 在Search标签或者Po ...
- Spring基础学习笔记
1. Spring入门 1. 1 Spring的体系结构 1.2 HelloWorld 1.2.1 Maven的使用 1)maven 的javase工程目录结构: 2)maven的settings.x ...
- T-SQL 基础学习 01
--新建数据库 create database Studentdb go --使用数据库 use Studentdb go --新建表 create table Username ( StudentN ...
随机推荐
- egret之一维,二维数组
一维数组转换成二维数组下标公式: 行=下标/二维数组列数 列=下标%二维数组列数+1 ] + ); ] + ); 二维数组转一维数组: 下标=(二维数当前行-1)*列数+二维数当前列-1: let i ...
- [Python] 数据结构--实现顺序表、链表、栈和队列
说明: 本文主要展示Python实现的几种常用数据结构:顺序表.链表.栈和队列. 附有实现代码. 来源主要参考网络文章. 一.顺序表 1.顺序表的结构 一个顺序表的完整信息包括两部分,一部分是表中元素 ...
- 10_switch语句的使用
/* switch 语句和c语言的用法不同 1.go语句是默认添加break语句的,但c不是默认的 2.go语句添加一个fallthrough语句,可以顺序执行接下来的结构 3.switch在关键词后 ...
- 【原创】Linux cpu hotplug
背景 Read the fucking source code! --By 鲁迅 A picture is worth a thousand words. --By 高尔基 说明: Kernel版本: ...
- awrcrt更新到2.17 ,添加了top SQL list
应广大Oracle专家,教授的要求(被问了很多次,什么时候添加top sql 啊~~,最近一年由于很少交付巡检类的服务,所以没有机会更新)>终于为awrcrt更新了Top SQL list,版本 ...
- 噩梦(双向BFS)
给定一张N*M的地图,地图中有1个男孩,1个女孩和2个鬼. 字符“.”表示道路,字符“X”表示墙,字符“M”表示男孩的位置,字符“G”表示女孩的位置,字符“Z”表示鬼的位置. 男孩每秒可以移动3个单位 ...
- session一致性的解决方案
更多内容,欢迎关注微信公众号:全菜工程师小辉.公众号回复关键词,领取免费学习资料. 什么是session? 服务器为每个用户创建一个会话,存储用户的相关信息,以便多次请求能够定位到同一个上下文,这个相 ...
- Linux下手动安装JDK
一.删除自带的JDK 查询系统自带JDK rpm -qa | grep java rpm -qa | grep jdk 删除查询出来的文件名 rpm -e --nodeps 文件名 命令执行成功后重新 ...
- NLP(十六) DL在NLP中的应用
深度学习中的核心主题是卷积神经网络(CNN)和循环神经网络(RNN) 卷积神经网络 CNN用于图像处理 卷积: 原始图像 5×5 滤波器 3×3 滤波器以步长大于小于1,到处平移,并与原始图像里的3× ...
- Nginx安装及详解
Nginx简介: Nginx(发音engine x)专为性能优化而开发的开源软件,是HTTP.反向代理.邮件代理.TCP/UDP协议代理软件,由俄罗斯的作者Igor Sysoev开发,其最知名的优点是 ...