Android中通过Fragment进行简单的页面切换
首先是activity中的布局
<?xml version="1.0" encoding="utf-8"?>

<androidx.constraintlayout.widget.ConstraintLayout xmlns:android="http://schemas.android.com/apk/res/android"

    xmlns:app="http://schemas.android.com/apk/res-auto"

    xmlns:tools="http://schemas.android.com/tools"

    android:layout_width="match_parent"

    android:layout_height="match_parent"

    tools:context=".MainActivity">

    <FrameLayout

        android:id="@+id/fragment"

        android:layout_width="395dp"

        android:layout_height="509dp"

        app:layout_constraintEnd_toEndOf="parent"

        app:layout_constraintHorizontal_bias="0.333"

        app:layout_constraintStart_toStartOf="parent"

        app:layout_constraintTop_toTopOf="parent">

    </FrameLayout>

    <Button

        android:id="@+id/b1"

        android:layout_width="wrap_content"

        android:layout_height="wrap_content"

        android:layout_marginStart="50dp"

        android:layout_marginBottom="12dp"

        android:text="1"

        app:layout_constraintBottom_toBottomOf="parent"

        app:layout_constraintStart_toStartOf="parent" />

    <Button

        android:id="@+id/b2"

        android:layout_width="wrap_content"

        android:layout_height="wrap_content"

        android:layout_marginEnd="64dp"

        android:layout_marginBottom="17dp"

        android:text="2"

        app:layout_constraintBottom_toBottomOf="parent"

        app:layout_constraintEnd_toEndOf="parent" />

</androidx.constraintlayout.widget.ConstraintLayout>
创建两个Fragment子类
这里以一个为例
package com.example.fragment;

import android.os.Bundle;

import androidx.annotation.NonNull;
import androidx.annotation.Nullable;
import androidx.fragment.app.Fragment;

import android.view.LayoutInflater;
import android.view.View;
import android.view.ViewGroup;

public class f1 extends Fragment {

    @Override
    public View onCreateView(@NonNull LayoutInflater inflater, @Nullable ViewGroup container,
                             @Nullable Bundle savedInstanceState) {
        return inflater.inflate(R.layout.f1_fragment2, container, false);
    }

}
其布局:
<?xml version="1.0" encoding="utf-8"?>

<androidx.constraintlayout.widget.ConstraintLayout xmlns:android="http://schemas.android.com/apk/res/android"

    xmlns:app="http://schemas.android.com/apk/res-auto"

    xmlns:tools="http://schemas.android.com/tools"

    android:id="@+id/f1"

    android:layout_width="match_parent"

    android:layout_height="match_parent"

    tools:context="f1">

    <TextView

        android:id="@+id/textView4"

        android:layout_width="182dp"

        android:layout_height="85dp"

        android:layout_marginTop="165dp"

        android:text="我是1"

        app:layout_constraintEnd_toEndOf="parent"

        app:layout_constraintStart_toStartOf="parent"

        app:layout_constraintTop_toTopOf="parent" />

</androidx.constraintlayout.widget.ConstraintLayout>
最后也是最重要的,Mainactivity内容:
package com.example.fragment;

import androidx.appcompat.app.AppCompatActivity;

import androidx.fragment.app.FragmentManager;

import androidx.fragment.app.FragmentTransaction;

import android.os.Bundle;

import android.view.View;

import android.widget.Button;

public class MainActivity extends AppCompatActivity {

    private Button b1=null;

    private Button b2=null;

   private  FragmentManager fm=null ;

    private  FragmentTransaction transaction =null ;

    private f1 f1;

    private f2 f2;

    @Override

    protected void onCreate(Bundle savedInstanceState) {

        super.onCreate(savedInstanceState);

        setContentView(R.layout.activity_main);

        b1=(Button)findViewById(R.id.b1);

        b2=(Button)findViewById(R.id.b2);

       fm = getSupportFragmentManager();

    setDefaultFragment();

    b1.setOnClickListener(new View.OnClickListener() {

        @Override

        public void onClick(View v) {

            transaction = fm.beginTransaction();

            f1=new f1();

            transaction.replace(R.id.fragment,f1);

            transaction.commit();

        }

    });

    b2.setOnClickListener(new View.OnClickListener() {

        @Override

        public void onClick(View v) {

            transaction = fm.beginTransaction();

            f2=new f2();

            transaction.replace(R.id.fragment,f2);

            transaction.commit();

        }

    });

    }

    private void setDefaultFragment()

    {

        transaction = fm.beginTransaction();

        f1=new f1();

        transaction.replace(R.id.fragment,f1);

        transaction.commit();

    }

}
注意:每个FragmentTransaction只能提交一次,因此在每次提交前都要重新为transaction赋予一个新对象;
还有关于“fm = getSupportFragmentManager();”处使用“getSupportFragmentManager();”,而不使用“fm = getFragmentManager();”的原因请参照这篇帖子https://blog.csdn.net/qq_28484355/article/details/67824228
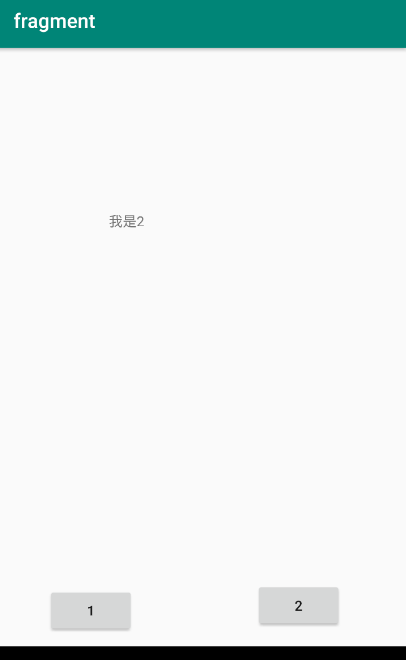
效果:

点击“2”后:
Android中通过Fragment进行简单的页面切换的更多相关文章
- android中viewPager+fragment实现的屏幕左右切换(进阶篇)
Fragment支持在不同的Activity中使用并且可以处理自己的输入事件以及生命周期方法等.可以看做是一个子Activity. 先看一下布局: 1 <LinearLayout xmlns:a ...
- Android中ViewPager+Fragment取消(禁止)预加载延迟加载(懒加载)问题解决方案
转载请注明出处:http://blog.csdn.net/linglongxin24/article/details/53205878本文出自[DylanAndroid的博客] Android中Vie ...
- Android笔记(十九) Android中的Fragment
通常我们使用Activity来展示界面,但是在手机上界面可能显示的很好看,但在平板上,因为平板的屏幕非常大,手机的界面放在平板上可能会出现控件被拉长.控件之间间距变大等问题.为了更好的体验效果,在Ac ...
- Android 中关于Fragment嵌套Fragment的问题
转载请注明出处:http://www.cnblogs.com/Joanna-Yan/p/5802146.html 问题描述: 在项目中Activity A中嵌套Fragment B,Fragment ...
- Android中GPS定位的简单应用
在Android中通过GPS获得当前位置,首先要获得一个LocationManager实例,通过该实例的getLastKnownLocation()方法获得第一个的位置,该方法的说明如下: void ...
- ViewPager (下)-- 利用 Fragment 实现美丽的 页面切换
之前用的ViewPager适用于简单的广告切换,但实现页面间的切换最好是用官方推荐的Fragment来处理. 本人力争做到最简单.最有用,是想以后用到的时候能够方便的拿过来复制就能够了. 效果图: w ...
- Android中的Fragment页面切换和selector选择器
效果如图: 提示:下面是用的整个的图片 下面看代码: //--------------------这是主页面布局文件----------------------- <?xml version=& ...
- Android中ViewPgae中的Fragment如何确认当前页面可见的问题
由于在ViewPage中PageAdapter来管理所有的Fragment.在加载一个Fragment的时候,会自动缓存左右几个(默认是一个)页面,此时也会调用到正常的生命周期函数,onCreate, ...
- 【IOS】ios中NSUserDefault与android中的SharedPreference用法简单对比
以下内容为原创,欢迎转载,转载请注明 来自天天博客:http://www.cnblogs.com/tiantianbyconan/p/3405308.html 有Android开发经验的朋友对Shar ...
随机推荐
- PBR原理
漫反射和镜面反射 漫反射和镜面反射(或反射)光是描述光和材料之间两种主要相互作用类型的两个术语.镜面光是指从表面反弹的光.在光滑的表面上,这种光将反射所有相同的方向,并且表面将呈现镜像.漫射光是被吸收 ...
- mysql--->权限管理原理和设置
mysql 权限管理 mysql权限检查原理 权限检查两个阶段 你有没有权限链接上来 你有没有权限执行此操作 服务器如何判断用户用户有没有权限连接上来? 通过mysql库下的user表 查看:sele ...
- docker相关----解决tomcat容器启动成功,无法访问的问题
使用docker安装了tomcat镜像,默认为latest最新的(8.5.50版本),依据tomcat镜像创建容器并同时做了端口映射 命令为:docker run --name tomcat01 -d ...
- Java8新特性一点通 | 回顾文件操作和watchService文件变更监视操作
文件操作 WatchService 文件操作 今天重温了一些文件操作: - Files.list() 遍历文件和目录 //List all files and sub-directories usin ...
- Docker快速上手之部署SpringBoot项目
Docker是基于Go语言实现的云开源项目. Docker的主要目标是“Build,Ship and Run Any App,Anywhere”,也就是通过对应用组件的封装.分发.部署.运行等生命周期 ...
- wordpress 如何防止盗链
盗链是指其它站点使用了你自己网站的图片音乐等资源,然后链接又没有更换,直接显示的就是你站点的图片,这在转载文章时最常见,比如转载时将 整篇文章都转载过去,包括文章里面的图片,有些人就懒得把图片再重新上 ...
- python UnicodeDecodeError: 'gbk' codec can't decode byte 0x99 in position 87: illegal multibyte sequence异常解决
我们处理文本文件时,经常会遇到这样的报错: UnicodeDecodeError: 'gbk' codec can't decode byte 0x99 in position 87: illegal ...
- 导弹拦截(dp复习)
题目描述:求最长下降子序列的长度 in: 71 7 3 5 9 4 8 out: 4 解释:1 3 4 8/1 3 5 8 长度为四 这让我想到了hdu上导弹拦截那道题,是求最长上升子序列长度 其转移 ...
- HTML5与HTML4的区别-----通用的排版结构
一个网页通常分为:头部,主体内容和脚部三个部分,当然也有其他更细的划分方法. 以移动端为例, 当给一个设计图,我通常使用一下结构: <div class="container&quo ...
- 第3章 JDK并发包(二)
3.1.2 重入锁的好搭档:Condition条件 它和wait()和notify()方法的作用是大致相同的.但是wait()和notify()方法是和synchronized关键字合作使用的,而Co ...