
如何在CentOS 7 / Fedora 31/30/29上安装ELK Stack
原文地址:https://computingforgeeks.com/how-to-install-elk-stack-on-centos-fedora/
原作者: Josphat Mutai
译者:高行行
如何在 CentOS 7 / Fedora 31/30/29 上安装 ELK Stack?“ ELK ”是 Elasticsearch, Logstash, and Kibana 的缩写。
- Elasticsearch:这是一个开源的、基于 REST 和 JSON 的搜索引擎。它具有可扩展性、易用性和灵活性
- Logstash :这是一个服务器端数据处理管道,它同时从多个来源中采集数据,转换数据,然后将其发送到类似 Elasticsearch 的“存储”中。
- Kibana 允许用户使用图表可视化 Elasticsearch 中的数据。
对于 RHEL 8,请参阅:
如何在 RHEL / CentOS 8 上安装 ELK Stack
请按照以下步骤在 CentOS 7 / Fedora 31/30/29 Linux 上安装和配置 ELK stack 工具。
步骤 1:安装 Java
由于 Elasticsearch 依赖 Java,因此你需要在 CentOS 7 / Fedora 系统上安装 Java。
sudo yum -y install java-openjdk-devel java-openjdk
步骤 2:添加 ELK 存储库
安装 Java 后,添加提供 ELK 堆栈软件包的 ELK 堆栈存储库。
对于 Elasticsearch 7.x
cat <<EOF | sudo tee /etc/yum.repos.d/elasticsearch.repo

[elasticsearch-7.x]

name=Elasticsearch repository for 7.x packages

baseurl=https://artifacts.elastic.co/packages/7.x/yum

gpgcheck=1

gpgkey=https://artifacts.elastic.co/GPG-KEY-elasticsearch

enabled=1

autorefresh=1

type=rpm-md

EOF
对于 Elasticsearch 6.x
cat <<EOF | sudo tee /etc/yum.repos.d/elasticsearch.repo

[elasticsearch-6.x]

name=Elasticsearch repository for 6.x packages

baseurl=https://artifacts.elastic.co/packages/6.x/yum

gpgcheck=1

gpgkey=https://artifacts.elastic.co/GPG-KEY-elasticsearch

enabled=1

autorefresh=1

type=rpm-md

EOF
添加仓库后,导入 GPG 密钥:
sudo rpm --import https://artifacts.elastic.co/GPG-KEY-elasticsearch
清除并更新你的 YUM 软件包索引。
sudo yum clean all

sudo yum makecache
步骤 3:安装和配置 Elasticsearch
Elasticsearch 存储库已准备就绪,可以使用。你可以使用以下命令安装 Elasticsearch:
sudo yum -y install elasticsearch
确认软件包安装。
$ rpm -qi elasticsearch

 Name        : elasticsearch

 Epoch       : 0

 Version     : 7.0.1

 Release     : 1

 Architecture: x86_64

 Install Date: Mon 06 May 2019 09:59:57 PM EAT

 Group       : Application/Internet

 Size        : 571521653

 License     : Elastic License

 Signature   : RSA/SHA512, Mon 29 Apr 2019 05:14:11 PM EAT, Key ID d27d666cd88e42b4

 Source RPM  : elasticsearch-7.0.1-1-src.rpm

 Build Date  : Mon 29 Apr 2019 04:06:59 PM EAT

 Build Host  : packer-virtualbox-iso-1553723689

 Relocations : /usr

 Packager    : Elasticsearch

 Vendor      : Elasticsearch

 URL         : https://www.elastic.co/

 Summary     : Elasticsearch is a distributed RESTful search engine built for the cloud. Reference documentation can be found at https://www.elastic.co/guide/en/elasticsearch/reference/current/index.html and the 'Elasticsearch: The Definitive Guide' book can be found at https://www.elastic.co/guide/en/elasticsearch/guide/current/index.html

 Description :

 Elasticsearch subproject :distribution:packages
你可以通过编辑文件来设置 JVM 选项(例如内存限制): /etc/elasticsearch/jvm.options
下面的示例设置总堆空间的初始/最大大小
-Xms1g

-Xmx1g
如果你的系统内存较少,则可以将其配置为使用较小的内存。
-Xms256m

-Xmx512m
启动并设置为开机时启用 elasticsearch 服务:
$ sudo systemctl enable --now elasticsearch.service

 Synchronizing state of elasticsearch.service with SysV service script with /usr/lib/systemd/systemd-sysv-install.

 Executing: /usr/lib/systemd/systemd-sysv-install enable elasticsearch

 Created symlink /etc/systemd/system/multi-user.target.wants/elasticsearch.service → /usr/lib/systemd/system/elasticsearch.service.
测试以验证其是否正常运行:
$ curl http://127.0.0.1:9200

{

  "name" : "localhost.localdomain",

  "cluster_name" : "elasticsearch",

  "cluster_uuid" : "7fyD4TuqQ7yxog0fCnPXuA",

  "version" : {

    "number" : "7.5.0",

    "build_flavor" : "default",

    "build_type" : "rpm",

    "build_hash" : "e9ccaed468e2fac2275a3761849cbee64b39519f",

    "build_date" : "2019-11-26T01:06:52.518245Z",

    "build_snapshot" : false,

    "lucene_version" : "8.3.0",

    "minimum_wire_compatibility_version" : "6.8.0",

    "minimum_index_compatibility_version" : "6.0.0-beta1"

  },

  "tagline" : "You Know, for Search"

}
创建一个测试的索引:
$ curl -X PUT "http://127.0.0.1:9200/mytest_index"

{"acknowledged":true,"shards_acknowledged":true,"index":"mytest_index"}
步骤 4:安装和配置 Kibana
从添加的 Elasticsearch 存储库下载并安装 Kibana。
sudo yum -y install kibana
成功安装后,配置 Kibana:
$ sudo vim /etc/kibana/kibana.yml

server.host: "0.0.0.0"

server.name: "kibana.example.com"

elasticsearch.url: "http://localhost:9200"
根据需要更改其他设置,然后启动 kibana 服务:
sudo systemctl enable --now kibana
访问 http://ip-address:5601 以打开 Kibana 信息中心:
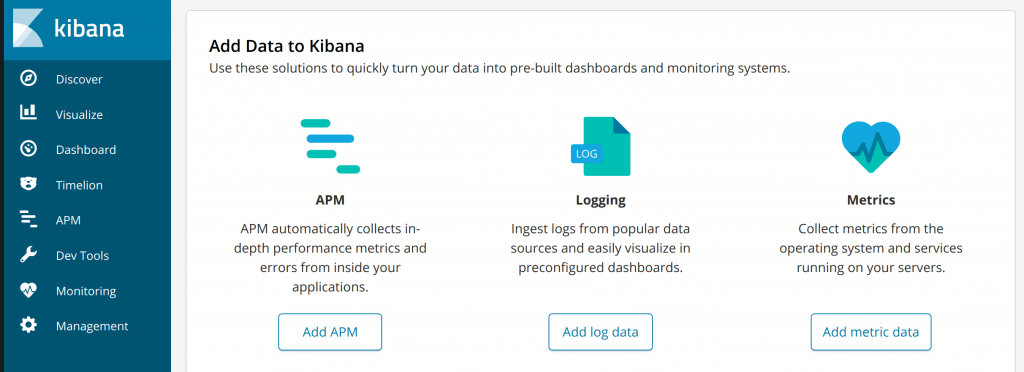
如果你有活动的防火墙服务,请允许使用 TCP 5601 端口
sudo firewall-cmd --add-port=5601/tcp --permanent

sudo firewall-cmd --reload
步骤 5:安装和配置 Logstash
最后安装的是针对 Logstash 的。它将充当客户端系统的集中式日志服务器,该服务器运行诸如filebeat之类的代理 。
sudo yum -y install logstash
Logstash 自定义配置可以放在 /etc/logstash/conf.d/目录下。
有关更多详细信息,请参阅 Logstash 配置手册。
步骤 6:安装其他 ELK 工具-锦上添花
可以安装的其他 ELK 工具包括:
- Filebeat:用于日志的轻量型采集器。通过提供一种转发和汇总日志与文件的轻量级方法,让简单的事情不再繁杂。
- Metricbeat:用于从系统和服务收集指标。Metricbeat 能够以一种轻量型的方式,输送各种系统和服务统计数据,从 CPU 到内存,从 Redis 到 Nginx,不一而足。
- Packetbeat:轻量型网络数据采集器。用于深挖网线上传输的数据,了解应用程序动态。Packetbeat 是一款轻量型网络数据包分析器,能够将数据发送至 Logstash 或 Elasticsearch。
- Heartbeat:用于正常运行时间监视的轻量型采集器。它通过主动探测帮助你监视服务的可用性
- Auditbeat:轻量型审计日志采集器,可帮助你审核系统上用户和进程的活动
这些工具可以通过 yum 软件包管理器使用它们各自的名称一起进行安装。下面的示例将安装所有ELK插件工具。
sudo yum install filebeat auditbeat metricbeat packetbeat heartbeat-elastic
有关每种工具的配置和进一步的阅读,请参考官方的 ELK Stack 文档 以及 资源和培训。
更多指南:
在 Ubuntu 上使用 Elasticsearch 6 安装 Graylog 3
在 CentOS / RHEL 8 上安装 Graylog 3
在 CentOS 7 上安装 Elasticsearch 7
本文由博客一文多发平台 OpenWrite 发布!
个人公众号《骇客与画家》,欢迎关注
如何在CentOS 7 / Fedora 31/30/29上安装ELK Stack的更多相关文章
- 在centos 6.5 在virtual box 上 安装增强版工具
centos 6.5 在virtual box 上 安装增强版工具: 出现:centos unable to find the source of your current linux kernel ...
- 【转】如何在win10(64位系统)上安装apache服务器
如何在win10(64位系统)上安装apache服务器 今天装了Apache服务器,下面是我总结的方法: 一,准备软件 1.64位的apache版本 传送门:http://www.apacheloun ...
- 如何在win7、win8、win8.1上安装使用vb6.0
https://jingyan.baidu.com/article/915fc414fdf8fb51384b2062.html如何在win7.win8.win8.1上安装使用vb6.0 如何在win7 ...
- 如何在CentOS/RHEL & Fedora上安装MongoDB 3.2
MongoDB(名称取自"huMONGOus")是一个有着全面灵活的索引支持和丰富的查询的数据库.MongoDB通过GridFS提供强大的媒体存储.点击这里获取MongoDB的更多 ...
- 在Centos 5.x或6.x上安装RHEL EPEL Repo
本文介绍了如何在CentOS 5.x或者CentOS 6.x的系统上使用Fedora Epel repos一个第三方repo:remi资源库.这些资源包并不是天然地支持CentOS,但是提供了很多流行 ...
- linux之 CentOS/RHEL/Scientific Linux 6 & 7上安装Telnet
声明: 在安装和使用Telnet之前,需要记住以下几点. 在公网(WAN)中使用Telnet是非常不好的想法.它会以明文的格式传输登入数据.每个人都可以看到明文.如果你还是需要Telnet,强烈建议你 ...
- 如何在win10(64位系统)上安装apache服务器
今天装了Apache服务器,下面是我总结的方法: 一,准备软件 1.64位的apache版本 传送门:http://www.apachelounge.com/download/ 2.VC11运行库 下 ...
- (转)如何在CentOS / RHEL 7上安装Elasticsearch,Logstash和Kibana(ELK)
原文:https://www.howtoing.com/install-elasticsearch-logstash-and-kibana-elk-stack-on-centos-rhel-7 如果你 ...
- 怎样在CentOS 7.0上安装和配置VNC服务器
VNC轻松连接远程Linux桌面 http://jingyan.baidu.com/article/6c67b1d6f1bac92786bb1e6d.html 这是一个关于怎样在你的 CentOS 7 ...
随机推荐
- enctype="multipart/form-data"的form传参
1.jsp <li class="btns"><input id="btnImport" class="btn btn-primar ...
- RQNOJ--160 竞赛真理(01背包)
题目http://www.rqnoj.cn/problem/160 分析:这是一个01背包问题,对于每一道题目,都有两个选择"做"或者"不做". 但是唯一不同的 ...
- Charles的https抓包方法及原理/下载ssl/http证书
本文的Charles,适应windows/MAC/IOS/Android,避免抓包HTTPS失败和乱码: charles如果不配置SSL通用证书: 会导致HPPTS协议的域名抓取失败/乱码的现象: 首 ...
- js 实现音频播放与暂停
html: <script src="js/jquery-2.1.3.min.js"></script> <div id="soundIco ...
- Activiti 部分实用功能
helloworld中已经写了关于部署流程图,查询个人任务,完成个人任务部分.现在添加几个新的实用功能 1.判断流程是否完成,代码如下 public void isProcessEnd() { Str ...
- Windows API 第15篇 GetVolumeInformation 获取磁盘卷(驱动器)信息
先看定义:BOOL GetVolumeInformation( [IN] LPCTSTR lpRootPathName, // root directory 卷所在的根目 ...
- Creating a bootable Ubuntu USB stick
Windows: https://tutorials.ubuntu.com/tutorial/tutorial-create-a-usb-stick-on-windows#0 Ubuntu: http ...
- 19-10-19-I
中午考试困够呛. T1 我想打矩阵快速幂,然后我咕了 T2 打T1了所以又咕了. T3 每一个黑点更新答案只有两种方式: 更新子树. 更新父链上的兄弟,叔伯,…… 于是: 把树拍在$DFS$序上. 更 ...
- hihocoder 1084 (哈希)
题目链接 时间限制:4000ms 单点时限:4000ms 内存限制:256MB 描述 你知道KMP吗?它是用于判断一个字符串是否是另一个字符串的子串的算法.今天我们想去扩展它. 在信息理论中,在两个相 ...
- hdu1233还是畅通工程
还是畅通工程 Time Limit: 4000/2000 MS (Java/Others) Memory Limit: 65536/32768 K (Java/Others) Total Sub ...