ActiveMQ-在Centos7下安装和安全配置
环境准备:
JDK1.8
ActiveMQ-5.11
Centos7
1、下载Linux版本的ActiveMQ:
$ wget http://apache.fayea.com/activemq/5.11.1/apache-activemq-5.11.1-bin.tar.gz
2、解压安装:
$ tar -zxvf apache-activemq-5.11.1-bin.tar.gz
$mv apache-activemq-5.11.1 /usr/local/
3、配置防火墙:
ActiveMQ 需要用到两个端口:
一个是消息通讯的端口(默认为 61616)
一个是管理控制台端口(默认为 8161)
可在 conf/jetty.xml 中修改, 如下:
<bean id="jettyPort" class="org.apache.activemq.web.WebConsolePort" init-method="start">

    <!-- the default port number for the web console -->

    <property name="host" value="0.0.0.0"/>

    <property name="port" value="8161"/>

</bean>
$ vi /etc/sysconfig/iptables
添加:
-A INPUT -m state --state NEW -m tcp -p tcp --dport 61616 -j ACCEPT
-A INPUT -m state --state NEW -m tcp -p tcp --dport 8161 -j ACCEPT
重启防火墙:
$ service iptables restart
4、启动ActiveMQ:
进入到ActiveMQ的bin目录下
$ cd /usr/local/apache-activemq-5.11.1/bin
启动:
$ ./activemq start
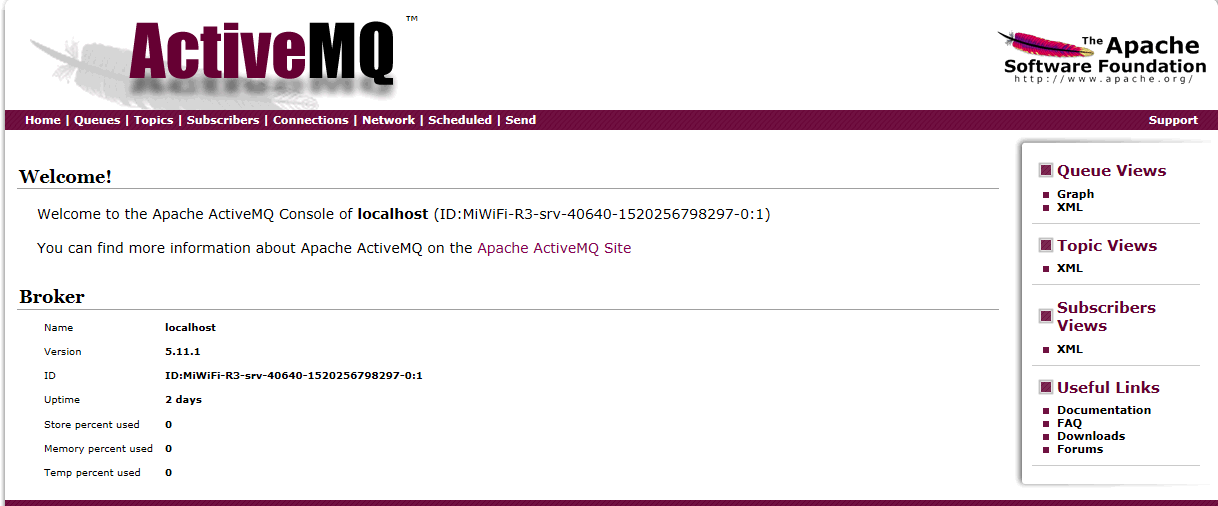
5、打开管理界面:
http://192.168.xx.xx:8161

点击 Manage ActiveMQ broker 输入:admin/admin 登陆
6、安全验证配置:
安全验证有两个概念:1.控制台安全配置;2.JMS服务安全配置
6.、 控制台安全配置
打开conf/jetty.xml文件,找到
<bean id="securityConstraint" class="org.eclipse.jetty.util.security.Constraint">

    <property name="name" value="BASIC" />

    <property name="roles" value="user,admin" />

    <!-- set authenticate=false to disable login -->

    <property name="authenticate" value="true" />

</bean>
将"false" 改为"true",重启ActiveMQ 即可。
控制台的登录用户名密码保存在conf/credentials.properties文件中。
activemq.username=system

activemq.password=manager

guest.password=password
6.2. JMS服务安全配置 在conf/activemq.xml文件中加入以下内容
<broker xmlns="http://activemq.apache.org/schema/core" brokerName="localhost" dataDirectory="${activemq.data}">
......
<transportConnectors>
<!-- DOS protection, limit concurrent connections to 1000 and frame size to 100MB -->
<transportConnector name="openwire" uri="tcp://0.0.0.0:61616?maximumConnections=1000&wireFormat.maxFrameSize=104857600"/>
<transportConnector name="amqp" uri="amqp://0.0.0.0:5672?maximumConnections=1000&wireFormat.maxFrameSize=104857600"/>
<transportConnector name="stomp" uri="stomp://0.0.0.0:61613?maximumConnections=1000&wireFormat.maxFrameSize=104857600"/>
<transportConnector name="mqtt" uri="mqtt://0.0.0.0:1883?maximumConnections=1000&wireFormat.maxFrameSize=104857600"/>
<transportConnector name="ws" uri="ws://0.0.0.0:61614?maximumConnections=1000&wireFormat.maxFrameSize=104857600"/>
</transportConnectors>
<!-- destroy the spring context on shutdown to stop jetty -->
<shutdownHooks>
<bean xmlns="http://www.springframework.org/schema/beans" class="org.apache.activemq.hooks.SpringContextHook" />
</shutdownHooks>
<plugins>
<!-- Configure authentication; Username, passwords and groups -->
<simpleAuthenticationPlugin>
<users>
<authenticationUser username="system" password="${activemq.password}" groups="users,admins"/>
<authenticationUser username="user" password="${guest.password}" groups="users"/>
<authenticationUser username="guest" password="${guest.password}" groups="guests"/>
</users>
</simpleAuthenticationPlugin>
</plugins>
</broker>
这个${activemq.password} 在conf/credentials.properties文件中配置
7、在程序中运行
public class Sendser {

    public static void main(String[] args) throws Exception{

        //第一步,建立ConnectionFactory工厂对象,需要填写用户名,密码,以及要连接的地址

        //输入账号密码

        /*ConnectionFactory connectionFactory = new ActiveMQConnectionFactory(

            ActiveMQConnectionFactory.DEFAULT_USER,

                ActiveMQConnectionFactory.DEFAULT_PASSWORD,

                "tcp://localhost:61616"

        );*/

        ConnectionFactory connectionFactory = new ActiveMQConnectionFactory(

                "system",

                "manager",

                "tcp://localhost:61616"

        );

    ......

}
ActiveMQ-在Centos7下安装和安全配置的更多相关文章
- CentOS7 下 安装 supervisor以及使用
CentOS7 下 安装 supervisor 以及使用 手动安装 [注] linux环境必须安装 python 1.获取supervisor包:[https://pypi.python.org/py ...
- Linux CentOs7 下安装 redis
Linux CentOs7 下安装 redis 请将以下命令放入linux命令行中运行 如果安装过程前没有安装GCC请先安装 命令如下 $ yum install gcc-c++ $ wget ht ...
- Centos7下安装配置Redsocks
Redsocks是一个开源的网络程序,代码依赖开源的libevent网络库.Redsocks允许你将所有TCP连接重定向到SOCKS或HTTPS代理,比如Shadowsocks(Centos7下安装配 ...
- CentOS7下安装SVN服务端
CentOS7下安装SVN服务 1. yum命令即可方便的完成安装# sudo yum install subversion 测试安装是否成功:# svnserve --version 更改svn的默 ...
- centOS7下安装GUI图形界面
1.如何在centOS7下安装GUI图形界面 当你安装centOS7服务器版本的时候,系统默认是不会安装GUI的图形界面程序,这个需要手动安装CentOS7 Gnome GUI包. 2.在系统下使用命 ...
- CentOS7下安装MySQL并配置远程连接
一.CentOS7下安装MySQL数据库 CentOS7默认的安装包里面已经没有 MySQL-Server安装包了,远程镜像中也没有了. 默认的是MariaDB (MySQL的一个分支,开发这个分支的 ...
- Docker学习笔记3:CentOS7下安装Docker-Compose
Docker-Compose是一个部署多个容器的简单但是非常必要的工具. 安装Docker-Compose之前,请先安装 python-pip,请参考我的另一篇博文CentOS7下安装python-p ...
- docker(一) Centos7下安装docker
docker(一) Centos7下安装dockerdocker(二) windows10下安装dockerdocker(三) 镜像和容器常用命令 docker(四) 使用Dockerfile构建镜像 ...
- centos7 下 安装部署nginx
centos7 下 安装部署nginx 1.nginx安装依赖于三个包,注意安装顺序 a.SSL功能需要openssl库,直接通过yum安装: #yum install openssl b.gzip模 ...
随机推荐
- 201521123014《Java程序设计》第1周学习总结
201521123014 java第一周总结 1.本周学习总结 刚认识这一门新语言,我就充满了好奇心,想看看Java和学过C语言,C++有什么区别.在这一周的学习中,我认识到,对于初学者而言,Java ...
- 控件无法安装的问题-Unable to execute file
官方网站:http://www.ncmem.com/ 产品首页:http://www.ncmem.com/webplug/wordpaster/ 产品介绍:http://www.cnblogs.com ...
- linux (centos 6.4)下编译安装git
是时候动手尝试下 Git 了,不过得先安装好它.有许多种安装方式,主要分为两种,一种是通过编译源代码来安装:另一种是使用为特定平台预编译好的安装包(yum install git). 若是条件允许,从 ...
- 20155225 2016-2017-2 《Java程序设计》第九周学习总结
20155225 2016-2017-2 <Java程序设计>第九周学习总结 教材学习内容总结 JDBC入门 了解JDBC架构 使用JDBC API JDBC是用于执行SQL的解决方案,开 ...
- java基础-day1
第01天 java基础知识 今日内容介绍 u Java概述.helloworld案例 u 工具安装 .配置环境变量.注释.关键字 u 常量.变量.数据类型.标识符 第1章 Java概述 1.1 ...
- git 删除追踪状态
当不小心添加一个不想被git记录等文件时,这个时候就算将该文件记录在了.gitignore里也是没有用的,因为那个文件已经被git记录过了,只有那些从来没有被git记录过的文件(即:自添加进项目后,从 ...
- Hibernate的查询方式汇总
分别是HQL查询,对象化查询Criteria方法,动态查询DetachedCriteria,例子查询,sql查询,命名查询. 如果单纯的使用hibernate查询数据库只需要懂其中的一项就可以完成想要 ...
- 【TypeScript】TypeScript 学习 5——方法
在 JavaScript 中,有两种方式定义方法. 1.命名的方法 function add(x,y){ return x+y; } 2.匿名方法 var myAdd = function(x,y) ...
- c# AOP编程:Context与方法拦截
之前做AgentBooking时候,遇到两个问题比较棘手,一个是异常的传递与捕获:如何可以合理地在层层代码调用中统一传递并统一捕获异常.因为如果有一个做法,可以地方统一处理异常,可以使代码减少很多tr ...
- JQuery fullcalender文档
转载: http://blog.csdn.net/lgg2011. 使用方式, 引入相关js, css后, $(‘#div_name’).fullCalendar({//options}); 接受的 ...