R-----shiny包的部分解释和控件介绍
R-----shiny包的部分解释和控件介绍
作者:周彦通、贾慧
shinyApp(
ui = fixedPage(
fixedPanel(
top = 50, right=50, width=200, draggable = TRUE, style="padding: 20px; border: 1px solid red;",
"可以移动的框框1"
),
absolutePanel(
top = 150, right=150, width=200, draggable = TRUE, style="padding: 20px; border: 1px solid red;",
"可以移动的框框2"
)
),
server = function(session, input, output) {
})

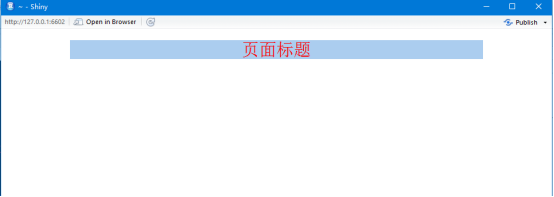
shinyApp(
ui = fixedPage(
tags$head(
tags$title('窗口标题'),
tags$style(
rel = 'stylesheet',
'.title-panel {background: #ABCDEF} ',
'.title-panel h2 {text-align:center; color: #FF0000}'
)
),
div(
class='col-md-12 title-panel',
h2('页面标题')
)
),
server = function(input, output, session) {}
)
shinyApp(
ui = fixedPage(
tags$style(
".container div {border: 1px solid gray; min-height:30px;}",
"h4 {color:red; margin-top: 20px;}"
),
h4("两栏模板"),
sidebarLayout(
sidebarPanel("side bar panel"),
mainPanel("main panel")
),
h4("垂直分割模板"),
splitLayout("aaaa", "bbbb", "cccc", "dddd"),
h4("垂直排列模板"),
verticalLayout("aaaa", "bbbb", "cccc", "dddd"),
h4("流式(自动折行)模板"),
flowLayout("aaaa", "bbbb", "cccc", "dddd")
),
server = function(session, input, output) {
}
)

排版样式
shinyApp(
ui = fixedPage(
textInput('itx1', '', value='1111'),
textInput('itx2', '', value='2222'),
textOutput('otx', container=pre)
),
server = function(input, output, session) {
output$otx <- renderPrint({
a <- NULL
isolate(a <- input$itx1)
b <- input$itx2
list(a=a, b=b)
})
})
阻止响应
测试
shinyApp(
ui = fixedPage(
h1('测试'), hr(),
radioButtons('opts', '', choices = c('图像', '文字'), inline = T, selected='图像'),
conditionalPanel(
condition = 'input.opts==="图像"',
plotOutput('pl')
),
conditionalPanel(
condition = 'input.opts==="文字"',
textOutput('tx', container=pre)
)
),
server = function(input, output, session) {
air <- na.omit(airquality)
pp <- ggplot(air, aes(x=Solar.R, y=Ozone)) + geom_point()
observe({
xtype <- input$opts
if(xtype=='图像') output$pl <- renderPlot({ pp })
else output$tx <- renderPrint({ str(pp) })
})
})
文件上传
shinyApp(
ui = fixedPage(
fileInput('f', '上传文件', multi=T, accept='text/plain, image/*'),
textOutput('tx', container=pre)
),
server = function(input, output, session) {
output$tx <- renderPrint({ str(input$f) })
})
保存
library('ggplot2')fig.w <- 400fig.h <- 300shinyApp(
ui = fixedPage(
plotOutput('pl', width=fig.w, height=fig.h),
radioButtons('xtype', '图片格式', c('png', 'jpeg', 'bmp'), selected='png', inline=T),
downloadLink('file', '保存图片')
),
server = function(input, output, session) {
air <- na.omit(airquality)
pp <- ggplot(air, aes(x=Solar.R, y=Ozone)) + geom_point()
output$pl <- renderPlot({ pp })
observeEvent(
input$xtype,
output$file <- downloadHandler(
filename = paste0('plot.', input$xtype),
content = function(file) {
image <- switch(input$xtype,
png=png, jpeg=jpeg, bmp=bmp)
image(file, width=fig.w, height=fig.h)
print(pp)
dev.off()
}
)
)
})
控件
shinyApp(
ui = fixedPage(
h2('输入控件演示'),
hr(),
sidebarLayout(
sidebarPanel(
textInput('tx', '文字输入', value='abc'),
checkboxGroupInput('cg', '选项组', choice=LETTERS[1:4], selected=c('A', 'D'), inline=TRUE),
sliderInput('sl', '滑动选数', min=1, max=10, value=6),
HTML('<label for="tt">文本框输入</label>',
'<textarea id="tt" class="form-control" style="resize:none"></textarea>'
),
HTML('<label for="clx">颜色选取</label>',
'<input id="clx" type="color" class="form-control" value="#FF0000">',
'<input id="cl" type="text" class="form-control" value="#FF0000" style="display:none">',
'<script>',
'$(function(){$("#clx").change(function(){$("#cl").val($(this).val()).trigger("change");});})',
'</script>'
)
),
mainPanel(
HTML('<textarea id="ta" class="form-control shiny-text-output"',
'style="resize:none; height:200px;" readonly></textarea>'
)
)
)
),
server = function(input, output, session) {
output$ta <- renderText({
paste(c(input$tx, input$tt, paste(input$cg, collapse='; '),
input$sl, input$cl), collapse='\n')
})
observe({
updateTextInput(session, inputId='tt', value=paste('文本输入:', input$tx))
})
})
Shiny、输出语法
shinyApp(
ui = fixedPage(
textOutput('tx', container=h1),
plotOutput('pl', width='100%', height='400px')
),
server = function(input, output, session) {
output$tx <- renderText({
"这是服务器输出的文字"
})
output$pl <- renderPlot({
a <- rnorm(20)
par(mar=c(3, 3, 0.5, 0.5), mgp=c(2, 0.5, 0))
plot(a)
})
})
函数xxxOutput和renderXXX函数
ls("package:shiny", pattern="Output$")
ls("package:shiny", pattern="^render")
renderXXX函数的一般形式是:
renderXXX(expr, ...)
(红色不分为关键参数)
更新输入演示案列
Server。R
function(input, output, clientData, session) {
observe({
# We'll use these multiple times, so use short var names for
# convenience.
c_label <- input$control_label
c_num <- input$control_num
# Text =====================================================
# Change both the label and the text
updateTextInput(session, "inText",
label = paste("New", c_label),
value = paste("New text", c_num)
)
# Number ===================================================
# Change the value
updateNumericInput(session, "inNumber", value = c_num)
# Change the label, value, min, and max
updateNumericInput(session, "inNumber2",
label = paste("Number ", c_label),
value = c_num, min = c_num-10, max = c_num+10, step = 5)
# Slider input =============================================
# Only label and value can be set for slider
updateSliderInput(session, "inSlider",
label = paste("Slider", c_label),
value = c_num)
# Slider range input =======================================
# For sliders that pick out a range, pass in a vector of 2
# values.
updateSliderInput(session, "inSlider2",
value = c(c_num-1, c_num+1))
# An NA means to not change that value (the low or high one)
updateSliderInput(session, "inSlider3",
value = c(NA, c_num+2))
# Date input ===============================================
# Only label and value can be set for date input
updateDateInput(session, "inDate",
label = paste("Date", c_label),
value = paste("2013-04-", c_num, sep=""))
# Date range input =========================================
# Only label and value can be set for date range input
updateDateRangeInput(session, "inDateRange",
label = paste("Date range", c_label),
start = paste("2013-01-", c_num, sep=""),
end = paste("2013-12-", c_num, sep=""),
min = paste("2001-01-", c_num, sep=""),
max = paste("2030-12-", c_num, sep="")
)
# # Checkbox ===============================================
updateCheckboxInput(session, "inCheckbox",value = c_num %% 2)
# Checkbox group ===========================================
# Create a list of new options, where the name of the items
# is something like 'option label x A', and the values are
# 'option-x-A'.
cb_options <- list()
cb_options[[paste("option label", c_num, "A")]] <-
paste0("option-", c_num, "-A")
cb_options[[paste("option label", c_num, "B")]] <-
paste0("option-", c_num, "-B")
# Set the label, choices, and selected item
updateCheckboxGroupInput(session, "inCheckboxGroup",
label = paste("checkboxgroup", c_label),
choices = cb_options,
selected = paste0("option-", c_num, "-A")
)
# Radio group ==============================================
# Create a list of new options, where the name of the items
# is something like 'option label x A', and the values are
# 'option-x-A'.
r_options <- list()
r_options[[paste("option label", c_num, "A")]] <-
paste0("option-", c_num, "-A")
r_options[[paste("option label", c_num, "B")]] <-
paste0("option-", c_num, "-B")
# Set the label, choices, and selected item
updateRadioButtons(session, "inRadio",
label = paste("Radio", c_label),
choices = r_options,
selected = paste0("option-", c_num, "-A")
)
# Select input =============================================
# Create a list of new options, where the name of the items
# is something like 'option label x A', and the values are
# 'option-x-A'.
s_options <- list()
s_options[[paste("option label", c_num, "A")]] <-
paste0("option-", c_num, "-A")
s_options[[paste("option label", c_num, "B")]] <-
paste0("option-", c_num, "-B")
# Change values for input$inSelect
updateSelectInput(session, "inSelect",
choices = s_options,
selected = paste0("option-", c_num, "-A")
)
# Can also set the label and select an item (or more than
# one if it's a multi-select)
updateSelectInput(session, "inSelect2",
label = paste("Select label", c_label),
choices = s_options,
selected = paste0("option-", c_num, "-B")
)
# Tabset input =============================================
# Change the selected tab.
# The tabsetPanel must have been created with an 'id' argument
if (c_num %% 2) {
updateTabsetPanel(session, "inTabset", selected = "panel2")
} else {
updateTabsetPanel(session, "inTabset", selected = "panel1")
}
})}
ui.R
fluidPage(
titlePanel("Changing the values of inputs from the server"),
fluidRow(
column(3, wellPanel(
h4("These inputs control the other inputs on the page"),
textInput("control_label",
"This controls some of the labels:",
"LABEL TEXT"),
sliderInput("control_num",
"This controls values:",
min = 1, max = 20, value = 15)
)),
column(3, wellPanel(
textInput("inText", "Text input:", value = "start text"),
numericInput("inNumber", "Number input:",
min = 1, max = 20, value = 5, step = 0.5),
numericInput("inNumber2", "Number input 2:",
min = 1, max = 20, value = 5, step = 0.5),
sliderInput("inSlider", "Slider input:",
min = 1, max = 20, value = 15),
sliderInput("inSlider2", "Slider input 2:",
min = 1, max = 20, value = c(5, 15)),
sliderInput("inSlider3", "Slider input 3:",
min = 1, max = 20, value = c(5, 15)),
dateInput("inDate", "Date input:"),
dateRangeInput("inDateRange", "Date range input:")
)),
column(3,
wellPanel(
checkboxInput("inCheckbox", "Checkbox input",
value = FALSE),
checkboxGroupInput("inCheckboxGroup",
"Checkbox group input:",
c("label 1" = "option1",
"label 2" = "option2")),
radioButtons("inRadio", "Radio buttons:",
c("label 1" = "option1",
"label 2" = "option2")),
selectInput("inSelect", "Select input:",
c("label 1" = "option1",
"label 2" = "option2")),
selectInput("inSelect2", "Select input 2:",
multiple = TRUE,
c("label 1" = "option1",
"label 2" = "option2"))
),
tabsetPanel(id = "inTabset",
tabPanel("panel1", h2("This is the first panel.")),
tabPanel("panel2", h2("This is the second panel."))
)
)
))
首先需要将ui.R和server.R两个代码保存为文件放在同一个文件夹下,然后就可以调用这个app了。
如果变量的值不使用input列表,这里有两种赋值方法:
server = function(input, output, session) {
var1 <- list(a=1, b=2, c=3)
var2 <- reactiveValues(a=1, b=2, c=3)}
R-----shiny包的部分解释和控件介绍的更多相关文章
- Android support library支持包常用控件介绍(二)
谷歌官方推出Material Design 设计理念已经有段时间了,为支持更方便的实现 Material Design设计效果,官方给出了Android support design library ...
- CPF 入门教程 - 各个控件介绍(八)
CPF C#跨平台桌面UI框架 系列教程 CPF 入门教程(一) CPF 入门教程 - 数据绑定和命令绑定(二) CPF 入门教程 - 样式和动画(三) CPF 入门教程 - 绘图(四) CPF 入门 ...
- 基于CkEditor实现.net在线开发之路(3)常用From表单控件介绍与说明
上一章已经简单介绍了CKEditor控件可以编写C#代码,然后可以通过ajax去调用,但是要在网页上面编写所有C#后台逻辑,肯定痛苦死了,不说实现复杂的逻辑,就算实现一个简单增删改查,都会让人头痛欲裂 ...
- iOS开发UI篇—UIScrollView控件介绍
iOS开发UI篇—UIScrollView控件介绍 一.知识点简单介绍 1.UIScrollView控件是什么? (1)移动设备的屏幕⼤大⼩小是极其有限的,因此直接展⽰示在⽤用户眼前的内容也相当有限 ...
- android xml 常用控件介绍
android常用控件介绍 ------文本框(TextView) ------列表(ListView) ------提示(Toast) ------编辑框(EditText) ...
- WPF Step By Step 控件介绍
WPF Step By Step 控件介绍 回顾 上一篇,我们主要讨论了WPF的几个重点的基本知识的介绍,本篇,我们将会简单的介绍几个基本控件的简单用法,本文会举几个项目中的具体的例子,结合这些 例子 ...
- ASP.NET服务端基本控件介绍
ASP.NET服务端基本控件介绍 大概分为三种控件: HTML控件,ASP.NET把HTML控件当成普通字符串渲染到浏览器端,不去检查正确性,无法在服务端进行处理ASP.NET服务端控件,经过ASP. ...
- Blend 多文本控件介绍
原文:Blend 多文本控件介绍 多文本控件 RichTextBox FlowDocumentScrollViewer FlowDocumentPageViewer FlowDocumentReade ...
- WPF控件介绍(2)
上一章讲到了布局.这点就有点类似建筑设计.第一步是出图纸.整体的结构.而第二步就是堆砌, 建筑学里面也会有很多描述, 例如砖头,水泥.玻璃.瓷板.而在WPF中, 这一切的基础也就是控件.用于填充结构的 ...
随机推荐
- pwnable.kr input解题记录
pwnable input解题记录 给了源码如下: #include "stdio.h" #include "unistd.h" #include " ...
- python不能调试的原因
最近有一个python项目,打开项目不能登录,想调试一下看看为什么,发现不能调试了,郁闷了,搞了半天,发现是进程里有多个python.exe,结束掉就好了.
- windows 2008 开机启动 Docker Toolbox 并运行容器
新建 docker-startup.bat @echo off REM Set the name of the VM configuration where dockerd will be hoste ...
- 用addRoutes实现动态路由
原文转自前端路上,转载请注明出处. 之前在基于Vue实现后台系统权限控制一文中提到路由权限的实现思路,因为不喜欢在每次路由跳转的before钩子里做判断,所以在初始化Vue实例前对路由做了筛选,再用实 ...
- sprintboot 中占位符及多环境配置
(原) 关于springboot中多环境配置问题 1.在application.properties文件中通过 spring.profiles.active=... 选择系统所要加载的配置文件,这里的 ...
- golang 日期时间处理
package main import ( "fmt" "time" ) func main() { fmt.Println(time.Now()) //显示时 ...
- 【vue】使用vue+element搭建项目,Tree树形控件使用
1.依赖安装 本例中,使用render-content进行树节点内容的自定义,因此需要支持JSX语法.(见参考资料第3个) 在Git bash中运行一下指令 cnpm install\ babel-p ...
- P3371 【模板】单源最短路径(弱化版)
// luogu-judger-enable-o2 #include<cstdio> #include<iostream> #include<algorithm> ...
- git@github.com: Permission denied (publickey).////remote: Permission to xxx/test.git denied to xxx.等权限问题
Error msg git@github.com: Permission denied (publickey) 或者: remote: Permission to xxx/test.git denie ...
- vue学习初探
一.环境的搭建安装 VS Code vue开发环境的搭建 理解vue的脚手架 合适的cnpm版本