
手把手带你撸一把springsecurity框架源码中的认证流程
提springsecurity之前,不得不说一下另外一个轻量级的安全框架Shiro,在springboot未出世之前,Shiro可谓是颇有统一J2EE的安全领域的趋势。
有关shiro的技术点
1、shiro之权限管理的概念
2、shiro之第一个程序认证
3、shiro之自定义realm
4、shiro认证+授权(使用MD5+salt加密)
5、shiro+springboot 图解分析思路
6、Shiro+springboot+mybatis(md5+salt+散列)认证与授权-01
7、Shiro+springboot+mybatis(md5+salt+散列)认证与授权-02
8、Shiro+springboot+mybatis+EhCache(md5+salt+散列)认证与授权-03
一、springsecurity因springboot而火
1.1.
Spring Security 并非一个新生的事物,它最早不叫 Spring Security ,叫 Acegi Security,叫 Acegi Security 并不是说它和 Spring 就没有关系了,它依然是为 Spring 框架提供安全支持的。事实上,Java 领域的框架,很少有框架能够脱离 Spring 框架独立存在。(spring真的是碉堡了呀)
1.2.
当 Spring Security 还叫 Acegi Security 的时候,流传着这样一句话,“每当有人要使用 Acegi Security,就会有一个精灵死去”,从这你就可以感觉到,其中的配置是多繁琐;
1.3.
之后Acegi Security投入了spring的窝里,(呵,这波操作可以呀),然后你懂的,研发团队的小凸凸们开始精简繁杂的xml配置;虽然比之前简化了很多,但一直没火起来,(这一波spring只能在心里默默的说:你是真的带不动,啥也不是;)
1.4.
直到有一天,springboot这个二愣子突然出现在了封建社会中,彻底颠覆了J2EE的世界,“约定大于配置 ”成为springboot的代名词。一人得道,鸡犬升天,连带着把spring家族的产品都带了一把,springsecurity就是其中之一。
1.5.
当前springboot/springcloud是J2EE中主流的技术栈(springboot不是一个新的框架,他是对spring的扩展,是为了高效开发而生)
spring是对Java代码的封装,springboot可以说又对spring进行了封装,屏蔽了内部的细节,让开发人员专注于业务逻辑;缺点就是封装太深,学习成本高。
推荐两种搭配
1.springboot+springcloud+springsecurity
2.SSM+shiro
二、代码准备工作
2.1.使用初始化向导快速搭建springboot项目
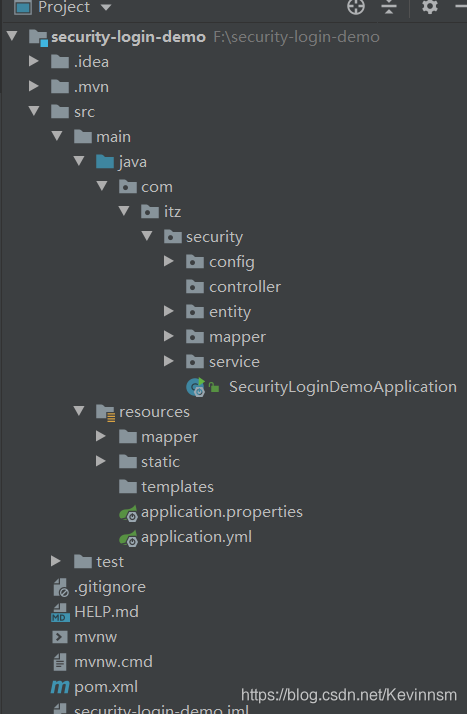
2.2.编写mapper、dao、文件
UserMapper.xml
<?xml version="1.0" encoding="UTF-8" ?>

<!DOCTYPE mapper

        PUBLIC "-//mybatis.org//DTD Mapper 3.0//EN"

        "http://mybatis.org/dtd/mybatis-3-mapper.dtd">

<mapper namespace="com.itz.security.mapper.UserMapper">

    <select id="findPasswordByUsername" resultType="Users">

        select * from users where username=#{usernaem}

    </select>

</mapper>
UserMapper接口
public interface UserMapper {

    Users findPasswordByUsername(String username);

}
2.3.service层编写
至于为什么要实现UserDetailService这个接口,后面会详细说
package com.itz.security.service;

import com.itz.security.entity.Users;

import com.itz.security.mapper.UserMapper;

import lombok.extern.slf4j.Slf4j;

import org.springframework.beans.factory.annotation.Autowired;

import org.springframework.security.core.authority.AuthorityUtils;

import org.springframework.security.core.userdetails.User;

import org.springframework.security.core.userdetails.UserDetails;

import org.springframework.security.core.userdetails.UserDetailsService;

import org.springframework.security.core.userdetails.UsernameNotFoundException;

import org.springframework.security.crypto.password.PasswordEncoder;

import org.springframework.stereotype.Service;

/**

 * @author:抱着鱼睡觉的喵喵

 * @date:2021/3/24

 * @description:

 */

@Service(value = "userDetailService")

@Slf4j

public class MyUserDetailService implements UserDetailsService {

    @Autowired

    private UserMapper userMapper;

    @Autowired

    private PasswordEncoder passwordEncoder;

    @Override

    public UserDetails loadUserByUsername(String username) throws UsernameNotFoundException {

        log.info("用户名:"+username);

        Users user = userMapper.findPasswordByUsername(username);

        if (user == null) {

            throw new UsernameNotFoundException("没有该账户!");

        }

        String password = passwordEncoder.encode(user.getPassword());

        log.info("加密后的密码为:"+password);

        return new User(user.getUsername(),password, AuthorityUtils.commaSeparatedStringToAuthorityList(user.getRole()));

    }

}
2.4.实体类编写
只是简单的模拟,就没必要太复杂。
注意:不要使用User这个名字,security中有这个类,防止冲突。
@Data

public class Users {

    private Integer id;

    private String username;

    private String password;

    private String role;

}
2.5.controller层编写
@RestController

public class HelloController {

    @GetMapping("/test")

    public String hello() {

        return "HELLO";

    }

}
2.6.login.html
<!DOCTYPE html>

<html lang="en">

<head>

    <meta charset="UTF-8">

    <title>Title</title>

</head>

<body>

    <form action="login.html" method="post">

        username: <input type="text" name="username"> <br>

        password: <input type="password" name="password"> <br>

                  <input type="submit" value="提交">

    </form>

</body>

</html>
2.7.编写SecurityConfig文件
至于为什么是这样,后面源码分析时会说
package com.itz.security.controller;

import lombok.NoArgsConstructor;

import org.springframework.beans.factory.annotation.Autowired;

import org.springframework.context.annotation.Bean;

import org.springframework.context.annotation.Configuration;

import org.springframework.security.config.annotation.authentication.builders.AuthenticationManagerBuilder;

import org.springframework.security.config.annotation.web.builders.HttpSecurity;

import org.springframework.security.config.annotation.web.builders.WebSecurity;

import org.springframework.security.config.annotation.web.configuration.WebSecurityConfigurerAdapter;

import org.springframework.security.core.userdetails.UserDetailsService;

import org.springframework.security.crypto.bcrypt.BCryptPasswordEncoder;

import org.springframework.security.crypto.password.NoOpPasswordEncoder;

import org.springframework.security.crypto.password.PasswordEncoder;

/**

 * @author:抱着鱼睡觉的喵喵

 * @date:2021/3/24

 * @description:

 */

@Configuration

public class SecurityConfig extends WebSecurityConfigurerAdapter {

    @Autowired

    private UserDetailsService userDetailsService;

    @Bean

    public PasswordEncoder getPasswordEncoder() {

        return new BCryptPasswordEncoder();

    }

    @Override

    protected void configure(AuthenticationManagerBuilder auth) throws Exception {

        auth.userDetailsService(userDetailsService).passwordEncoder(getPasswordEncoder());

    }

    @Override

    protected void configure(HttpSecurity http) throws Exception {

        http.authorizeRequests()

                .anyRequest().authenticated()

                .and()	//设置默认登录界面

                .formLogin().loginPage("/login.html").permitAll()

                .and()

                .csrf().disable();//关闭csrf(一种web攻击手段)

    }

    @Override

    public void configure(WebSecurity web) throws Exception {

        web.ignoring().antMatchers("/js/**","/css/**","/images/**");

    }

}
2.8.application.yml编写
spring:

  datasource:

    driver-class-name: com.mysql.cj.jdbc.Driver

    password: hao20001010

    username: root

    url: jdbc:mysql://localhost:3306/crud?serverTimezone=UTC

mybatis:

  mapper-locations: /mapper/**

  type-aliases-package: com.itz.security.entity
2.9.数据库表设计
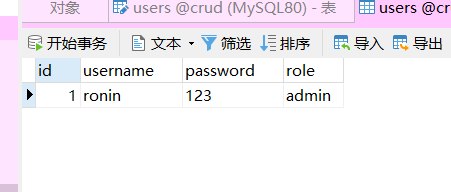
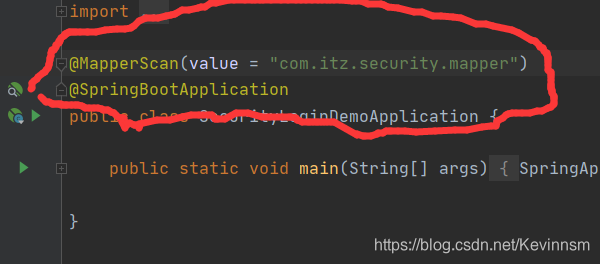
注意扫描mapper接口
三、源码认证流程分析
首先会使用debug调试,最基本的F7和F8以及F9,当然鼠标点击也一样
F7:调试的时候遇到方法体会进入到方法体内部执行
F8:遇到方法体不会进入到方法体内部,只会依次执行
F9:只会执行打断点的地方
3.1. ctrl+N 查看UsernamePasswordAuthenticationFilter类的源码,在attemptAuthentication方法上打上断点,bebug模式下启动
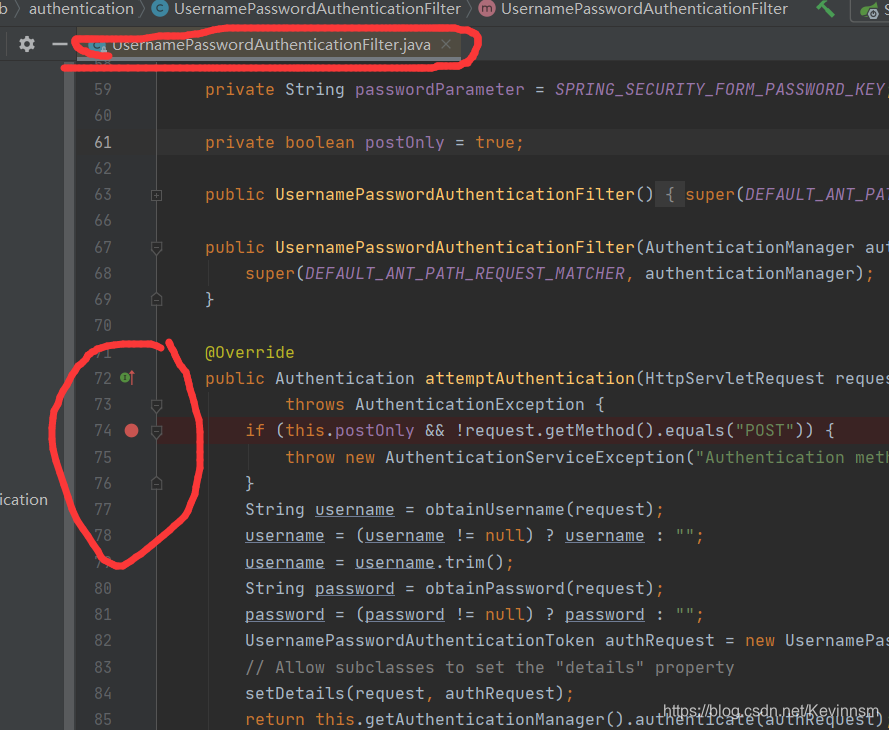
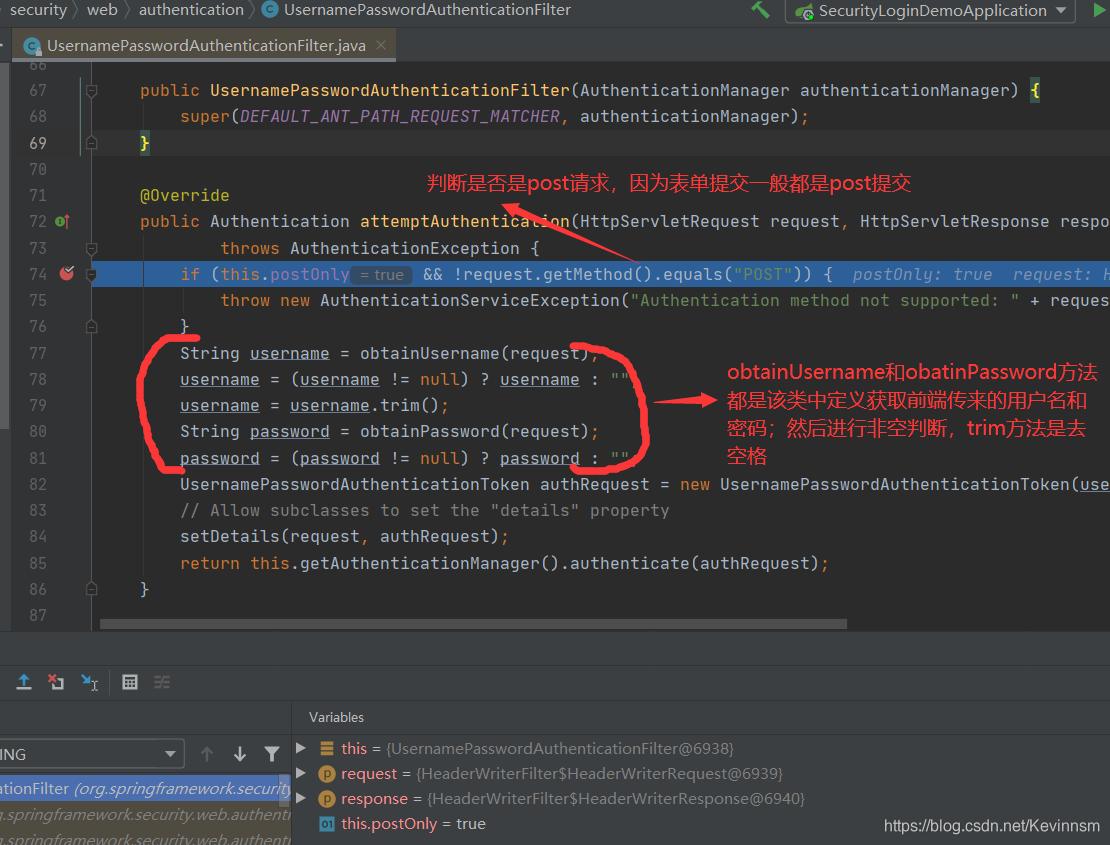
当走到82行,这个令牌类UsernamePasswordAuthenticationToken
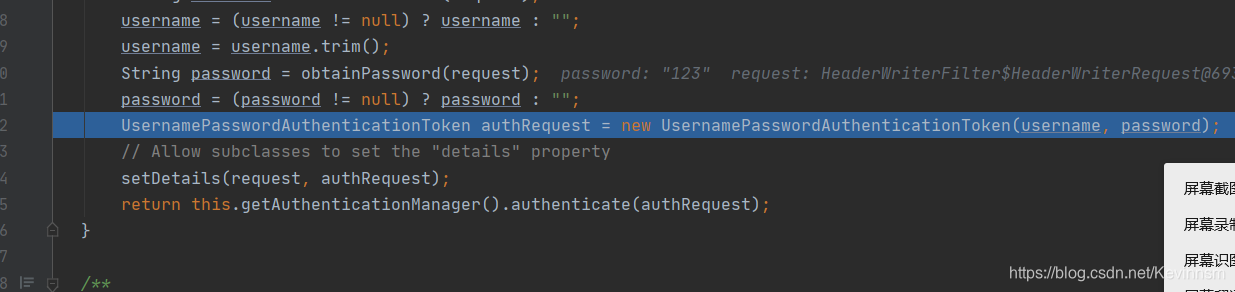
点击F7 debug进入该类中查看执行情况
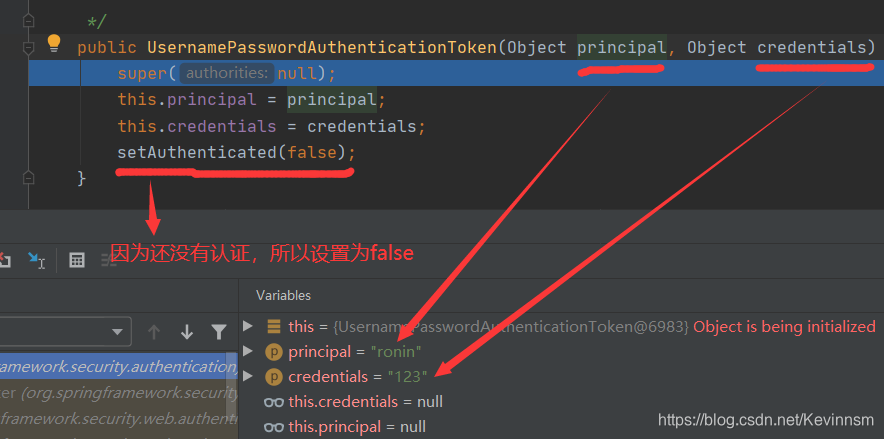
你可以把这个令牌类UsernamePasswordAuthenticationToken当作一个实体类,用来将前端传来的变量赋值给本地变量;简单了说就是将其封装
继续F8之后,就会返回到UsernamePasswordAuthenticationFilter类中
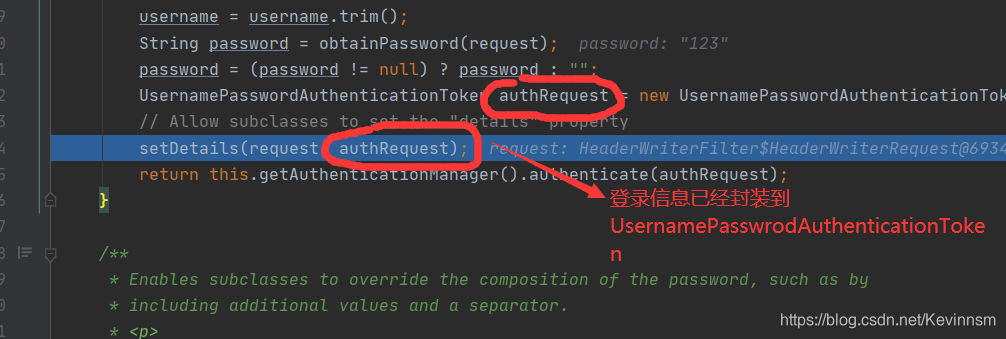
点击F7,进入查看setDetails方法的源码
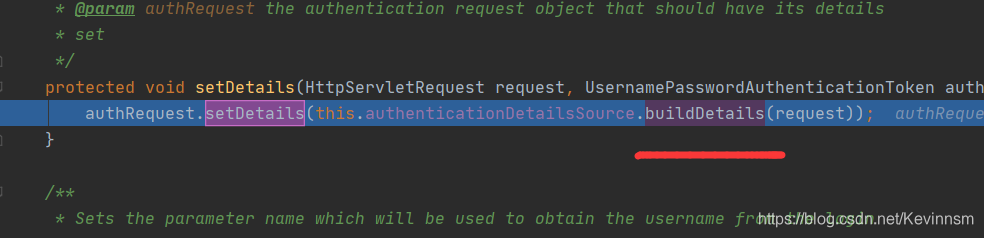
击F7查看buildDetails方法
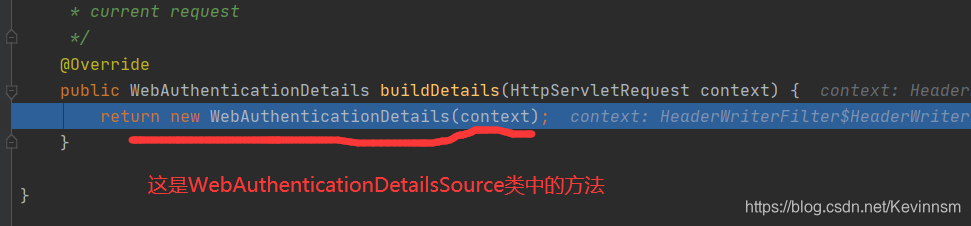
击F7查看WebAuthenticationDetails类的具体细节
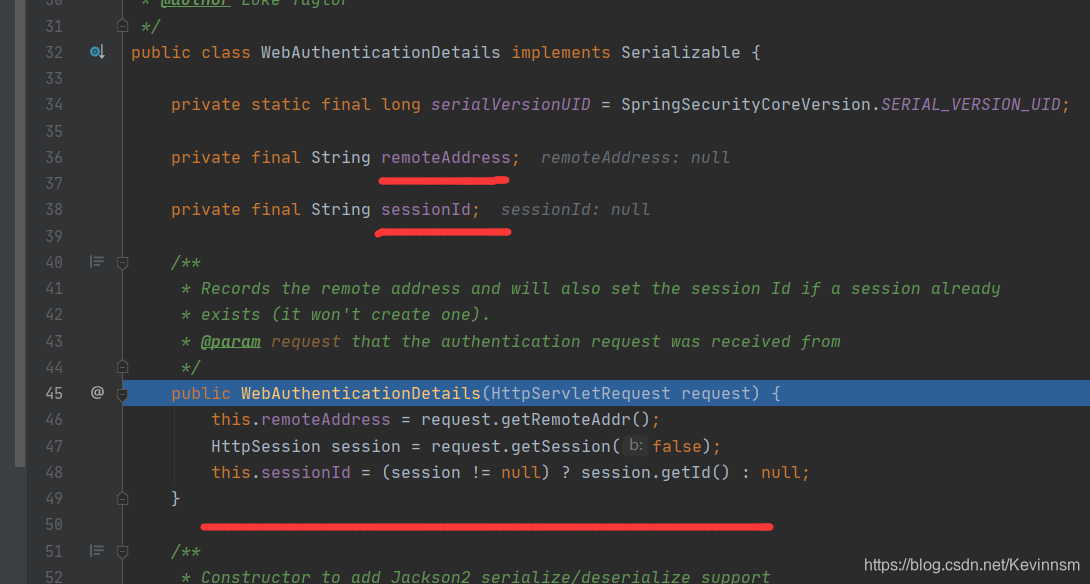
原来这个setDetails方法主要是为了将请求中的额外信息保存起来。
下面要进入AbstractUserDetailsAuthenticationProvider类了
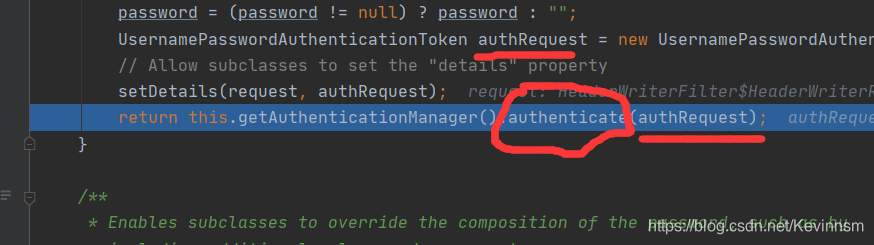
点击F7查看authenticate方法的具体实现细节
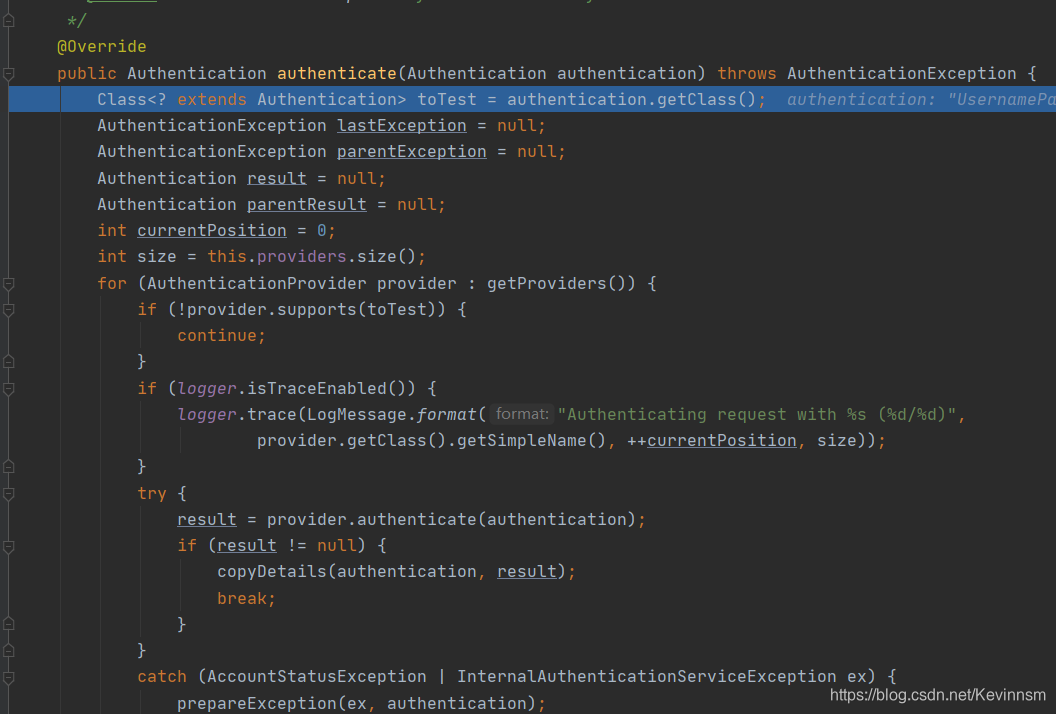
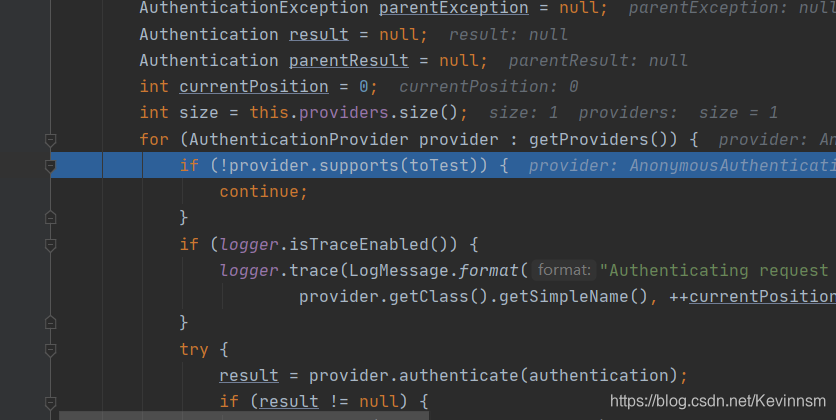
通过AuthenticationProvicer接口的实现类获取用户的登录方式,然后通过for循环,查看是否支持该登录方式;(一般的登录方式有vx,qq,表单等)
如果不支持支持该登录方式你会发现
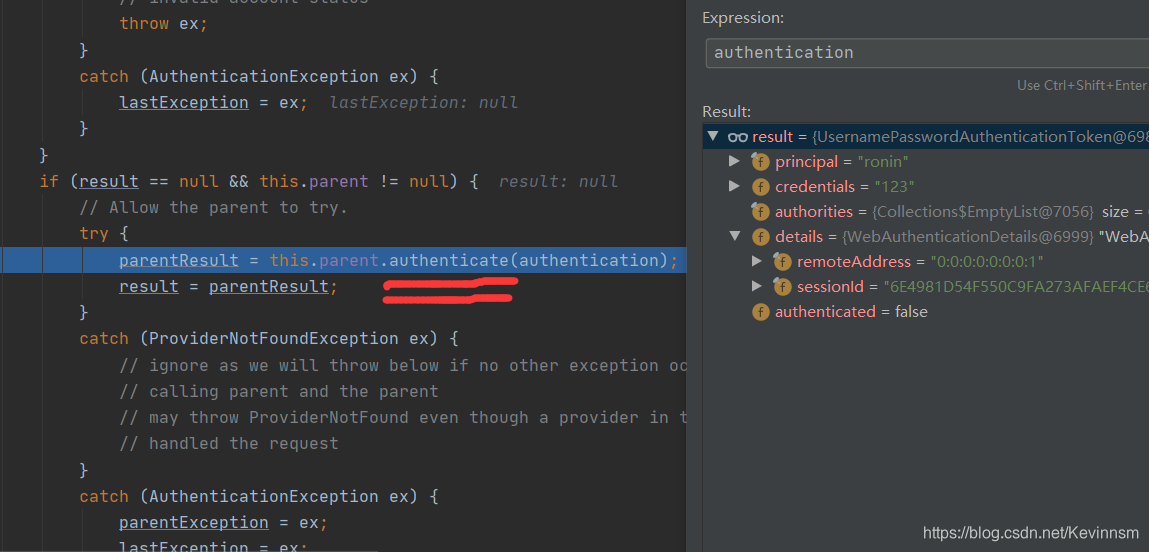
parentResult = this.parent.authenticate(authentication);
从表面意思我们也可以猜到,调用父级提供Provider,重新执行该authenticate方法,看是否支持该登录方式
当支持该登录方式之后,
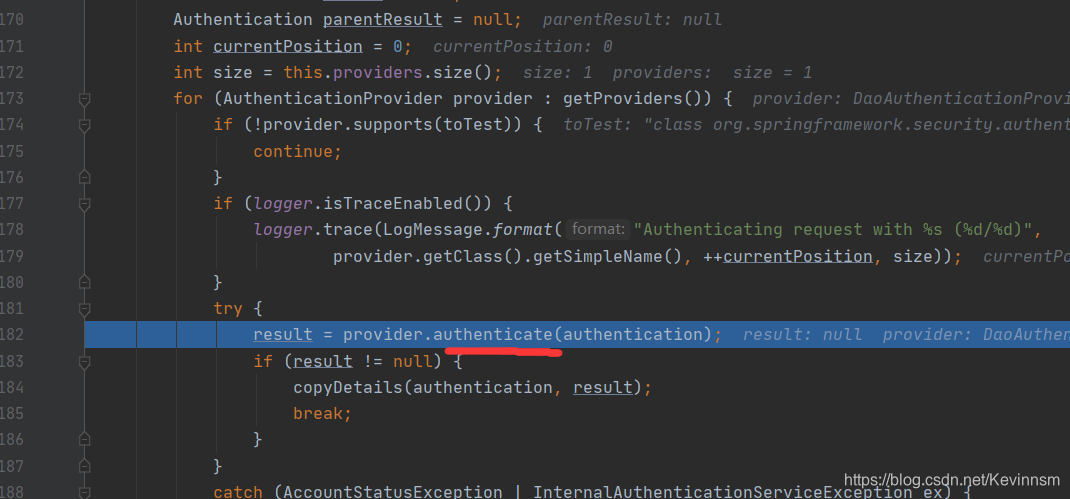
然后父类会调用authenticate对用户的身份进行认证(也就是那个支持登录方式的父类)
F7查看具体的认证细节
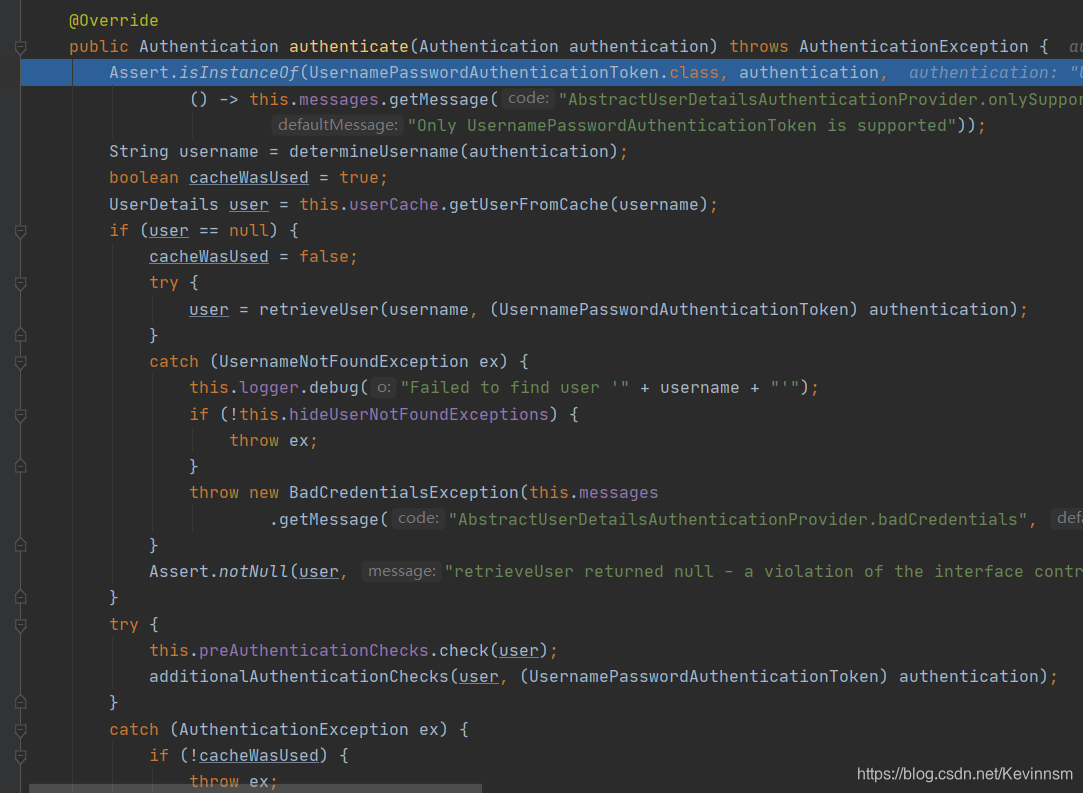
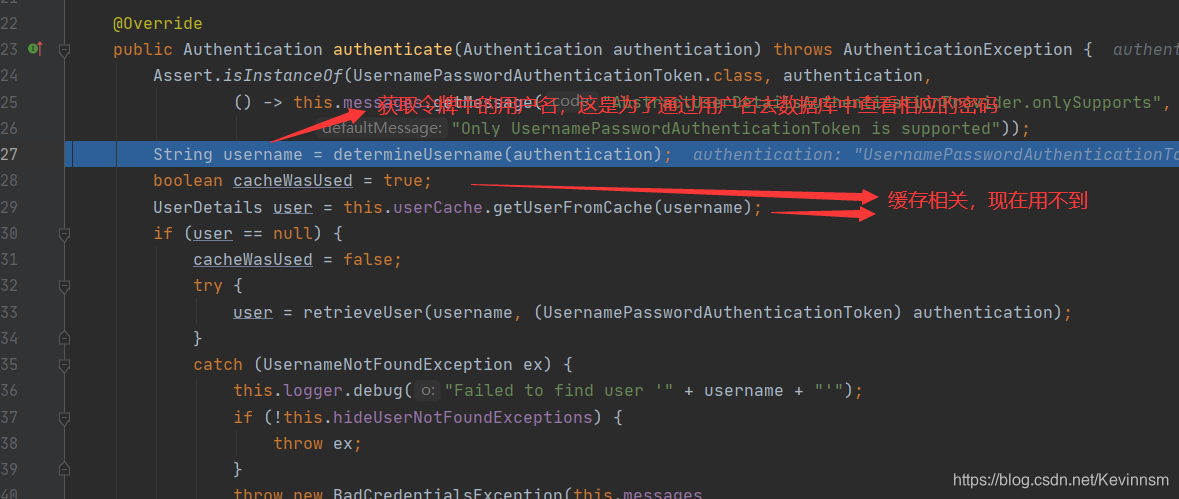
重点来了
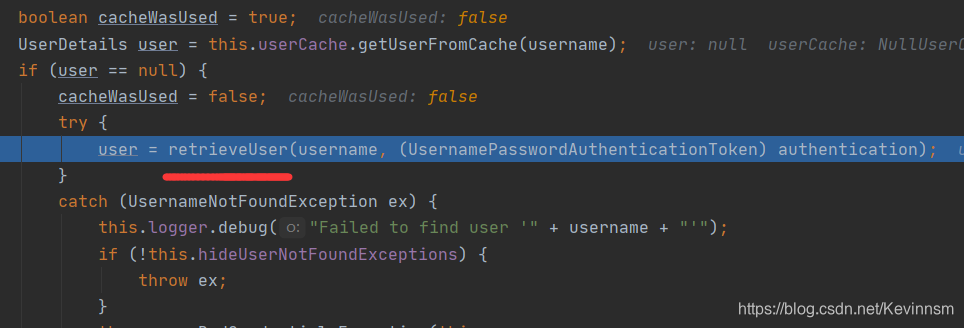
user = retrieveUser(username, (UsernamePasswordAuthenticationToken) authentication);
retrieveUser是AbstractUserDetailsAuthenticationProvider抽象类的继承类DaoAuthenticationProvider类中的方法
作用是从数据库或者缓存中获取用户信息
F7查看源码
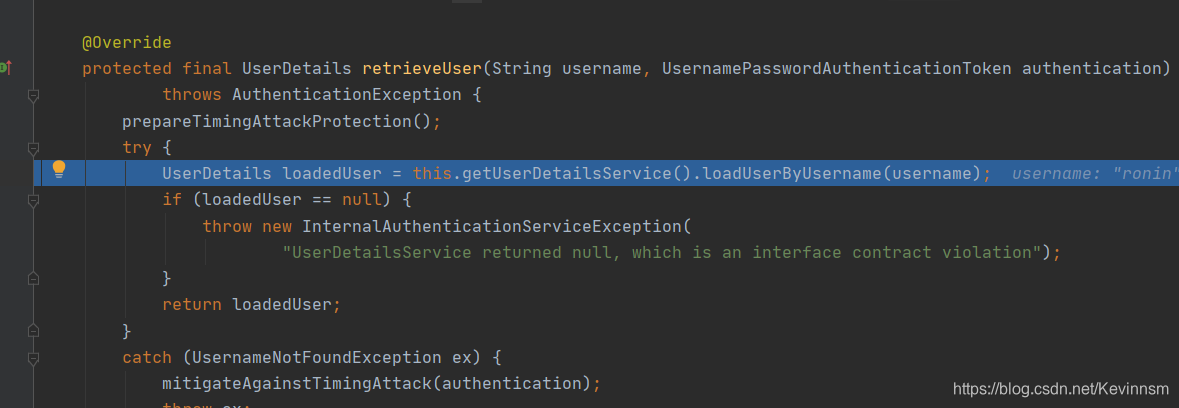
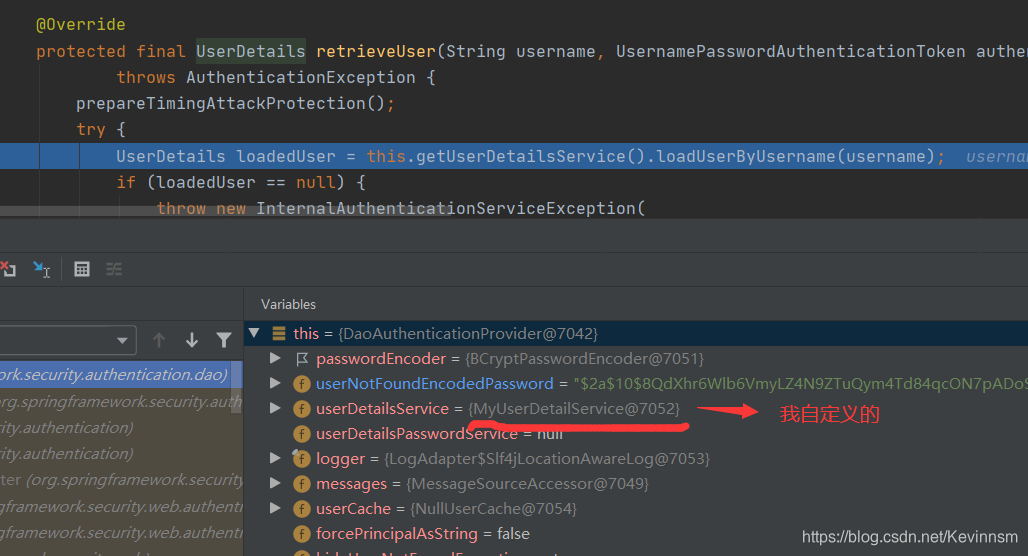
UserDetails loadedUser = this.getUserDetailsService().loadUserByUsername(username);
可以发现它加载了我自定义的MyUserDetailService类,为什么呢?当然是因为我实现了UserDetailService接口,接下来的debug到哪个类你也因该明白了(多态)
没错就是我自定义的MyUserDetailService类
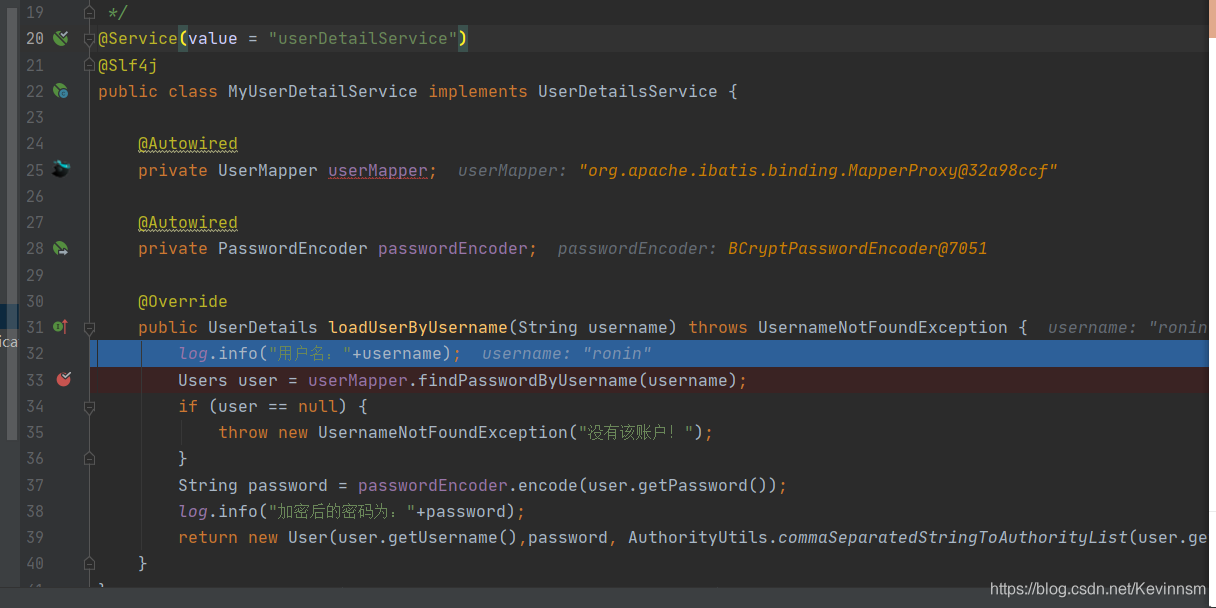
还是自己写的代码香哈
在39行F7进入查看源码,然后一直F8返回到上一级的调用处
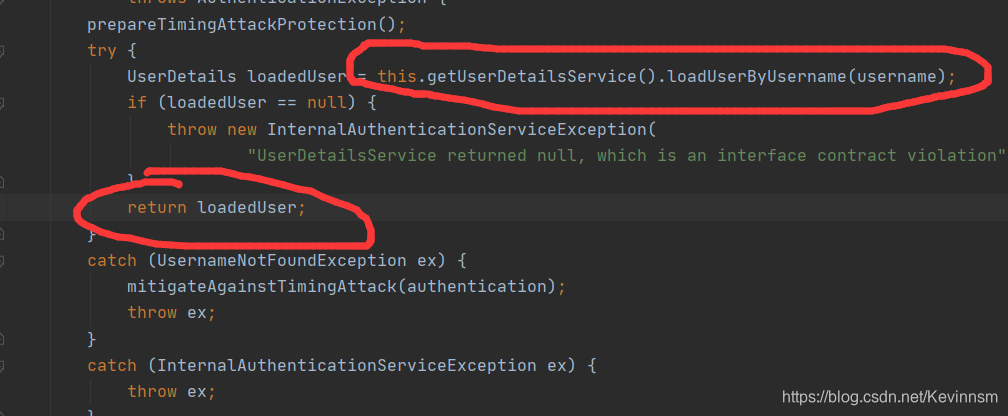
return loadedUser执行之后就会返回到AbstractUserDetailsAuthenticationProvider类中的authenticate方法中
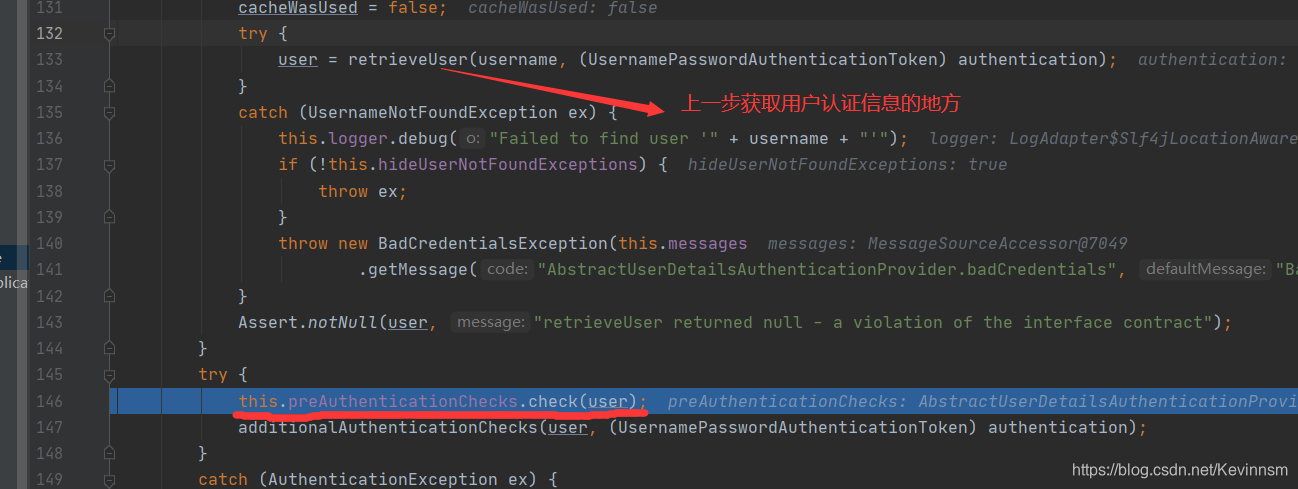
this.preAuthenticationChecks.check(user);
这个方法主要是对用户状态进行检测,看是否可用,过期,锁定等
下面是它的方法
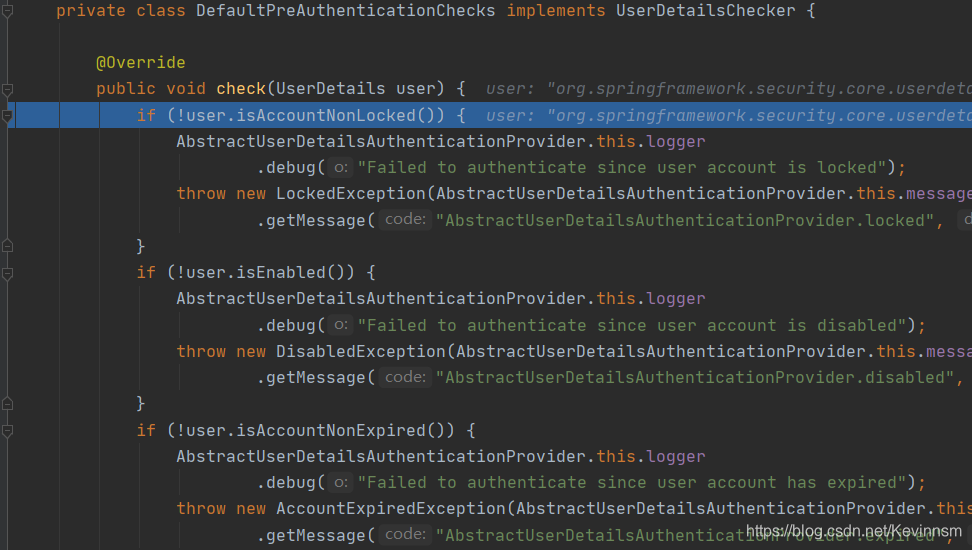
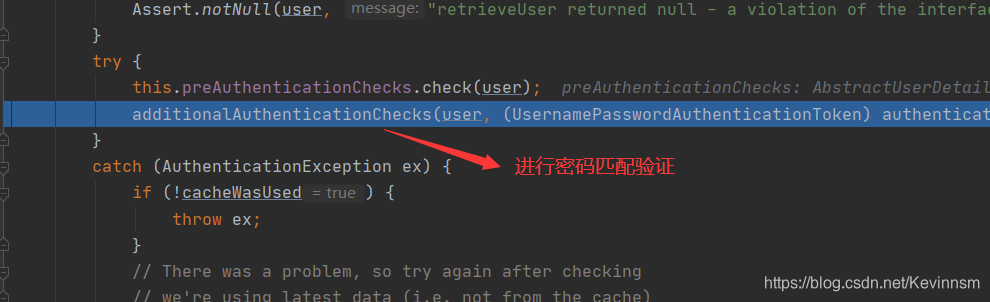
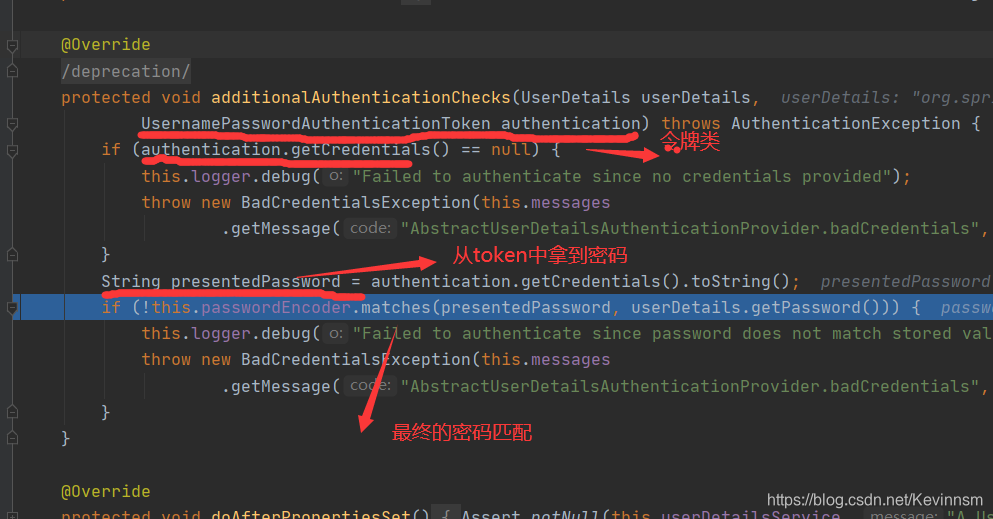
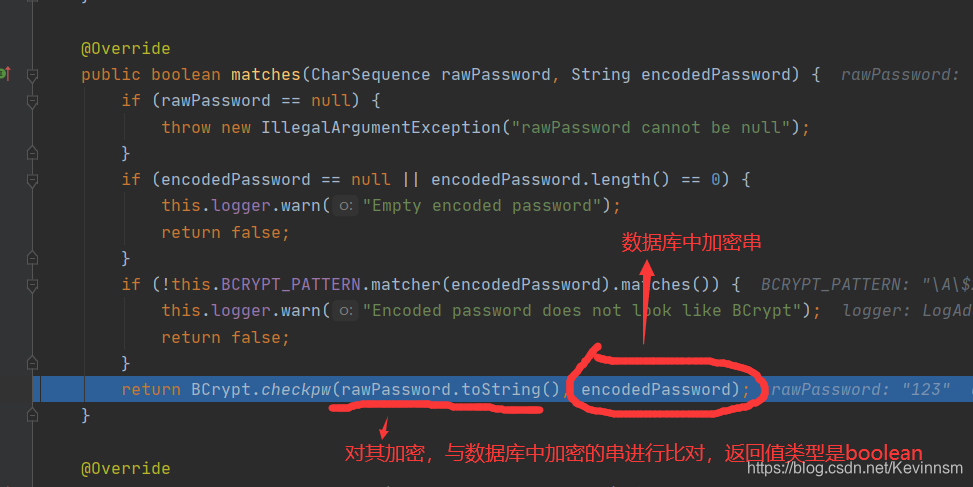
matches方法具体源码如下,其中BCrypt.checkpw中的方法不再展示,主要是干嘛的,下面已说明
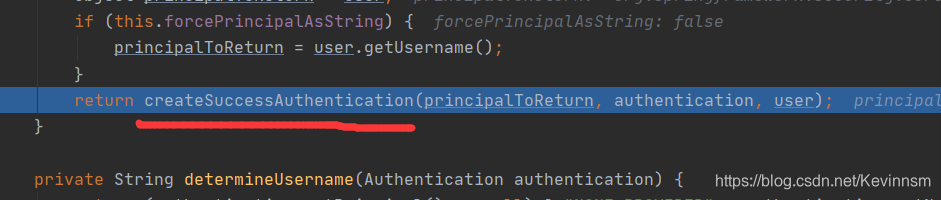
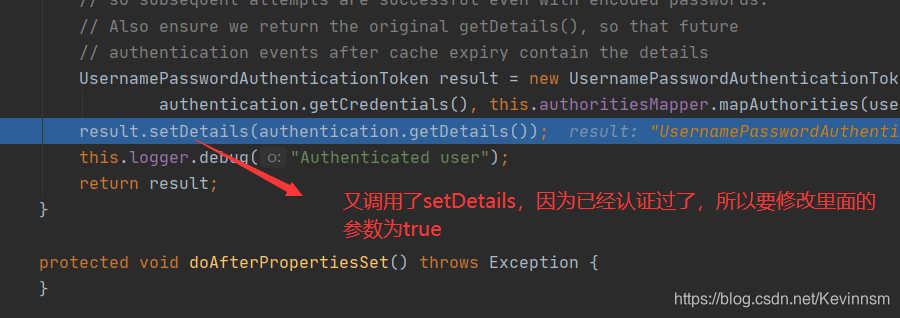
放行
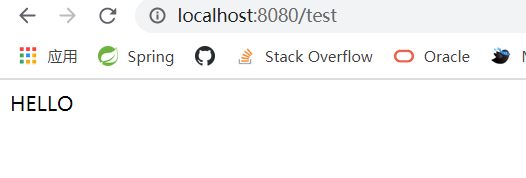
自此认证流程就分析结束了
总结认证流程
1.首先进入到UsernamePasswordAuthenticationFilter类中的attemptAuthentication方法
1.1.将用户登录信息封装到UsernamePasswordToken令牌中
1.2.setDetails将请求中额外的信息封装到WebAuthenticaitonDetails
1.3.调用AuthenticationManager接口的实现类ProviderManager中的authenticate方法
2.在ProviderManager类中的authenticate进行执行
2.1.匹配支持的登录方式
2.2.匹配成功后,进入到AuthenticationProvider接口的实现类AbstractUserDetailsAuthenticationProvider中的authenticate方法
2.3.在authenticate方法中,获取用户认证信息,然后进行校验是否过期,最后进行密码的匹配
简单了说就上面两点,但是细节还是有很多的
希望有服务端大佬指点迷津
手把手带你撸一把springsecurity框架源码中的认证流程的更多相关文章
- nodejs的Express框架源码分析、工作流程分析
nodejs的Express框架源码分析.工作流程分析 1.Express的编写流程 2.Express关键api的使用及其作用分析 app.use(middleware); connect pack ...
- ABP框架源码中的Linq扩展方法
文件目录:aspnetboilerplate-dev\aspnetboilerplate-dev\src\Abp\Collections\Extensions\EnumerableExtensions ...
- java源码中的注解
spring框架源码中充满了注解,如果对注解不是很了解,阅读源码就寸步难行,下面我们来看看annotation.https://blog.csdn.net/briblue/article/detail ...
- YII框架源码分析(百度PHP大牛创作-原版-无广告无水印)
YII 框架源码分析 百度联盟事业部——黄银锋 目 录 1. 引言 3 1.1.Yii 简介 3 1.2.本文内容与结构 3 2.组件化与模块化 4 2.1.框架加载和运行流程 4 ...
- iOS学习——布局利器Masonry框架源码深度剖析
iOS开发过程中很大一部分内容就是界面布局和跳转,iOS的布局方式也经历了 显式坐标定位方式 --> autoresizingMask --> iOS 6.0推出的自动布局(Auto La ...
- 【安卓网络请求开源框架Volley源码解析系列】定制自己的Request请求及Volley框架源码剖析
通过前面的学习我们已经掌握了Volley的基本用法,没看过的建议大家先去阅读我的博文[安卓网络请求开源框架Volley源码解析系列]初识Volley及其基本用法.如StringRequest用来请求一 ...
- Gin框架源码解析
Gin框架源码解析 Gin框架是golang的一个常用的web框架,最近一个项目中需要使用到它,所以对这个框架进行了学习.gin包非常短小精悍,不过主要包含的路由,中间件,日志都有了.我们可以追着代码 ...
- Android开源框架源码分析:Okhttp
一 请求与响应流程 1.1 请求的封装 1.2 请求的发送 1.3 请求的调度 二 拦截器 2.1 RetryAndFollowUpInterceptor 2.2 BridgeInterceptor ...
- [集合]Collection集合框架源码分析
Collection接口 在java的集合类库中,基本接口是Collection,该接口的在集合中的源码定义如下(将源码中的注释删掉了): public interface Collection< ...
随机推荐
- 一比一还原axios源码(八)—— 其他功能
到此,我们完成了axios的绝大部分的功能,接下来我们来补全一下其他的小功能. 一.withCredentials 这个参数可以可以表明是否是一个跨域的请求.那这个的使用场景是啥呢?就是我们在同域的 ...
- python关于openpyxl库的常用使用介绍
from openpyxl import load_workbook #只能加载已存在的表格 wb=load_workbook("D:\zhijing_work\测试数据\测试文件\yeta ...
- C 如何将输出的地址转化为十进制数
•需求 这两天在看内存对齐的相关问题,因此产生了一个,如何将地址转换为十进制数? 对于如下程序: void func() { int a = 10; printf("a 的地址为:%p\n& ...
- 使用阿里云镜像站NTP服务搭建NTP服务器(基于CentOS 7系统)
镜像下载.域名解析.时间同步请点击 阿里云开源镜像站 一.NTP服务器介绍 网络时间协议(Network Time Protocol,NTP)服务器,也就是日常所说的NTP服务器,用来提供同步时间服务 ...
- HashMap集合类 5种最佳遍历方式
1. 使用 Iterator 遍历 HashMap EntrySet 2. 使用 Iterator 遍历 HashMap KeySet 3. 使用 For-each 循环迭代 HashMap 4. 使 ...
- uoj310【UNR #2】黎明前的巧克力(FWT)
uoj310[UNR #2]黎明前的巧克力(FWT) uoj 题解时间 对非零项极少的FWT的优化. 首先有个十分好想的DP: $ f[i][j] $ 表示考虑了前 $ i $ 个且异或和为 $ j ...
- mysql 客户无感知迁移_亿级账户数据迁移,不用数据库工具还能怎么搞?
原标题:亿级账户数据迁移,不用数据库工具还能怎么搞? 背景 在阿里巴巴内部"大中台,小前台"的组织和业务体制,使前线业务更加敏捷,赋能业务积极迎接未来挑战和机遇,在阿里大中台能力建 ...
- BASH和DOS之间的基本区别是什么?
BASH和DOS控制台之间的主要区别在于3个方面:1. BASH命令区分大小写,而DOS命令则不区分;2. 在BASH下,/ character是目录分隔符,\作为转义字符.在DOS下,/用作命令参数 ...
- switch语句能否作用在byte上,能否作用在long上,能否作用在String上?
在Java 7以前,在switch(expr1)中,expr1只能是一个整数表达式(但不包括long和Long)或者枚举常量,整数表达式可以是int基本类型或Integer包装类型,byte.shor ...
- Java 中如何实现序列化,有什么意义?
序列化就是一种用来处理对象流的机制,所谓对象流也就是将对象的内容进行流 化.可以对流化后的对象进行读写操作,也可将流化后的对象传输于网络之间. 序列化是为了解决对象流读写操作时可能引发的问题(如果不进 ...