
深度学习中的Data Augmentation方法(转)基于keras
在深度学习中,当数据量不够大时候,常常采用下面4中方法:
2. Regularization. 数据量比较小会导致模型过拟合, 使得训练误差很小而测试误差特别大. 通过在Loss Function 后面加上正则项可以抑制过拟合的产生. 缺点是引入了一个需要手动调整的hyper-parameter. 详见 https://www.wikiwand.com/en/Regularization_(mathematics)
3. Dropout. 这也是一种正则化手段. 不过跟以上不同的是它通过随机将部分神经元的输出置零来实现. 详见 http://www.cs.toronto.edu/~hinton/absps/JMLRdropout.pdf
4. Unsupervised Pre-training. 用Auto-Encoder或者RBM的卷积形式一层一层地做无监督预训练, 最后加上分类层做有监督的Fine-Tuning. 参考 http://citeseerx.ist.psu.edu/viewdoc/download?doi=10.1.1.207.1102&rep=rep1&type=pdf
不同的任务背景下, 我们可以通过图像的几何变换, 使用以下一种或多种组合数据增强变换来增加输入数据的量. 这里具体的方法都来自数字图像处理的内容, 相关的知识点介绍, 网上都有, 就不一一介绍了.
- 旋转 | 反射变换(Rotation/reflection): 随机旋转图像一定角度; 改变图像内容的朝向;
- 翻转变换(flip): 沿着水平或者垂直方向翻转图像;
- 缩放变换(zoom): 按照一定的比例放大或者缩小图像;
- 平移变换(shift): 在图像平面上对图像以一定方式进行平移;
可以采用随机或人为定义的方式指定平移范围和平移步长, 沿水平或竖直方向进行平移. 改变图像内容的位置; - 尺度变换(scale): 对图像按照指定的尺度因子, 进行放大或缩小; 或者参照SIFT特征提取思想, 利用指定的尺度因子对图像滤波构造尺度空间. 改变图像内容的大小或模糊程度;
- 对比度变换(contrast): 在图像的HSV颜色空间,改变饱和度S和V亮度分量,保持色调H不变. 对每个像素的S和V分量进行指数运算(指数因子在0.25到4之间), 增加光照变化;
- 噪声扰动(noise): 对图像的每个像素RGB进行随机扰动, 常用的噪声模式是椒盐噪声和高斯噪声;
- 颜色变换(color): 在训练集像素值的RGB颜色空间进行PCA, 得到RGB空间的3个主方向向量,3个特征值, p1, p2, p3, λ1, λ2, λ3. 对每幅图像的每个像素Ixy=[IRxy,IGxy,IBxy]T进行加上如下的变化:
[p1,p2,p3][α1λ1,α2λ2,α3λ3]T
其中:αi是满足均值为0,方差为0.1的随机变量.
代码实现
作为实现部分, 这里介绍一下在python 环境下, 利用已有的开源代码库Keras作为实践:
 # -*- coding: utf-8 -*-

 __author__ = 'Administrator'

 # import packages

 from keras.preprocessing.image import ImageDataGenerator, array_to_img, img_to_array, load_img

 datagen = ImageDataGenerator(

         rotation_range=0.2,

         width_shift_range=0.2,

         height_shift_range=0.2,

         shear_range=0.2,

         zoom_range=0.2,

         horizontal_flip=True,

         fill_mode='nearest')

 img = load_img('C:\Users\Administrator\Desktop\dataA\lena.jpg')  # this is a PIL image, please replace to your own file path

 x = img_to_array(img)  # this is a Numpy array with shape (3, 150, 150)

 x = x.reshape((1,) + x.shape)  # this is a Numpy array with shape (1, 3, 150, 150)

 # the .flow() command below generates batches of randomly transformed images

 # and saves the results to the `preview/` directory

 i = 0

 for batch in datagen.flow(x,

                           batch_size=1,

                           save_to_dir='C:\Users\Administrator\Desktop\dataA\pre',#生成后的图像保存路径

                           save_prefix='lena',

                           save_format='jpg'):

     i += 1

     if i > 20: #这个20指出要扩增多少个数据

         break  # otherwise the generator would loop indefinitely
主要函数:ImageDataGenerator 实现了大多数上文中提到的图像几何变换方法.
- rotation_range: 旋转范围, 随机旋转(0-180)度;
- width_shift and height_shift: 随机沿着水平或者垂直方向,以图像的长宽小部分百分比为变化范围进行平移;
- rescale: 对图像按照指定的尺度因子, 进行放大或缩小, 设置值在0 - 1之间,通常为1 / 255;
- shear_range: 水平或垂直投影变换, 参考这里 https://keras.io/preprocessing/image/
- zoom_range: 按比例随机缩放图像尺寸;
- horizontal_flip: 水平翻转图像;
- fill_mode: 填充像素, 出现在旋转或平移之后.
效果如下图所示:

转载于:http://blog.csdn.net/mduanfire/article/details/51674098
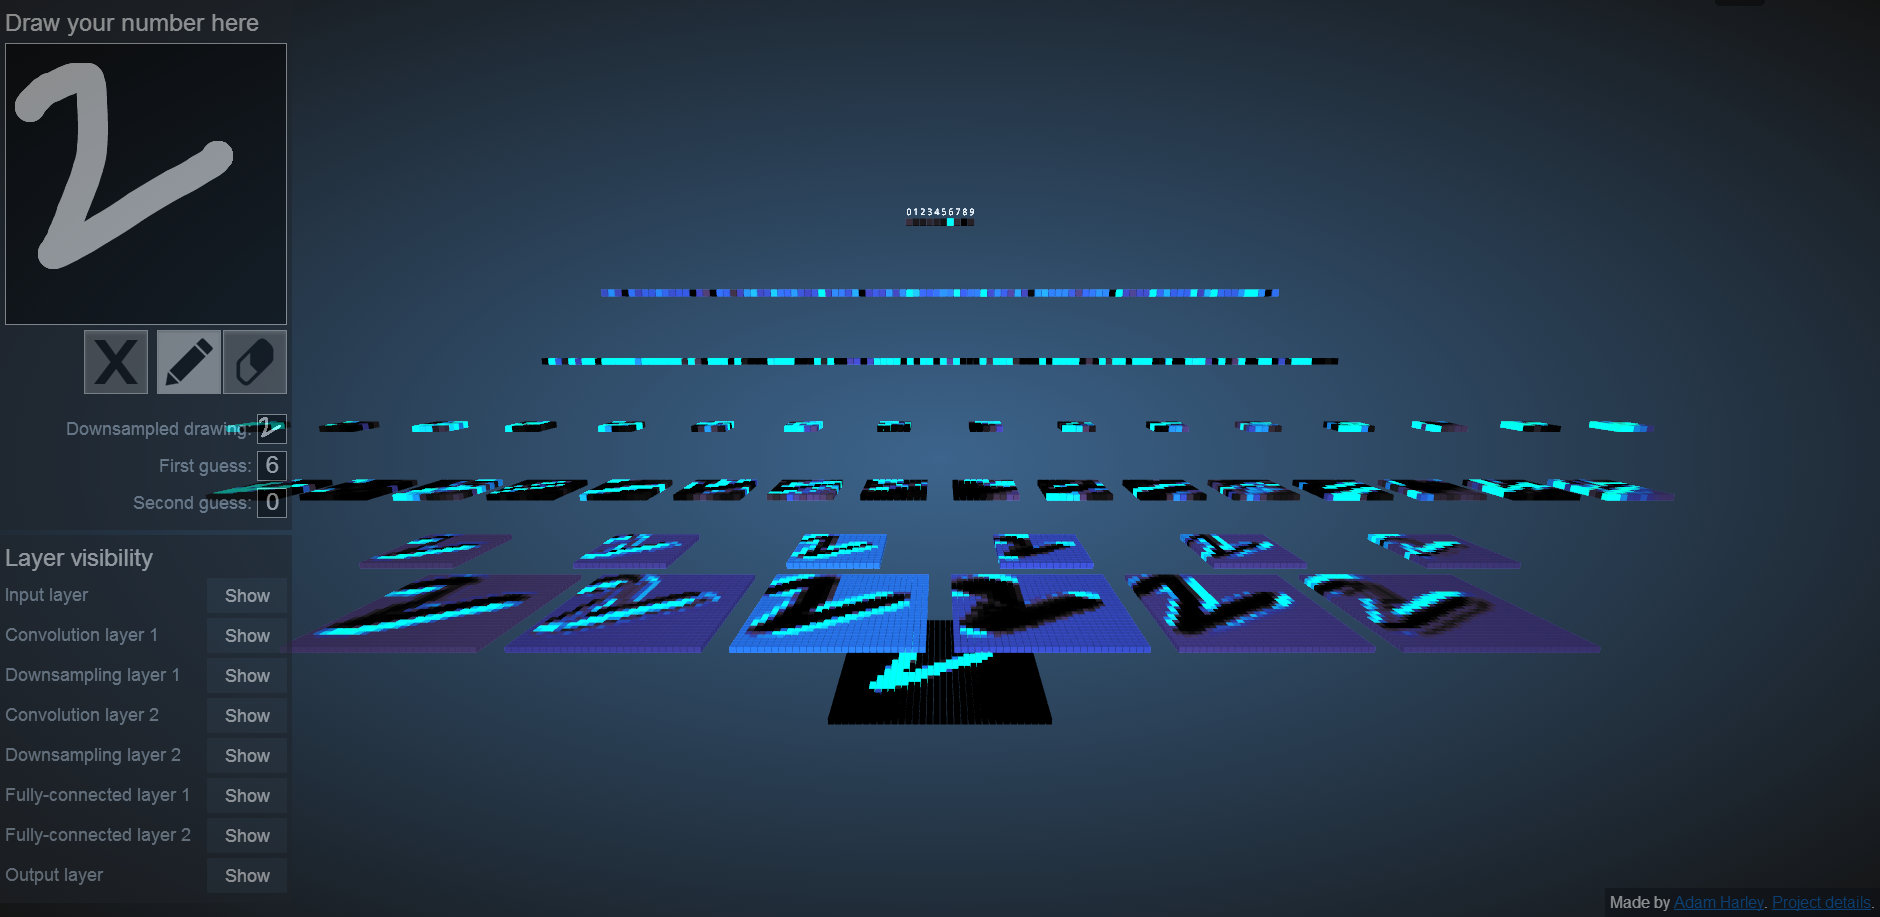
为什么要做变形,或者说数据增强。从这个网站可以看出 http://scs.ryerson.ca/~aharley/vis/conv/ 手写字符稍微变形点,就有可能识别出错,因此数据增强可以生成一些变形的数据,让网络提前适应
 # -*- coding: utf-8 -*-

 __author__ = 'Administrator'

 # import packages

 from keras.preprocessing.image import ImageDataGenerator, array_to_img, img_to_array, load_img

 datagen = ImageDataGenerator(

         rotation_range=0.2,

         width_shift_range=0.2,

         height_shift_range=0.2,

         shear_range=0.2,

         zoom_range=0.2,

         horizontal_flip=True,

         fill_mode='nearest')

 for k in range(33):

     numstr = "{0:d}".format(k);

     filename='C:\\Users\\Administrator\\Desktop\\bad\\'+numstr+'.jpg';

     ufilename = unicode(filename , "utf8")

     img = load_img(ufilename)  # this is a PIL image, please replace to your own file path

     x = img_to_array(img)  # this is a Numpy array with shape (3, 150, 150)

     x = x.reshape((1,) + x.shape)  # this is a Numpy array with shape (1, 3, 150, 150)

     # the .flow() command below generates batches of randomly transformed images

     # and saves the results to the `preview/` directory

     i = 0

     for batch in datagen.flow(x,

                               batch_size=1,

                               save_to_dir='C:\\Users\\Administrator\\Desktop\\dataA\\',#生成后的图像保存路径

                               save_prefix=numstr,

                               save_format='jpg'):

         i += 1

         if i > 20:

             break  # otherwise the generator would loop indefinitely

 end
 # -*- coding: utf- -*-

 __author__ = 'Administrator'

 # import packages

 from keras.preprocessing.image import ImageDataGenerator, array_to_img, img_to_array, load_img

 datagen = ImageDataGenerator(

         rotation_range=,

         width_shift_range=0.2,

         height_shift_range=0.2,

         rescale=./,

         shear_range=0.2,

         zoom_range=0.2,

         horizontal_flip=True,

         fill_mode='nearest')

 import os

 import sys

 reload(sys)

 sys.setdefaultencoding('utf8')

 ufilename = unicode("C:\\Users\\Administrator\\Desktop\\测试" , "utf8")

 for filename in os.listdir(ufilename):              #listdir的参数是文件夹的路径

     print ( filename)                                  #此时的filename是文件夹中文件的名称

     pathname='C:\\Users\\Administrator\\Desktop\\测试\\'+filename;

     #ufilename = unicode(pathname , "utf8")

     img = load_img(pathname)  # this is a PIL image, please replace to your own file path

     x = img_to_array(img)  # this is a Numpy array with shape (, , )

     x = x.reshape((,) + x.shape)  # this is a Numpy array with shape (, , , )

     # the .flow() command below generates batches of randomly transformed images

     # and saves the results to the `preview/` directory

     i =

     for batch in datagen.flow(x,

                               batch_size=,

                               save_to_dir='C:\\Users\\Administrator\\Desktop\\result\\',#生成后的图像保存路径

                               save_prefix=filename,

                               save_format='jpg'):

         i +=

         if i > :

             break  # otherwise the generator would loop indefinitely

 # datagen = ImageDataGenerator(

 #         rotation_range=0.2,

 #         width_shift_range=0.2,

 #         height_shift_range=0.2,

 #         rescale=./,

 #         shear_range=0.1,

 #         zoom_range=0.4,

 #         horizontal_flip=True,

 #         fill_mode='nearest')

 #

 # ufilename = unicode("C:\\Users\\Administrator\\Desktop\\训练" , "utf8")

 # for filename in os.listdir(ufilename):              #listdir的参数是文件夹的路径

 #     print ( filename)                                  #此时的filename是文件夹中文件的名称

 #     pathname='C:\\Users\\Administrator\\Desktop\\训练\\'+filename;

 #    # ufilename = unicode(pathname , "utf8")

 #     img = load_img(pathname)  # this is a PIL image, please replace to your own file path

 #     x = img_to_array(img)  # this is a Numpy array with shape (, , )

 #     x = x.reshape((,) + x.shape)  # this is a Numpy array with shape (, , , )

 #

 #     # the .flow() command below generates batches of randomly transformed images

 #     # and saves the results to the `preview/` directory

 #

 #     i =

 #

 #     for batch in datagen.flow(x,

 #                               batch_size=,

 #                               save_to_dir='C:\\Users\\Administrator\\Desktop\\result\\',#生成后的图像保存路径

 #                               save_prefix=filename,

 #                               save_format='jpg'):

 #         i +=

 #         if i > :

 #             break  # otherwise the generator would loop indefinitely
https://github.com/mdbloice/Augmentor
深度学习中的Data Augmentation方法(转)基于keras的更多相关文章
- 深度学习中数据的augmentation
为了提高模型的泛化能力,同时也为了增大数据集,我们往往需要对数据进行augmentation,在这篇博客中,将总结一下可以对数据进行的augmentation. 1.颜色数据增强,对图像亮度.饱和度. ...
- 深度学习中dropout策略的理解
现在有空整理一下关于深度学习中怎么加入dropout方法来防止测试过程的过拟合现象. 首先了解一下dropout的实现原理: 这些理论的解释在百度上有很多.... 这里重点记录一下怎么实现这一技术 参 ...
- 深度学习中Dropout原理解析
1. Dropout简介 1.1 Dropout出现的原因 在机器学习的模型中,如果模型的参数太多,而训练样本又太少,训练出来的模型很容易产生过拟合的现象. 在训练神经网络的时候经常会遇到过拟合的问题 ...
- Hebye 深度学习中Dropout原理解析
1. Dropout简介 1.1 Dropout出现的原因 在机器学习的模型中,如果模型的参数太多,而训练样本又太少,训练出来的模型很容易产生过拟合的现象. 在训练神经网络的时候经常会遇到过拟合的问题 ...
- 深度学习中正则化技术概述(附Python代码)
欢迎大家关注我们的网站和系列教程:http://www.tensorflownews.com/,学习更多的机器学习.深度学习的知识! 磐石 介绍 数据科学研究者们最常遇见的问题之一就是怎样避免过拟合. ...
- zz详解深度学习中的Normalization,BN/LN/WN
详解深度学习中的Normalization,BN/LN/WN 讲得是相当之透彻清晰了 深度神经网络模型训练之难众所周知,其中一个重要的现象就是 Internal Covariate Shift. Ba ...
- 深度学习中交叉熵和KL散度和最大似然估计之间的关系
机器学习的面试题中经常会被问到交叉熵(cross entropy)和最大似然估计(MLE)或者KL散度有什么关系,查了一些资料发现优化这3个东西其实是等价的. 熵和交叉熵 提到交叉熵就需要了解下信息论 ...
- 卷积在深度学习中的作用(转自http://timdettmers.com/2015/03/26/convolution-deep-learning/)
卷积可能是现在深入学习中最重要的概念.卷积网络和卷积网络将深度学习推向了几乎所有机器学习任务的最前沿.但是,卷积如此强大呢?它是如何工作的?在这篇博客文章中,我将解释卷积并将其与其他概念联系起来,以帮 ...
- 深度学习中 --- 解决过拟合问题(dropout, batchnormalization)
过拟合,在Tom M.Mitchell的<Machine Learning>中是如何定义的:给定一个假设空间H,一个假设h属于H,如果存在其他的假设h’属于H,使得在训练样例上h的错误率比 ...
随机推荐
- 弹层,iframe页面
前台页面: <img src="chb/老玩家 好礼送.jpg" border="0" width="202" height=&quo ...
- phpmyadmin Wrong permissions on configuration file, should not be world writable!
巴拉巴拉,实际场景是这样,因为有需要,所以想用django 做个rest服务给其他平台提供服务,发现以前正常的页面都无法运行,奇怪发现有一个页面提示连接不上mysql 难道mysql挂了,打开phpm ...
- 作业八—Alpha阶段项目总结
一.项目的预期目标: 我们的图书管理系统之前的目标是做出可以让读者和管理员采用不同的搜索方式,并且时要做到读者和管理者两种不同的方式的!但是我们目前做到了部分搜索方式和管理员界面,主要原因是该项目如果 ...
- gtest 1.7编译错误:std:tr1:tuple模板参数过多的解决方案
在gtest/gtest.h文件中添加如下代码 #define _VARIADIC_MAX 10
- FusionCharts简单教程(三)-----FusionCharts的基本属性
通过前面两章的讲解我们可以制作出简单的图像,但是有时候我们需要对图像进行一个精确的规划,比如设置背景颜色.设置提示信息.设置间隔颜色等等,这时就需要我们对FusionCharts的细节有比 ...
- java算法(二)
四.最小公倍数最大公约数问题: 分析:两个数的最小公倍数等于两个数相乘再除以他们的最大公约数,因此只要求出最大公约数就可以啦. package JingDian; public class yuebe ...
- js模版引擎handlebars.js实用教程——if-判断的基本用法
返回目录 <!DOCTYPE html> <html> <head> <META http-equiv=Content-Type content=" ...
- asp.net web api CORS
using System; using System.Web.Http.Filters; public class AllowCrossSiteJsonAttribute : ActionFilter ...
- Linux初学 - 文件夹及文件操作
创建文件夹 mkdir 移动文件夹 mv dir1 dir2 复制文件夹 cp 删除文件夹 rm 创建文件 touch 编辑文件内容 vi /vim 查看文件内容 cat 追加文件内容 echo 复制 ...
- 防止SQL注入的,网站安全的一些常用解决方案
--------------------------------------------------------过滤URL中的一些特殊字符,动态SQL语句使用PrepareStatement.. -- ...