
caffe 学习(1) —— Classification: Instant Recognition with Caffe
学习地址http://nbviewer.jupyter.org/github/BVLC/caffe/blob/master/examples/00-classification.ipynb
1.安装matlabplotlib:
sudo apt-get install python-matplotlib
2. 安装google test, automake, google proto buffer
./autogen.sh: 43: autoreconf: not found
是因为没有安装automake
工具, 用下面的命令安装好就可以了。
- make[3]: *** [src/gtest.lo] Error 1
- make[3]: Leaving directory `/home/sisinc/Desktop/protobuf-2.4.1/gtest'
- make[2]: *** [check-local] Error 2
- make[2]: Leaving directory `/home/sisinc/Desktop/protobuf-2.4.1'
- make[1]: *** [check-am] Error 2
- make[1]: Leaving directory `/home/sisinc/Desktop/protobuf-2.4.1'
解决办法:安装最新版本gtest
安装gtest时稍微修改一下travis.sh文件,运行它即可。修改好的文件如下
#!/usr/bin/env sh

set -evx

env | sort

mkdir build || true

mkdir build/$GTEST_TARGET || true

cd build/$GTEST_TARGET

cmake -D gtest_build_samples=ON \

      -D gmock_build_samples=ON \

      -D gtest_build_tests=ON \

      -D gmock_build_tests=ON \

      -D CMAKE_CXX_FLAGS=$CXX_FLAGS \

      ../$GTEST_TARGET

make

make test
安装proto buffer:
sudo sh ./autogen.sh

make

sudo make check

sudo make install
默认是安装在“/usr/local/lib”下的,在有些平台/usr/local/lib不是默认的LD_LIBRARY_PATH变量里面,可以在通过如下命令改变安装目录
$ ./configure --prefix=/usr
当看到类似下面的文字,说明protobuf基本安装完成
============================================================================
Testsuite summary for Protocol Buffers 3.0.0-beta-2
============================================================================
# TOTAL: 6
# PASS: 6
# SKIP: 0
# XFAIL: 0
# FAIL: 0
# XPASS: 0
# ERROR: 0
============================================================================
安装protobuf的Python支持
cd python # 位于protobuf下
sudo python setup.py install
3. can not find module skimage.io错误,解决办法
安装skimage.io: sudo apt-get install python-sklearn python-skimage python-h5py
4.学习代码
# set up Python envirionment: numpy for numerical routines, and matplotlib for plotting

import numpy as np

import matplotlib.pyplot as plt

#display plots in this notebook

# %matplotlib inline

# set display defaults

plt.rcParams['figure.figsize'] = (10, 10)	#large images

plt.rcParams['image.interpolation'] = 'nearest'

plt.rcParams['image.cmap'] = 'gray'	#use grayscale output rather than a (potentiallly misleading) color heatmap

# load caffe

# the caffe module needs to be on the Python path

import sys

caffe_root='../'

sys.path.insert(0, caffe_root + 'python')

import caffe

import os

if os.path.isfile(caffe_root + 'models/bvlc_reference_caffenet/bvlc_reference_caffenet.caffemodel'):

	print 'Caffenet found.'

else:

	print 'Downloading pre-trained CaffeNet model...'

	#../scripts/download_model_binary.py ../models/bvlc_reference_caffenet

caffe.set_mode_cpu()

model_def = caffe_root + 'models/bvlc_reference_caffenet/deploy.prototxt'

model_weights = caffe_root + 'models/bvlc_reference_caffenet/bvlc_reference_caffenet.caffemodel'

net = caffe.Net(model_def,	# defines the structure of the model

	model_weights,	# contains the trained weights

	caffe.TEST)	# use test mode

# load the mean ImageNet Image (as distributed with caffe) for subtraction

mu = np.load(caffe_root + 'python/caffe/imagenet/ilsvrc_2012_mean.npy')

mu = mu.mean(1).mean(1)	# average over pixels to obtain the mean (BGR) pixel values

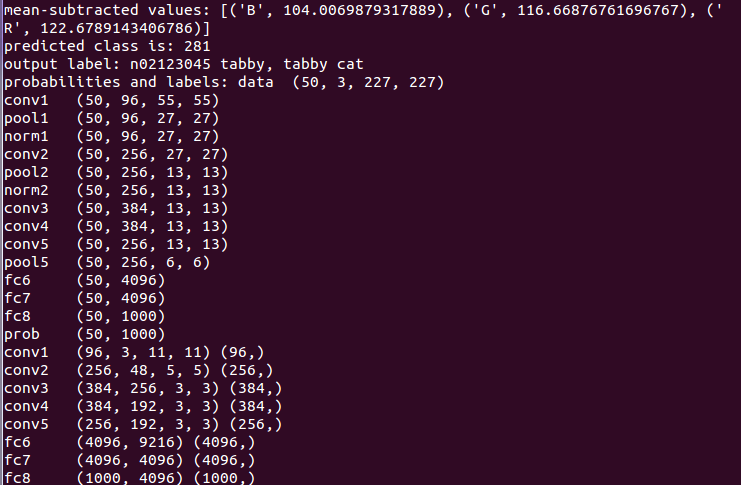
print 'mean-subtracted values:', zip('BGR', mu)

# create transformer for the imput called 'data'

transformer = caffe.io.Transformer({'data': net.blobs['data'].data.shape})

transformer.set_transpose('data', (2, 0, 1)) # move image channels to outermost dimension

transformer.set_mean('data', mu)

transformer.set_raw_scale('data', 255)

transformer.set_channel_swap('data', (2, 1, 0))	# swap channels from RGB to BGR

net.blobs['data'].reshape(50,	# batch size

	3,	# 3-channel (BGR) images

	227, 227)	# image size is 227*227

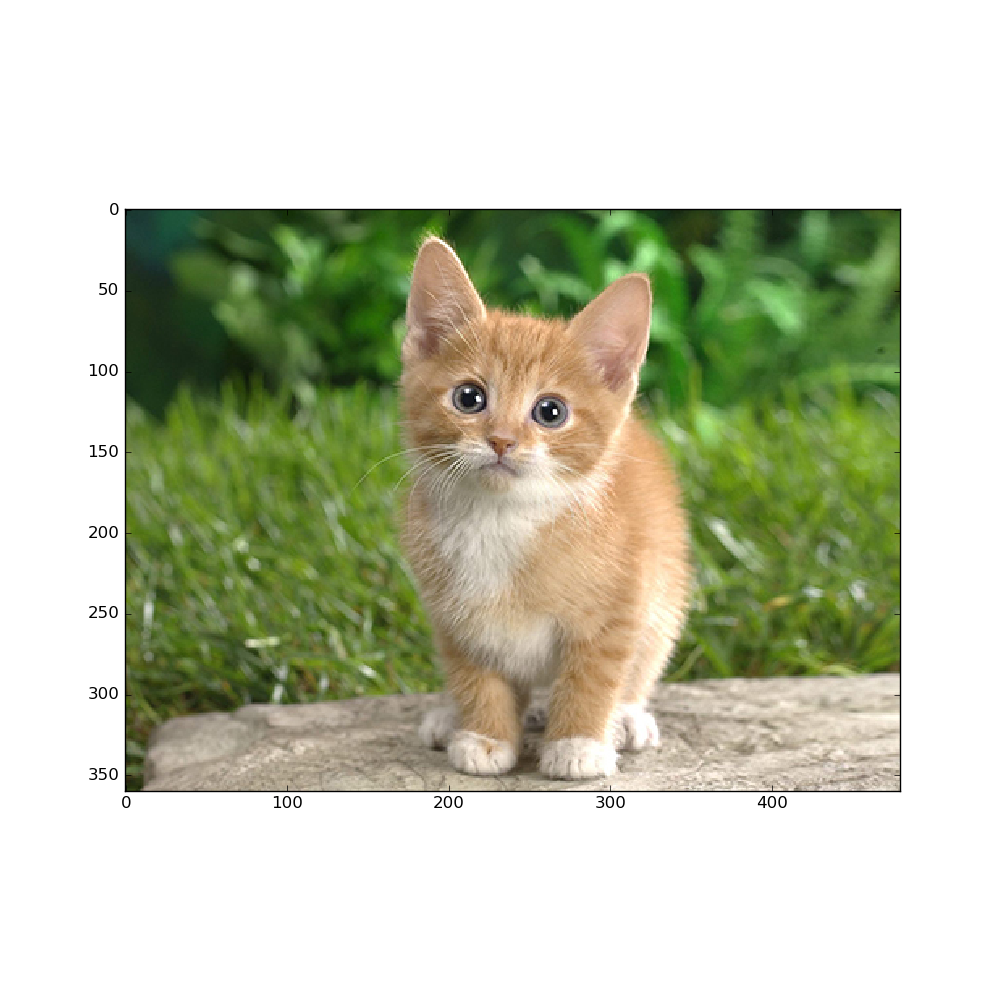
image = caffe.io.load_image(caffe_root + 'examples/images/cat.jpg')

transformed_image = transformer.preprocess('data', image)

plt.imshow(image)

plt.show()

# copy the image data into the memory allocated for the net

net.blobs['data'].data[...]=transformed_image

### perform calssification

output = net.forward()

output_prob = output['prob'][0] # the output probability vector for the first image in the batch

print 'predicted class is:', output_prob.argmax()

# load ImageNet labels

labels_file = caffe_root + 'data/ilsvrc12/synset_words.txt'

if not os.path.exists(labels_file):

	#!../data/ilsvrc12/get_ilsvrc_aux.sh

	print 'exetute the bash file above'

labels = np.loadtxt(labels_file, str, delimiter='\t')

print 'output label:', labels[output_prob.argmax()]

#sort top five predictions from softmax output

top_inds = output_prob.argsort()[::-1][:5] # reverse sort and take five largest items

print 'probabilities and labels:',

zip(output_prob[top_inds], labels[top_inds])

# %timeit net.forward()

# caffe.set_device(0)

caffe.set_mode_gpu()

net.forward()

# %timeit net.forward()

for layer_name, blob in net.blobs.iteritems():

	print layer_name + '\t' + str(blob.data.shape)

for layer_name, param in net.params.iteritems():

	print layer_name + '\t' + str(param[0].data.shape), str(param[1].data.shape)

def vis_square(data):

	"""Take an array of shape (n, height, width) or (n, height, width, 3)

	and visulaize each (height, widht) thing in a grid of size approx.sqrt(n) by sqrt(n)"""

	# normalize data for display

	data = (data - data.min())/(data.max() - data.min())

	# force the number of filters to be square

	n = int(np.ceil(np.sqrt(data.shape[0])))

	padding = (((0, n**2 - data.shape[0]),

		(0, 1), (0, 1))	# add some space between filters

		+ ((0, 0),) * (data.ndim - 3)) #don't pad the last dimension (if there is one)

	data = np.pad(data, padding, mode='constant', constant_values=1)

	# tile the filters into an image

	data = data.reshape((n, n) + data.shape[1:]).transpose((0, 2, 1, 3) + tuple(range(4, data.ndim + 1)))

	data = data.reshape((n * data.shape[1], n * data.shape[3]) + data.shape[4:])

	plt.imshow(data); plt.axis('off')

	plt.show()

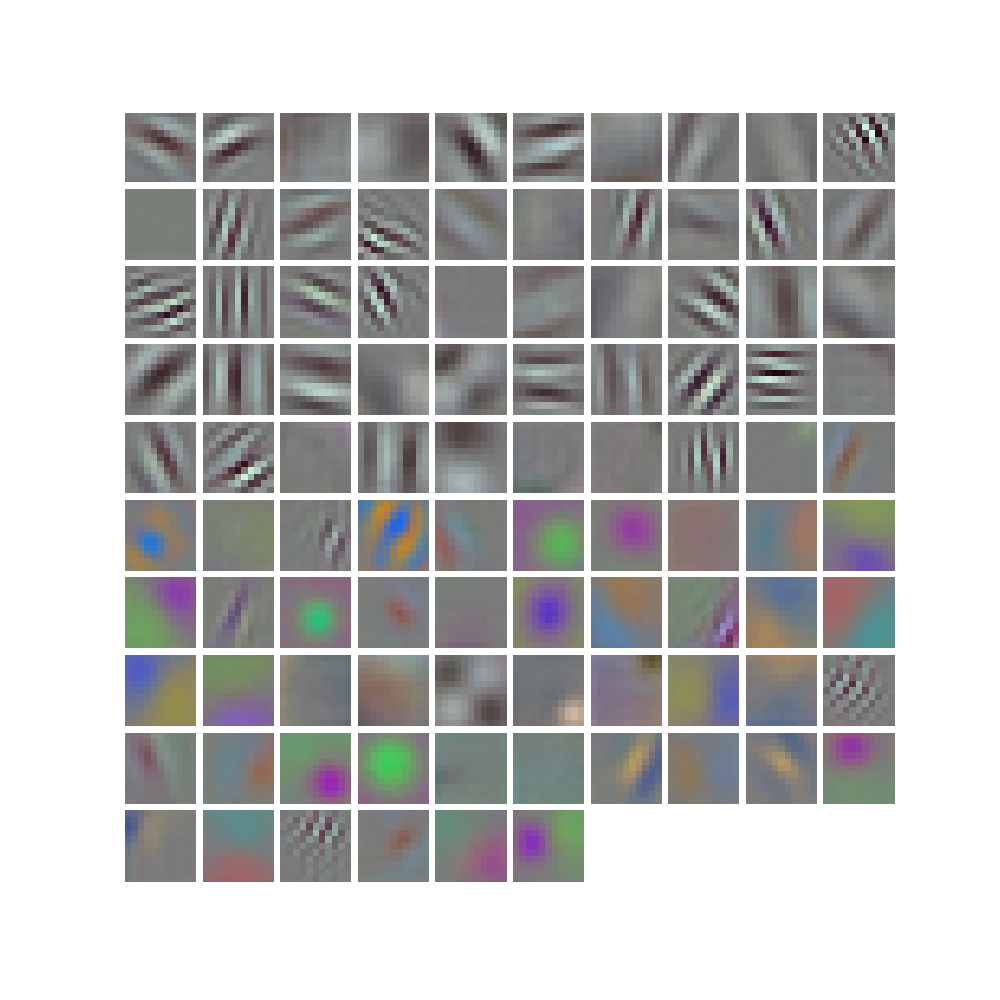
filters = net.params['conv1'][0].data

vis_square(filters.transpose(0, 2, 3, 1))

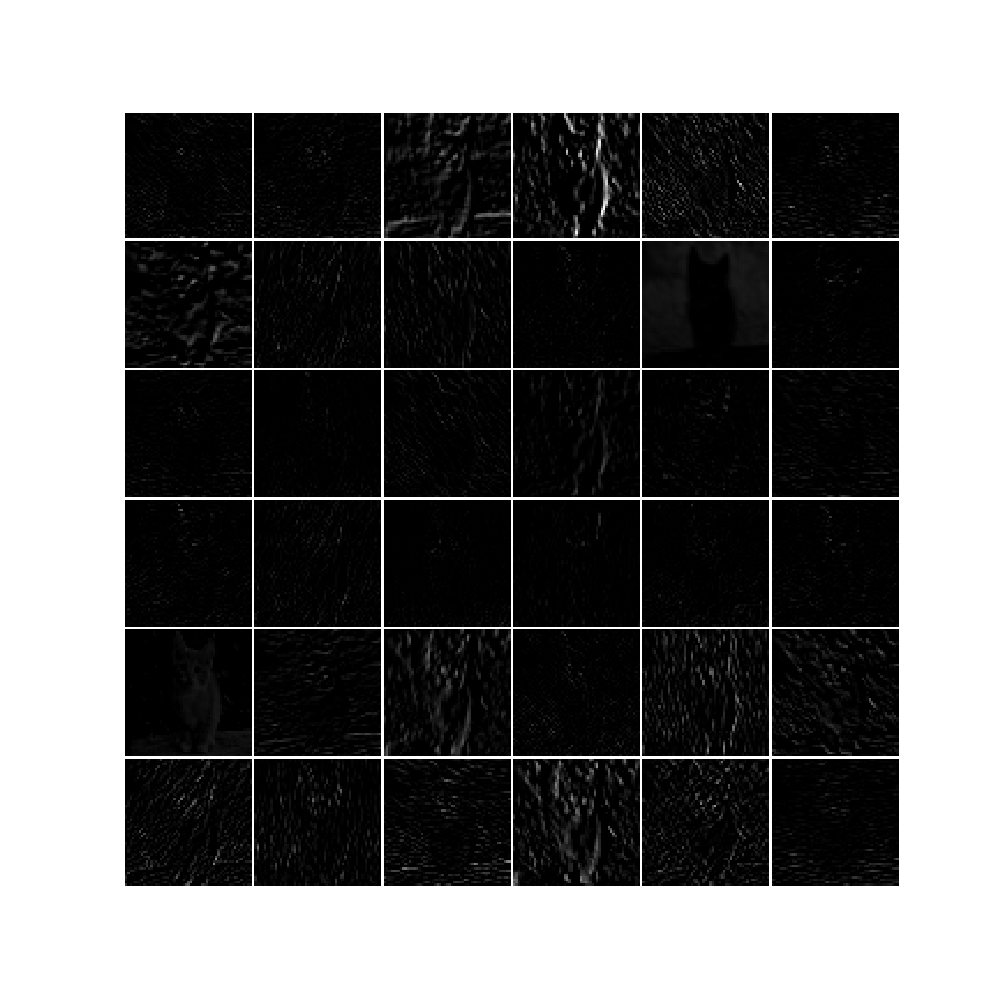
feat = net.blobs['conv1'].data[0, :36]

vis_square(feat)

feat = net.blobs['pool5'].data[0]

vis_square(feat)

feat = net.blobs['fc6'].data[0]

plt.subplot(2, 1, 1)

plt.plot(feat.flat)

plt.subplot(2, 1, 2)

_=plt.hist(feat.flat[feat.flat > 0], bins=100)

plt.show()
命令行下root用户运行python class_and_plot.py可以获得正确输出结果。


完成,继续努力!
caffe 学习(1) —— Classification: Instant Recognition with Caffe的更多相关文章
- Caffe学习笔记(三):Caffe数据是如何输入和输出的?
Caffe学习笔记(三):Caffe数据是如何输入和输出的? Caffe中的数据流以Blobs进行传输,在<Caffe学习笔记(一):Caffe架构及其模型解析>中已经对Blobs进行了简 ...
- Caffe学习笔记(二):Caffe前传与反传、损失函数、调优
Caffe学习笔记(二):Caffe前传与反传.损失函数.调优 在caffe框架中,前传/反传(forward and backward)是一个网络中最重要的计算过程:损失函数(loss)是学习的驱动 ...
- Caffe学习笔记(一):Caffe架构及其模型解析
Caffe学习笔记(一):Caffe架构及其模型解析 写在前面:关于caffe平台如何快速搭建以及如何在caffe上进行训练与预测,请参见前面的文章<caffe平台快速搭建:caffe+wind ...
- CAFFE学习笔记(五)用caffe跑自己的jpg数据
1 收集自己的数据 1-1 我的训练集与测试集的来源:表情包 由于网上一幅一幅图片下载非常麻烦,所以我干脆下载了两个eif表情包.同一个表情包里的图像都有很强的相似性,因此可以当成一类图像来使用.下载 ...
- Caffe学习笔记1--Ubuntu 14.04 64bit caffe安装
本篇博客主要用于记录Ubuntu 14.04 64bit操作系统搭建caffe环境,目前针对的的是CPU版本: 1.安装依赖库 sudo apt-get install libprotobuf-dev ...
- Caffe学习系列(17): caffe源码分析 vector<Blob<Dtype>*>& bottom(转)
转自:http://blog.csdn.net/qq_14975217/article/details/51524042 Blob:4个维度 n x c x h x w: bottom[0] .bot ...
- Caffe学习笔记2--Ubuntu 14.04 64bit 安装Caffe(GPU版本)
0.检查配置 1. VMWare上运行的Ubuntu,并不能支持真实的GPU(除了特定版本的VMWare和特定的GPU,要求条件严格,所以我在VMWare上搭建好了Caffe环境后,又重新在Windo ...
- Caffe 学习系列
学习列表: Google protocol buffer在windows下的编译 caffe windows 学习第一步:编译和安装(vs2012+win 64) caffe windows学习:第一 ...
- Caffe学习系列(23):如何将别人训练好的model用到自己的数据上
caffe团队用imagenet图片进行训练,迭代30多万次,训练出来一个model.这个model将图片分为1000类,应该是目前为止最好的图片分类model了. 假设我现在有一些自己的图片想进行分 ...
随机推荐
- SpringMVC 源码阅读
- SQL Server 2008 SQL2012 SQL2014 收缩日志 清空删除大日志文件
SQL2008 SQL2012 SQL2014 的收缩日志 由于SQL2008对文件和日志管理进行了优化,所以以下语句在SQL2005中可以运行但在SQL2008中已经被取消:(SQL2005)Bac ...
- 成功配置TOMCAT的LOG4J日志系统,格式:HTML+每天以YYYY-MM-DD.LOG命名的日志文件
关于log4j.properties文件在web项目中放的位置,找过很多,最后实践结果是: 一.web项目 二.放在src的目录里面,然后项目生成后会自动在\WEB-INF\classes文件里有份l ...
- 使用SeaJS实现模块化JavaScript开发【转】
前言 SeaJS是一个遵循CommonJS规范的JavaScript模块加载框架,可以实现JavaScript的模块化开发及加载机制.与jQuery等JavaScript框架不同,SeaJS不会扩展封 ...
- 从函数作用域和块级作用域看javascript的作用域链
在ES6之前,javascript只有全局作用域和函数作用域.所谓作用域就是一个变量定义并能够被访问到的范围.也就是说如果一个变量定义在全局(window)上,那么在任何地方都能访问到这个变量,如果这 ...
- SQL Exists 的用法 转载
比如在Northwind数据库中 有一个查询为 SELECT c.CustomerId, CompanyName FROM Customers c WHERE EXISTS( SELECT O ...
- Hashtable语法简介
Hashtable简述 Hashtable是System.Collections命名空间提供的一个容器 Hashtable中keyvalue键值对均为object类型,所以Hashtable可以支持任 ...
- Promise/A+规范学习总结
Promise的实现:因为他只是一个规范,所以在不同的框架或者平台下有不同的实现 Angular:$q服务 Node:q模块,co,then Es6:Promise, yield Es7:async ...
- owin解决跨域js请求
最近在用owin打了一个建议的http的api服务,但遇到了js跨域访问的问题,后来在网上找到了答案,已帮助遇到此问题的人 1.首先nuget先按着owin依赖的包,然后至关重要的一步是引用Micro ...
- linux服务器上创建svn版本库
1. 创建存放各个svn版本库的目录svnrepos(自己定义路径) -bash: cd /usr/local/apache/htdocs/ -bash: mkdir svnrepos 2. 假设我要 ...