PostgreSQL数据库的安装与配置
项目中要用PostgreSQL,所以专门学习了一下如何安装和调试postgresql,此博文用来记录自己的安装和调试过程,安装环境是centos7。
首先尝试了yum安装,因为毕竟yum安装简单粗暴,官网的安装指导地址:
https://www.postgresql.org/download/linux/redhat/
安装了半天,报错,以为是自己的yum源有问题,换了几个,还是不行,所以只能放弃这种安装方式。
接下来尝试源码编译安装,我们首先从官网取Source,官网在这里:
https://www.postgresql.org/ftp/source/
打开如下:
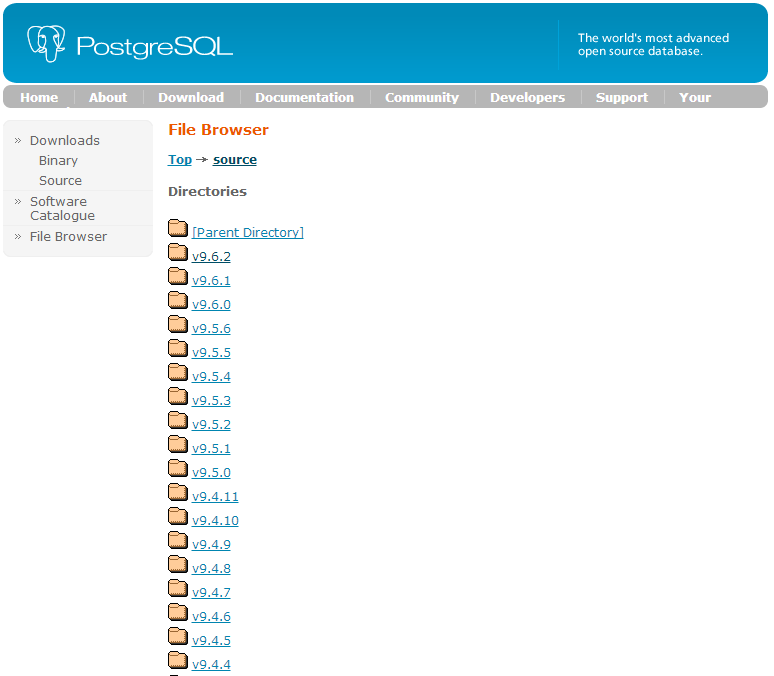
目前已经最新的版本已经到10了,但最新的稳定版是9.6,所以我下载就是9.6这个版本,执行下面命令下载:
wget https://www.postgresql.org/ftp/source/v9.6.2/
取到source后,准备开始编译安装。
这里需要注意的postgresql编译需要预装一些工具。除了make、gcc(GNU编译器套件)这些基本必备的工具,还要有zlib、bison等等,也不用提前装,反正安装过程中缺少什么再装就好了。
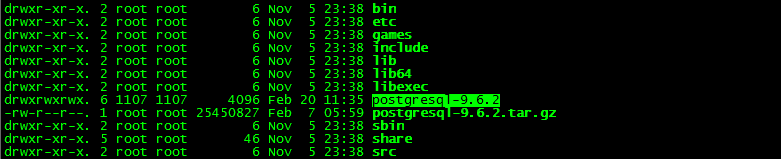
取到源码,先解压:
tar -zxvf postgresql-9.6.2.tar.gz
进入postgresql-9.6.2文件夹:
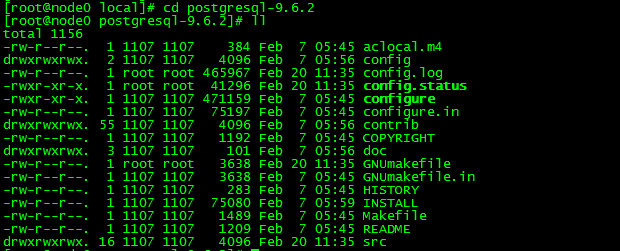
再执行下面指令:
export CFLAGS = "-g -Wall -Wmissing-prototypes -Wpointer-arith

-Wdeclaration-after-statement -Wendif-labels -Wformat-security

-fno-strict-aliasing -fwrapv"
然后再执行下列指令
./configure --prefix=/opt/psql --with-perl --with-tcl --with-python --with-openssl

--with-pam --without-ldap --with-libxml --with-libxslt --enable-thread-safety

--with-wal-blocksize=16 --with-blocksize=16 --enable-dtrace --enable-debug
其中--prefix是指定软件的安装路径,--with选项是指安装本文件依赖的库文件。如有不清楚可以自己学习下configure命令的相关参数。
运行之后,会出现报错,我这个报的错还挺多,我都贴上来,供大家参考一下:
问题1:

checking for dtrace... no

configure: error: dtrace not found

解决方法:

yum search dtrace

Loaded plugins: fastestmirror, refresh-packagekit, security

Loading mirror speeds from cached hostfile

 * base: mirrors.163.com

 * extras: mirrors.163.com

 * updates: mirrors.163.com

=============================================================================================== Matched: dtrace ===============================================================================================

systemtap-sdt-devel.i686 : Static probe support tools

systemtap-sdt-devel.x86_64 : Static probe support tools

找到了,就安装,我是64位的,安装第二个

[root@localhost postgresql-9.3.5]# yum install -y systemtap-sdt-devel.x86_64

问题2:

checking for flags to link embedded Perl... Can't locate ExtUtils/Embed.pm in @INC (@INC contains: /usr/local/lib64/perl5 /usr/local/share/perl5 /usr/lib64/perl5/vendor_perl /usr/share/perl5/vendor_perl /usr/lib64/perl5 /usr/share/perl5 .).

BEGIN failed--compilation aborted.

no

configure: error: could not determine flags for linking embedded Perl.

This probably means that ExtUtils::Embed or ExtUtils::MakeMaker is not

installed.

解决方法:

yum install perl-ExtUtils-Embed -y

问题3:

configure: error: could not determine flags for linking embedded Perl.

This probably means that ExtUtils::Embed or ExtUtils::MakeMaker is not

installed.

解决方法:

yum install perl-ExtUtils-Embed

问题4:

configure: error: readline library not found

If you have readline already installed, see config.log for details on the

failure. It is possible the compiler isn't looking in the proper directory.

Use --without-readline to disable readline support.

解决方法:

yum install readline readline-devel

问题5:

checking for inflate in -lz... no

configure: error: zlib library not found

If you have zlib already installed, see config.log for details on the

failure. It is possible the compiler isn't looking in the proper directory.

Use --without-zlib to disable zlib support.

解决方法:

yum install zlib zlib-devel

问题6:

checking for CRYPTO_new_ex_data in -lcrypto... no

configure: error: library 'crypto' is required for OpenSSL

解决方法:

yum install openssl openssl-devel

问题7:

checking for pam_start in -lpam... no

configure: error: library 'pam' is required for PAM

解决方法:

yum install pam pam-devel

问题8:

checking for xmlSaveToBuffer in -lxml2... no

configure: error: library 'xml2' (version >= 2.6.23) is required for XML support

解决方法:

yum install libxml2 libxml2-devel

问题9:

checking for xsltCleanupGlobals in -lxslt... no

configure: error: library 'xslt' is required for XSLT support

解决方法:

yum install libxslt libxslt-devel

问题10:

configure: error: Tcl shell not found

解决方法:

yum install tcl tcl-devel

问题11:

checking for ldap.h... no

configure: error: header file is required for LDAP

解决方法:

yum install openldap openldap-devel

问题12:

checking for Python.h... no

configure: error: header file <Python.h> is required for Python

解决方法:

yum install python python-devel
以上这些依赖库都安装成功后,再运行上面的configure命令,就能成功啦。
接下来就是编译安装啦:
make && make install
这两个命令可能会比较慢,执行完成后,会提示成功。
然后你就会发现在/opt/目录下找到你安装的psql了
其中:
/opt/psql/bin里面放的是可执行命令,比如createdb之类的;
/opt/psql/lib里面放的是库文件;
/opt/psql/include里面放的是头文件;
/opt/psql/share是相关的资源文件。
这些文件如果在configure命令中没有指定--prefix的话,会安装到/usr/local/目录下,以后要删除的时候就要一个个找了,比较麻烦。
好的 我们安装好了postgresql程序,接下来进行配置。
为了安全考虑,postgresql不允许使用root用户操作数据库,我们在系统中为使用postgresql添加一个用户postgres:
adduser postgres
创建密码:
passwd postgres
然后切换到postgres用户下面:
su - postgres
编辑/home/postgres下的.bash_profile
设置以下的环境变量
export PGHOME=/opt/psql  (这个就是我们的安装目录)

export PGDATA=~/data        (数据存放的目录,这个看你高兴了,不要求一定放在这里)

export PATH=$PATH:$HOME/bin:$PGHOME/bin
然后source一下
source ~/.bash_profile
使环境变量生效。
接下来初始化数据库,使用initdb命令(如果提示command not found,那么很有可能是你上面的PGHOME设置错误或者没有source一下)
#初始化数据库

initdb
数据库的初始化完成后运行:
pg_ctl start
启动postgres数据库实例。此时你就可以使用:
ps -ef | grep postgres
现在我们可以进入数据库,使用如下命令:
psql -h 127.0.0.1 -d postgres -U postgres

如果我们比较懒,不想每次登录手动启动psql,那么设置下psql开机启动。
PostgreSQL的开机自启动脚本位于PostgreSQL源码目录的contrib/start-scripts路径下:

linux文件即为自启动脚本。
1)修改linux文件属性,添加X属性(这里如果提示无权限的话,切换到root用户进行操作)
chmod a+x linux
2) 复制linux文件到/etc/init.d目录下,更名为postgresql
cp linux /etc/init.d/postgresql
3)修改/etc/init.d/postgresql文件的两个变量
prefix设置为postgresql的安装路径:/opt/psql
PGDATA设置为postgresql的数据目录路径:/home/postgres/data
执行service postgresql start,就可以启动PostgreSQL服务
4) 执行service postgresql start,就可以启动PostgreSQL服务
service postgresql start
5)设置postgresql服务开机自启动
chkconfig --add postgresql
执行上面的命令,就可以实现postgresql服务的开机自启动。
接下来就是PostgreSQL的远程连接设置
1) 设置远程访问认证机制
编辑/home/postgres/PGHOME/pg_dat/pg_hba.conf 文件:
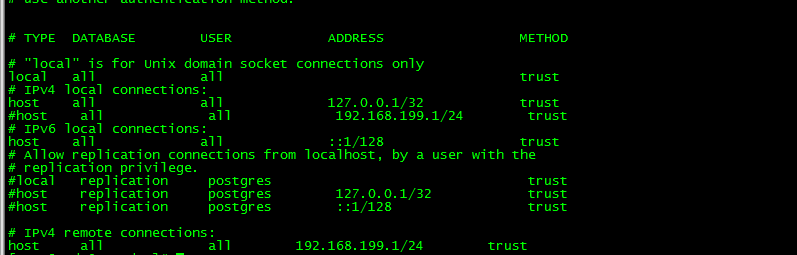
说明:
每一行有五个字段,
# TYPE DATABASE USER CIDR-ADDRESS METHOD
分别是:连接类型、可使用的数据库名、使用者、DIDR地址、和验证方法等五项。
在该配置文件中的加上图中最后两行 IPv4 remote connections的配置,把该网段的IP配置进去,就可以。
2. 改监听地址
默认下,POSTGRESQL只接受本地服务,要接受远程服务,需改postgresql.conf 文件listen_address = *
配置完后,重新启动一下数据库,既可以进行远程访问数据库了。
以上是我安装配置PostgreSQL的大概过程,后续遇到的问题会在文章中持续更新,有错误欢迎提出指正,谢谢~
PostgreSQL数据库的安装与配置的更多相关文章
- SSD Cloud Hosting–Linode-Mysql数据库的安装与配置
接着上一篇的话题:SSD Cloud Hosting - Linode的配置和部署,搭建Java环境 8.Mysql数据库的安装与配置 安装 检查yum里边有没有mysql: yum list|gre ...
- mysql数据库的安装与配置
mysql数据库的安装与配置及workbench的简单使用 mysql数据库社区版下载:https://dev.mysql.com/downloads/installer/ 我这里选的是社区安装版(适 ...
- mongoDB数据库的安装与配置
noSql数据库MongoDB的安装地址:https://www.mongodb.com/download-center?jmp=nav#community 选择相应的版本进行下载,在此以window ...
- linux学习之centos(三):mysql数据库的安装和配置
前言:mysql简介 说到数据库,我们大多想到的是关系型数据库,比如mysql.oracle.sqlserver等等,这些数据库软件在windows上安装都非常的方便,在Linux上如果要安装数据库, ...
- linux应用之mysql数据库的安装及配置(centos)
CentOS下Mysql数据库的安装与配置 如果要在Linux上做j2ee开发,首先得搭建好j2ee的开发环境,包括了jdk.tomcat.eclipse的安装(这个在之前的一篇随笔中已经有详细讲 ...
- MySQL数据库的安装与配置(windows)
MySQL是目前最为流行的开放源码的数据库,是完全网络化的跨平台的关系型数据库系统,它是由瑞典MySQLAB公司开发,目前属于Oracle公司.任何人都能从Internet下载MySQL软件,而无需支 ...
- Ubuntu 下 firebird 数据库的安装和配置
Ubuntu 下 firebird 数据库的安装和配置 1.简介 本文主要是 Ubuntu 下 firebird 数据库的安装和目录迁移,同样适用于 Debian 系统:Ubuntu 20.0.4 f ...
- Windows下Postgresql数据库的下载与配置方法
注意下载的是二进制版,不是带Windows Installer的,即绿色版本 http://www.enterprisedb.com/products-services-training/pgbind ...
- PostgreSQL数据库的安装
1 总体规划 操作系统 CentOS Linux release 7.5.1804 处理器 1 内存 4G 硬盘 38G 主机名称 chenzx IP地址 192.168.56.8 1.1 用户组和用 ...
随机推荐
- 创建第一个maven项目的那些坑
1.记事本方式: class所在的目录结构: class的代码书写: package com.imooc.maven01.mode1; public class HelloWorld { public ...
- Java坦克大战 (七) 之图片版
本文来自:小易博客专栏.转载请注明出处:http://blog.csdn.net/oldinaction 在此小易将坦克大战这个项目分为几个版本,以此对J2SE的知识进行回顾和总结,希望这样也能给刚学 ...
- pandas求五日线并画图
import pandas as pd import numpy as np import matplotlib.pyplot as plt stock_data = pd.read_csv('000 ...
- selenium 3.0 键盘事件 +强制结束chromedriver进程代码
selenium自动化测试常常用到键盘操作,一下是键盘操作的详细操作,和部分代码.截图来自于虫师的自动化相关书籍. public static void main(String[] args) thr ...
- poj 1066(枚举+线段相交)
Treasure Hunt Time Limit: 1000MS Memory Limit: 10000K Total Submissions: 6328 Accepted: 2627 Des ...
- 百度之星资格赛 2016 Problem 1001
本文链接http://www.cnblogs.com/Ash-ly/p/5494618.html 题意: 度熊手上有一本字典存储了大量的单词,有一次,他把所有单词组成了一个很长很长的字符串.现在麻烦来 ...
- NOIP2014飞扬的小鸟
长为n,高为m的二维平面,其中有k个管道(忽略管道的宽度)小鸟始终在游戏界面内移动.从最左边任意高度位置出发,到达游戏界面最右边,游戏完成每个单位时间沿横坐标方向右移距离为1,竖直移动的距离由玩家控制 ...
- 简单DP【p1934】封印
Description 很久以前,魔界大旱,水井全部干涸,温度也越来越高.为了拯救居民,夜叉族国王龙溟希望能打破神魔之井,进入人界"窃取"水灵珠,以修复大地水脉.可是六界之间皆有封 ...
- 29、Django实战第29天:修改密码和头像
修改头像 1.上传头像,我们需要的对它做一个forms验证,编辑users.forms.py ... from .models import UserProfile class UploadImage ...
- 浅析module.exports和exports区别和使用
module.exports和exports 写node的时候,特别是自定义模块的时候,都是一顿乱敲,然后module.exports={}完事. 但有时候去看别人写的代码的时候会发现还可以expor ...