RHEL 6.5----Nginx负载均衡
实验环境
| 主机名 | IP |
| master | 192.168.30.130 |
| node-1 | 192.168.30.131 |
| node-2 | 192.168.30.132 |
在master上安装
本次安装过程统一采用YUM的方式,比较快,也省的出各种问题

首先在本地yum源里面添加

[root@master ~]# vim /etc/yum.repos.d/rhel-source.repo

[rhel-source]

name=Red Hat Enterprise Linux $releasever - $basearch - Source

baseurl=file:///media/cdrom

enabled=

gpgcheck=

gpgkey=file:///etc/pki/rpm-gpg/RPM-GPG-KEY-redhat-release

[nginx]

name=nginx repo

baseurl=http://nginx.org/packages/rhel/6/$basearch/

gpgcheck=

enabled=

或者直接新建个nginx.repo文件在文件中写入

[nginx]

name=nginx repo

baseurl=http://nginx.org/packages/rhel/6/$basearch/

gpgcheck=

enabled=

完事之后,执行下面命令

[root@master ~]# yum install -y zlib zlib-devel openssl openssl-devel pcre pcre-devel nginx
如果是源码编译安装的,可能没有nginx用户需要手动添加,但是这里yum安装的,就不需要添加了
[root@master ~]# id nginx

uid=(nginx) gid=(nginx) groups=(nginx)
启动nginx
[root@master ~]# /etc/init.d/nginx start

Starting nginx:                                            [  OK  ]

[root@master ~]# /etc/init.d/nginx status

-b (pid  ) is running...
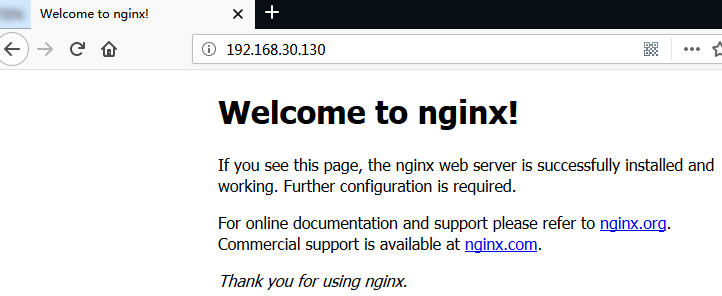
测试nginx
配置分发器实现动静分离
[root@master ~]# cp /etc/nginx/conf.d/default.conf{,.bak}

[root@master ~]# cd /etc/nginx/

[root@master nginx]# ls

conf.d          koi-utf  mime.types  nginx.conf   uwsgi_params

fastcgi_params  koi-win  modules     scgi_params  win-utf

[root@master nginx]# cp nginx.conf{,.bak}

[root@master nginx]# vim nginx.conf  #末尾添加

 upstream htmlservers {

        server 192.168.30.131:;

        server 192.168.30.132:;

    }

    upstream phpservers {

        server 192.168.30.131:;

        server 192.168.30.132:;

    }

    upstream picservers {

        server 192.168.30.131:;

        server 192.168.30.132:;

    }

}

"nginx.conf" 44L, 902C written

[root@master conf.d]# vim default.conf

server {

    listen       ;

    server_name  localhost;

    #charset koi8-r;

    #access_log  /var/log/nginx/host.access.log  main;

    location / {

        root   /usr/share/nginx/html;

        index  index.html index.htm;

        if ($request_uri ~* \.html$) {

                proxy_pass http://htmlservers;

        }

        if ($request_uri ~* \.php) {

                proxy_pass http://phpservers;

        }

                proxy_pass http://picservers;

    }
测试配置文件是否配置正确
[root@master ~]# /etc/init.d/nginx configtest

nginx: the configuration file /etc/nginx/nginx.conf syntax is ok

nginx: configuration file /etc/nginx/nginx.conf test is successful
在node-1上
[root@node- ~]# yum install -y php httpd
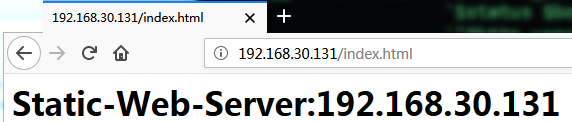
[root@node- ~]# echo "<h1>Static-Web-Server:192.168.30.131</h1>" > /var/www/html/index.html
[root@node- ~]# echo "<h1>Web-Server:192.168.30.131</h1><?php phpinfo(); ?>" > /var/www/html/index.php
[root@node- ~]# rz
[root@node- ~]# mv .jpg /var/www/html/
[root@node- ~]# service httpd restart
Stopping httpd: [ OK ]
Starting httpd: [ OK ]
[root@node- ~]# ls /var/www/html/
.jpg index.html index.php
node-2做相同操作,只是将测试页面的内容改下
[root@node- ~]# echo "<h1>Web-Server:192.168.30.132</h1>" > /var/www/html/index.html

[root@node- ~]# echo "<h1>Web-Server:192.168.30.132</h1><?php phpinfo(); ?>" > /var/www/html/index.php

[root@node- ~]# rz

[root@node- ~]# mv .jpg /var/www/html/

[root@node- ~]# ls /var/www/html/

.jpg  index.html  index.php

[root@node- ~]# service httpd restart
测试
[root@master ~]# /etc/init.d/nginx reload

Reloading nginx:                                           [  OK  ]
首先直接测试web-server,看是否正常


然后测试分发器
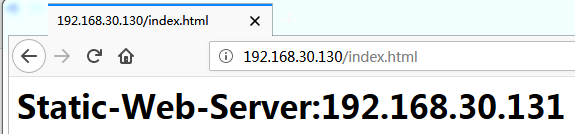
刷新之后
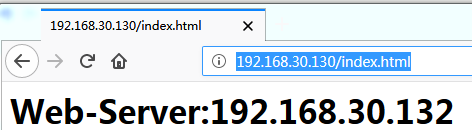

按F5刷新


压力测试
[root@node- ~]# ab -c  -n  http://192.168.30.130/index.html

This is ApacheBench, Version 2.3 <$Revision:  $>

Copyright  Adam Twiss, Zeus Technology Ltd, http://www.zeustech.net/

Licensed to The Apache Software Foundation, http://www.apache.org/

Benchmarking 192.168.30.130 (be patient)

Completed  requests

Completed  requests

Completed  requests

Completed  requests

Completed  requests

Completed  requests

Completed  requests

Completed  requests

Completed  requests

Completed  requests

Finished  requests

Server Software:        nginx/1.14.

Server Hostname:        192.168.30.130

Server Port:

Document Path:          /index.html

Document Length:         bytes

Concurrency Level:

Time taken for tests:   1.020 seconds

Complete requests:

Failed requests:

   (Connect: , Receive: , Length: , Exceptions: )

Write errors:

Total transferred:       bytes

HTML transferred:        bytes

Requests per second:    980.42 [#/sec] (mean)

Time per request:       1019.966 [ms] (mean)

Time per request:       1.020 [ms] (mean, across all concurrent requests)

Transfer rate:          282.93 [Kbytes/sec] received

Connection Times (ms)

              min  mean[+/-sd] median   max

Connect:              32.1

Processing:         73.1

Waiting:            73.1

Total:              80.8

Percentage of the requests served within a certain time (ms)

  %

  %

  %

  %

  %

  %

  %

  %

 %    (longest request)
[root@node- ~]# ab -c  -n  -q http://192.168.30.130/index.html

This is ApacheBench, Version 2.3 <$Revision:  $>

Copyright  Adam Twiss, Zeus Technology Ltd, http://www.zeustech.net/

Licensed to The Apache Software Foundation, http://www.apache.org/

Benchmarking 192.168.30.130 (be patient)...socket: Too many open files ()

解决办法

[root@node- ~]# ulimit -a

core file size          (blocks, -c)

data seg size           (kbytes, -d) unlimited

scheduling priority             (-e)

file size               (blocks, -f) unlimited

pending signals                 (-i)

max locked memory       (kbytes, -l)

max memory size         (kbytes, -m) unlimited

open files                      (-n)

pipe size            ( bytes, -p)

POSIX message queues     (bytes, -q)

real-time priority              (-r)

stack size              (kbytes, -s)

cpu time               (seconds, -t) unlimited

max user processes              (-u)

virtual memory          (kbytes, -v) unlimited

file locks                      (-x) unlimited

[root@node- ~]# ulimit -n  #系统默认值

[root@node- ~]# ulimit -n

[root@node- ~]# ulimit -n

[root@node- ~]# ab -c  -n  -q http://192.168.30.131/index.html

This is ApacheBench, Version 2.3 <$Revision:  $>

Copyright  Adam Twiss, Zeus Technology Ltd, http://www.zeustech.net/

Licensed to The Apache Software Foundation, http://www.apache.org/

Benchmarking 192.168.30.131 (be patient).....done

Server Software:        Apache/2.2.

Server Hostname:        192.168.30.131

Server Port:

Document Path:          /index.html

Document Length:         bytes

Concurrency Level:

Time taken for tests:   1.274 seconds

Complete requests:

Failed requests:

Write errors:

Total transferred:       bytes

HTML transferred:        bytes

Requests per second:    1570.26 [#/sec] (mean)

Time per request:       1273.678 [ms] (mean)

Time per request:       0.637 [ms] (mean, across all concurrent requests)

Transfer rate:          475.61 [Kbytes/sec] received

Connection Times (ms)

              min  mean[+/-sd] median   max

Connect:           329.6

Processing:        228.9

Waiting:           228.9

Total:             386.9

Percentage of the requests served within a certain time (ms)

  %

  %

  %

  %

  %

  %

  %

  %

 %    (longest request)

[root@node- ~]# ab -c  -n  -q http://192.168.30.130/index.html

This is ApacheBench, Version 2.3 <$Revision:  $>

Copyright  Adam Twiss, Zeus Technology Ltd, http://www.zeustech.net/

Licensed to The Apache Software Foundation, http://www.apache.org/

Benchmarking 192.168.30.130 (be patient).....done

Server Software:        nginx/1.14.

Server Hostname:        192.168.30.130

Server Port:

Document Path:          /index.html

Document Length:         bytes

Concurrency Level:

Time taken for tests:   1.081 seconds

Complete requests:

Failed requests:

   (Connect: , Receive: , Length: , Exceptions: )

Write errors:

Non-2xx responses:

Total transferred:       bytes

HTML transferred:        bytes

Requests per second:    1849.81 [#/sec] (mean)

Time per request:       1081.193 [ms] (mean)

Time per request:       0.541 [ms] (mean, across all concurrent requests)

Transfer rate:          558.97 [Kbytes/sec] received

Connection Times (ms)

              min  mean[+/-sd] median   max

Connect:           327.6

Processing:        212.8

Waiting:           212.8

Total:            351.5

Percentage of the requests served within a certain time (ms)

  %

  %

  %

  %

  %

  %

  %

  %

 %    (longest request)
RHEL 6.5----Nginx负载均衡的更多相关文章
- 对比Haproxy和Nginx负载均衡效果
为了对比Hproxy和Nginx负载均衡的效果,分别在测试机上(以下实验都是在单机上测试的,即负载机器和后端机器都在一台机器上)做了这两个负载均衡环境,并各自抓包分析.下面说下这两种负载均衡环境下抓包 ...
- nginx负载均衡集群
nginx负载均衡集群 0.前言:nginx 负载均衡,属于网络7层模型中的应用层,说白了就是一个代理,要用 upstrem 模块实现,代理则用proxy模块 1.可以针对域名做转发,lvs只能针对 ...
- 手把手教你玩转nginx负载均衡(二)----安装虚拟机操作系统
引言 在上一篇,我们组装好了虚拟机的硬件部分,那么现在我们就要把操作系统装上了,既然是服务器,那么安装linux操作系统是个比较好的选择,如果你喜欢的话,安装windows也是没有任何问题的 我这里选 ...
- nginx负载均衡基于ip_hash的session粘帖
nginx负载均衡基于ip_hash的session粘帖 nginx可以根据客户端IP进行负载均衡,在upstream里设置ip_hash,就可以针对同一个C类地址段中的客户端选择同一个后端服务器,除 ...
- Net分布式系统之二:CentOS系统搭建Nginx负载均衡
一.关于CentOS系统介绍 CentOS(Community Enterprise Operating System,中文意思是:社区企业操作系统)是Linux发行版之一,它是来自于Red Hat ...
- Net分布式系统之三:Keepalived+LVS+Nginx负载均衡之高可用
上一篇写了nginx负载均衡,此篇实现高可用(HA).系统整体设计是采用Nginx做负载均衡,若出现Nginx单机故障,则导致整个系统无法正常运行.针对系统架构设计的高可用要求,我们需要解决Nginx ...
- 配置nginx负载均衡
配置nginx负载均衡 执行命令:vi /usr/local/nginx/sbin/nginx/conf/nginx.conf 修改为: worker_processes 2; events { ...
- 烂泥:nginx负载均衡
本文由秀依林枫提供友情赞助,首发于烂泥行天下. 今天我们来学习下有关nginx的负载均衡配置.nginx的负载均衡是通过nginx的upstream模块和proxy_pass反向代理来实现的. 说明: ...
- nginx负载均衡集群中的session共享说明
在网站使用nginx+php做负载均衡情况下,同一个IP访问同一个页面会被分配到不同的服务器上,如果session不同步的话,就会出现很多问题,比如说最常见的登录状态. 下面罗列几种nginx负载均衡 ...
- nginx 负载均衡策略
nginx 负载均衡策略 1. 轮询轮询方式是nginx负载均衡的默认策略,根据每个server的权重值来轮流发送请求,例如:upstream backend {server backend1.e ...
随机推荐
- hive增加Update、Delete支持
一.配置hive-site.xml二.建表三.操作四.总结 一.配置hive-site.xml CDH版本先进入Hive配置页 选择高级,找到hive-site.xml 的 Hive 客户端高级配置代 ...
- Scrapy 'module' object has no attribute 'Spider'错误
在“Scrapy入门教程”中,在创建的“dmoz_spider.py”文件中是通过 import scrapy class DmozSpider(scrapy.Spider): 的方式导入.但是用这种 ...
- 教你如何配置Ubuntu用于高效、高质量的发送邮件
本文首发在: http://mengxi.me/how-to-setup-ubuntu-sendmail-to-deliver-email-fast-and-reliable/ 在网站上线后,经常会遇 ...
- js对table操作(添加删除交换上下TR)
<table width="100%" border="0" cellpadding="2" cellspacing="1& ...
- UIPageControll 的属性和用法
UIPageControll 是继承于UIControl的一个IOS系统UI控件,可以提供给开发者设计分页效果的功能. 初始化方法 UIPageControl * page = [[UIPageCon ...
- Node安装及搭建简单HTTP服务器
注:本文安装系统为mac,windows及其他系统下载对应安装包 ,mac下载后的安装包为apk文件,windows为msi文件. 安装 1.在网上下载node安装包,官方网站2.双击下载文件,按步骤 ...
- bzoj4105: [Thu Summer Camp 2015]平方运算
填坑 我不知道怎么算的,但是所有环的LCM数不会超过60 然后用线段树维护这个东西,每个节点记录子树内的循环节 没到循环节的暴力枚举 复杂度是nlogn再乘以循环节长度 #include<cst ...
- express 中文文档
express() 创建一个express应用程序 var express = require('express'); var app = express(); app.get('/', functi ...
- mongodb c++ driver安装踩坑记
安装教程:https://mongodb.github.io/mongo-cxx-driver/mongocxx-v3/installation/ (1) “initializer_list” fil ...
- bzoj1087互不侵犯King——状压DP
题目:https://www.lydsy.com/JudgeOnline/problem.php?id=1087 水题... 然而犯了两个致命小错误,调了好半天...详见注释. 代码如下: #incl ...