JAVAEE——SpringBoot入门:简介、微服务、环境准备、helloworld与探究、快速构建项目
一、Spring Boot 入门
1、Spring Boot 简介
简化Spring应用开发的一个框架;
整个Spring技术栈的一个大整合;
J2EE开发的一站式解决方案;
2、微服务
2014,martin fowler
微服务:架构风格(服务微化)
一个应用应该是一组小型服务;可以通过HTTP的方式进行互通;
单体应用:ALL IN ONE
微服务:每一个功能元素最终都是一个可独立替换和独立升级的软件单元;
3、环境准备
环境约束
–jdk1.8:Spring Boot 推荐jdk1.7及以上;java version "1.8.0_112"
–maven3.x:maven 3.3以上版本;Apache Maven 3.3.9
–IntelliJIDEA2017:IntelliJ IDEA 2017.2.2 x64、STS
–SpringBoot 1.5.9.RELEASE:1.5.9;
统一环境;
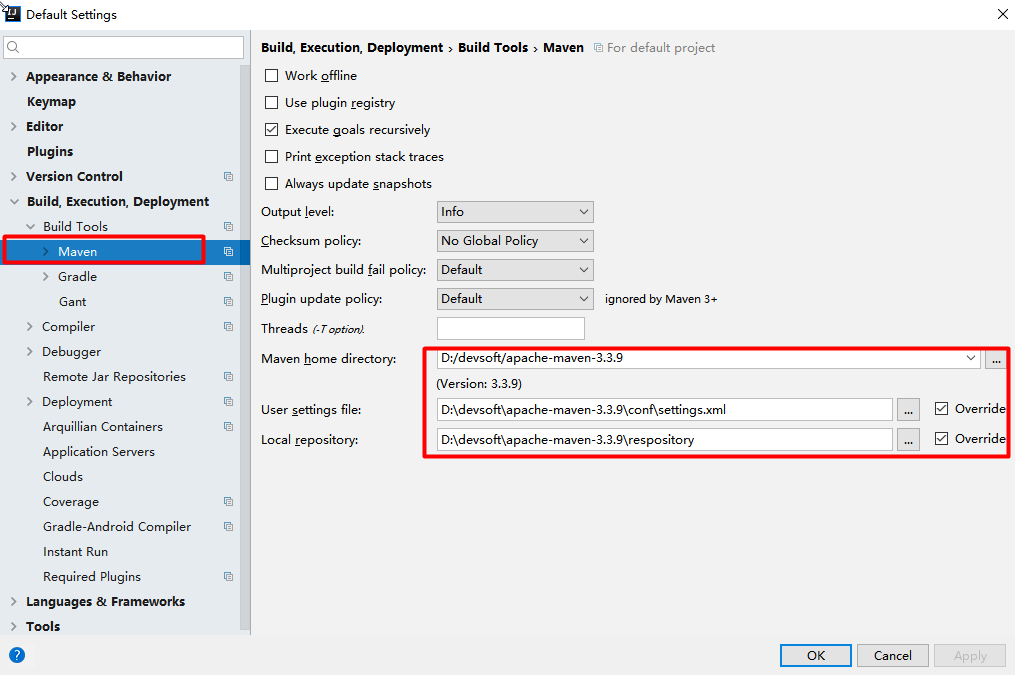
1、MAVEN设置;
给maven 的settings.xml配置文件的profiles标签添加
<profile>

  <id>jdk-1.8</id>

  <activation>

    <activeByDefault>true</activeByDefault>

    <jdk>1.8</jdk>

  </activation>

  <properties>

    <maven.compiler.source>1.8</maven.compiler.source>

    <maven.compiler.target>1.8</maven.compiler.target>

    <maven.compiler.compilerVersion>1.8</maven.compiler.compilerVersion>

  </properties>

</profile>
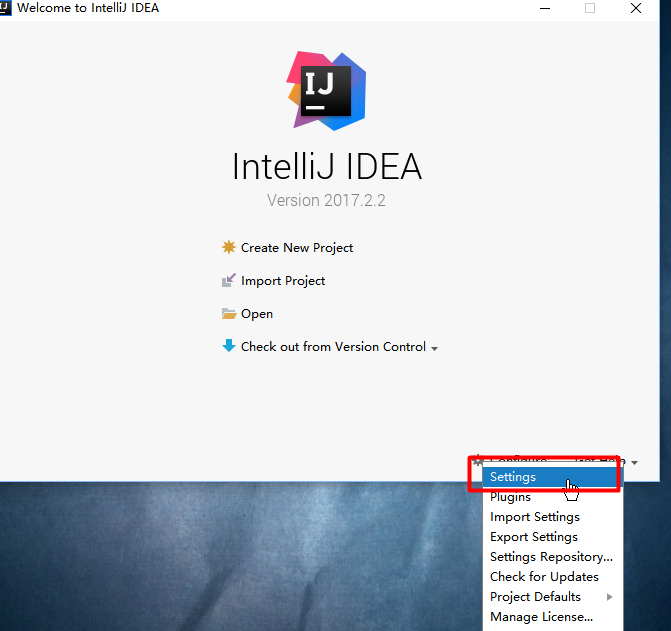
2、IDEA设置
整合maven进来;


4、Spring Boot HelloWorld
一个功能:
浏览器发送hello请求,服务器接受请求并处理,响应Hello World字符串;
1、创建一个maven工程;(jar)
2、导入spring boot相关的依赖
    <parent>

        <groupId>org.springframework.boot</groupId>

        <artifactId>spring-boot-starter-parent</artifactId>

        <version>1.5.9.RELEASE</version>

    </parent>

    <dependencies>

        <dependency>

            <groupId>org.springframework.boot</groupId>

            <artifactId>spring-boot-starter-web</artifactId>

        </dependency>

    </dependencies>
3、编写一个主程序;启动Spring Boot应用
/**
* @SpringBootApplication 来标注一个主程序类,说明这是一个Spring Boot应用
*/
@SpringBootApplication
public class HelloWorldMainApplication {
public static void main(String[] args) {
// Spring应用启动起来
SpringApplication.run(HelloWorldMainApplication.class,args);
}
}
4、编写相关的Controller、Service
@Controller
public class HelloController {
@ResponseBody
@RequestMapping("/hello")
public String hello(){
return "Hello World!";
}
}
5、运行主程序测试
6、简化部署
 <!-- 这个插件,可以将应用打包成一个可执行的jar包;-->

    <build>

        <plugins>

            <plugin>

                <groupId>org.springframework.boot</groupId>

                <artifactId>spring-boot-maven-plugin</artifactId>

            </plugin>

        </plugins>

    </build>
将这个应用打成jar包,直接使用java -jar的命令进行执行;
5、Hello World探究
1、POM文件
1、父项目
<parent>
<groupId>org.springframework.boot</groupId>
<artifactId>spring-boot-starter-parent</artifactId>
<version>1.5.9.RELEASE</version>
</parent>
他的父项目是
<parent>
<groupId>org.springframework.boot</groupId>
<artifactId>spring-boot-dependencies</artifactId>
<version>1.5.9.RELEASE</version>
<relativePath>../../spring-boot-dependencies</relativePath>
</parent>
他来真正管理Spring Boot应用里面的所有依赖版本;
Spring Boot的版本仲裁中心;
以后我们导入依赖默认是不需要写版本;(没有在dependencies里面管理的依赖自然需要声明版本号)
2、启动器
<dependency>

    <groupId>org.springframework.boot</groupId>

    <artifactId>spring-boot-starter-web</artifactId>

</dependency>
spring-boot-starter-web:
spring-boot-starter:spring-boot场景启动器;帮我们导入了web模块正常运行所依赖的组件;
Spring Boot将所有的功能场景都抽取出来,做成一个个的starters(启动器),只需要在项目里面引入这些starter相关场景的所有依赖都会导入进来。要用什么功能就导入什么场景的启动器
2、主程序类,主入口类
/**
* @SpringBootApplication 来标注一个主程序类,说明这是一个Spring Boot应用
*/
@SpringBootApplication
public class HelloWorldMainApplication {
public static void main(String[] args) {
// Spring应用启动起来
SpringApplication.run(HelloWorldMainApplication.class,args);
}
}
@SpringBootApplication: Spring Boot应用标注在某个类上说明这个类是SpringBoot的主配置类,SpringBoot就应该运行这个类的main方法来启动SpringBoot应用;
@Target(ElementType.TYPE)

@Retention(RetentionPolicy.RUNTIME)

@Documented

@Inherited

@SpringBootConfiguration

@EnableAutoConfiguration

@ComponentScan(excludeFilters = {

      @Filter(type = FilterType.CUSTOM, classes = TypeExcludeFilter.class),

      @Filter(type = FilterType.CUSTOM, classes = AutoConfigurationExcludeFilter.class) })

public @interface SpringBootApplication {
@SpringBootConfiguration:Spring Boot的配置类;
标注在某个类上,表示这是一个Spring Boot的配置类;
@Configuration:配置类上来标注这个注解;
配置类 ----- 配置文件;配置类也是容器中的一个组件;@Component
@EnableAutoConfiguration:开启自动配置功能;
以前我们需要配置的东西,Spring Boot帮我们自动配置;
@EnableAutoConfiguration告诉SpringBoot开启自动配置功能;这样自动配置才能生效;
@AutoConfigurationPackage

@Import(EnableAutoConfigurationImportSelector.class)

public @interface EnableAutoConfiguration {
@AutoConfigurationPackage:自动配置包
@Import(AutoConfigurationPackages.Registrar.class):
Spring的底层注解@Import,给容器中导入一个组件;导入的组件由AutoConfigurationPackages.Registrar.class;
==将主配置类(@SpringBootApplication标注的类)的所在包及下面所有子包里面的所有组件扫描到Spring容器;==
@Import(EnableAutoConfigurationImportSelector.class);
给容器中导入组件?
EnableAutoConfigurationImportSelector:导入哪些组件的选择器;
将所有需要导入的组件以全类名的方式返回;这些组件就会被添加到容器中;
会给容器中导入非常多的自动配置类(xxxAutoConfiguration);就是给容器中导入这个场景需要的所有组件,并配置好这些组件; !自动配置类
有了自动配置类,免去了我们手动编写配置注入功能组件等的工作;
SpringFactoriesLoader.loadFactoryNames(EnableAutoConfiguration.class,classLoader);
Spring Boot在启动的时候从类路径下的META-INF/spring.factories中获取EnableAutoConfiguration指定的值,将这些值作为自动配置类导入到容器中,自动配置类就生效,帮我们进行自动配置工作;以前我们需要自己配置的东西,自动配置类都帮我们;
J2EE的整体整合解决方案和自动配置都在spring-boot-autoconfigure-1.5.9.RELEASE.jar;
6、使用Spring Initializer快速创建Spring Boot项目
1、IDEA:使用 Spring Initializer快速创建项目
IDE都支持使用Spring的项目创建向导快速创建一个Spring Boot项目;
选择我们需要的模块;向导会联网创建Spring Boot项目;
默认生成的Spring Boot项目;
主程序已经生成好了,我们只需要我们自己的逻辑
resources文件夹中目录结构
static:保存所有的静态资源; js css images;
templates:保存所有的模板页面;(Spring Boot默认jar包使用嵌入式的Tomcat,默认不支持JSP页面);可以使用模板引擎(freemarker、thymeleaf);
application.properties:Spring Boot应用的配置文件;可以修改一些默认设置;
2、STS使用 Spring Starter Project快速创建项目
JAVAEE——SpringBoot入门:简介、微服务、环境准备、helloworld与探究、快速构建项目的更多相关文章
- SpringCloudAlibaba 微服务讲解(二)微服务环境搭建
微服务环境搭建 我们这次是使用的电商项目的商品.订单.用户为案例进行讲解 2.1 案例准备 2.1.1 技术选型 maven :3.3.9 数据库:mysql 持久层:SpringData JPA S ...
- SpringBoot入门简介(一)
1.SpringBoot简介 1.1 什么是Spring 随着动态语言的流行 (Ruby.Groovy.Scala.Node.js),Java 的开发显得格外的笨重:繁多的配置.低下的开发效率.复杂的 ...
- SpringBoot系列——快速构建项目
前言 springboot官方参考指南:https://docs.spring.io/spring-boot/docs/2.1.0.RELEASE/reference/htmlsingle/ Spri ...
- SpringBoot:使用IDEA快速构建项目
西部开源-秦疆老师:基于SpringBoot 2.1.6 的博客教程 秦老师交流Q群号: 664386224 未授权禁止转载!编辑不易 , 转发请注明出处!防君子不防小人,共勉! SpringBoot ...
- 基于spring-boot的rest微服务框架
周末在家研究spring-boot,参考github上的一些开源项目,整了一个rest微服务框架,取之于民,用之于民,在github上开源了,地址如下: https://github.com/yjmy ...
- springboot+dubbo+zookeeper微服务实践demo
微服务化越来越火,实际上是应互联网时代而生的,微服务化带来的不仅是性能上的提升,更带来了研发组织的更加便利,协作更加轻松,团队效能更高. 当然不能为了技术而技术,我们需要切合实际的对业务进行划分,降低 ...
- dubbo入门之微服务客户端服务端配置
正常一个服务不会只做客户端或者只做服务端,一般的微服务都是服务与服务相互调用,那么,应该怎么配置呢?接着之前的dubbo入门之helloWorld,我们再改改配置,即可实现正常的微服务架构.与之前相比 ...
- 通过Dapr实现一个简单的基于.net的微服务电商系统(十三)——istio+dapr构建多运行时服务网格之生产环境部署
之前所有的演示都是在docker for windows上进行部署的,没有真正模拟生产环境,今天我们模拟真实环境在公有云上用linux操作如何实现istio+dapr+电商demo的部署. 目录:一. ...
- SpringBoot+idea搭建微服务简化流程
作者:个人微信公众号:程序猿的月光宝盒 1.新建普通maven工程 2.在父级pom中按需修改 3.删除父级src目录 4.创建公共模块common,里面只有service接口和实体类 5.构建微服务 ...
随机推荐
- 解决 django 博客归档 “Are time zone definitions for your database and pytz installed?”的错误
修改 project 中的settings 文件,问题解决! # USE_TZ = True USE_TZ = False # LANGUAGE_CODE = 'en-us' LANGUAGE_COD ...
- What does -1 mean in numpy reshape?
The criterion to satisfy for providing the new shape is that 'The new shape should be compatible wit ...
- ajax实现输入用户名异步提示是否可用
<script type="text/javascript"> //页面加载完毕后执行 $(document).ready(function(){ //用户名输入框绑定 ...
- 【51Nod】1920 空间统计学 状压DP
[题目]1920 空间统计学 [题意]给定m维空间中的n个点坐标,满足每一维坐标大小都在[0,3]之间,现在对于[0,3*m]的每个数字x统计曼哈顿距离为x的有序点对数.\(n \leq 2*10^5 ...
- <td>内容超出自动换行
td 内容自动换行 table表格td设置宽度后文字太多自动换行 设置table 的 style="table-layout:fixed;" 然后设置td的 style=" ...
- MySQL忘记密码了怎么办?
接手一个项目时,如果上一位负责人没有把项目文档.账号密码整理好是一件很头疼的事情.. 例如,当你想打开MySQL数据库的时候 输入: mysql -u root -p 一回车想输入密码,发现密码错误! ...
- Python3之外部文件调用Django程序操作model等文件实现
import os import sys import django sys.path.append(r'C:\Users\Administrator\PycharmProjects\your pro ...
- 蓝桥杯 问题 1110: 2^k进制数 (排列组合+高精度巧妙处理)
题目链接 题目描述 设r是个2^k 进制数,并满足以下条件: (1)r至少是个2位的2^k 进制数. (2)作为2^k 进制数,除最后一位外,r的每一位严格小于它右边相邻的那一位. (3)将r转换为2 ...
- Django安装配置
django2.0基础 一.安装与项目的创建 1.安装 pip install django 2.查看版本 python -m django --version 3.创建项目 django-admin ...
- 字符串对象的charAt函数存在的意义
var style = ""; style[0] //undefined var style = ""; style.charAt(0); //"&q ...