如何使用借助python完成 ARCGIS工具箱的调用
上个月使用python调用arcgis工具箱完成了火点txt文件转shp文件的小功能, 感觉很不错, 写下这篇博客希望对大家有所帮助。
1.环境介绍:
系统: win8.1(64位)
arcgis:desktop10.2
2.ARCGIS 工具箱简单介绍:
| 工具英文名称 | 工具中文名称 |
| 3D Analyst toolbox |
三维分析工具箱 |
| Data Reviewer toolbox | 绘图工具箱 |
| Conversion toolbox | 转换工具箱 |
| Data Management toolbox | 数据管理工具箱 |
| Data Reviewer toolbox | 数据检查工具箱 |
| Geostatistical Analyst | 地统计分析 |
| Spatial Analyst toolbox | 空间分析工具箱 |
| Spatial Statistics toolbox | 空间统计工具箱 |
详细帮助页面可以参考 : http://help.arcgis.com/zh-cn/arcgisdesktop/10.0/help/index.html#/na/00r90000001n000000/
3.使用python代码完成arcgis工具箱的调用
3.1.在介绍这个调用之前,先学习一个简单的python程序
import sys

def hello(name):

    print "hello " + name +"!"

if "__main__" == __name__:

    #get count of parameter

    nLen = len(sys.argv)

    #print parametes

    for i in range(0, nLen):

        print ("argv %d:%s"%(i, sys.argv[i]))

    #call method hello

    hello(sys.argv[1])
这个python程序的功能很简单的, 就是接收一个name, 打印hello name!。 我们需要将这个文本保存到本地,修改名字为hello.py,主要扩展名为.py 。 这个hello.py就是python程序的源码文件了。接着打开命令行(win +r) 输入 d:\Python27\ArcGIS10.2\python.exe e:\test\hello.py zhaojiedi 回车就完成了程序的调用。d:\Python27\ArcGIS10.2\python.exe 是你python程序的所在位置,用于解释后面的python程序文件,e:\test\hello.py是你编写的python文件位置,zhaojiedi 这个就是你要传递给python程序的参数。这里是一个参数的, 如果多个参数, 参数中间空格分隔即可。
下面是我调用的输出结果
argv 0:E:\test\hello.py

argv 1:zhaojiedi

hello zhaojiedi!
通过以上的简单小程序,就可以完成python程序接收外部参数,完成指定的功能啦。
3.2.接下来使用c#调用下这个python文件。(当然可以使用其他语言调用了,这里使用c#语言演示下,其他语言同理)
  void  TestPython(string name)

  {

    string pythonExe =  @"d:\Python27\ArcGIS10.2\python.exe";

    string pythonFile = @"e:\test\hello.py";

    string outMessage = "";

    //创建一个进程

    Process process = new Process();

    //设置进程的exe文件

    process.StartInfo.FileName =pythonExe;

    //设置启动参数

    process.StartInfo.Arguments = string.Format(" {0} {1}", pythonFile, "zhaojiedi");

    //设置窗口风格

    process.StartInfo.WindowStyle = ProcessWindowStyle.Normal;

    process.StartInfo.CreateNoWindow = false;

    //是否使用shell ,这个是false的时候才可以将下面的重定向参数设置为true

    process.StartInfo.UseShellExecute = false;

    //设置重定向

    process.StartInfo.RedirectStandardError = true;

    process.StartInfo.RedirectStandardInput = true;

    process.StartInfo.RedirectStandardOutput = true;

    //初始化退出码

    exitCode = -;

    try

    {

        process.Start();


       //获取重定向的结果信息。

        outMessage = process.StandardOutput.ReadToEnd();

        process.WaitForExit();

        exitCode = process.ExitCode;

    }

    catch (Exception ex)

    {

        //todo log

    }


   //在终端打印结果信息。

    Console.WriteLine(outMessage);

    //todo 判断退出码

  }
3.3. 有了上面的基础, 接下来就可以我们的正题啦, 了解arcgis工具, 并使用python调用。
这里提供一个样例 , 就是通过python程序完成txt文本文件的点转矢量shp文件。
在arcgis中我们可以使用工具箱的Data management Tools | Layer and Table Views | Make XY EventLayer 这个工具 添加txt文本文件,如下图:

data.txt 内容如下(中间制表符分割)
101.2	35.1	0.3

121.2	43.2	0.8

101.5	40.2	0.96

110.5	35.6	0.4
点击OK 我们就可以将txt文件中经纬度转成要素(还不是矢量文件呢)。 点击ToolHelp(上图中的按钮) 获取工具帮助信息,弹出如下帮助信息。

copy 这段代码。
在打开arcgis 工具箱 Convert Tools | ToShapeFile | Feature Class To ShapeFile ,点击ToolHelp 获取工具帮助信息,copy调用样例。
修改copy的代码如下
#made by zhaojiedi1992

#import model

import os

import os.path

import arcpy

import sys

if "__main__" == __name__:

    nLen = len(sys.argv)

    for i in range(0, nLen):

        print ("argv %d:%s\n"%(i, sys.argv[i]))

    print "===parm ready============ Start ................"
  #get parameter

    txtFile = sys.argv[1]

    curDir = os.path.split(txtFile)[0];

    filename = os.path.split(txtFile)[1];

    arcpy.env.workspace = curDir

    lonField = "Field1"

    latField = "Field2"

    featureLayer = filename.replace(".txt","");

    sharpFile = txtFile.replace(".txt",".shp")

    if os.path.exists(sharpFile):

        os.remove(sharpFile)

    print "txtFile" + ":\t" + txtFile

    print "curDir" + ":\t" + curDir

    print "filename" + ":\t" + filename

    print "featureLayer" + ":\t" + featureLayer

    #step1 Creates an XY layer

    try:

        # Make the XY event layer...

        arcpy.MakeXYEventLayer_management(txtFile, lonField, latField, featureLayer)

    except:

        # If an error occurred print the message to the screen

        print arcpy.GetMessages()

    #step2 feature to sharpfile

    arcpy.FeatureClassToShapefile_conversion([featureLayer], curDir)

    print "===========================end============================================\n"
保存这个python代码为txtToShp.py,打开命令行就可以调用了d:\Python27\ArcGIS10.2\python.exe e:\test\txtToShp.py e:\test\data.txt, 当然可以使用3.2中的方法创建一个进程去调用python.exe解析python程序完成调用。
把结果的data.shp文件加载到arcgis中如下图:
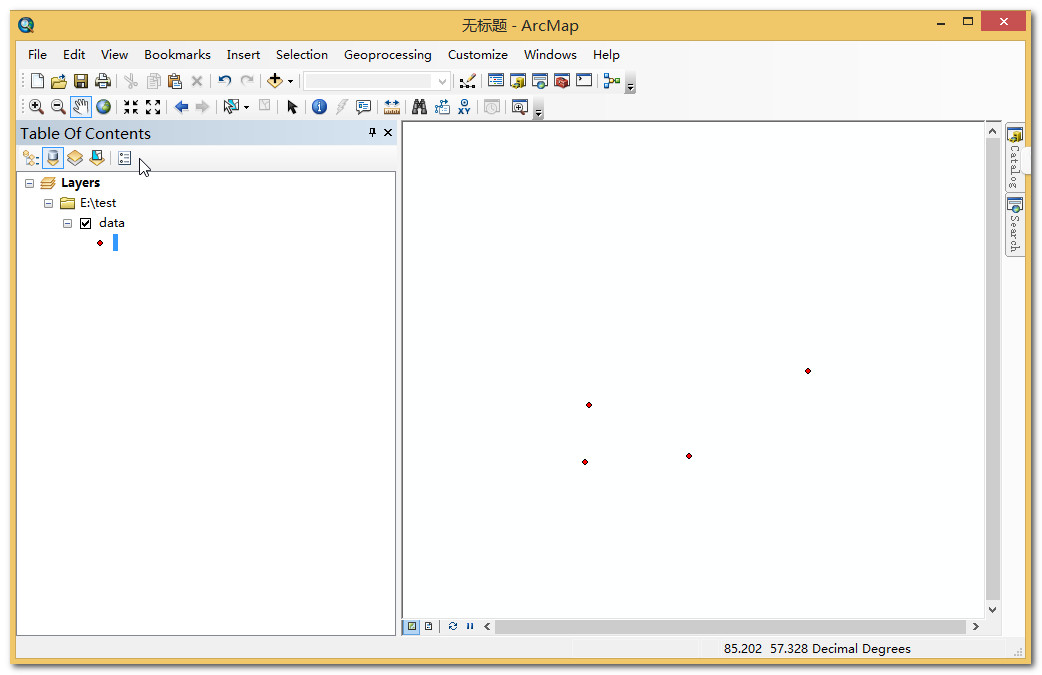
看完我的这个文章是不是感觉,arcgis 工具箱手工点击实现的功能都可以通过python程序调用了呢。
如何使用借助python完成 ARCGIS工具箱的调用的更多相关文章
- 使用python制作ArcGIS插件(2)代码编写
使用python制作ArcGIS插件(2)代码编写 by 李远祥 上一章节已经介绍了如何去搭建AddIn的界面,接下来要实现具体的功能,则到了具体的编程环节.由于使用的是python语言进行编程,则开 ...
- 使用python制作ArcGIS插件(1)工具介绍
使用python制作ArcGIS插件(1)工具介绍 by 李远祥 ArcGIS从10.0开始支持addin(ArcGIS软件中又叫作加载项)的方式进行插件制作.相对于以往9.x系列,addin的无论是 ...
- 《零基础学习Python制作ArcGIS自定义工具》课程简介
Python for ArcGIS Python for ArcGIS是借助Python语言实现ArcGIS自动化行为的综合,它不止是如课程标题所述的“制作ArcGIS自定义工具”,还包括使用Pyth ...
- 【转载】Python与ArcGIS Engine的集成
本文转载自Fransico<Python与ArcGIS Engine的集成> 1 在Python中调用AO类库 1.1 准备工作 本文所使用环境:ArcGIS 10.0.Python ...
- 使用python制作ArcGIS插件(5)其他技巧
使用python制作ArcGIS插件(5)其他技巧 by 李远祥 使用python做插件开发,除了了解ArcToolBox工具之外,还需要在了解ArcPy的相关函数和接口.只有掌握了这些,才可以顺利的 ...
- 使用python制作ArcGIS插件(4)界面交互
使用python制作ArcGIS插件(4)界面交互 by 李远祥 插件界面部分,除了一开始在设计器中设计的这些界面元素之外,还可以与操作系统进行一些输入输出的交互,这部分的实现全部在pythonadd ...
- 使用python制作ArcGIS插件(3)ArcPy的使用说明
使用python制作ArcGIS插件(3)ArcPy的使用说明 by 李远祥 ArcPy 是一个以成功的 arcgisscripting 模块为基础并继承了 arcgisscripting 功能进而构 ...
- ArcGis Python脚本——ArcGIS 中使用的 Python 是什么版本
Python 编程语言用于自 9.0 起的各版本 ArcGIS 中,并被整合到 ArcMap 和 ArcGIS for Server 的自动安装中. ArcGIS 将在完整安装过程中安装下列 Pyth ...
- 借助python工具从word文件中抽取相关表的定义,最后组装建表语句-非常好
借助python工具从word文件中抽取表的定义,最后组装建表语句-非常好 --如有转载请以超链接的方式注明原文章出处,谢谢大家.请尊重每一位乐于分享的原创者 1.python脚本 ## -*- co ...
随机推荐
- 小白的CTF学习之路4——内存
明天要进行二模考试了,沉住气,加油,能过 内存是学C路上必不可少的一环,一定要非常认真的去学 内存的物理结构: ROM:只读内存——早期的手机 RAM:读写(数据断点既消) DRAM:经常更新 SRA ...
- select、poll、epoll
1.概念 select.poll.epoll都是事件触发机制,当等待的事件发生就触发进行处理,用于I/O复用 2.简单例子理解 3.select函数 3.1函数详解 int select(int ma ...
- 流量控制与RateLimiter
一背景 如何提高系统的稳定性,简单来说除了加机器外就是服务降级.限流.加机器就是常说的分布式,从整个架构的稳定性角度看,一般SOA每个接口的所能提供的单位时间服务能力是有上限.假如超过服务能力,一般会 ...
- 初学者必看的文章:在VM12中安装 RedHat RHEL7.2 系统的详细步骤:看我如何操纵RHEL系统
一.开始安装 1)新建虚拟机 RHEL7.2 2)成功引导系统--开机出现此画面 Install Red Hat EnterpriseLinux 7.2 安装RHLE7.2 操作系统 Test th ...
- ios系统的Date的兼容问题
内容来源网上,自己记录下 问题1: var date =new Date(); 这个是获取当前系统时间的对象,在各端都可以 但是: var date =new Date("2017-01-2 ...
- vue监听滚动事件-元素固定位置显示
1.监听滚动事件 用VUE写一个在控制台打印当前的scrollTop用来测试是否执行: mounted () { window.addEventListener('scroll', this.hand ...
- data science学习笔记1
Mutiple Plots on One Graph plt.plot(x, norm.pdf(x)) plt.plot(x, norm.pdf(x, 1.0, 0.2)) #1.0 = mean, ...
- js的window.open()改写
说明:window.open(url,"_blank")方法替换如下: function openUrl(url) { try { if (/MSIE\s*(\d+\.\d+);/ ...
- Codeforces831A Unimodal Array
A. Unimodal Array time limit per test 1 second memory limit per test 256 megabytes input standard in ...
- Java对象序列化和返序列化
public class SerializeUtil { /** * 序列化 * * @param object * @return */ public static byte[] serialize ...