react中文API解读二(教程)
记下自己的react学习之路 ,官方文档写的很详尽,学起来应该比较简单
官方文档地址:react.http://reactjs.cn/react/docs/getting-started.html
2 .1运行一个服务器
我使用的是wampserver,当图标显示为绿色时表示服务器正常开启 。红色表示服务器异常。
进入www目录,初始index.php名称改成其他的,我改成index11.php。
将下载后的压缩包(react-tutorial-master)解压,改名成react后复制到进入www目录。
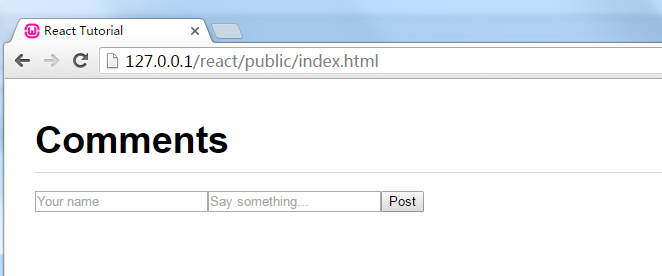
在浏览器中输入http://127.0.0.1/react/public/index.html 正常显示
2.2你的第一个组件
// tutorial1.js

var CommentBox = React.createClass({

  render: function() {

    return (

      <div className="commentBox">

        Hello, world! I am a CommentBox.

      </div>

    );

  }

});

ReactDOM.render(

  <CommentBox />,

  document.getElementById('content')

);
React.createClass构造react网页组件。可以理解为在内存中创建了一个虚拟网页。
ReactDOM.render();render()函数有两个参数。第一个指的是需要从内存中取出的网页,第二个指的是要渲染到的目标对象。

2.3制作组件

逻辑和1.2一样,只是在结构嵌套一层,更符合实际。
本例代码结构:构造一个CommentList组件和CommentForm组件。
<script type="text/babel">

var CommentList = React.createClass({

  render: function() {

    return (

      <div className="commentList">

        Hello, world! I am a CommentList.

      </div>

    );

  }

});

var CommentForm = React.createClass({

  render: function() {

    return (

      <div className="commentForm">

        Hello, world! I am a CommentForm.

      </div>

    );

  }

});

var CommentBox = React.createClass({

  render: function() {

    return (

      <div className="commentBox">

        <h1>Comments</h1>

        <CommentList />

        <CommentForm />

      </div>

    );

  }

});

ReactDOM.render(

  React.createElement(CommentBox, null),

  document.getElementById('content')

);

</script>
2.4使用属性与2.5组件属性
如果纯粹2.2,2.3中的使用方法,把所有内容直接写出来,那还不如直接在html里面写简单,模板标签也失去了存在的意义。
正是有了属性,才使得模板有了血液,模板和数据进行分离。
var CommentForm = React.createClass({

  render: function() {

    return (

      <div className="commentForm">

        Hello, world! I am a CommentForm.

      </div>

    );

  }

});

var CommentBox = React.createClass({

  render: function() {

    return (

      <div className="commentBox">

        <h1>Comments</h1>

        <CommentList />

        <CommentForm />

      </div>

    );

  }

});

var Comment = React.createClass({

  render: function() {

    return (

      <div className="comment">

        <h2 className="commentAuthor">

          {this.props.author}

        </h2>

        {this.props.children}

      </div>

    );

  }

});

var CommentList = React.createClass({

  render: function() {

    return (

      <div className="commentList">

        <Comment author="Pete Hunt">This is one comment</Comment>

        <Comment author="Jordan Walke">This is *another* comment</Comment>

      </div>

    );

  }

});

ReactDOM.render(

  React.createElement(CommentBox, null),

  document.getElementById('content')

);
2.6 添加 Markdown 语法格式的评论
本节可以看到,<p>标签并没有被解析成html标签,而是直接被输出到页面。
2.7接入数据模型
我们的使用越来越接近实际开发了。
data可以看作是接口给我们返回的数据
 var data = [

  {author: "Pete Hunt", text: "This is one comment"},

  {author: "Jordan Walke", text: "This is *another* comment"}

];

var Comment = React.createClass({

  rawMarkup: function() {

    var rawMarkup = marked(this.props.children.toString(), {sanitize: true});

    return { __html: rawMarkup };

  },

  render: function() {

    return (

      <div className="comment">

        <h2 className="commentAuthor">

          {this.props.author}

        </h2>

        <span dangerouslySetInnerHTML={this.rawMarkup()} />

      </div>

    );

  }

});

var CommentList = React.createClass({

  render: function() {

    var commentNodes = this.props.data.map(function (comment) {

      return (

        <Comment author={comment.author}>

          {comment.text}

        </Comment>

      );

    });

    return (

      <div className="commentList">

        {commentNodes}

      </div>

    );

  }

});

var CommentForm = React.createClass({

  render: function() {

    return (

      <div className="commentForm">

        Hello, world! I am a CommentForm.

      </div>

    );

  }

});

var CommentBox = React.createClass({

  render: function() {

    return (

      <div className="commentBox">

        <h1>Comments</h1>

        <CommentList data={this.props.data} />

        <CommentForm />

      </div>

    );

  }

});

ReactDOM.render(

  <CommentBox data={data} />,

  document.getElementById('content')

);
2.8从服务器获取数据
2.9响应状态变化( Reactive state )
react中文API解读二(教程)的更多相关文章
- react中文API解读一(快速开始)
记下自己的react学习之路 ,官方文档写的很详尽,学起来应该比较简单 官方文档地址:react.http://reactjs.cn/react/docs/getting-started.html 1 ...
- js-jquery-Validate校验【二】中文api
jQuery.validate 中文 API 名称 返回类型 描述 validate(options) Validator 验证所选的 FORM. valid() Boolean 检查是否验证通过. ...
- .NET Core 微服务—API网关(Ocelot) 教程 [二]
上篇文章(.NET Core 微服务—API网关(Ocelot) 教程 [一])介绍了Ocelot 的相关介绍. 接下来就一起来看如何使用,让它运行起来. 环境准备 为了验证Ocelot 网关效果,我 ...
- [Python][flask][flask-wtf]关于flask-wtf中API使用实例教程
简介:简单的集成flask,WTForms,包括跨站请求伪造(CSRF),文件上传和验证码. 一.安装(Install) 此文仍然是Windows操作系统下的教程,但是和linux操作系统下的运行环境 ...
- [转载]fullPage.js中文api 配置参数~
fullPage.js中文api 配置参数 选项 类型 默认值 说明 verticalCentered 字符串 true 内容是否垂直居中 resize 布尔值 false 字体是否随着窗口缩放而缩放 ...
- android SDK下载及中文API地址
中文API:http://wiki.eoeandroid.com/Android_API_Guides Android Dev Tools官网地址:www.androiddevtools.cn 收集整 ...
- 【干货分享】Node.js 中文学习资料和教程导航
这篇文章来自 Github 上的一位开发者收集整理的 Node.js 中文学习资料和教程导航.Node 是一个服务器端 JavaScript 解释器,它将改变服务器应该如何工作的概念,它的目标是帮助程 ...
- 中文翻译:pjsip教程(一)之PJNATH简介
在学习pjsip的过程中,发现只是单单的阅读英文官方文档,对于里边概念的理解还是不够透彻,并且苦于pjsip没有发现全一点的中文版本,所以想尽自己所能为建设和谐社会而贡献一份力量,文中定会有所疏漏,希 ...
- [置顶] COcos2d-X 中文API
本文来自http://blog.csdn.net/runaying ,引用必须注明出处! COcos2d-X 中文API 温馨提醒:使用二维码扫描软件,就可以在手机上访问我的博客啦!另外大家可以访问另 ...
随机推荐
- angularjs的懒加载
1.angularJS懒加载依赖模块 //设置 .config [ '$ocLazyLoadProvider' ($ocLazyLoadProvider) -> # We configure o ...
- JavaScript的Array.prototype.filter()详解
摘抄与:https://developer.mozilla.org/zh-CN/docs/Web/JavaScript/Reference/Global_Objects/Array/filter 概述 ...
- Base64加密与解密
import sun.misc.BASE64Decoder;import sun.misc.BASE64Encoder; // 将 str进行 BASE64 编码 public static Stri ...
- http://www.spasvo.com/ceshi/open/kyxncsgj/Jmeter/
http://www.spasvo.com/ceshi/open/kyxncsgj/Jmeter/
- SSH通过超链接传递中文参数出现乱码问题
通过超链接传递中文参数出现乱码问题 tomcat中的server.xml文件中修改如下配置: <Connector port="8080" protocol="HT ...
- CentOS 7安装Teamviewer 12
1 下载teamviewer 12的rpm包 方法一:访问官网 https://www.teamviewer.com/en/download/linux/ 方法二:wget https://downl ...
- uoj 55 紫荆花之恋 动态点分治+替罪羊式重构+treap
每插入一个点,直接把它当做重心插入原树,当做是动态点分树一样维护 但这样深度会越来越大,所以我们用类似替罪羊的方法 当树失去平衡时,对子树进行一次点分,保证复杂度 #include <cstdi ...
- 利用java实现抽奖转盘(着重安全控制)
本文是针对jquery 实现抽奖转盘作者的一个补充(主要用java去实现转盘结果生成及存储,解决jquery 做法 非法用户采用模拟器实现改变转盘值的风险性),针对jQuery的具体实现,请看案例:h ...
- chd校内选拔赛题目+题解
题目链接 A. Currency System in Geraldion 有1时,所有大于等于1的数都可由1组成.没有1时,最小不幸的数就是1. #include<iostream> ...
- 3.struts2访问Servlet API,并和mybaits实现全套增删改查
1.创建数据库脚本userinfo.sql prompt PL/SQL Developer import file prompt Created on 2016年5月19日 by pc set fee ...