Tensorflow[LSTM]
0.背景
通过对《tensorflow machine learning cookbook》第9章第3节"implementing_lstm"进行阅读,发现如下形式可以很方便的进行训练和预测,通过类进行定义,并利用了tf中的变量重用的能力,使得在训练阶段模型的许多变量,比如权重等,能够直接用在预测阶段。十分方便,不需要自己去做一些权重复制等事情。这里只是简单记录下这一小节的源码中几个概念性的地方。
# 定义LSTM模型

class LSTM_Model():

    def __init__(self, embedding_size, rnn_size, batch_size, learning_rate,

                 training_seq_len, vocab_size, infer_sample=False):

        self.embedding_size = embedding_size

        self.rnn_size = rnn_size #LSTM单元隐层的神经元个数

        self.vocab_size = vocab_size

        self.infer_sample = infer_sample

        self.learning_rate = learning_rate#学习率

        if infer_sample:#如果是inference,则batch size设为1

            self.batch_size = 1

            self.training_seq_len = 1

        else:

            self.batch_size = batch_size

            self.training_seq_len = training_seq_len

        '''建立LSTM单元和初始化state'''

        self.lstm_cell = tf.contrib.rnn.BasicLSTMCell(self.rnn_size)

        self.initial_state = self.lstm_cell.zero_state(self.batch_size, tf.float32)

       '''进行输入和输出的占位'''

        self.x_data = tf.placeholder(tf.int32, [self.batch_size, self.training_seq_len])

        self.y_output = tf.placeholder(tf.int32, [self.batch_size, self.training_seq_len])

        with tf.variable_scope('lstm_vars'):

            # Softmax 部分的权重

            W = tf.get_variable('W', [self.rnn_size, self.vocab_size], tf.float32, tf.random_normal_initializer())

            b = tf.get_variable('b', [self.vocab_size], tf.float32, tf.constant_initializer(0.0))

            # Define Embedding

            embedding_mat = tf.get_variable('embedding_mat', [self.vocab_size, self.embedding_size],

                                            tf.float32, tf.random_normal_initializer())

            embedding_output = tf.nn.embedding_lookup(embedding_mat, self.x_data)

            rnn_inputs = tf.split(axis=1, num_or_size_splits=self.training_seq_len, value=embedding_output)

            rnn_inputs_trimmed = [tf.squeeze(x, [1]) for x in rnn_inputs]

        # If we are inferring (generating text), we add a 'loop' function

        # Define how to get the i+1 th input from the i th output

        def inferred_loop(prev, count):

            # Apply hidden layer

            prev_transformed = tf.matmul(prev, W) + b

            # Get the index of the output (also don't run the gradient)

            prev_symbol = tf.stop_gradient(tf.argmax(prev_transformed, 1))

            # Get embedded vector

            output = tf.nn.embedding_lookup(embedding_mat, prev_symbol)

            return(output)

        decoder = tf.contrib.legacy_seq2seq.rnn_decoder

        outputs, last_state = decoder(rnn_inputs_trimmed,

                                      self.initial_state,

                                      self.lstm_cell,

                                      loop_function=inferred_loop if infer_sample else None)

        # Non inferred outputs

        output = tf.reshape(tf.concat(axis=1, values=outputs), [-1, self.rnn_size])

        # Logits and output

        self.logit_output = tf.matmul(output, W) + b

        self.model_output = tf.nn.softmax(self.logit_output)

        loss_fun = tf.contrib.legacy_seq2seq.sequence_loss_by_example

        loss = loss_fun([self.logit_output],[tf.reshape(self.y_output, [-1])],

                [tf.ones([self.batch_size * self.training_seq_len])],

                self.vocab_size)

        self.cost = tf.reduce_sum(loss) / (self.batch_size * self.training_seq_len)

        self.final_state = last_state

        gradients, _ = tf.clip_by_global_norm(tf.gradients(self.cost, tf.trainable_variables()), 4.5)

        optimizer = tf.train.AdamOptimizer(self.learning_rate)

        self.train_op = optimizer.apply_gradients(zip(gradients, tf.trainable_variables()))

    def sample(self, sess, words=ix2vocab, vocab=vocab2ix, num=10, prime_text='thou art'):

        state = sess.run(self.lstm_cell.zero_state(1, tf.float32))

        word_list = prime_text.split()

        for word in word_list[:-1]:

            x = np.zeros((1, 1))

            x[0, 0] = vocab[word]

            feed_dict = {self.x_data: x, self.initial_state:state}

            [state] = sess.run([self.final_state], feed_dict=feed_dict)

        out_sentence = prime_text

        word = word_list[-1]

        for n in range(num):

            x = np.zeros((1, 1))

            x[0, 0] = vocab[word]

            feed_dict = {self.x_data: x, self.initial_state:state}

            [model_output, state] = sess.run([self.model_output, self.final_state], feed_dict=feed_dict)

            sample = np.argmax(model_output[0])

            if sample == 0:

                break

            word = words[sample]

            out_sentence = out_sentence + ' ' + word

        return(out_sentence)
上述代码就建立好了lstm的网络结构,其中想要说明的重点就是,如往常一样构建lstm结构,其中BasicLSTMCell中的权重和上述的lstm_vars一样是有variable_scope的
# 定义训练阶段的lstm

lstm_model = LSTM_Model(embedding_size, rnn_size, batch_size, learning_rate,

                        training_seq_len, vocab_size)

# 定义测试阶段的lstm

with tf.variable_scope(tf.get_variable_scope(), reuse=True):

    test_lstm_model = LSTM_Model(embedding_size, rnn_size, batch_size, learning_rate,

                                 training_seq_len, vocab_size, infer_sample=True)
上述代码通过先建立一个训练的lstm结构,然后采用全局变量重用的形式,使得inference的lstm中的变量都方便的使用train阶段的变量。
下面是训练和inference的代码
# Train model

train_loss = []

iteration_count = 1

for epoch in range(epochs):

    # Shuffle word indices

    random.shuffle(batches)

    # Create targets from shuffled batches

    targets = [np.roll(x, -1, axis=1) for x in batches]

    # Run a through one epoch

    print('Starting Epoch #{} of {}.'.format(epoch+1, epochs))

    # Reset initial LSTM state every epoch

    state = sess.run(lstm_model.initial_state)

    for ix, batch in enumerate(batches):

        training_dict = {lstm_model.x_data: batch, lstm_model.y_output: targets[ix]}

        '''每个batch的LSTM中初始化状态c和h,其状态被赋值为上一个batch的LSTM的最终状态的c和h '''

        '''也就是前后相接 '''

        c, h = lstm_model.initial_state

        training_dict[c] = state.c

        training_dict[h] = state.h

        temp_loss, state, _ = sess.run([lstm_model.cost, lstm_model.final_state, lstm_model.train_op],

                                       feed_dict=training_dict)

        train_loss.append(temp_loss)

        # Print status every 10 gens

        if iteration_count % 10 == 0:

            summary_nums = (iteration_count, epoch+1, ix+1, num_batches+1, temp_loss)

            print('Iteration: {}, Epoch: {}, Batch: {} out of {}, Loss: {:.2f}'.format(*summary_nums))

        if iteration_count % eval_every == 0:

            for sample in prime_texts:

                print(test_lstm_model.sample(sess, ix2vocab, vocab2ix, num=10, prime_text=sample))

        iteration_count += 1
在后续的训练中只要正常训练和测试即可,其中inference阶段时候lstm中的权重,全都会自动的从训练阶段直接拿来用,在"site-packages/tensorflow/python/ops/rnn_cell_impl.py"的1240行:
  scope = vs.get_variable_scope()

  with vs.variable_scope(scope) as outer_scope:

    weights = vs.get_variable(

        _WEIGHTS_VARIABLE_NAME, [total_arg_size, output_size],

        dtype=dtype,

        initializer=kernel_initializer)
如上述代码中所示,当采用了全局变量重用功能之后,就无需手动去复制train好的权重到inference阶段了。

图0.1 graph图,左边红框是train的结构;右边红框是inference的结构
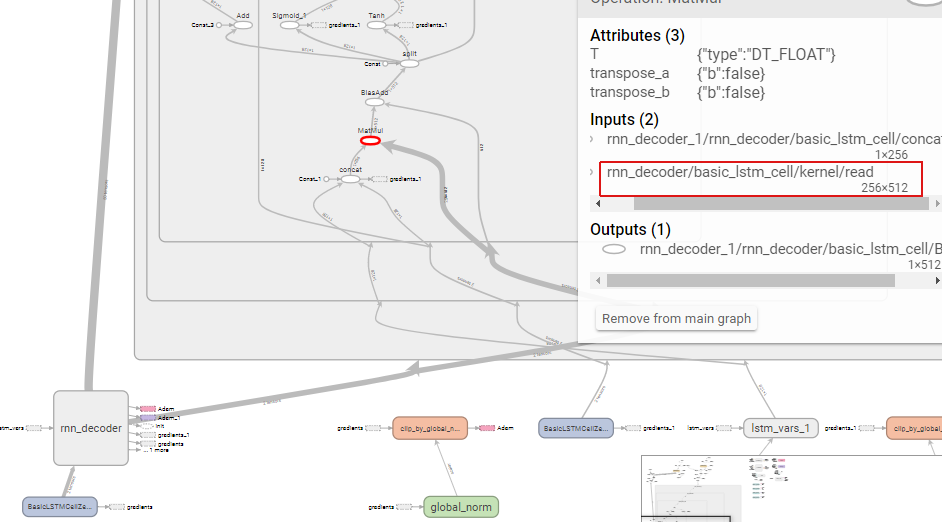
图0.2 基于图0.1的局部放大
Tensorflow[LSTM]的更多相关文章
- TensorFlow LSTM 注意力机制图解
TensorFlow LSTM Attention 机制图解 深度学习的最新趋势是注意力机制.在接受采访时,现任OpenAI研究主管的Ilya Sutskever提到,注意力机制是最令人兴奋的进步之一 ...
- TensorFlow-Bitcoin-Robot:一个基于 TensorFlow LSTM 模型的 Bitcoin 价格预测机器人
简介 TensorFlow-Bitcoin-Robot:一个基于 TensorFlow LSTM 模型的 Bitcoin 价格预测机器人. 文章包括一下几个部分: 1.为什么要尝试做这个项目? 2.为 ...
- Tensorflow LSTM实现
Tensorflow[LSTM] 0.背景 通过对<tensorflow machine learning cookbook>第9章第3节"implementing_lstm ...
- TensorFlow-Bitcoin-Robot:一个基于 TensorFlow LSTM 模型的 Bitcoin 价格预测机器人。
简介 TensorFlow-Bitcoin-Robot:一个基于 TensorFlow LSTM 模型的 Bitcoin 价格预测机器人. 文章包括一下几个部分: 1.为什么要尝试做这个项目? 2.为 ...
- 芝麻HTTP:TensorFlow LSTM MNIST分类
本节来介绍一下使用 RNN 的 LSTM 来做 MNIST 分类的方法,RNN 相比 CNN 来说,速度可能会慢,但可以节省更多的内存空间. 初始化 首先我们可以先初始化一些变量,如学习率.节点单元数 ...
- tflearn tensorflow LSTM predict sin function
from __future__ import division, print_function, absolute_import import tflearn import numpy as np i ...
- tensorflow LSTM+CTC使用详解
最近用tensorflow写了个OCR的程序,在实现的过程中,发现自己还是跳了不少坑,在这里做一个记录,便于以后回忆.主要的内容有lstm+ctc具体的输入输出,以及TF中的CTC和百度开源的warp ...
- TensorFlow——LSTM长短期记忆神经网络处理Mnist数据集
1.RNN(Recurrent Neural Network)循环神经网络模型 详见RNN循环神经网络:https://www.cnblogs.com/pinard/p/6509630.html 2. ...
- TensorFlow入门(五)多层 LSTM 通俗易懂版
欢迎转载,但请务必注明原文出处及作者信息. @author: huangyongye @creat_date: 2017-03-09 前言: 根据我本人学习 TensorFlow 实现 LSTM 的经 ...
随机推荐
- window的cmd命令行下新增/删除文件夹及文件
新增文件夹 (md / mkdir) md <folderName>: folderName 就是文件路径,只输入文件夹名称时表示在当前目录下创建文件夹. 比如:md F:\test\pr ...
- 关于z-index使用方法
z-index控制的是元素的层叠顺序,当z-index越大此层越靠上:但是z-index需在已给元素定位(定位方式不限)的前提下否则该属性失效!! jquery获取index值的方法: $(" ...
- loadrunner 运行场景-运行时设置
运行场景-运行时设置 by:授客 QQ:1033553122 A. 查看.修改单个脚本的运行时设置 a) 途径1: Scenario Groups.Scenario Groups Script ...
- Java并发编程(六)volatile关键字解析
由于volatile关键字是与Java的内存模型有关的,因此在讲述volatile关键之前,我们先来了解一下与内存模型相关的概念和知识. 一.内存模型的相关概念 Java内存模型规定所有的变量都是存在 ...
- TensorFlow 安装教程
1.准备好Anaconda环境 tensorflow是属于很高层的应用.高层应用的一个比较大的麻烦就是需要依赖的底层的东西很多,如果底层依赖没有弄好的话,高层应用是没法玩转的. 在极客学院有关tens ...
- 18LaTeX学习系列之---LaTeX的参考文献
目录 目录 前言 (一)简单的参考文献 1.说明 2.源代码 3.输出效果 (二)以文件管理的方式 1.说明: 2.源代码: 3.输出效果 (三)直接从源网站获取 1.说明 2.操作 目录 本系列是有 ...
- NSTimer+倒计时功能实现
NSTimer 一.前言,查看官方文档,可以发现NSTimer是Foundation框架下的一个类,它直接继承与NSObject. 二.常用属性 1. @property (copy) NSDate ...
- 关于plist文件的那些事
今天遇到新生问一个问题,就是用自己定义了一个plist文件,然后可以往里面写东西,但是写过再次运行的时候里面的数据总是最后一次写入的数据.后来就专门研究了一下plist文件. 大家都知道当你创建一个项 ...
- Java实现对zip和rar文件的解压缩
通过java实现对zip和rar文件的解压缩
- SQL Server2008 4064错误
无法打开用户默认数据库,登录失败,其原因是登录帐户的默认数据库被删除. 解决办法是使用管理员帐户修改此登录帐户的默认数据库. 1.使用管理员帐号登入企业管理器,在"对象资源管理器& ...