一步步完成Maven+SpringMVC+SpringFox+Swagger整合示例
本文给出一个整合Maven+SpringMVC+SpringFOX+Swagger的示例,并且一步步给出完成步骤。
本人在做实例时发现 http://blog.csdn.net/zth1002/article/details/46927187 中,Spring必须是4.0以上版本。
目标
在做项目的时候,有时候需要提供其它平台(如业务平台)相关的HTTP接口,业务平台则通过开放的HTTP接口获取相关的内容,并完成自身业务~
提供对外开放HTTP API接口,比较常用的是采用Spring MVC来完成。
本文的目标是先搭建一个简单的Spring MVC应用,然后为Spring MVC整合SpringFox-Swagger以及SpringFox-Swagger-UI,最终,达到Spring MVC对外开放接口API文档化。
如下图所示:
搭建SpringMVC工程
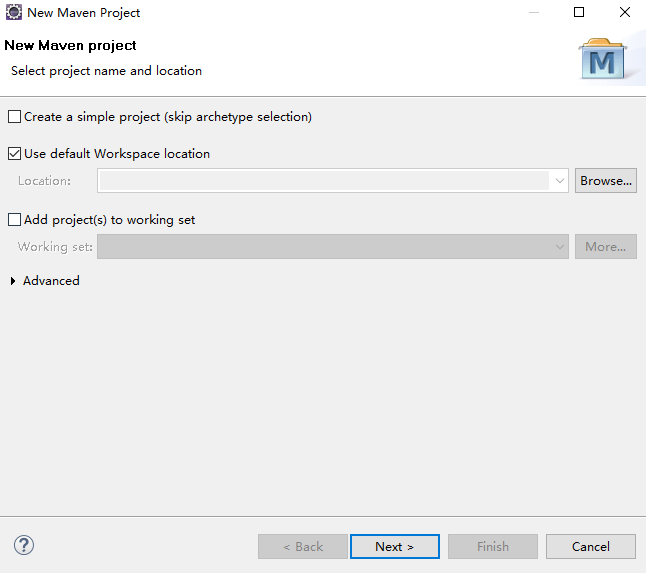
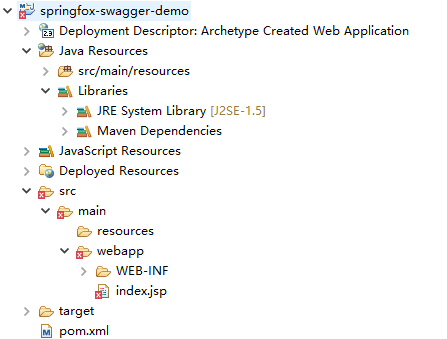
新建Maven工程
Eclipse中,File --> New --> Maven Project,
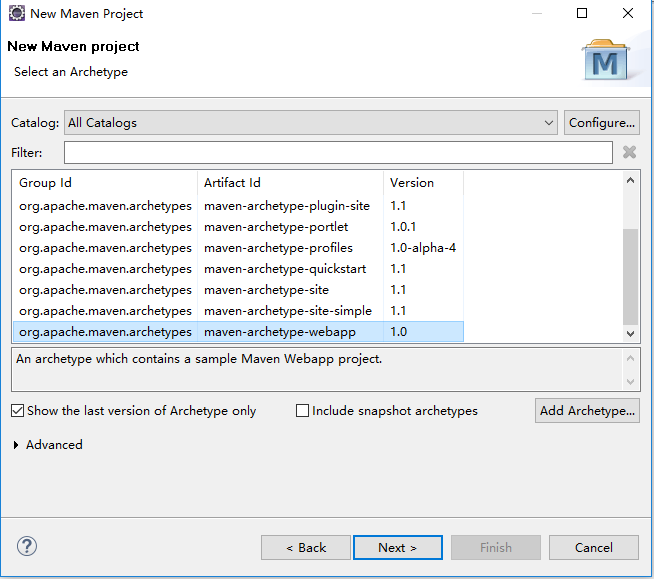
点击“Next”按钮, 然后选择 “maven-archetype-webapp”,
继续点击“Next”按钮,然后指定
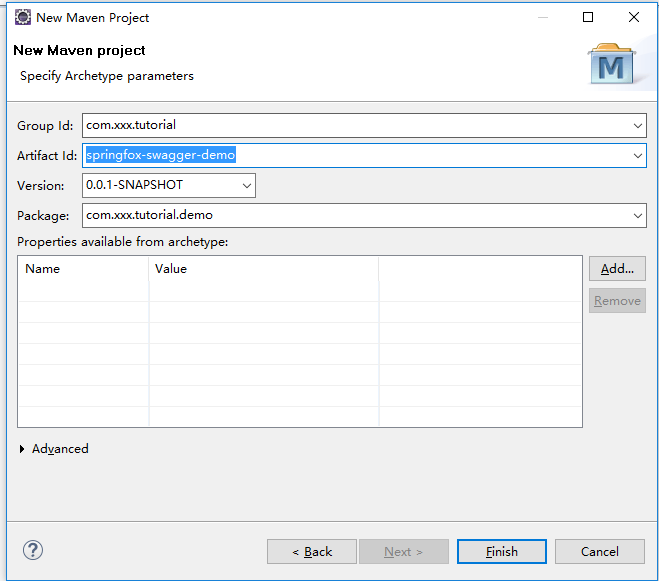
点击“Finish” 按钮结束~ 就这样,一个简单的Web工程就建好了~
但是,
默认是使用J2SE-1.5, 配置一下Build Path,使用本地机器上安装的JDK
(本文中使用的是JDK 1.7),工程默认字体是GBK,将其改成UTF-8
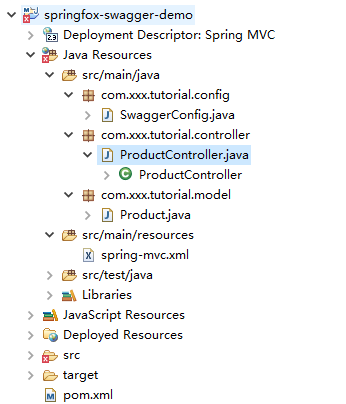
完成后,Maven工程的结构如下图所示:

引入Spring依赖包
在本示例中,因为简单,所以只要引入如下几个jar包就好了~
	<dependencies>

		<!--引入Spring依赖包 -->

		<dependency>

			<groupId>org.springframework</groupId>

			<artifactId>spring-core</artifactId>

			<version>${spring.framework.version}</version>

		</dependency>

		<dependency>

			<groupId>org.springframework</groupId>

			<artifactId>spring-context</artifactId>

			<version>${spring.framework.version}</version>

		</dependency>

		<dependency>

			<groupId>org.springframework</groupId>

			<artifactId>spring-webmvc</artifactId>

			<version>${spring.framework.version}</version>

		</dependency>

	</dependencies>
完整的pom.xml文件内容如下:
<project xmlns="http://maven.apache.org/POM/4.0.0" xmlns:xsi="http://www.w3.org/2001/XMLSchema-instance"

	xsi:schemaLocation="http://maven.apache.org/POM/4.0.0 http://maven.apache.org/maven-v4_0_0.xsd">

	<modelVersion>4.0.0</modelVersion>

	<groupId>com.xxx.tutorial</groupId>

	<artifactId>springfox-swagger-demo</artifactId>

	<packaging>war</packaging>

	<version>0.0.1-SNAPSHOT</version>

	<name>springfox-swagger-demo Maven Webapp</name>

	<url>http://maven.apache.org</url>

	<properties>

		<project.build.sourceEncoding>UTF-8</project.build.sourceEncoding>

		<spring.framework.version>4.3.6.RELEASE</spring.framework.version>

	</properties>

	<dependencies>

		<!--引入Spring依赖包 -->

		<dependency>

			<groupId>org.springframework</groupId>

			<artifactId>spring-core</artifactId>

			<version>${spring.framework.version}</version>

		</dependency>

		<dependency>

			<groupId>org.springframework</groupId>

			<artifactId>spring-context</artifactId>

			<version>${spring.framework.version}</version>

		</dependency>

		<dependency>

			<groupId>org.springframework</groupId>

			<artifactId>spring-webmvc</artifactId>

			<version>${spring.framework.version}</version>

		</dependency>

	</dependencies><build><finalName>springfox-swagger-demo</finalName></build></project>
编写spring-mvc.xml文件
<?xml version="1.0" encoding="UTF-8"?>

<beans xmlns="http://www.springframework.org/schema/beans"

	xmlns:xsi="http://www.w3.org/2001/XMLSchema-instance" xmlns:context="http://www.springframework.org/schema/context"

	xmlns:mvc="http://www.springframework.org/schema/mvc" xmlns:p="http://www.springframework.org/schema/p"

	xsi:schemaLocation="http://www.springframework.org/schema/beans http://www.springframework.org/schema/beans/spring-beans-4.0.xsd

		http://www.springframework.org/schema/context http://www.springframework.org/schema/context/spring-context-4.0.xsd

		http://www.springframework.org/schema/mvc http://www.springframework.org/schema/mvc/spring-mvc-4.0.xsd">

	<!-- 默认的注解映射的支持 ,它会自动注册DefaultAnnotationHandlerMapping 与AnnotationMethodHandlerAdapter -->

	<mvc:annotation-driven />

	<!-- enable autowire 向容器自动注册 -->

	<context:annotation-config />

	<!-- 设置使用注解的类所在的jar包 -->

	<context:component-scan base-package="com.xxx.tutorial" />

	<bean

		class="org.springframework.web.servlet.mvc.annotation.AnnotationMethodHandlerAdapter" />

</beans>
配置web.xml
<?xml version="1.0" encoding="UTF-8"?>

<web-app xmlns:xsi="http://www.w3.org/2001/XMLSchema-instance"

	xmlns="http://java.sun.com/xml/ns/javaee"

	xsi:schemaLocation="http://java.sun.com/xml/ns/javaee http://java.sun.com/xml/ns/javaee/web-app_3_0.xsd"

	id="WebApp_ID" metadata-complete="true" version="3.0">

	<display-name>Spring MVC</display-name>

	<servlet>

		<servlet-name>spring-mvc</servlet-name>

		<servlet-class>org.springframework.web.servlet.DispatcherServlet</servlet-class>

		<init-param>

			<param-name>contextConfigLocation</param-name>

			<param-value>classpath:spring-mvc.xml</param-value>

		</init-param>

		<load-on-startup>1</load-on-startup>

		<async-supported>true</async-supported>

	</servlet>

	<servlet-mapping>

		<servlet-name>spring-mvc</servlet-name>

		<url-pattern>/</url-pattern>

	</servlet-mapping>

	<filter>

		<filter-name>encodingFilter</filter-name>

		<filter-class>org.springframework.web.filter.CharacterEncodingFilter</filter-class>

		<init-param>

			<param-name>encoding</param-name>

			<param-value>UTF-8</param-value>

		</init-param>

		<init-param>

			<param-name>forceEncoding</param-name>

			<param-value>true</param-value>

		</init-param>

	</filter>

	<filter-mapping>

		<filter-name>encodingFilter</filter-name>

		<url-pattern>/*</url-pattern>

	</filter-mapping>

</web-app>
编写Controller并测试
配置好spring-mvc.xml以及web.xml文件之后,咱们继续往下走~
因为,本文Spring MVC示例的作用主要用来暴露对外HTTP API接口,先写一个简单的ProductController,其包含一个按照id查询的方法。
Product.java和ProductController.java的内容如下:
Product.java
package com.xxx.tutorial.model;

import java.io.Serializable;

/**

 *

 * @author wangmengjun

 *

 */

public class Product implements Serializable {

	private static final long serialVersionUID = 1L;

	/**ID*/

	private Long id;

	/**产品名称*/

	private String name;

	/**产品型号*/

	private String productClass;

	/**产品ID*/

	private String productId;

	/**

	 * @return the id

	 */

	public Long getId() {

		return id;

	}

	/**

	 * @param id

	 *            the id to set

	 */

	public void setId(Long id) {

		this.id = id;

	}

	/**

	 * @return the name

	 */

	public String getName() {

		return name;

	}

	/**

	 * @param name

	 *            the name to set

	 */

	public void setName(String name) {

		this.name = name;

	}

	/**

	 * @return the productClass

	 */

	public String getProductClass() {

		return productClass;

	}

	/**

	 * @param productClass

	 *            the productClass to set

	 */

	public void setProductClass(String productClass) {

		this.productClass = productClass;

	}

	/**

	 * @return the productId

	 */

	public String getProductId() {

		return productId;

	}

	/**

	 * @param productId

	 *            the productId to set

	 */

	public void setProductId(String productId) {

		this.productId = productId;

	}

	/*

	 * (non-Javadoc)

	 *

	 * @see java.lang.Object#toString()

	 */

	@Override

	public String toString() {

		return "Product [id=" + id + ", name=" + name + ", productClass=" + productClass + ", productId=" + productId

				+ "]";

	}

}
ProductController.java
package com.xxx.tutorial.controller;

import org.springframework.http.ResponseEntity;

import org.springframework.web.bind.annotation.PathVariable;

import org.springframework.web.bind.annotation.RequestMapping;

import org.springframework.web.bind.annotation.RequestMethod;

import org.springframework.web.bind.annotation.RestController;

import com.xxx.tutorial.model.Product;

@RestController

@RequestMapping(value = { "/api/product/"})

public class ProductController {

	@RequestMapping(value = "/{id}", method = RequestMethod.GET)

	public ResponseEntity<Product> get(@PathVariable Long id) {

		Product product = new Product();

		product.setName("七级滤芯净水器");

		product.setId(1L);

		product.setProductClass("seven_filters");

		product.setProductId("T12345");

		return ResponseEntity.ok(product);

	}

}
注:
鉴于是一个demo示例,所以没有写ProductService以及相关DAO, 直接在方法中返回固定的Product信息~
验证Spring MVC是否ok
完成Controller的代码,运行Spring MVC项目,然后,看一下Spring MVC是否运行ok,访问URL地址
http://localhost:8888/springfox-swagger-demo/api/product/1
- 出现错误
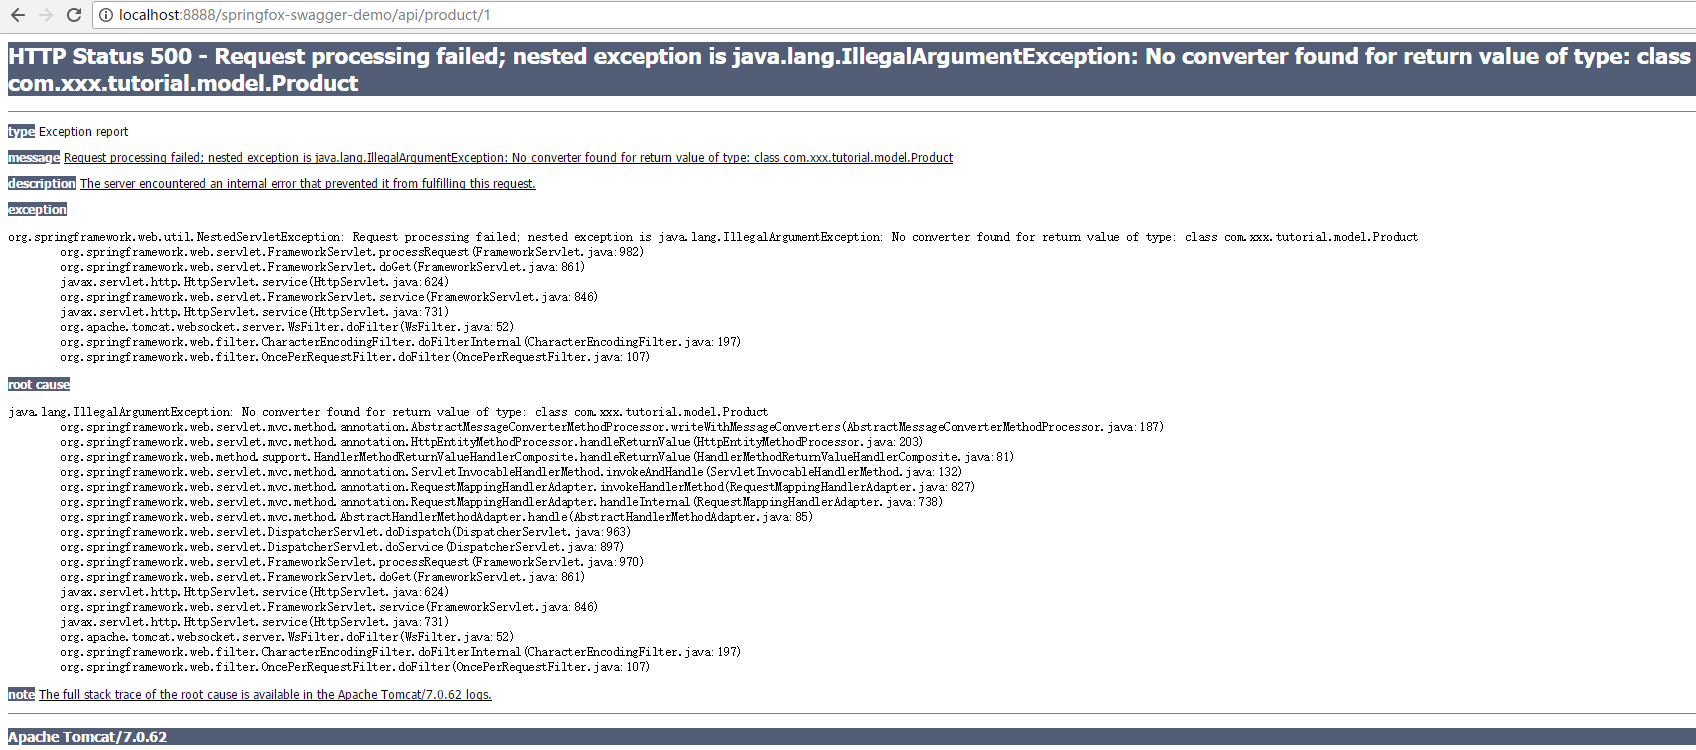
详细的错误信息如下:
五月 23, 2017 3:00:55 下午 org.apache.catalina.core.StandardWrapperValve invoke

严重: Servlet.service() for servlet [spring-mvc] in context with path [/springfox-swagger-demo] threw exception [Request processing failed; nested exception is java.lang.IllegalArgumentException: No converter found for return value of type: class com.xxx.tutorial.model.Product] with root cause

java.lang.IllegalArgumentException: No converter found for return value of type: class com.xxx.tutorial.model.Product

	at org.springframework.web.servlet.mvc.method.annotation.AbstractMessageConverterMethodProcessor.writeWithMessageConverters(AbstractMessageConverterMethodProcessor.java:187)

	at org.springframework.web.servlet.mvc.method.annotation.HttpEntityMethodProcessor.handleReturnValue(HttpEntityMethodProcessor.java:203)

	at org.springframework.web.method.support.HandlerMethodReturnValueHandlerComposite.handleReturnValue(HandlerMethodReturnValueHandlerComposite.java:81)

	at org.springframework.web.servlet.mvc.method.annotation.ServletInvocableHandlerMethod.invokeAndHandle(ServletInvocableHandlerMethod.java:132)

	at org.springframework.web.servlet.mvc.method.annotation.RequestMappingHandlerAdapter.invokeHandlerMethod(RequestMappingHandlerAdapter.java:827)

	at org.springframework.web.servlet.mvc.method.annotation.RequestMappingHandlerAdapter.handleInternal(RequestMappingHandlerAdapter.java:738)

	at org.springframework.web.servlet.mvc.method.AbstractHandlerMethodAdapter.handle(AbstractHandlerMethodAdapter.java:85)

	at org.springframework.web.servlet.DispatcherServlet.doDispatch(DispatcherServlet.java:963)

	at org.springframework.web.servlet.DispatcherServlet.doService(DispatcherServlet.java:897)

	at org.springframework.web.servlet.FrameworkServlet.processRequest(FrameworkServlet.java:970)

	at org.springframework.web.servlet.FrameworkServlet.doGet(FrameworkServlet.java:861)

	at javax.servlet.http.HttpServlet.service(HttpServlet.java:624)

	at org.springframework.web.servlet.FrameworkServlet.service(FrameworkServlet.java:846)

	at javax.servlet.http.HttpServlet.service(HttpServlet.java:731)

	at org.apache.catalina.core.ApplicationFilterChain.internalDoFilter(ApplicationFilterChain.java:303)

	at org.apache.catalina.core.ApplicationFilterChain.doFilter(ApplicationFilterChain.java:208)

	at org.apache.tomcat.websocket.server.WsFilter.doFilter(WsFilter.java:52)

	at org.apache.catalina.core.ApplicationFilterChain.internalDoFilter(ApplicationFilterChain.java:241)

	at org.apache.catalina.core.ApplicationFilterChain.doFilter(ApplicationFilterChain.java:208)

	at org.springframework.web.filter.CharacterEncodingFilter.doFilterInternal(CharacterEncodingFilter.java:197)

	at org.springframework.web.filter.OncePerRequestFilter.doFilter(OncePerRequestFilter.java:107)

	at org.apache.catalina.core.ApplicationFilterChain.internalDoFilter(ApplicationFilterChain.java:241)

	at org.apache.catalina.core.ApplicationFilterChain.doFilter(ApplicationFilterChain.java:208)

	at org.apache.catalina.core.StandardWrapperValve.invoke(StandardWrapperValve.java:220)

	at org.apache.catalina.core.StandardContextValve.invoke(StandardContextValve.java:122)

	at org.apache.catalina.core.StandardHostValve.invoke(StandardHostValve.java:170)

	at org.apache.catalina.valves.ErrorReportValve.invoke(ErrorReportValve.java:103)

	at org.apache.catalina.valves.AccessLogValve.invoke(AccessLogValve.java:957)

	at org.apache.catalina.core.StandardEngineValve.invoke(StandardEngineValve.java:116)

	at org.apache.catalina.connector.CoyoteAdapter.service(CoyoteAdapter.java:423)

	at org.apache.coyote.http11.AbstractHttp11Processor.process(AbstractHttp11Processor.java:1079)

	at org.apache.coyote.AbstractProtocol$AbstractConnectionHandler.process(AbstractProtocol.java:620)

	at org.apache.tomcat.util.net.JIoEndpoint$SocketProcessor.run(JIoEndpoint.java:316)

	at java.util.concurrent.ThreadPoolExecutor.runWorker(Unknown Source)

	at java.util.concurrent.ThreadPoolExecutor$Worker.run(Unknown Source)

	at org.apache.tomcat.util.threads.TaskThread$WrappingRunnable.run(TaskThread.java:61)

	at java.lang.Thread.run(Unknown Source)
解决方法,添加jackson-databind依赖包即可~
		<dependency>

			<groupId>com.fasterxml.jackson.core</groupId>

			<artifactId>jackson-databind</artifactId>

			<version>2.6.6</version>

		</dependency>
重新启动,运行一下,成功返回信息~

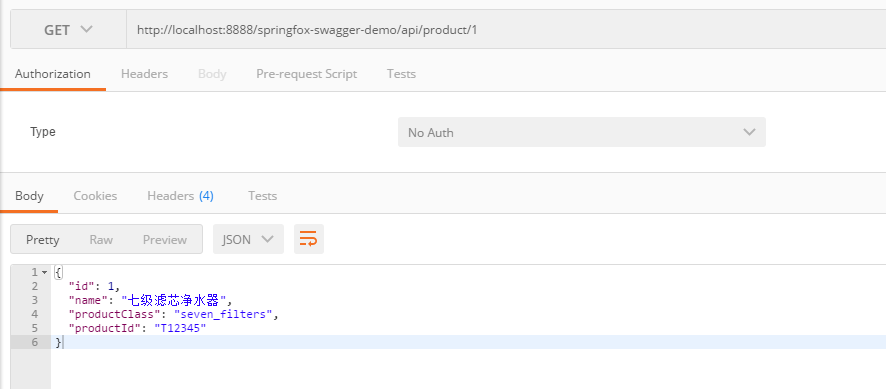
为了看的更加清楚,可以使用postman来完成~, 如~
至此,一个简单的基于SpringMVC的Web项目已经创建,并能对外提供API接口~
接下来,我们要整合SpringFox和SwaggerUI到该SpringMVC项目中去,使其对外接口文档化
整合SpringFox-Swagger
SpringFox【SpringFox链接】已经可以代替Swagger-SpringMVC, 目前SpringFox同时支持Swagger 1.2 和 2.0.
在SpringMVC项目中整合SpringFox-Swagger只要如下几步即可~
- 添加SpringFox-Swagger依赖
- 添加SwaggerConfig
添加依赖
		<dependency>

			<groupId>io.springfox</groupId>

			<artifactId>springfox-swagger2</artifactId>

			<version>2.7.0</version>

		</dependency>
添加SwaggerConfig
package com.xxx.tutorial.config;

import org.springframework.context.annotation.Bean;

import org.springframework.context.annotation.Configuration;

import springfox.documentation.builders.ApiInfoBuilder;

import springfox.documentation.builders.RequestHandlerSelectors;

import springfox.documentation.service.ApiInfo;

import springfox.documentation.spi.DocumentationType;

import springfox.documentation.spring.web.plugins.Docket;

import springfox.documentation.swagger2.annotations.EnableSwagger2;

@Configuration

@EnableSwagger2

public class SwaggerConfig {

	@Bean

	public Docket api() {

		return new Docket(DocumentationType.SWAGGER_2)

				.select()

				.apis(RequestHandlerSelectors.any())

				.build()

				.apiInfo(apiInfo());

	}

	private ApiInfo apiInfo() {

		return new ApiInfoBuilder()

				.title("对外开放接口API 文档")

				.description("HTTP对外开放接口")

				.version("1.0.0")

				.termsOfServiceUrl("http://xxx.xxx.com")

				.license("LICENSE")

				.licenseUrl("http://xxx.xxx.com")

				.build();

	}

}
整合SpringFox-Swagger-UI
在SpringMVC项目中整合SpringFox-Swagger-UI也只要如下两个步骤即可~
- 添加SpringFox-Swagger-UI依赖
- 添加配置
添加依赖
		<dependency>

			<groupId>io.springfox</groupId>

			<artifactId>springfox-swagger-ui</artifactId>

			<version>2.7.0</version>

		</dependency>
添加配置
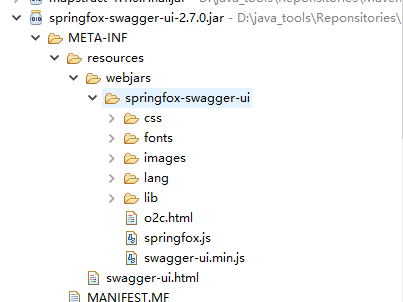
在添加配置之前,一起来看一下swagger-ui中使用的静态资源文件(如swagger-ui.html )放在那里~
spingfox-swagger-ui-2.7.0.jar中的/META-INF/resources/下~ 如下图所示:
为了访问swagger-ui.html,我们配置对这些静态资源的访问~ 如:
package com.xxx.tutorial.config;

import org.springframework.context.annotation.Configuration;

import org.springframework.web.servlet.config.annotation.EnableWebMvc;

import org.springframework.web.servlet.config.annotation.ResourceHandlerRegistry;

import org.springframework.web.servlet.config.annotation.WebMvcConfigurerAdapter;

@Configuration

@EnableWebMvc

public class WebAppConfig extends WebMvcConfigurerAdapter {

    @Override

    public void addResourceHandlers(ResourceHandlerRegistry registry) {

        registry.addResourceHandler("swagger-ui.html").addResourceLocations("classpath:/META-INF/resources/");

        registry.addResourceHandler("/webjars/**").addResourceLocations("classpath:/META-INF/resources/webjars/");

    }

}
该配置代码的效果和如下代码等价~
	<mvc:resources mapping="swagger-ui.html" location="classpath:/META-INF/resources/" />

	<mvc:resources mapping="/webjars/**"

		location="classpath:/META-INF/resources/webjars/" />
在本文中,可以将其配置在spring-mvc.xml中,
<?xml version="1.0" encoding="UTF-8"?>

<beans xmlns="http://www.springframework.org/schema/beans"

	xmlns:xsi="http://www.w3.org/2001/XMLSchema-instance" xmlns:context="http://www.springframework.org/schema/context"

	xmlns:mvc="http://www.springframework.org/schema/mvc" xmlns:p="http://www.springframework.org/schema/p"

	xsi:schemaLocation="http://www.springframework.org/schema/beans http://www.springframework.org/schema/beans/spring-beans-4.0.xsd

		http://www.springframework.org/schema/context http://www.springframework.org/schema/context/spring-context-4.0.xsd

		http://www.springframework.org/schema/mvc http://www.springframework.org/schema/mvc/spring-mvc-4.0.xsd">

	<!-- 默认的注解映射的支持 ,它会自动注册DefaultAnnotationHandlerMapping 与AnnotationMethodHandlerAdapter -->

	<mvc:annotation-driven />

	<!-- enable autowire 向容器自动注册 -->

	<context:annotation-config />

	<!-- 设置使用注解的类所在的jar包 -->

	<context:component-scan base-package="com.xxx.tutorial" />

	<bean

		class="org.springframework.web.servlet.mvc.annotation.AnnotationMethodHandlerAdapter" />

	<mvc:resources mapping="swagger-ui.html" location="classpath:/META-INF/resources/" />

	<mvc:resources mapping="/webjars/**"

		location="classpath:/META-INF/resources/webjars/" />

</beans>
API接口说明代码添加并测试
经过上述几个步骤之后,之前写的ProductController的接口,就可以实现文档化了,如本文通过如下的访问地址访问:
http://localhost:8888/springfox-swagger-demo/swagger-ui.html
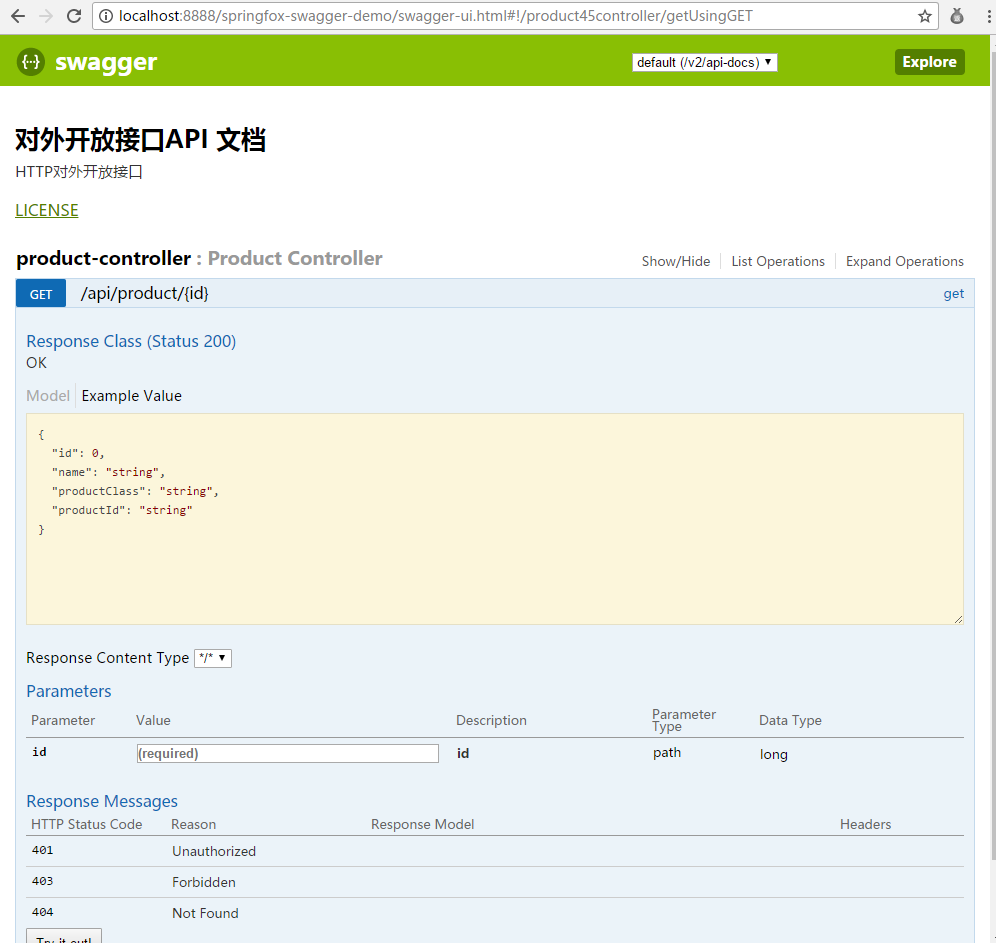
这个接口API雏形出来了,但是还缺少点东西,比如:接口方法的描述等都没有~
修改一下,ProductController.java内容,如:
package com.xxx.tutorial.controller;

import org.springframework.http.ResponseEntity;

import org.springframework.web.bind.annotation.PathVariable;

import org.springframework.web.bind.annotation.RequestMapping;

import org.springframework.web.bind.annotation.RequestMethod;

import org.springframework.web.bind.annotation.RestController;

import com.xxx.tutorial.model.Product;

import io.swagger.annotations.Api;

import io.swagger.annotations.ApiOperation;

@RestController

@RequestMapping(value = { "/api/product/" })

@Api(value = "/product", tags = "Product接口")

public class ProductController {

	@RequestMapping(value = "/{id}", method = RequestMethod.GET)

	@ApiOperation(value = "根据id获取产品信息", notes = "根据id获取产品信息", httpMethod = "GET", response = Product.class)

	public ResponseEntity<Product> get(@PathVariable Long id) {

		Product product = new Product();

		product.setName("七级滤芯净水器");

		product.setId(1L);

		product.setProductClass("seven_filters");

		product.setProductId("T12345");

		return ResponseEntity.ok(product);

	}

}
重新访问,接口已经出现多个我们指定的描述信息~
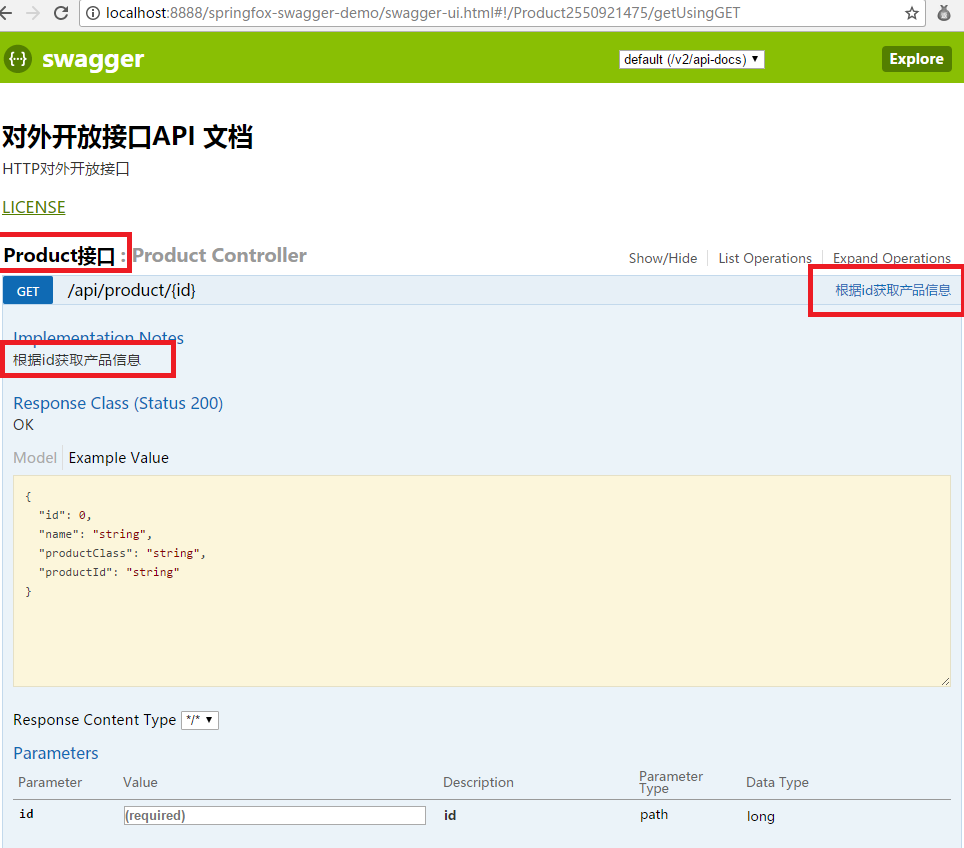
在参数id栏中输入1,然后点击“try it out”按钮~ 可以查看接口调用结果~
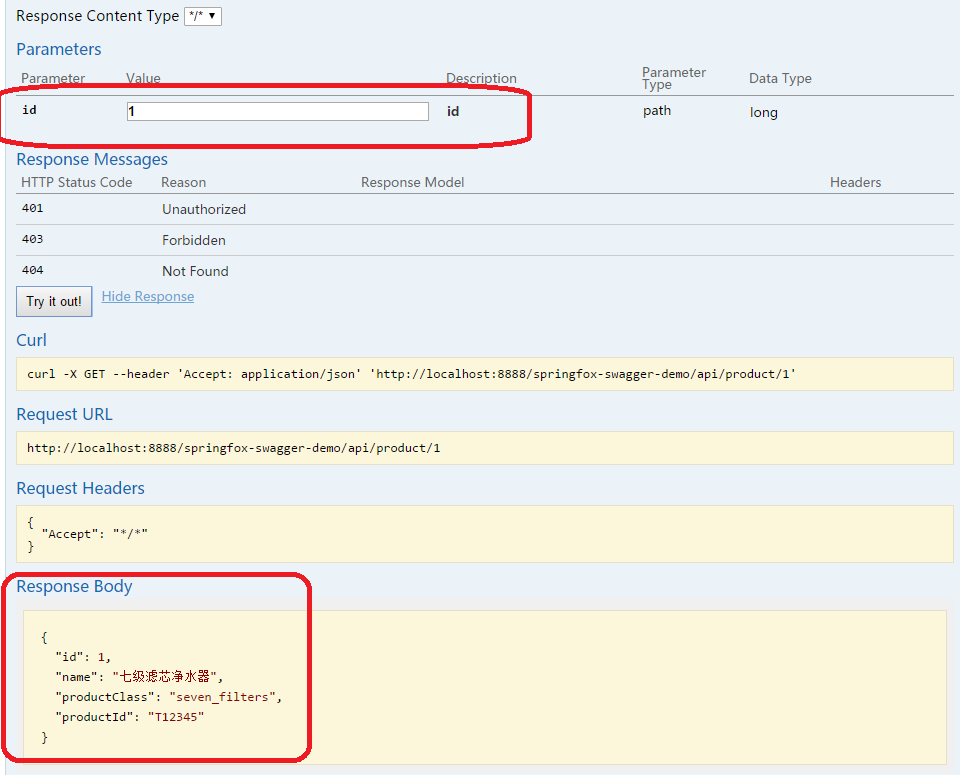
至此一个简单的示例就完成了~
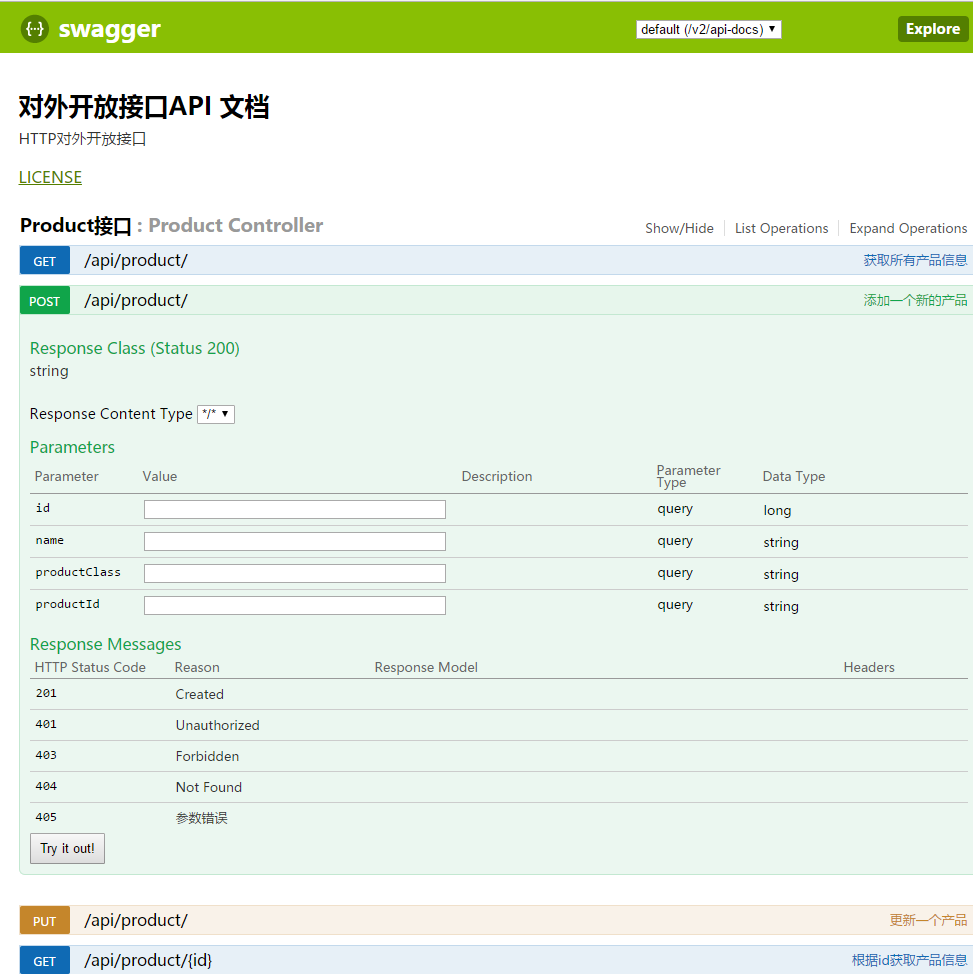
稍微增加几个接口
修改ProductController
package com.xxx.tutorial.controller;

import java.util.Arrays;

import java.util.List;

import org.springframework.http.ResponseEntity;

import org.springframework.web.bind.annotation.PathVariable;

import org.springframework.web.bind.annotation.RequestMapping;

import org.springframework.web.bind.annotation.RequestMethod;

import org.springframework.web.bind.annotation.RestController;

import com.xxx.tutorial.model.Product;

import io.swagger.annotations.Api;

import io.swagger.annotations.ApiOperation;

import io.swagger.annotations.ApiResponse;

import io.swagger.annotations.ApiResponses;

@RestController

@RequestMapping(value = { "/api/product/" })

@Api(value = "/product", tags = "Product接口")

public class ProductController {

	@RequestMapping(value = "/{id}", method = RequestMethod.GET)

	@ApiOperation(value = "根据id获取产品信息", notes = "根据id获取产品信息", httpMethod = "GET", response = Product.class)

	public ResponseEntity<Product> get(@PathVariable Long id) {

		Product product = new Product();

		product.setName("七级滤芯净水器");

		product.setId(1L);

		product.setProductClass("seven_filters");

		product.setProductId("T12345");

		return ResponseEntity.ok(product);

	}

	@RequestMapping(method = RequestMethod.POST)

	@ApiOperation(value = "添加一个新的产品")

	@ApiResponses(value = { @ApiResponse(code = 405, message = "参数错误") })

	public ResponseEntity<String> add(Product product) {

		return ResponseEntity.ok("SUCCESS");

	}

	@RequestMapping(method = RequestMethod.PUT)

	@ApiOperation(value = "更新一个产品")

	@ApiResponses(value = { @ApiResponse(code = 400, message = "参数错误") })

	public ResponseEntity<String> update(Product product) {

		return ResponseEntity.ok("SUCCESS");

	}

	@RequestMapping(method = RequestMethod.GET)

	@ApiOperation(value = "获取所有产品信息", notes = "获取所有产品信息", httpMethod = "GET", response = Product.class, responseContainer = "List")

	public ResponseEntity<List<Product>> getAllProducts() {

		Product product = new Product();

		product.setName("七级滤芯净水器");

		product.setId(1L);

		product.setProductClass("seven_filters");

		product.setProductId("T12345");

		return ResponseEntity.ok(Arrays.asList(product, product));

	}

}
swagger-ui展示
由上图可以看出,不同的method(GET / PUT / POST等)都会以不同的颜色展示出来~
Swagger-ui的添加,可以帮助他人查看接口信息,并在页面上进行输入参数来调用接口~
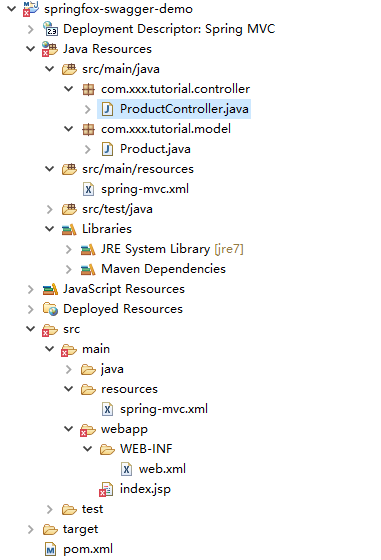
Maven工程的目录如下:
本文只是一个简单的整合示例,大家只要操作一下就能出来结果。
更加详细的文档,有兴趣的小伙伴可以访问swagger-ui的官网查看~
http://blog.csdn.net/u011277123/article/details/76643284
一步步完成Maven+SpringMVC+SpringFox+Swagger整合示例的更多相关文章
- Maven+SpringMVC+SpringFox+Swagger整合示例
查考链接:https://my.oschina.net/wangmengjun/blog/907679 coding地址:https://git.coding.net/conding_hjy/Spri ...
- 关于Maven+Springmvc+Dubbo+Zookeeper整合
为什么要用dubbo? 还是让官方来解释吧: http://dubbo.io/User+Guide-zh.htm http://dubbo.io/ 一般 nginx+tomcat | - ...
- SpringMVC集成Swagger插件以及Swagger注解的简单使用
一.简介 Swagger 是一个规范和完整的框架,用于生成.描述.调用和可视化 RESTful 风格的 Web 服务.总体目标是使客户端和文件系统作为服务器以同样的速度来更新 .接口的方法,参数和模型 ...
- SpringMVC、SpringFox和Swagger整合项目实例
目标 在做项目的时候,有时候需要提供其它平台(如业务平台)相关的HTTP接口,业务平台则通过开放的HTTP接口获取相关的内容,并完成自身业务~ 提供对外开放HTTP API接口,比较常用的是采用Spr ...
- Spring+SpringMVC+MyBatis+easyUI整合基础篇(六)maven整合SSM
写在前面的话 承接前文<Spring+SpringMVC+MyBatis+easyUI整合基础篇(五)讲一下maven>,本篇所讲述的是如何使用maven与原ssm项目整合,使得一个普 ...
- Dubbo与Zookeeper、Spring整合使用 maven+springmvc+dubbo+zookeeper
为什么要用dubbo? 还是让官方来解释吧: http://dubbo.io/User+Guide-zh.htm http://dubbo.io/ 一般 nginx+tomcat | - ...
- 一篇文章带你搞懂 SpringBoot与Swagger整合
Swagger使用由于不喜欢csdn的markwoen编辑器,对代码样式支持不好,看着不舒服,对审美要求比较高的同学移步github:https://github.com/itguang/swagge ...
- Zuul Swagger 整合
疯狂创客圈 Java 高并发[ 亿级流量聊天室实战]实战系列 [博客园总入口 ] 架构师成长+面试必备之 高并发基础书籍 [Netty Zookeeper Redis 高并发实战 ] 前言 Crazy ...
- Swagger整合Jwt授权配置
Swagger整合Jwt授权配置 欢迎关注博主公众号「Java大师」, 专注于分享Java领域干货文章http://www.javaman.cn/sb2/swagger-jwt 一.Swagger入门 ...
随机推荐
- html5和html的区别
最近看群里聊天聊得最火热的莫过于手机网站和html5这两个词.可能有人会问,这两者有什么关系呢?随着这移动互联网快速发展的时代,尤其是4G时代已经来临的时刻,加上微软对“XP系统”不提供更新补丁.维护 ...
- javascript获取时间戳
时间戳: 时间戳是自 1970 年 1 月 1 日(00:00:00 GMT)以来的秒数.它也被称为 Unix 时间戳(Unix Timestamp). JavaScript 获取当前时间戳: < ...
- 计算1至n中数字X出现的次数【math】
转自: nailperry 一.1的数目 编程之美上给出的规律: 1. 如果第i位(自右至左,从1开始标号)上的数字为0,则第i位可能出现1的次数由更高位决定(若没有高位,视高位为0),等于更高位数字 ...
- lojround3
A.绯色 IOI(开端) 首先注意到是完全图,数据范围又很大,肯定要观察一些性质 我们化简一下式子 发现其实是要求simga(xixj)最大 那么结论就很好想了 最大的和次大的第三大的连一起...然后 ...
- java抽象类详解
前言 在没讲抽象类之前 我们先来看看 final关键字 final 修饰符 可以修饰 类.属性.方法 修饰类时 表示该类不能被继承 其他特征 跟普通的类一样 修饰 属性时 表示 改属性不能改变 ...
- Codeforces 887D Ratings and Reality Shows
Ratings and Reality Shows 参加talk show的时间肯定是在某个t[ i ]的后一秒, 枚举一下就好了. #include<bits/stdc++.h> #de ...
- jQuery懒加载插件 – jquery.lazyload.js简单调用
Lazy Load 是一个用 JavaScript 编写的 jQuery 插件. 它可以延迟加载长页面中的图片. 在浏览器可视区域外的图片不会被载入, 直到用户将页面滚动到它们所在的位置. 这与图片预 ...
- 微信小程序—文件系统
文件系统 文件系统是小程序提供的一套以小程序和用户维度隔离的存储以及一套响应的管理接口.通过wx.getFilesSystemManager()可以获取到全局唯一的文件管理器,所有文件管理操作通过Fi ...
- 关闭PHP的opcache缓存
1.使用phpinfo();查看配置信息 2.搜索Additional .ini files parsed 3.查看opcache安装目录 4.打开文件将 opcache.enable=1 改成 ...
- NOIP2017提高组Day1T3 逛公园 洛谷P3953 Tarjan 强连通缩点 SPFA 动态规划 最短路 拓扑序
原文链接https://www.cnblogs.com/zhouzhendong/p/9258043.html 题目传送门 - 洛谷P3953 题目传送门 - Vijos P2030 题意 给定一个有 ...