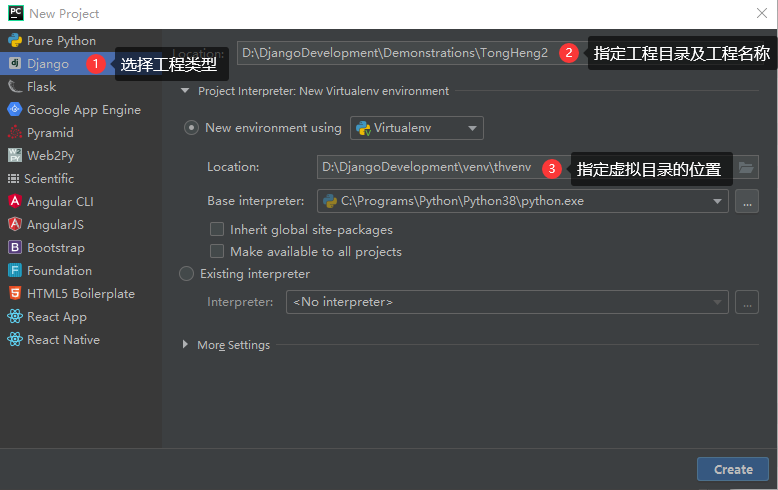
0002 Django工程创建
1 创建一个目录,用于专门存放Django工程的虚拟环境
PyCharm默认虚拟环境在工程内,从而导致打包的时候,会把虚拟环境一起打包。
同时,虚拟环境中的插件较多,一个工程创建了一个虚拟环境,以后,其它的工程可以共享这个虚拟环境。
2 打开PyCharm,选择创建Django工程。
3 安装pip
pip在开发环境中已安装,但在虚拟环境中PyCharm只安装了开发环境中的相应版本的Django,而没有安装pip,故虚拟环境中需要重新安装。
安装方法同样是在pypi.org上下载一个pip-20.0.2包,用7Zip解压后,进入目录执行:python setup.py install
4 安装工程插件
开源软件官方网站几乎都在国外,速度慢,为了提交效率,一般用国内镜像源安装。
国内镜像源很多,以下使用清华镜像源。地址为:https://pypi.tuna.tsinghua.edu.cn/simple
4.01 安装DRF框架(即djangorestframework框架)
DRF框架是基于Django框架之上的一个框架。
pip install -i https://pypi.tuna.tsinghua.edu.cn/simple djangorestframework
4.02 python3 安装操作mysql数据库的包
pip install -i https://pypi.tuna.tsinghua.edu.cn/simple --upgrade mysqlclient
4.03 添加django-fitlter扩展来增强支持
pip install -i https://pypi.tuna.tsinghua.edu.cn/simple django-filter
4.04 自动生成接口文档
pip install -i https://pypi.tuna.tsinghua.edu.cn/simple coreapi
4.05 安装Markdown插件
Markdown插件主要用于把文本渲染成HTML格式。此处主要用于对coreapi中注释文本换行。
pip install -i https://pypi.tuna.tsinghua.edu.cn/simple Markdown
4.06 安装图像处理库
pip install -i https://pypi.tuna.tsinghua.edu.cn/simple Pillow
4.07 安装Redis工具包
pip install -i https://pypi.tuna.tsinghua.edu.cn/simple redis
4.08 安装redis缓存工具包
pip install -i https://pypi.tuna.tsinghua.edu.cn/simple django-redis
4.09 安装异步处理工具包
pip install -i https://pypi.tuna.tsinghua.edu.cn/simple celery
4.10 win10下面启动celery需要安装eventlet包:
pip install -i https://pypi.tuna.tsinghua.edu.cn/simple eventlet
4.11 安装跨域CORS
pip install -i https://pypi.tuna.tsinghua.edu.cn/simple django-cors-headers
4.12 安装Json Web Token认证
pip install -i https://pypi.tuna.tsinghua.edu.cn/simple djangorestframework-jwt
4.13 安装itsdangerous生成凭据access_token
pip install -i https://pypi.tuna.tsinghua.edu.cn/simple itsdangerous
4.14 安装缓存扩展
pip install -i https://pypi.tuna.tsinghua.edu.cn/simple drf-extensions
4.15 安装xmltodict工具包
pip install -i https://pypi.tuna.tsinghua.edu.cn/simple xmltodict
4.16 安装xadmin包
pip install -i https://pypi.tuna.tsinghua.edu.cn/simple future

pip install -i https://pypi.tuna.tsinghua.edu.cn/simple six

pip install -i https://pypi.tuna.tsinghua.edu.cn/simple httplib2

pip install -i https://pypi.tuna.tsinghua.edu.cn/simple django-import-export
4.17 安装微信插件
pip install -i https://pypi.tuna.tsinghua.edu.cn/simple wechatpy

pip install -i https://pypi.tuna.tsinghua.edu.cn/simple cryptography
4.18 让django restfull支持xml解析
pip install -i https://pypi.tuna.tsinghua.edu.cn/simple djangorestframework-xml
4.19 安装腾讯云短信SDK
pip install qcloudsms_py
4.20 安装fastDFS插件
pip install -i https://pypi.tuna.tsinghua.edu.cn/simple py3Fdfs
pip install -i https://pypi.tuna.tsinghua.edu.cn/simple djangorestframework

pip install -i https://pypi.tuna.tsinghua.edu.cn/simple django-filter

pip install -i https://pypi.tuna.tsinghua.edu.cn/simple coreapi

pip install -i https://pypi.tuna.tsinghua.edu.cn/simple Markdown

pip install -i https://pypi.tuna.tsinghua.edu.cn/simple Pillow

pip install -i https://pypi.tuna.tsinghua.edu.cn/simple redis

pip install -i https://pypi.tuna.tsinghua.edu.cn/simple django-redis

pip install -i https://pypi.tuna.tsinghua.edu.cn/simple celery

pip install -i https://pypi.tuna.tsinghua.edu.cn/simple django-celery-results

pip install -i https://pypi.tuna.tsinghua.edu.cn/simple django-celery-beat

pip install -i https://pypi.tuna.tsinghua.edu.cn/simple django-cors-headers

pip install -i https://pypi.tuna.tsinghua.edu.cn/simple djangorestframework-jwt

pip install -i https://pypi.tuna.tsinghua.edu.cn/simple itsdangerous

pip install -i https://pypi.tuna.tsinghua.edu.cn/simple drf-extensions

pip install -i https://pypi.tuna.tsinghua.edu.cn/simple xmltodict

pip install -i https://pypi.tuna.tsinghua.edu.cn/simple wechatpy

pip install -i https://pypi.tuna.tsinghua.edu.cn/simple cryptography

pip install -i https://pypi.tuna.tsinghua.edu.cn/simple djangorestframework-xml

pip install -i https://pypi.tuna.tsinghua.edu.cn/simple qcloudsms_py

pip install -i https://pypi.tuna.tsinghua.edu.cn/simple requests

pip install -i https://pypi.tuna.tsinghua.edu.cn/simple py3Fdfs

pip install -i https://pypi.tuna.tsinghua.edu.cn/simple future

pip install -i https://pypi.tuna.tsinghua.edu.cn/simple six

pip install -i https://pypi.tuna.tsinghua.edu.cn/simple httplib2

pip install -i https://pypi.tuna.tsinghua.edu.cn/simple django-import-export

pip install -i https://pypi.tuna.tsinghua.edu.cn/simple --upgrade mysqlclient
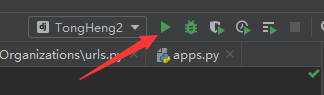
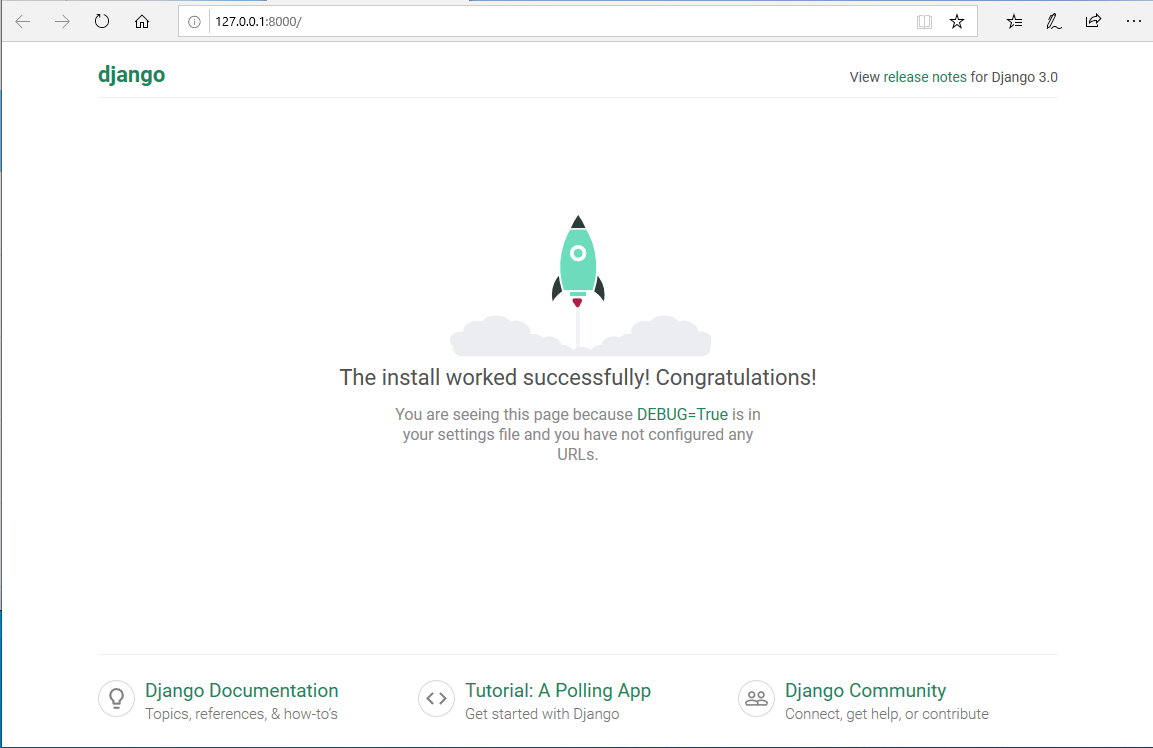
5 运行工程
看到以下欢迎页面,表示工程创建成功!
0002 Django工程创建的更多相关文章
- python web框架 django 工程 创建 目录介绍
# 创建Django工程django-admin startproject [工程名称] 默认创建django 项目都会自带这些东西 django setting 配置文件 django可以配置缓存 ...
- Django工程创建
方法一: 1.win+r进入cmd命令窗口: 2.找到Django的安装地址: 3.cmd窗口中利用cd 进入相应的文件夹,再输入命令如下: django-admin.exe startproject ...
- Django—工程创建以及models数据库易错点
Python的WEB框架有Django.Tornado.Flask 等多种,Django相较与其他WEB框架其优势为:大而全,框架本身集成了ORM.模型绑定.模板引擎.缓存.Session等诸多功能. ...
- Django工程
一.Django工程创建 1.Django安装: pip3 install django 安装成功后,会在python的安装目录下“Scripts"中生成”django-admin.exe& ...
- Django后台创建
1.首先创建Django工程 创建Django有两种方法我用的是pycharm的创建 2.查看url.py 如下 from django.contrib import admin from djang ...
- Django初探——工程创建以及models数据库相关配置
Python的WEB框架有Django.Tornado.Flask 等多种,Django相较与其他WEB框架其优势为:大而全,框架本身集成了ORM.模型绑定.模板引擎.缓存.Session等诸多功能. ...
- 第1天:Django框架简介与工程创建
Django简介 Django特点 环境搭建 创建工程 启动服务 使用pycharm打开工程 创建子应用 Django简介 Django,是用Python语言写的开源web开发框架,并遵循MVC设计. ...
- django学习笔记【001】django版本的确定&创建一个django工程
2.3 查看当前的django版本 python3. -m django --version 2.3.1 创建一个django工程 django-admin startproject mysite 在 ...
- Django基于Pycharm开发之一【创建django工程】
Django的工程结构,可以通过pycharm里面,选择创建django工程来直接创建,也可以通过命令行通过pip来安装. 一.通过命令行安装的步骤 Install Python. Install a ...
随机推荐
- GNU make doc - 函数总结
$(value variable) 使用variable未展开状态的值 FOO = $(PATH) all: $(warning $(FOO)) $(warning $(value FOO)) #ou ...
- string的基本操作
在C++中,string 可以来定义一个字符串,用之前得调用下相应的库 #include<string> . 可以不用初始化字符串容量大小,系统会根据后续的赋值自动安排其容量大 ...
- C语言:字符串拷贝(截取)、查找
C语言:字符串拷贝(截取).查找 很惭愧,学了这么久别的语言,一直没有好好学C和C++,所以现在开始认真C/C++的一些特性和比较,这里记录下C语言拷贝和截取的一些方式,由于系统库带的函数不方便,所以 ...
- pycharm(迅雷下载链接)
pycharm2020迅雷下载链接: https://download.jetbrains.com/python/pycharm-professional-2019.3.3.exe?_ga=2.146 ...
- HTML连载70-相片墙、盒子阴影和文字阴影
一. 制作一个相片墙 二. <!DOCTYPE html> <html lang="en"> <head> <meta charset=& ...
- Python和Anoconda和Pycharm联合使用教程
简介 Python是一种跨平台的计算机程序设计语言.是一种面向对象的动态类型语言,最初被设计用于编写自动化脚本(shell),随着版本的不断更新和语言新功能的添加,越多被用于独立的.大型项目的开发. ...
- Python核心编程:《8个实践性建议》
前言 我们在用Python进行机器学习建模项目的时候,每个人都会有自己的一套项目文件管理的习惯,我自己也有一套方法,是自己曾经踩过的坑踩过的雷总结出来的,现在在这里分享一下给大家,因为很多伙伴是接触P ...
- .NET CORE(C#) WPF 方便的实现用户控件切换(祝大家新年快乐)
微信公众号:Dotnet9,网站:Dotnet9,问题或建议:请网站留言, 如果对您有所帮助:欢迎赞赏. .NET CORE(C#) WPF 方便的实现用户控件切换(祝大家新年快乐) 快到2020年了 ...
- 关于apt-get remove 与 apt-get purge
今天在Ubuntu服务器上安装supervisor,部署没成功想卸载重来,sudo apt-get remove supervisor 后发现配置文件还在,便手动删除了配置文件.再次安装,提示配置文件 ...
- 《手把手教你构建自己的 Linux 系统》学习笔记(8)
目录 Binutils 软件包有什么用? make -k 的作用是什么? man-pages 里有几种文档?分别表示什么意思? 如何查询指定目录的 man-pages ? 如何使用 make 命令的同 ...