centos6安装lamp
1、安装Apache
[root@localhost ~]# yum -y install httpd
设置开启自启动
[root@localhost ~]# chkconfig httpd on
启动httpd服务
[root@localhost ~]# service httpd start

Starting httpd: httpd: Could not reliably determine the server's fully qualified domain name, using ::1 for ServerName

                                                           [  OK  ]
测试:如果是远程访问的话,需要在服务器上放行80端口
2.安装Mysql
[root@localhost ~]# yum -y install mysql mysql-server mysql-devel
#开机自启动
[root@localhost ~]# chkconfig mysqld on
#启动mysqld服务
[root@localhost ~]# service mysqld start

[root@localhost ~]# service mysqld status

mysqld (pid  ) is running...
设置密码:
[root@localhost ~]#  /usr/bin/mysql_secure_installation
Set root password? [Y/n] Y

New password:

Re-enter new password:

Password updated successfully!

Reloading privilege tables..

 ... Success!

By default, a MySQL installation has an anonymous user, allowing anyone

to log into MySQL without having to have a user account created for

them.  This is intended only for testing, and to make the installation

go a bit smoother.  You should remove them before moving into a

production environment.

Remove anonymous users? [Y/n] Y

 ... Success!

Normally, root should only be allowed to connect from 'localhost'.  This

ensures that someone cannot guess at the root password from the network.

Disallow root login remotely? [Y/n] Y

 ... Success!

By default, MySQL comes with a database named 'test' that anyone can

access.  This is also intended only for testing, and should be removed

before moving into a production environment.

Remove test database and access to it? [Y/n] Y

 - Dropping test database...

 ... Success!

 - Removing privileges on test database...

 ... Success!

Reloading the privilege tables will ensure that all changes made so far

will take effect immediately.

Reload privilege tables now? [Y/n] Y

 ... Success!

Cleaning up...

All done!  If you've completed all of the above steps, your MySQL

installation should now be secure.
查看监听的端口
[root@localhost ~]# netstat -tulpn | grep -i mysql

tcp               0.0.0.0:                0.0.0.0:*                   LISTEN      /mysqld
可以看到mysqld已经启动,监听在3306端口上
3、安装php
安装相关模块:为了让PHP支持MySQL,我们可以安装php-mysql软件包;也可使用以下命令搜索可用的php模块
[root@localhost ~]# yum -y install php php-mysql
# 安装php常用扩展
[root@localhost ~]# yum search php  #东西太多,就不显示出来了
[root@localhost ~]# yum -y install gd php-gd gd-devel php-xml php-common php-mbstring php-ldap php-pear php-xmlrpc php-imap
### 重启httpd服务,这一步很重要
[root@localhost ~]#  service httpd restart

Stopping httpd:                                            [  OK  ]

Starting httpd: httpd: Could not reliably determine the server's fully qualified domain name, using ::1 for ServerName

                                                           [  OK  ]
测试php
root@localhost ~]# cd /var/www/html/

[root@localhost html]# vim index.php

<?php

    phpinfo();

?>
然后,我们再次在浏览器键入http://localhost 或 http://本机IP ,应该会看到如下页面
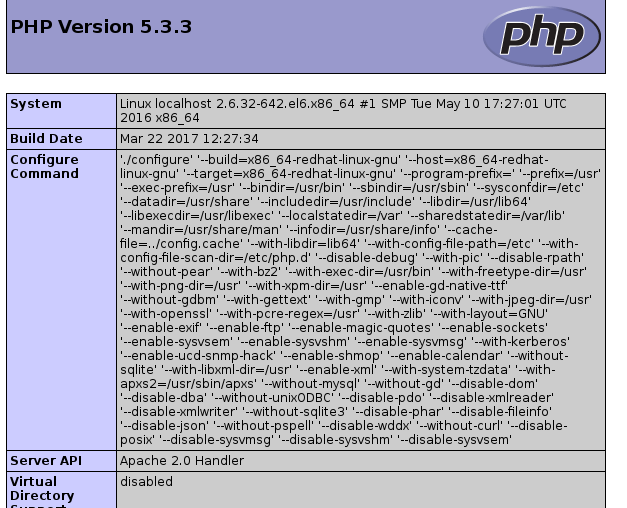
查看版本:
php版本:
[root@localhost html]# php -v

PHP 5.3. (cli) (built: Mar   ::)

Copyright (c) - The PHP Group

Zend Engine v2.3.0, Copyright (c) - Zend Technologies
mysql版本
[root@localhost html]# mysql -V

mysql  Ver 14.14 Distrib 5.1., for redhat-linux-gnu (x86_64) using readline 5.1
apache版本:
[root@localhost html]# apachectl -v

Server version: Apache/2.2. (Unix)

Server built:   Oct   ::38

或者:
[root@localhost html]# httpd -v
Server version: Apache/2.2.15 (Unix)
Server built:   Oct 19 2017 16:43:38
http://www.linuxidc.com/Linux/2014-07/104563.htm
centos6安装lamp的更多相关文章
- centos6 安装 lamp
首先更新一下yum -y update 安装Apache yum install httpd httpd-devel 安装完成后,用/etc/init.d/httpd start 启动apache 设 ...
- Ubuntu --- 【转】安装lamp(php7.0)
本篇转自:http://www.laozuo.org/8303.html.以防丢失,再次记录 PHP7已经出来有一段时间,根据网友的实践测试比之前的版本效率会高不少,而且应用到网站中打开速度会有明显的 ...
- CentOS6.3 编译安装LAMP(1):准备工作
卸载yum或rpm安装的amp软件 #在编译安装lamp之前,首先先卸载已存在的rpm包. rpm -e httpd rpm -e mysql rpm -e php yum -y remove htt ...
- CentOS6.3 编译安装LAMP(2):编译安装 Apache2.2.25
所需源码包: /usr/local/src/Apache-2.2.25/httpd-2.2.25.tar.gz 编译安装 Apache2.2.25 #切换到源码目录 cd /usr/local/src ...
- CentOS6.3 编译安装LAMP(2):编译安装 Apache2.4.6
Apache官方说: 与Apache 2.2.x相比,Apache 2.4.x提供了很多性能方面的提升,包括支持更大流量.更好地支持云计算.利用更少的内存处理更多的并发等.除此之外,还包括性能提升.内 ...
- CentOS6.3 编译安装LAMP(3):编译安装 MySQL5.5.25
所需源码包: /usr/local/src/MySQL-5.5.25/cmake-2.8.8.tar.gz /usr/local/src/MySQL-5.5.25/mysql-5.5.25.tar.g ...
- CentOS6.3 编译安装LAMP(4):编译安装 PHP5.2.17
所需源码包: /usr/local/src/PHP-5.2.17/libmcrypt-2.5.8.tar.gz /usr/local/src/PHP-5.2.17/mhash-0.9.9.9.tar. ...
- CentOS6.3 编译安装LAMP(4):编译安装 PHP5.3.27
所需源码包: /usr/local/src/PHP-5.3.27/libmcrypt-2.5.8.tar.gz /usr/local/src/PHP-5.3.27/mhash-0.9.9.9.tar. ...
- CentOS6.5下编译安装LAMP环境
LAMP(Linux-Apache-MySQL-PHP)网站架构是目前国际流行的Web框架.该框架能够满足大流量.大并发量的网站需求:当然.也可以直接使用高性能的服务器.高性能的负载均衡硬件以及CDN ...
随机推荐
- LOJ 北校门外的回忆 倍增+线段树
正解:倍增+线段树 解题报告: 传送门! $umm$这题有个对正解毫无启发的部分分还有个正解,都挺神仙的所以我都写了趴$QAQ$ 先说部分分 可以考虑把$x$向$x+lowbit(x)$连边,然后当$ ...
- 开箱即用!使用Rancher 2.3 启用Istio初体验
本文来自Rancher Labs Rancher的理念是Run Kubernetes Everywhere,Rancher 2.3中许多重大更新,让这一理念的实现又向前一步. 其中,最重要的两个特性是 ...
- JUC 中的 Atomic 原子类总结
1 Atomic 原子类介绍 Atomic 翻译成中文是原子的意思.在化学上,我们知道原子是构成一般物质的最小单位,在化学反应中是不可分割的.在我们这里 Atomic 是指一个操作是不可中断的.即使是 ...
- BZOJ 2038: [2009国家集训队]小Z的袜子 (莫队)
题目传送门:小Z的袜子 Description 作为一个生活散漫的人,小Z每天早上都要耗费很久从一堆五颜六色的袜子中找出一双来穿.终于有一天,小Z再也无法忍受这恼人的找袜子过程,于是他决定听天由命…… ...
- springmvc接收json数据的常见方式
经常使用Ajax异步请求来进行数据传输,传的数据是json数据,json数据又有对象,数组.所有总结下springmvc获取前端传来的json数据方式:1.以RequestParam接收前端传来的是j ...
- 剑指Offer-3~9题
3. 数组中重复的数字 题目描述: 在一个长度为 \(n\) 的数组里的所有数字都在 \(0\) 到 \(n-1\) 的范围内. 数组中某些数字是重复的,但不知道有几个数字是重复的,也不知道每个 ...
- 基于Arduino的红外遥控
1.红外接收头介绍 一.什么是红外接收头? 红外遥控器发出的信号是一连串的二进制脉冲码.为了使其在无线传输过程中免受其他红外信号的干扰,通常都是先将其调制在特定的载波频率上,然后再经红外发射二极管 ...
- (1)解锁 MongoDB replica set核心姿势
副本集Replica Set是一个术语,定义具有多节点的数据库集群,这些节点具有主从复制(master-slave replication) 且节点之间实现了自动故障转移. 这样的结构通常需要具有奇数 ...
- vue超简单加载字体方法,解决scss难加载字体的问题
vue超简单加载字体方法,解决scss难加载字体的问题 scss在加载字体方面一直不太好用,需要繁杂的配置才能达到想要的效果,这里说一种非常简单的方法 在App.vue的style标签下引入字体文件后 ...
- CDH安装详细测试正确
1. CDH简介 简单来说,Cloudera Manager是一个拥有集群自动化安装.中心化管理.集群监控.报警功能的一个工具(软件),使得安装集群从几天的时间缩短在几个小时内,运维人员从数十人降低到 ...