
Nginx流量复制
1. 需求
将生产环境的流量拷贝到预上线环境或测试环境,这样做有很多好处,比如:
- 可以验证功能是否正常,以及服务的性能;
- 用真实有效的流量请求去验证,又不用造数据,不影响线上正常访问;
- 这跟灰度发布还不太一样,镜像流量不会影响真实流量;
- 可以用来排查线上问题;
- 重构,假如服务做了重构,这也是一种测试方式;
为了实现流量拷贝,Nginx提供了ngx_http_mirror_module模块
2. 安装Nginx
首页,设置yum仓库。为此,创建一个文件/etc/yum.repos.d/nginx.repo
将以下内容写入文件
[nginx-stable]

name=nginx stable repo

baseurl=http://nginx.org/packages/centos/$releasever/$basearch/

gpgcheck=1

enabled=1

gpgkey=https://nginx.org/keys/nginx_signing.key

module_hotfixes=true

[nginx-mainline]

name=nginx mainline repo

baseurl=http://nginx.org/packages/mainline/centos/$releasever/$basearch/

gpgcheck=1

enabled=0

gpgkey=https://nginx.org/keys/nginx_signing.key

module_hotfixes=true
yum安装nginx
yum install nginx
默认情况下,nginx配置文件是nginx.conf
一般情况下,nginx.conf文件在 /usr/local/nginx/conf 或者 /etc/nginx 或者 /usr/local/etc/nginx 目录下
为了启动nginx,直接在命令行里输入nginx回车即可
# 启动nginx

nginx

# fast shutdown

nginx -s stop

# graceful shutdown

nginx -s quit

# reloading the configuration file

nginx -s reload

# reopening the log files

nginx -s reopen

# list of all running nginx processes

ps -ax | grep nginx
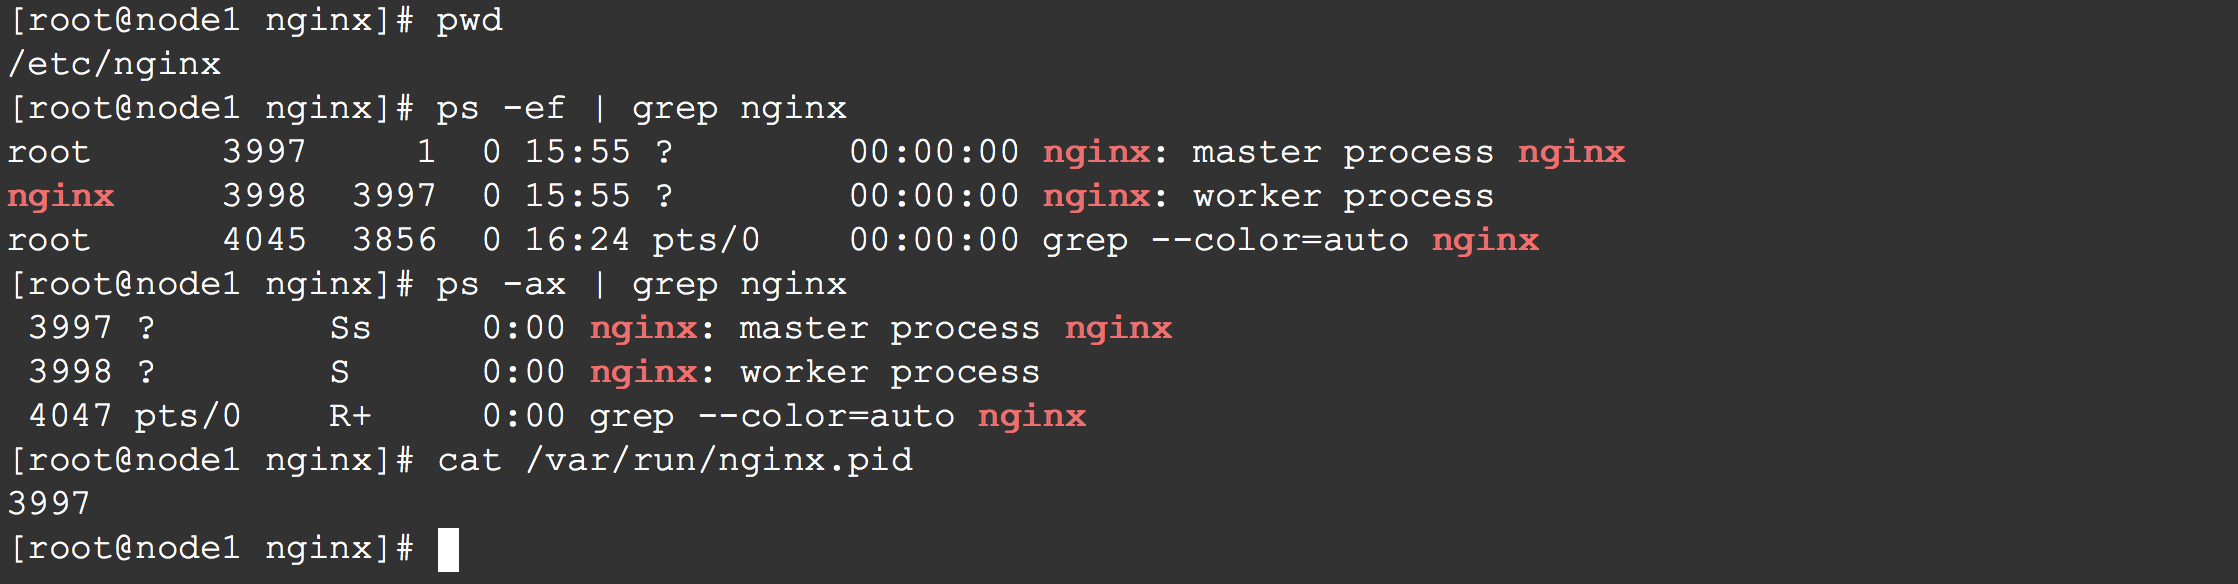
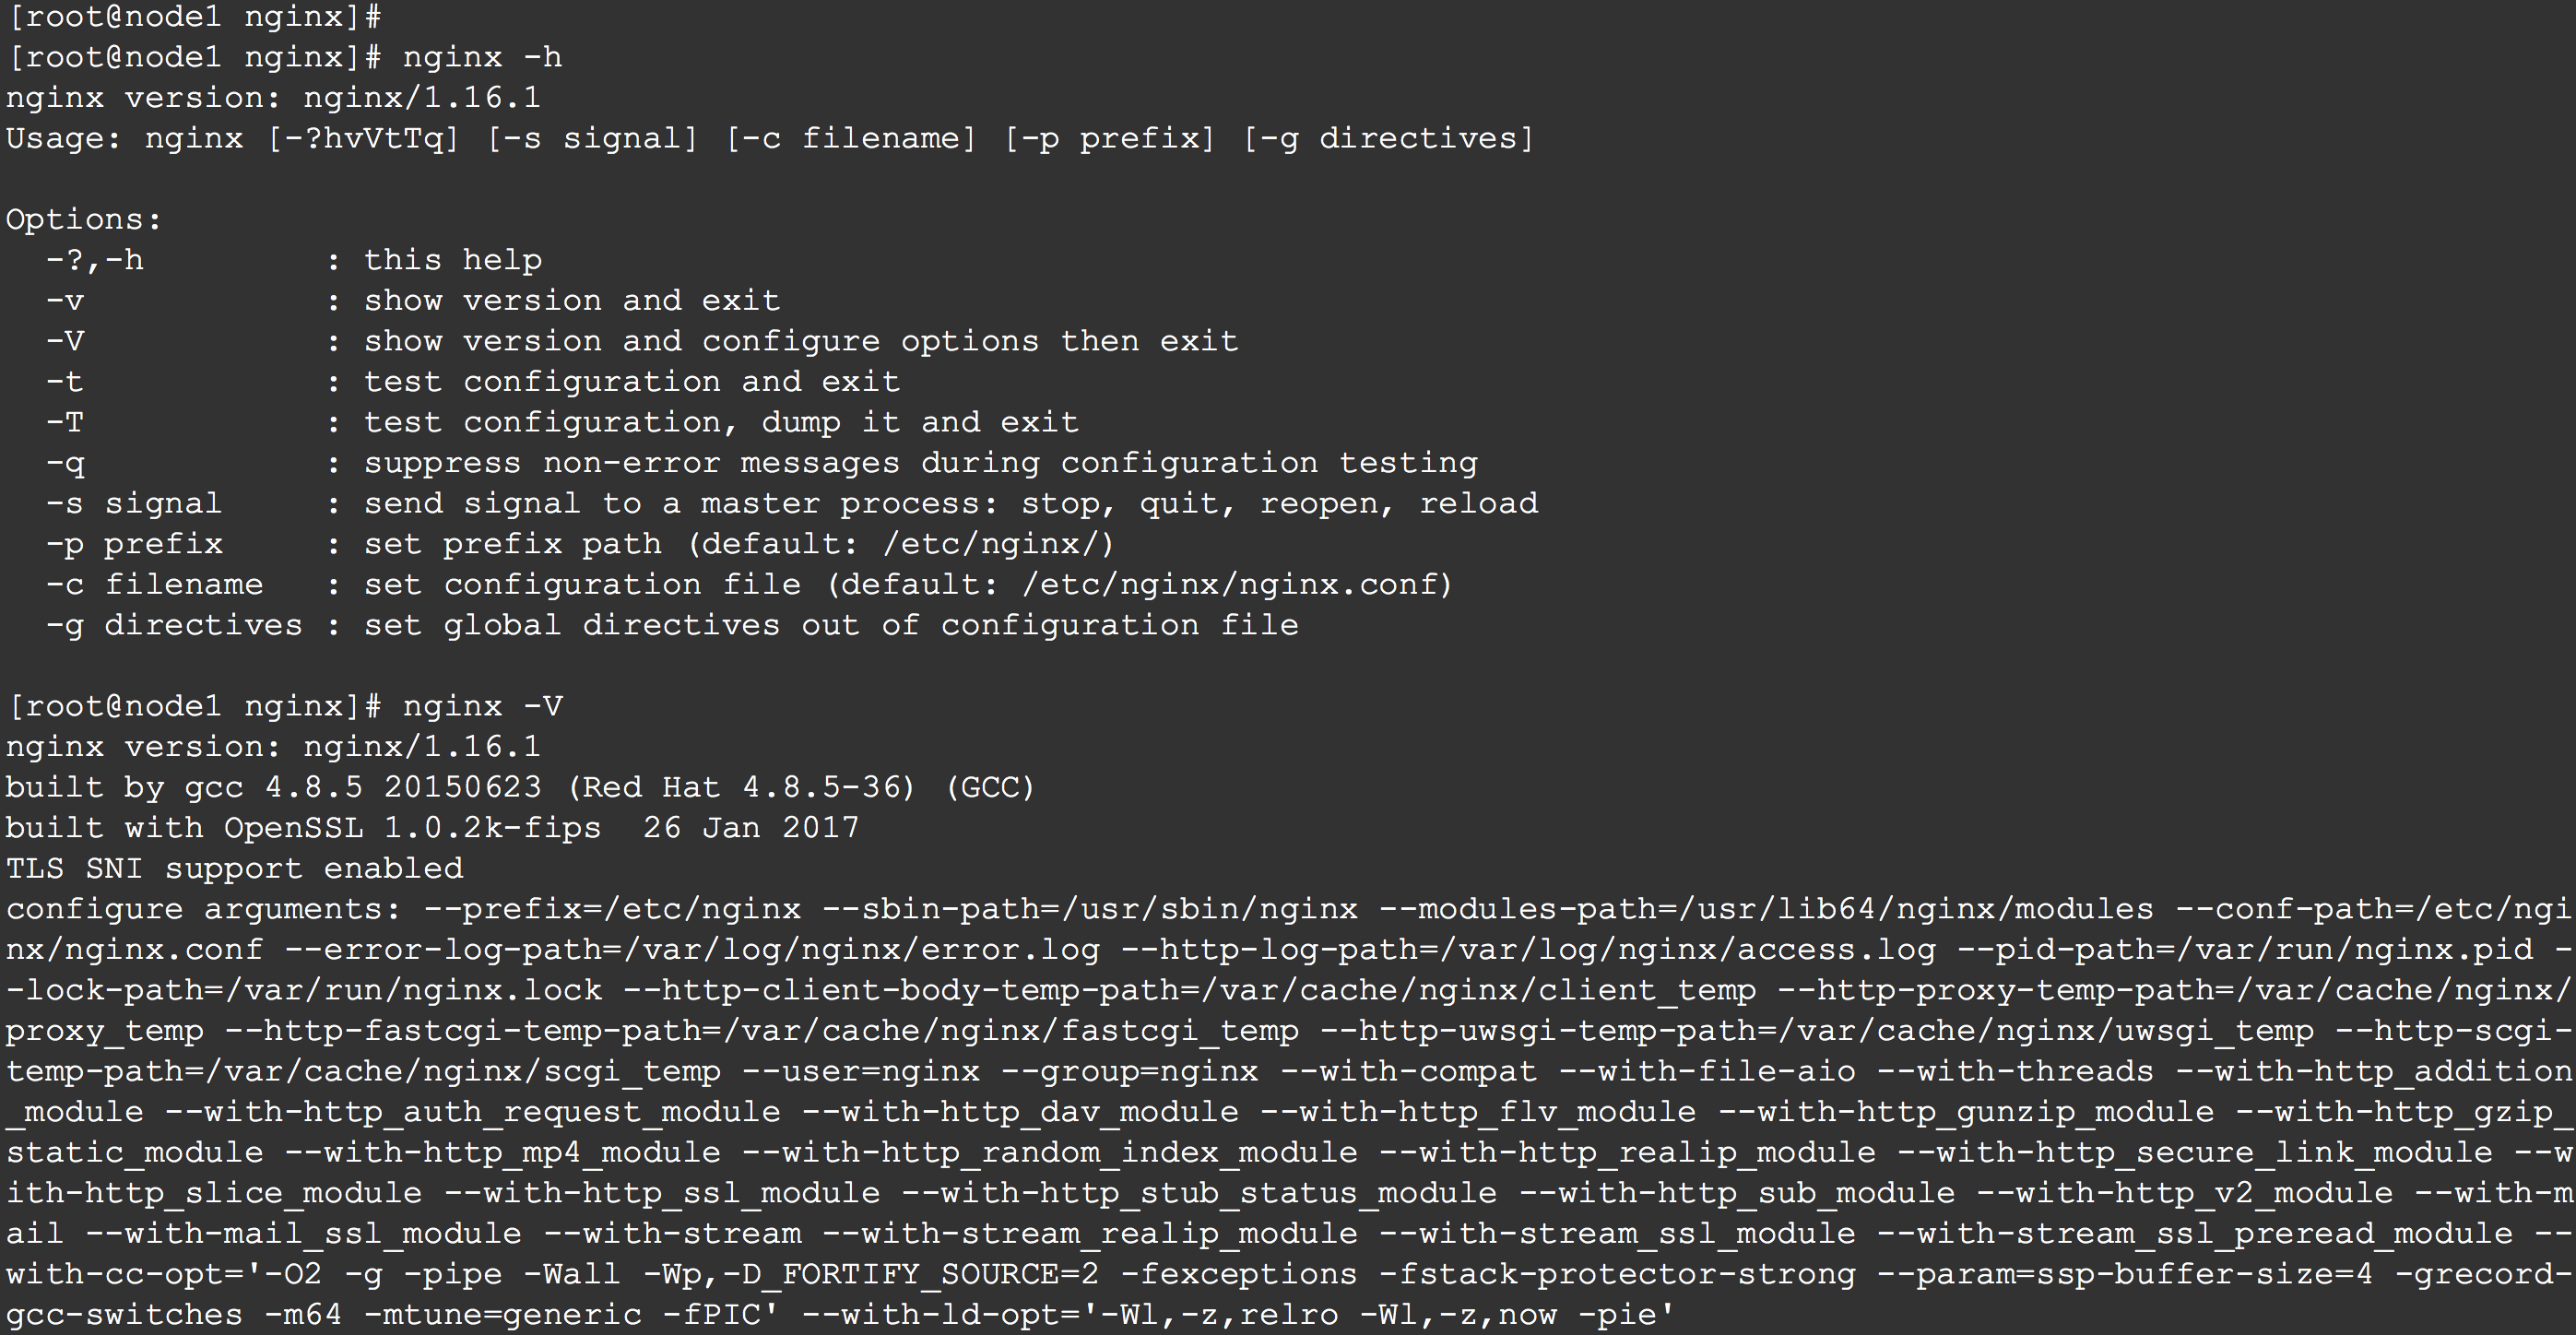
一旦master进程接收到重新加载配置的信号,它将检查新配置文件的语法是否正确,并尝试应用其中提供的配置。如果成功,master进程将启动新的worker进程,并发送消息给旧的worker进程,要求他们shutdown。否则,master进程将回滚所做的更改,并继续使用旧配置。旧的worker进程在接收到关闭命令后,停止接受新的连接,直到所有之前已经接受的连接全部处理完为止。之后,旧的worker进程退出。
nginx的master进程的进程ID,默认情况下,放在nginx.pid文件中,该文件所在的目录一般是/usr/local/nginx/logs 或者 /var/run
还可以这样停止nginx
kill -s QUIT 3997
初始配置文件长这样:
user  nginx;

worker_processes  1;

error_log  /var/log/nginx/error.log warn;

pid        /var/run/nginx.pid;

events {

    worker_connections  1024;

}

http {

    include       /etc/nginx/mime.types;

    default_type  application/octet-stream;

    log_format  main  '$remote_addr - $remote_user [$time_local] "$request" '

                      '$status $body_bytes_sent "$http_referer" '

                      '"$http_user_agent" "$http_x_forwarded_for"';

    access_log  /var/log/nginx/access.log  main;

    sendfile        on;

    #tcp_nopush     on;

    keepalive_timeout  65;

    #gzip  on;

    include /etc/nginx/conf.d/*.conf;

}
3. ngx_http_mirror_module
The ngx_http_mirror_module module (1.13.4) implements mirroring of an original request by creating background mirror subrequests. Responses to mirror subrequests are ignored.
我是这样理解的,这里,mirror本意是镜子、镜像,这里可以理解就像一个镜像站点一样,将所有的请求都收集起来,这个镜像就代表了所有真实有效的原始请求。有了这个镜像,后续我们才可能用这个镜像去做一些事情,比如重现一下所有的请求,这就实现了把线上的流程复制到别的地方。
官网给出的示例倒是很简单,如下:
location / {

    mirror /mirror;

    proxy_pass http://backend;

}

location = /mirror {

    internal;

    proxy_pass http://test_backend$request_uri;

}
如果请求体被镜像,那么在创建子请求之前会先读取请求体
location / {

    mirror /mirror;

    mirror_request_body off;

    proxy_pass http://backend;

}

location = /mirror {

    internal;

    proxy_pass http://log_backend;

    proxy_pass_request_body off;

    proxy_set_header Content-Length "";

    proxy_set_header X-Original-URI $request_uri;

}
前面我们安装了Nginx,但是里面没有包含我们所需的ngx_http_mirror_module模块,因此,真正要使用的时候最好还是采用自定义安装,即从源码构建
首先,下载源码 http://nginx.org/en/download.html
接下来,编译安装,例如:
./configure

    --sbin-path=/usr/local/nginx/nginx

    --conf-path=/usr/local/nginx/nginx.conf

    --pid-path=/usr/local/nginx/nginx.pid

    --with-http_ssl_module

    --without-http_limit_req_module

    --without-http_mirror_module

    --with-pcre=../pcre-8.43

    --with-zlib=../zlib-1.2.11

    --add-module=/path/to/ngx_devel_kit

    --add-module=/path/to/lua-nginx-module

make & make install
配置
upstream api.abc.com {

	server 127.0.0.1:8080;

}

upstream tapi.abc.com {

    server 127.0.0.1:8081;

}

server {

    listen 80;

   # 源站点

    location /api {

        proxy_pass http://api.cjs.com;

        proxy_set_header Host $host;

        proxy_set_header X-Real-IP $remote_addr;

        proxy_set_header X-Forwarded-For $proxy_add_x_forwarded_for;

        # 流量复制

	mirror /newapi;

	mirror /mirror2;

	mirror /mirror3;

	# 复制请求体

	mirror_request_body on;

    }

    # 镜像站点

    location /tapi {

        proxy_pass http://tapi.cjs.com$request_uri;

        proxy_pass_request_body on;

        proxy_set_header Host $host;

        proxy_set_header X-Real-IP $remote_addr;

        proxy_set_header X-Forwarded-For $proxy_add_x_forwarded_for;

    }

}
4. 文档
Nginx文档
http://nginx.org/en/docs/http/ngx_http_mirror_module.html
http://nginx.org/en/docs/beginners_guide.html
http://nginx.org/en/docs/http/ngx_http_core_module.html#location
http://nginx.org/en/docs/configure.html
第三方模板
https://www.nginx.com/resources/wiki/
https://www.nginx.com/resources/wiki/modules/lua/
https://www.nginx.com/resources/wiki/modules/index.html
https://github.com/openresty/lua-nginx-module
补充
# 查看进程运行时间

ps -eo pid,user,lstart,etime,cmd | grep nginx

# 查看已经建立连接的数量

netstat -an | grep ESTABLISHED | wc -l

# 查看80端口的连接数

netstat -an | grep ":80" | wc -l
Nginx流量复制的更多相关文章
- 高并发 Nginx+Lua OpenResty系列(11)——流量复制/AB测试/协程
流量复制 在实际开发中经常涉及到项目的升级,而该升级不能简单的上线就完事了,需要验证该升级是否兼容老的上线,因此可能需要并行运行两个项目一段时间进行数据比对和校验,待没问题后再进行上线.这其实就需要进 ...
- gor实现线上HTTP流量复制压测引流
一.使用背景 gor 是一款go语言实现的简单的http流量复制工具,它的主要目的是使你的生产环境HTTP真实流量在测试环境和预发布环境重现.只需要在 代理例如nginx入口服务器上执行一个进程,就可 ...
- Nginx流量拷贝
1. 需求 将生产环境的流量拷贝到预上线环境或测试环境,这样做有很多好处,比如: 可以验证功能是否正常,以及服务的性能: 用真实有效的流量请求去验证,又不用造数据,不影响线上正常访问: 这跟灰度发布还 ...
- Nginx 流量和连接数限制
1.Nginx流量限制 实现流量限制由两个指令 limit_rate 和 limit_rate_after 共同完成: limit_rate 语法:limit_rate rate; 默认值:limit ...
- Nginx 流量带宽等请求状态统计( ngx_req_status)
Nginx 流量带宽等请求状态统计 ( ngx_req_status) 插件下载地址: wget http://nginx.org/download/nginx-1.4.2.tar.gz git c ...
- TCPCopy 线上流量复制工具
TCPCopy是一种重放TCP流的工具,使用真实环境来测试互联网服务器上的应用程序. 一.描述: 虽然真实的实时流量对于Internet服务器应用程序的测试很重要,但是由于生产环境中的情况很负责,测试 ...
- 使用traefik进行流量复制
文章转载自:https://mp.weixin.qq.com/s/nMMN7hAJK6SFn1V1YyxvHA Traefik 2.0 还引入了镜像服务,一种可以将流入流量复制并同时将其发送给其他服务 ...
- nginx mirror/post_action+gor实现https流量复制
关于gor: 参考: https://www.cnblogs.com/jinjiangongzuoshi/p/11773070.html https://github.com/buger/gorepl ...
- Prometheus 监控 Nginx 流量 (三)
介绍 基于Openresty和Prometheus.Consul.Grafana设计的,实现了针对域名和Endpoint级别的流量统计,使用Consul做服务发现.KV存储,Grafana做性能图展示 ...
随机推荐
- 记一次sublime text3更新 注册码失效问题和永久解决~
前言: 一段时间不用sublime,打开提示我更新,不知怎么想的鬼使神差给点了~ 然后喵喵喵??? 取消 一会又出来了 受不了啦 搞事开整~ 正文: 本想直接找个注册码完事,奈何好多都用不了,想着再更 ...
- H3C 常用接口和线缆
- fastclick使用与 fastclick ios11.3相关bug原因(ios输入框点击变得不灵敏,ios input失焦后,页面上移,点击不了)
FastClick 移动设备上的浏览器默认会在用户点击屏幕大约延迟300毫秒后才会触发点击事件,这是为了检查用户是否在做双击.为了能够立即响应用户的点击事件,就有了FastClick. 安装fastc ...
- H3C 帧中继地址映射
- html5在微信中不允许放大缩小页面
在头部添加 <meta name="viewport" content="width=device-width, initial-scale=1, maximum- ...
- 2018-8-10-C#-判断文件编码
title author date CreateTime categories C# 判断文件编码 lindexi 2018-08-10 19:16:52 +0800 2018-2-13 17:23: ...
- vue-learning:32 - component - 异步组件和工厂函数
异步组件 只有在这个组件需要使用的时候才从服务器加载这一个组件模块,用于渲染,并且会把结果缓存起来供未来复用. 实现方法: 组件定义的时候,以一个工厂函数的形式传入,在需要组件的执行这个函数,然后将组 ...
- 2018.11.23 浪在ACM 集训队第六次测试赛
2018.11.23 浪在ACM 集训队第六次测试赛 整理人:刘文胜 div 2: A: Jam的计数法 参考博客:[1] 万众 B:数列 参考博客: [1] C:摆花 参考博客: [1] D:文化之 ...
- dotnet 新项目格式与对应框架预定义的宏
在 sdk style 的项目格式支持使用多框架开发,此时需要在代码里面通过宏判断,在编译的时候执行不同的代码.本文告诉大家在框架里面对应的预定义的条件编译符有哪些 在让一个 csproj 项目指定多 ...
- jQuery的使用及关于框架造型 专题
Introduction 正如jQuery所宣称的一样,Write Less, Do More.很多时候我们喜欢用它来解决问题.但增加一个库必然意味着更大的网络负担,意味着更高的页面初始载入时间.并且 ...